Table of Contents
Advertisement
Available languages
Available languages
Advertisement
Chapters
Table of Contents

Related Manuals for Silverline SLV 242


Summary of Contents for Silverline SLV 242
- Page 1 SLV 242 Fırın Kullanım Kılavuzu Built-in Oven User Manual...
- Page 2 DEĞERLİ MÜŞTERİMİZ, Öncellikle ürünümüzü satın aldığınız için teşekkür ederiz. Bu kullanım kılavuzundaki tüm talimat ve uyarıları dikkatlice okuyunuz. Bu kılavuz; ürününüzün güvenli kurulumu, kullanımı ve bakımı hakkında önemli bilgiler ve cihazınızdan en yararlı biçimde faydalanmanız için gerekli uyarılar içermektedir. Bu kılavuzu ileride gerekli olduğunda kullanılmak üzere güvenli ve kolay ulaşılabilir bir yerde saklayınız.
-
Page 3: Table Of Contents
İÇİNDEKİLER Teknik Özellikler ......................... 4 Aksesuarlar ........................5 Güvenlik İle İlgili Önemli Bilgiler ..................5 Cihazın Kurulumu ......................7 Elektrik Bağlantısı ......................10 Cihazın İlk Çalıştırılması ....................11 Enerji Tasarrufu İçin İpuçları ..................... 11 Fırının Tanımlanması ....................... 12 Fırının Kullanımı ......................13 Fırın Zamanlayıcı... -
Page 4: Teknik Özellikler
TEKNİK ÖZELLİKLER Bu ürün, 220-240V AC 50 Hz geriliminde çalışmak üzere tasarlanmıştır. Kurulumdan önce lütfen fırının ön alt tarafına yerleştirilmiş olan sicil etiketini dikkatlice okuyunuz. Dış Boyutlar ( Yükseklik / Genişlik / Derinlik ) 595mm / 595mm / 570 mm Kurulum boyutları... -
Page 5: Aksesuarlar
AKSESUARLAR Ürün modeline göre, verilen aksesuar aşağıdaki gibidir. Fırın Tepsisi Tel Izgara Hamur işleri, donmuş gıdalar ve büyük parçalı Izgara yapmak, ısıtmak veya pişirmek için yiyecekleri pişirmek veya ızgara yaparken ya da kızartılacak yiyeceklerin istenilen rafa akan yağların toplanması için kullanılır. yerleştirilmesi için kullanılır. - Page 6 Fırın yüzeyi ızgara fonksiyonunda çok ısınabilir dikkatli olunuz. Sıcak fırına yemek yerleştirirken, yemeği çıkartırken vb. daima ısıya dayanıklı fırın eldivenleri kullanınız. Kesinlikle fırının tabanında pişirme veya kızartma yapmayınız. Fırın tepsilerini, tabakları ya da alüminyum folyoyu doğrudan fırının tabanına koymayınız. Aksi takdirde biriken ısı...
-
Page 7: Cihazın Kurulumu
Elektrikle İlgili Çalışmalarda Güvenlik Elektrikli ekipmanlar ve sistemler üzerinde yapılacak her türlü çalışma, yetkili ve ehliyetli kişiler tarafından gerçekleştirilmelidir. Herhangi bir hasar durumunda ürünü kapatın ve elektrik bağlantısını kesiniz. Bunun için evinizin sigortasını kapatınız. Sigorta akımının ürün akımıyla uyumlu olduğundan emin olunuz. CİHAZIN KURULUMU Kurulum, talimatlara göre yetkili bir servis tarafından yapılmalıdır. - Page 8 Şekil 1 Şekil 2...
- Page 9 Şekil 3 FIRININ KABİNE MONTAJI Cihazı, gömme kabinine merkezlenerek ve dengeli olarak yerleştiriniz. Fırın kapağını açınız ve fırını, gövdesinin yanlarında bulunan montaj deliklerine (A) hizalayarak mutfak tezgahına montaj vidaları ile montajını yapınız. (Bkz. Şekil 4) Fırın, tercihe göre yüksekte bir dolap içine veya tezgah altına monte edilebilir. Fırının bağlandığı...
-
Page 10: Elektrik Bağlantısı
ELEKTRİK BAĞLANTISI Bütün elektriksel bağlantılar, yürürlükte olan yasalara ve kurallara uygun olarak sadece ehliyetli elektrik teknisyeni tarafından yapılmalıdır. Bağlantılar ulusal yönetmeliklerle uyumlu olmalıdır. Cihazın Elektrik Bağlantısını Yapmadan Önce Ana şebekeden gelen gücün cihazın ön alt tarafına yerleştirilmiş olan sicil etiketinde belirtilen gücü... -
Page 11: Cihazın İlk Çalıştırılması
Adaptörlerin, çoklu prizlerin veya uzatma kablolarının kullanılması tavsiye edilmemektedir. Mutlaka kullanılması gerekiyorsa geçerli olan emniyet yasalarına uygun olarak adaptör veya uzatma kablosu kullanılabilir. Ancak, kesinlikle adaptör için belirlenen maksimum akım kapasitesi ve gücü aşmamalıdır. Bağlantı işlemi bittikten sonra ısıtma elemanlarını 3 dakika kadar test ediniz. ... -
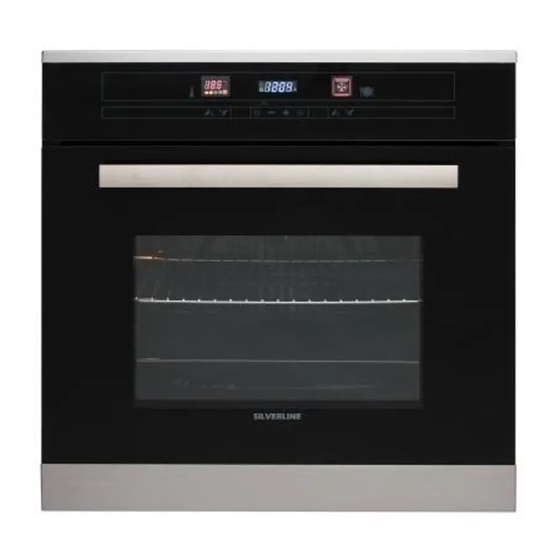
Page 12: Fırının Tanımlanması
FIRININ TANIMLANMASI Dokunmatik Kontrol Paneli Üst ve Izgara Isıtıcıları Fırın İçi Aydınlatma Lambası Turbo Isıtıcı Turbo Fan Alt Isıtıcı Fırın Kapağı İç Camı Fırın Kapağı Sicil Etiketi... -
Page 13: Fırının Kullanımı
TUÞ FONKSÝYON Sýcaklýk deðerlerini artýrýr Sýcaklýk deðerlerini azaltýr Fýrýný çalýþtýrýr / kapatýr, TUÞ FONKSÝYON O--n Sýcaklýk deðerlerini artýrýr AÇIK/ KAPALI (ON/OFF) tuþuna > 4 saniye basýldýðýnda Tuþ Kilidi etkinleþtirilir TUÞ FONKSÝYON FIRININ KULLANIMI Sýcaklýk deðerlerini azaltýr Sýcaklýk deðerlerini artýrýr Deðerleri düþürür ( zamanlamalar ) Fýrýný... -
Page 14: Fırın Zamanlayıcı Çeşitleri
SAAT GÖSTERGESİ 4 haneli gösterge Zamanlamaları, Süreleri ve Mesajları görüntüler. Ayrıca zamanlama işlemi durumlarını temsil eden 3 simgeyi de içerir. *Pişirme Kabı Simgesi Manuel modda dahi bir pişirme fonksiyonunun çalıştığını göstermek için yanar. Not: Pişirme fonksiyonları “Işık” ve “Buz Çözme” pişirme fonksiyonları olarak kabul edilmemektedir. - Page 15 ÇALIŞTIRMA TALİMATLARI Fırın ilk çalıştırmada, saat göstergesi “00:00”ı gösterir, yanıp söner. Sadece aşağıdaki iki işleme izin verilir. Aksi takdirde fırın çalışmayacaktır. tuşlarıyla saat ayarı tuşu ile fırını açma (mevcutta gösterilen saat otomatik olarak kabul edilir) SAAT AYARI Güncel saat ayarlı değilse, 4 saniye boyunca düğmesine basılı...
- Page 16 ZAMANLANMIŞ SÜRELİ PİŞİRME Fırını açık konuma getirin ve 2 defa tuşuna basın, saat göstergesinde “ dur ” ibaresi görüntülenir ve daha sonrasında otomatik hafızada olan 90 ’ dakika değeri görünür. tuşlarıyla minimum 0saat:00dakika ile maksimum 23saat:59dakika aralığında bir değer girin. 4 saniyelik bir zaman aşımından sonra seçilen değer kabul edilir. Değer dakika başı bazda ayarlanır.
- Page 17 Pişirme Modu Tablosu: PİŞİRME MODU SEÇİMİ Saat göstergesi o anda seçilen Program Numarasını veya hiçbir program seçilmemişse “ışık” modunu Simge Pişirme Modu gösterecektir. Simge göstergesi programın düzenlenmekte olduğunu göstermek için yanıp sönen fırın boşluğu sınırı simgesine sahiptir. tuşlarıyla istediğiniz programı seçin, bu tuşlar “Açık (On)”...
-
Page 19: Soğutma Fanı Çalışması
SOĞUTMA FANI ÇALIŞMASI Ankastre fırının dış yüzeyinin aşırı ısınmasını ve çevresine zarar vermesini önleyen havalandırma sistemi soğutma fanı ile sağlanır. Bu fan ön ızgaralardan (havalandırma açıklıkları) sıcak havanın dışarı atılmasını sağlayan bir hava akımı oluşturur. Aynı zamanda kontrol paneli ile kapak arasında hava perdesi oluşturarak bu iki parçanın ve üzerindeki komponentlerin aşırı... -
Page 20: Muhtelif Öneriler
Izgara yapılacak parçaları tel ızgara ya da tel ızgaralı tepsinin üzerine ısıtıcı boyutlarını geçmeyecek şekilde dağıtarak yerleştiriniz. Tel ızgarada ızgara yapıyorsanız, yağların toplanmasını için alta fırın tepsisi sürünüz. Fırın tepsisinin içine biraz su koyarsanız, daha sonra kolayca temizlersiniz. Izgaraya uygun olmayan yiyecekler, yangın tehlikesi taşımaktadır. - Page 21 Mayalı 35-45 Hamur Lazanya 30-40 Fırında 180-200 30-45 Makarna 25 dk. 250/max. Biftek 100-120 sonra 190 Balık 20-30 Sığır Fileto 190-200 Izgara Köfte 190-200 8-10 Milföy 170-190 20-30 Tavuk 1000 60-90 Et 500 gr 60-90 2 tepsi ile aynı anda pişirme yapılırken derin tepsiyi üst rafa, fırın tepsisini alt rafa yerleştiriniz.
-
Page 22: Pişirme İçin Püf Noktalar
PİŞİRME İÇİN PÜF NOKTALAR Kek pişirmenin püf noktaları Kek çok kuruysa, sıcaklığı 10 °C kadar arttırınız ve pişirme süresini kısaltınız. Kek nemliyse, az miktarda sıvı kullanınız ya da sıcaklığı 10 °C kadar azaltınız. Kekin üstü yanmışsa daha alt rafa koyunuz, sıcaklığı düşürünüz ve pişirme süresini arttınız. - Page 23 FIRIN DIŞ CAMI Dış camı her zaman fırın soğukken nemli yumuşak sünger ve bezlerle temizleyip kurulayınız. Temizlikte asla aşındırıcı maddeler kullanmayınız. FIRIN İÇ CAMI İç cam kapağını nemli yumuşak sünger ve bezlerle temizleyip kurulayınız. Temizlikte asla aşındırıcı maddeler kullanmayınız. İç...
- Page 24 FIRIN KAZAN CONTASI Kazan contası fırının verimli çalışması için gerekli bir parçadır. (Bkz. Şekil 10) Kullanımlarla zaman içinde contada kirlenmeler olabilir. Bu durumda conta nemli bez ile temizlenebilir. Bu temizlik işlemi hiç bir zaman ağır ve aşındırıcı temizlik maddeleri ile yapılmaz. Conta yıpranır ya da yırtılırsa yetkili servise başvurunuz.
- Page 25 SÜRGÜLÜ RAFLARIN KURULUMU SÜRGÜLÜ RAFLARIN KURULUMU FLARIN KURULUMU FIRIN LAMBASININ DEĞİŞTİRİLMESİ Bu işlemi yapmadan önce cihaza elektrik gelmediğinden emin olunuz. Fırının ampulü şu özelliklere sahip olmalıdır. Yüksek ısıya dayanıklı 300 ºC, Elektrik değerleri: 220-240V AC 50Hz, Elektrik gücü: 25 W Fırının iç...
-
Page 26: Nakliye İle İlgili Bilgiler
Şekil 12 Not: Lambanın konumu, şekilde gösterilenden farklı olabilir. NAKLİYE İLE İLGİLİ BİLGİLER Orjinal ambalajını saklayınız. Orjinal ambalajı ile taşıyınız, ambalaj üzerindeki işaretlere uyunuz. Orjinal ambalajı yok ise; Ürününüzün dış yüzeylerine hasar gelmeyecek şekilde önlem alın ve üzerine ağır yük koymayın. T aşıma sırasında ürününüzü... -
Page 27: Yetkili Servis Çağırmadan Önce Yapılması Gereken İşlemler
Şekil 13 YETKİLİ SERVİS ÇAĞIRMADAN ÖNCE YAPILMASI GEREKEN İŞLEMLER Hiç bir durumda cihazı kendiniz tamir etmeye çalışmayınız. Ürüne müdahale sadece yetkili servis tarafından yapılmalıdır. Servis çağırmadan önce aşağıdaki işlemler yapılmalıdır. Fırın ısıtmıyor. Fonksiyon ve/veya sıcaklık düğmesi ayarlanmamış olabilir. Fonksiyon ve/veya sıcaklık ... -
Page 28: Müşteri Servis Ve Garanti
MÜŞTERİ SERVİS VE GARANTİ MÜŞTERİ SERVİS VE GARANTİ Malın kullanma kılavuzunda gösterildiği şekilde kullanılması ve Silverline’nin yetkili kıldığı Malın kullanma kılavuzunda gösterildiği şekilde kullanılması ve Silverline’nin yetkili kıldığı servis elemanları dışındaki şahıslar tarafından montaj, bakım, onarım veya başka bir nedenle servis elemanları... - Page 29 ürün üzerindeki orjinal seri numarası kaldırıldığı veya tahrif edildiği takdirde bu garanti geçersizdir. Size en yakın Silverline Yetkili Servis acentesini öğrenmek için ürün ile beraber sağlanan yetkili servis listesine başvurabilirsiniz. Listeniz 1–2 yıldan eski ise güncel servis noktalarını öğrenmek ve sorularınıza cevap alabilmek için SILVERLINE DANIŞMA HATTI 444 4 758’i arayabilirsiniz.
- Page 31 SLV 242 Built-in Oven User Manual...
- Page 32 Dear costumer, Firstly thank you for purchasing our product. Carefully read all instructions and warnings in this manual. These guides include important information about your product safe installation, operation, maintenance and have warning to take advantage of the most useful product. Keep this guide in safe and easily available place when it becomes necessary.
- Page 33 TABLE OF CONTENTS Technical Specifications ....................... 34 Accessories .......................... 35 Important Safety Information ....................35 Installation ..........................37 Electrıcal Connection ......................40 Tips for Saving Energy ......................41 When The Oven First İnstalled ..................... 41 Description of Oven ......................42 Use of Oven .........................
-
Page 34: Technical Specifications
TECHNICAL SPECIFICATIONS The ovens are designed to operate with a monophase alternating current of 220-240V AC 50Hz. Anyway, before the installation of the appliance, we suggest you to check always the specifications on the rating label applied on the front bottom side of the oven. External Dimensions ( Height x Width x Depth ) 595 x 595 x 570 mm Installation Dimensions ( Height x Width x Depth ) -
Page 35: Accessories
ACCESSORIES Product according to the model, the accessories are as follows. Baking Tray Wire Grid Can be used for pastries, big roasts, foods Used for the grilling, heating and to cook or with liquid content and during grilling as for to place the roasting food the intended dripping tray. - Page 36 Surface of the grill function can become very hot, be careful. Always use heat-resistant gloves when putting or removing the dishes into/from your oven. Do not make the cooking or frying the base of the oven absolutely. Do not put the oven trays, plates, or wrap in aluminum foil directly onto the oven floor.
-
Page 37: Installation
Working about Electrical Safety Any work done on electrical equipment and systems, performed by competent and qualified persons. Turn the product off and disconnect power in case of any damage. Turn off your home insurance. Make sure it is compatible with the fuse. INSTALLATION Installation should be carried out according to the instructions by a professionally qualified person. - Page 38 Figure 1 Figure 2...
- Page 39 Figure 3 MONTAGE THE OVEN TO THE CABINET The device, place balanced and centered recessed cabinet. Oven, according to preferred mounted higher into a closet or under your sink. Open the door and secure the oven to the kitchen cabinet with four wood screws, which fit the holes provided in both side of the oven frame (A).
-
Page 40: Electrıcal Connection
ELECTRICAL CONNECTION All electrical connections in accordance with applicable laws and rules should be done only by a qualified electrician. Connections must comply with national regulations. Electrıc Connectıon Device Before Which is positioned on the front bottom of the main power is supplied from the mains power will meet the specified record label sure. -
Page 41: Tips For Saving Energy
Do not position the Power supply cord to contact hot surfaces. When the Power supply cord is damaged, consult your nearest authorized service location, and Table 1, provide to change with the appropriate to feature of original spare parts. If the device is connected directly to the device with the electrical wiring system shall be installed between the two poles of a circuit breaker and the earthing cable must not be interrupted by a two-pole circuit breaker. -
Page 42: Description Of Oven
All cooking must be at least 10 minutes for the pre-heating. Frozen foods must be resolved before cooking. The oven, turn off a few minutes before the end of cooking time. DESCRIPTION OF OVEN Touch control panel The top and grid heaters Oven dome light Turbo heater Turbo fan The lower heater... -
Page 43: Use Of Oven
USE OF OVEN Şekil 7 FUNCTION Increments temperatures values. Decrements temperatures values. Turns on / off the oven, n--O Children Lock if pressed > 4 seconds Decrements values (timings) Increments values (timings) Timing Edit menu (Minute minder, duration, end of cook) Increments programs values. - Page 44 OVEN OFF OVEN ON Visual Clock Display after User Actıon pressing 2 sec. Impulse Impulse Description “ 0:00” As default value, otherwise Minute Minder 1 Key the actual value 1 Key press editing. press As default value, shown. otherwise the [ bell ] actual value. Cooking duration Cooking pot icon editing.
- Page 45 COOKING MODES DISPLAY It visually represents the active oven elements. The “Oven Cavity / Light” square symbol: - Represents the oven actively turned on, it is normally lit-up. - It is turned off while in delayed cooking mode, to represent the “wait for a start” condition. - In the light pos ition it is always on since there are no other indications.
- Page 46 MINUTE MINDER Minute minder, the oven is always available in case of an open or closed. Press the key 1 time, clock display,’’ bell ‘’ is displayed automatically in the memory and later, the 90 ‘min value appears. Keys, at least 0h: 00m with a maximum of 180 minutes, enter a value.
- Page 47 DELAYED COOKING You can set the end of cooking time just after setting a time of cooking time. Set the duration and press 3 times more, the clock display shows “ End ”. Edit the value by means of . The allowed editing range is from the current Time of Day and Time Of Day +23h59m.
- Page 48 Cooking Mode Table: Cooking Icon Mode Light on Defrost Pr 01 Keep warm Grill Pr 02 / Spit motor Double Pr 03 Grill / Spit motor Convection Pr 04 Grill Double Pr 05 Convection Grill Pr 06 Bake Ring + Pr 07 Convection Bake ECO Convection...
- Page 49 COOKING TEMPERATURE SELECTION Press : the temperature display flashes to repres ent the value being edited. Change the value by means of between the minimum and maximum in 5 °C steps. After a timeout of 4 seconds the selec ted value is acc epted and becomes operative.
-
Page 50: Cooling Fan Operation
PREHEAT BAR-GRAPH The bar shows the preheating status and it expresses how far away is the require s etpoint compared to the actual temperature. The ratio k =Probe / Setpoint defines the bar: (note: k can be > 100%) i. If k > 75%: 1°,2°,3° on; 4° flashing ii. -
Page 51: Cooking Tips
COOKING TIPS Take care when opening the oven door as steam may escape. Escaped steam can damage your hand, face and/or eyes. Tips for baking • Use non-stick coated appropriate metal plates or aluminum containers or heat- resstant silicone moulds. • Make best use of the space on the rack. •... - Page 52 RACK TIME(min) FOOD FUNCTION TEMPERATURE (°C) POSITION (approx.) Cake in tray 25-30 Cake in 40-50 mould Cakes in 25-30 paper Sponge 5-10 cakes Cookies 20-30 Dough 30-40 pastry Filled savory 25-35 pastry Leaven 35-45 Lasagna 30-40 Pasta bake 180-200 30-45 Steak 25 sec. 250/max. after 190 100-120 Fish 20-30 Fillet of beef 190-200 Grilled 190-200 8-10...
-
Page 53: Tips For Cooking
While cooking with 2 trays at the same time, place the oven tray at the upper shelf and baking tray at the lower shelf. Please pre-heat for all makers. FAULTS CAUSES REMEDIES The upper crust is dark and Not enough heat from May be a wrong shelf the lower part too pale the bottom Put on a lower shelf The lower part is dark and Excessive heat from May be a wrong shelf the upper crust too pale the bottom... -
Page 54: General Cleaning And Maintenance
GENERAL CLEANING AND MAINTENANCE Oven after each use with warm, soapy damp cloth, wipe the oven should not be in the food and oil waste.Because these wastes can cause corrosion on the inner and outer surfaces. Disconnect the plug before any cleaning or on-off button on the device is switched off by bringing the theme of the furnace switch off the electricity. - Page 55 Figure 9 OVEN SEALING Your oven has a sealing surrounding the inside edges which provides the oven to work properly. Check the state of the sealing periodically. If cleaning is necessary, avoid using abrasives, corrosive detergents, bleaches or acids. If the sealing is damaged, consult with your nearest authorized service provider in your area.
- Page 56 SIDE RACKS It is possible to easily remove and clean the wire shelving placed in the wire grid and tray. You can recover the wire shelving from screw channel by stretch down the edge of special plug, like as shown. Then, you can recover with pull up to outward and lift up to from upper tabs. Install after cleaning;...
- Page 57 CHANGING THE OVEN LAMP Make sure that the electricity did not come from the device before performing this operation. The oven lamp has to comply to these features; 1. Resistant to heat, 2. Electric rate: 220-240V AC 50Hz, 3. Electric power rate: 25W To replace the lamp, proceed as follows (See Figue 12) ;...
-
Page 58: Transport Information
TRANSPORT INFORMATION • During the transportation carry/place your product parallel to the floor with top- side up position. • Placed the cardbord aligned with the tray to inner side of oven door for prevent from the wire grid and tray to oven door.Tape to the side walls of the oven door. •... - Page 59 Oven light does not work. -Oven lamp is defective. Replace oven lamp. Steam escapes when the oven working. - It is a normal that steam escapes during operations. Metal sound is coming when the product is warming up and cool down. - When the metal parts are heated, they may expand and cause noise.It is not trouble. Although the instructions in this section apply to resolve the issue please contact an authorized service facility.
- Page 60 444 4 758 Yetkili Servisler 444 4 758 01.03.2013 İL İLÇE SERVİS ÜNVANI YETKİLİ KİŞİ YAZIŞMA ADRESİ TELEFON 1: GÜRBÜZ TEKNİK SERVİS YASİN GÜRBÜZ CUMHURRİYET MH.FATİH SK.NO:9/C 0 322 515 20 40 KOZAN HÜSEYİN DEMİR HÜSEYİN DEMİR B.KIRIM MH.4 SK.NO:8/A 0 322 613 17 77 CEYHAN ADANA...
-
Page 61: Yetkili Servis Listesi
ŞABANÖZÜ SOĞUTMA ÇANKIRI CİHAN TEKNİK CİHAT ASLAN BUĞDAY PAZARI MAH.ATATÜTK BLV.ANIL APT.A BLOK NO:4 0 376 212 29 16 MERKEZ ÇORUM ERDEM SOĞUTMA ERSOY ERDEM KALE MAH.EMEK CAD.NO:14/B 0 364 224 77 80 MERKEZ AKSU TEKNİK MUHAMMET AKSU DEĞİRMEN ÖNÜ MH. LOZAN CD. NO:49 / A 0 258 264 44 04 MERKEZ DENİZLİ... - Page 62 ERCAN TEKNİK ERCAN ŞİMŞEK KÜÇÜK MUSTAFA PAŞA MH. MİLLİ EGEMENLİK CD. NO:95 0 422 321 40 46 MERKEZ EKOL SERVİS METİN BULDUK MİMAR SİNAN MH.ERLER CD.NO:17/A 0 236 232 74 66 MERKEZ HİSAR SOĞUTMA BİLAL KOCATÜRK. ORT SARISU MH. İSTİKLAL CD. NO:199 0 236 653 44 51 ALAŞEHİR MANİSA...
- Page 64 Üretici / Manufacturer SILVERLINE EV GEREÇLERİ Satış ve Pazarlama A.Ş. Orta Mah. Topkapı Maltepe Cad. No:6 Silkar Plaza Kat: 3 Bayrampaşa/ İSTANBUL Tel: 0212 484 48 00 (pbx) Fax: 0212 481 40 08...
Need help?
Do you have a question about the SLV 242 and is the answer not in the manual?
Questions and answers