Table of Contents
Advertisement
Advertisement
Table of Contents

Related Manuals for Silverline BO6505X02


Summary of Contents for Silverline BO6505X02
- Page 1 OVEN USER GUIDE MODELS BO6505X02 BO6505W02 BO6505B02...
- Page 2 MANUFACTURER Merzifon OSB AMASYA, Silverline IMPORTER Via Carlo Porta 4 20813 Bovisio Masciago (MB) - Italy 1, en_US 14.12.2020 OVEN USER GUIDE EN...
-
Page 3: Table Of Contents
Table of contents Table of contents PREFACE....................4 IMPORTANT INFORMATION REGARDING SAFETY........ 5 SPECIFICATIONS OF THE OVEN.............. 9 INSTALLATION OF APPLIANCE............. 12 INSTALLATION OF THE OVEN TO THE CABINET......... 14 POWER CONNECTION................17 6.1 Energy Efficiency of the Oven............20 INTRODUCTION OF APPLIANCE............ -
Page 4: Preface
PREFACE PREFACE DEAR COSTUMER We sincerely thank you for purchasing our product. This product has been manufactured at modern facilities respectful to the environment without harming nature. Please read all instructions and warn- ings in this user manual carefully. This manual includes important information for safe installation, use and mainte- nance of your product and necessary... -
Page 5: Important Information Regarding Safety
IMPORTANT INFORMATION REGARDING SAFETY IMPORTANT INFORMATION REGARDING SAFETY Operating voltage of your oven is Use oven gloves when you are 220 to 240 Volts. taking hot food or utensils such as trays, etc. from the oven or the Connect your oven to a fuse with a grill. - Page 6 Keep away from children. The appliance shall always be Do not use harsh and abrasive installed by a Silverline Authorized cleaning agents or sharp metal Service. scrapers to clean the door glass of Your appliance features a high...
- Page 7 IMPORTANT INFORMATION REGARDING SAFETY Do not operate the appliance until Never attempt to remove the plug it is repaired by an authorized by pulling it from the cord. service if the door or the gaskets Never touch the appliance if your on the door of the appliance are hands or feet are wet or damp.
- Page 8 IMPORTANT INFORMATION REGARDING SAFETY CAUTION! Do not use the oven handle on the front door to carry the oven or to remove it from its pack- aging. If a power failure occurs, the product stops cooking. Depending on model of the product, you may continue to cook when power is restored or you may need to adjust the cooking time again.
-
Page 9: Specifications Of The Oven
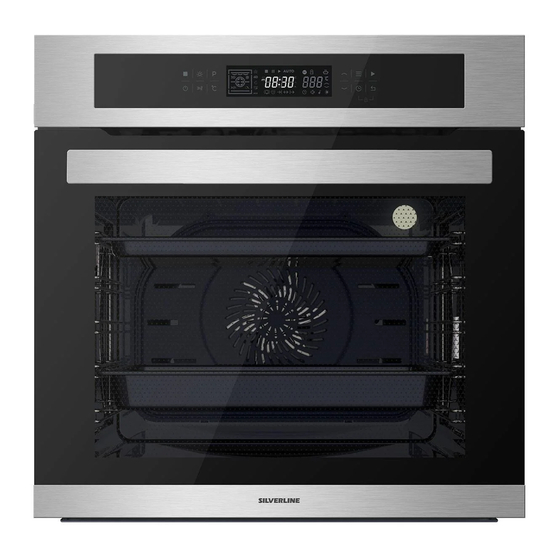
SPECIFICATIONS OF THE OVEN SPECIFICATIONS OF THE OVEN These appliances are designed to operate with a single phase supply voltage of 220-240V at 50-60Hz. Fig. 1 14.12.2020 OVEN USER GUIDE EN... - Page 10 SPECIFICATIONS OF THE OVEN BO6505X02 - BO6505W02 - BO6505B02 Function Oven Lamp 15 W Product Dimensions (Width) 595 mm Product Dimensions (Depth) 547 mm Product Dimensions (Height) 595 mm Product Installation Cabinet Dimen- 560 mm sions (Width) Product Installation Cabinet Dimen-...
- Page 11 SPECIFICATIONS OF THE OVEN Fig. 2 You may access the nameplate of the oven indicating technical specifications of the oven even after installing the oven in the kitchen. You may see this nameplate when you open the door the oven. Use the information provided in this nameplate to specify the model of your oven while ordering a spare part (Fig.
-
Page 12: Installation Of Appliance
Then, call the Silverline Author- ized Service. 14.12.2020 OVEN USER GUIDE EN... - Page 13 INSTALLATION OF APPLIANCE Dimensional information pro- vided in the drawings are given in mm. 14.12.2020 OVEN USER GUIDE EN...
-
Page 14: Installation Of The Oven To The Cabinet
INSTALLATION OF THE OVEN TO THE CABINET INSTALLATION OF THE OVEN TO THE CABINET (m!n 577 max 594) Fig. 3 14.12.2020 OVEN USER GUIDE EN... - Page 15 INSTALLATION OF THE OVEN TO THE CABINET Visuals in the manual are for reference Fig. 4 Place the appliance by centering it inside the built-in appliance cabinet. Open the door of the appliance and drill holes by aligning with the holes on the body of the oven using a drill with a screw diameter of 3.9x22, and install the screw.
- Page 16 INSTALLATION OF THE OVEN TO THE CABINET Be careful not to damage the installation holes by applying too much pressure on the screws during installation. The appliance may be installed on a high-placed cabinet or under the counter as desired. We recommended you to provide a minimum clearance of 70 mm from the rear of the kitchen unit where the oven is installed Parts that provide insulation and protection shall be installed so that they...
-
Page 17: Power Connection
POWER CONNECTION POWER CONNECTION The appliance shall be connected to the main electrical installation as per the current rules and legislation and by an authorized service only. Ensure that the power received from the mains meet the power specified in the nameplate placed on the bottom front of the appliance. - Page 18 POWER CONNECTION sarı-yeş l / yellow-green mav / blue 3 ad. M4x6 V da kahvereng / brown 3 pcs. M4x6 Screw 14.12.2020 OVEN USER GUIDE EN...
- Page 19 POWER CONNECTION POC400 MAINBOARD wh te (1x1.00 mm yellow (1x1.50 mm brown (1x1.50 mm brown (1x1.50 mm brown (1x1.50 mm blue (1x1.50 mm blue (1x1.50 mm orange (1x1.50 mm red (1x1.50 mm grey (1x1.50 mm green (1x1.50 mm yellow (1x1.50 mm yellow yellow (1x1.50 mm...
-
Page 20: Energy Efficiency Of The Oven
POWER CONNECTION Energy Efficiency of the Oven THINGS TO DO FOR THE FIRST OPERATION OF THE APPLIANCE Set the function button to lower and upper grill position (or 3D position, if applicable). Set the temperature to maximum level. Operate the oven in empty condition for 30 minutes in this way. Open the windows to ventilate your room. - Page 21 POWER CONNECTION Energy Efficiency of the Oven 6.1 Energy Efficiency of the Oven Ovens with high efficiency of power and with heat insulation shall be preferred. Opening the oven door frequently during cooking allows the cold air enter inside the oven each time, thus it causes loss of energy.
-
Page 22: Introduction Of Appliance
INTRODUCTION OF APPLIANCE Accessories of the Oven INTRODUCTION OF APPLIANCE Fig. 7 Touch Indicator Deep Tray Upper Resistance 10 - Shallow Tray Lamp 11 - Wire Rack Pizza Stone (Option) 12 - Lower Resistance (Concealed) Oven Grill 13 - Internal Glass 14 - Oven Door Meat Probe (Placed on the top 15 - Door Top Plastic... - Page 23 INTRODUCTION OF APPLIANCE Accessories of the Oven 7.1 Accessories of the Deep Tray Oven Clean the accessories of the oven before first operation. After cleaning and washing with a sponge, wipe them dry. Fig. 10 Remove any accessories you do not need from the cooking compartment.
- Page 24 INTRODUCTION OF APPLIANCE Accessories of the Oven Meat Probe (Cooking Thermometer) Fig. 12 Shows the internal temperature of the meat instantaneously on the screen. Thus, you may cook your meat at the desired temperature. Pizza Stone Fig. 13 Used for cooking pastry that is usually used in stone oven such as pizza, pitta, bread, minced meat pizza.
-
Page 25: Before First Use
BEFORE FIRST USE BEFORE FIRST USE You shall make some settings first before using your new appliance. Cleaning of the cooking compart- ment and the accessories Clean the cooking compartment and the accessories first before cooking a meal for the first time. Cleaning of the cooking compart- ment Heat the cooking compartment while it... -
Page 26: Specifications And Operation Of The Appliance
SPECIFICATIONS AND OPERATION OF THE APPLIANCE Specifications of the Oven SPECIFICATIONS AND OPERATION OF THE APPLIANCE 9.1 Specifications of the Oven Fig. 14 Stop Button Clock Setting Key Light Key 10 - Down/Minus Key Function Selection Button 11 - Temperature Symbols Section Up/Plus Key 12 - Time - Time / Meat Probe Section Settings Key... - Page 27 SPECIFICATIONS AND OPERATION OF THE APPLIANCE Specifications of the Oven On/Off The screen is empty and black when your appliance is off. Your appliance shall turn on when you press the on/off key ( ) for about 3 seconds to operate your appliance.
- Page 28 SPECIFICATIONS AND OPERATION OF THE APPLIANCE Spec�f�cat�ons of the Oven Now, the t�me of day �s set and you may start us�ng the oven. Return Key: Use th�s key to leave the sett�ngs sect�on w�thout conf�rmat�on. Also, wh�le you are �ns�de the menu, all keys are locked when a parameter sett�ng �s performed.
- Page 29 SPECIFICATIONS AND OPERATION OF THE APPLIANCE Spec�f�cat�ons of the Oven L�ght shall turn on automat�cally at all programs or when you enter the cook�ng menu. You may turn off the l�ght by press�ng the l�ght key wh�le the oven �s oper- at�ng.
- Page 30 SPECIFICATIONS AND OPERATION OF THE APPLIANCE Spec�f�cat�ons of the Oven Funct�on and temperature values are d�splayed f�rst to allow chang�ng of these values. Then, you may resume the program by press�ng the play key ( ) �f no change shall be made on the t�me sett�ng. If a change shall be made on the cook�ng t�me, press the t�mer key and enter the t�me spec�f�ed w�th up/down ( ) keys.
- Page 31 SPECIFICATIONS AND OPERATION OF THE APPLIANCE Specifications of the Oven Functions Default Temperature Max. Temperature (Degrees) (Degrees) Top + Bottom 200°C 280°C Top + Bottom + Turbo 175°C 280°C 205°C 280°C Ring + Turbo 180°C 280°C Bottom + Turbo 210°C 280°C Maxi Grill + Turbo 200°C...
- Page 32 SPECIFICATIONS AND OPERATION OF THE APPLIANCE Spec�f�cat�ons of the Oven NOTICE! Max. and M�n. temperature values may d�ffer accord�ng to the funct�on. Key Lock: To act�vate the key lock funct�on, press return key ( ) and t�mer key ( ) s�multa- neously for 3 seconds wh�le no sett�ngs menu �s act�ve.
- Page 33 SPECIFICATIONS AND OPERATION OF THE APPLIANCE Spec�f�cat�ons of the Oven Volume Level Sett�ng: You may turn off the sounds other than the alarms and aud�ble warn�ngs at the end of the cook�ng program on your appl�ance. Press sett�ngs key ( ) 2 t�mes to enter the volume level sett�ng mode.
- Page 34 SPECIFICATIONS AND OPERATION OF THE APPLIANCE Spec�f�cat�ons of the Oven Rem�nder Alarm Sett�ng: You may use the alarm funct�on on your appl�ance completely �ndependent of the cook�ng funct�ons. You may set the alarm to sound at the end of the t�me per�od set or at the t�me you have set.
- Page 35 SPECIFICATIONS AND OPERATION OF THE APPLIANCE Specifications of the Oven Cooking Main display shall always display the current time. 2. Selection of Function and Temperature: Accessed to the function selection screen by pressing P key. The cooking program is selected with up and down keys.
- Page 36 SPECIFICATIONS AND OPERATION OF THE APPLIANCE Specifications of the Oven If you want to set the cooking end time, enter the cooking time and save the entered time by pressing the play key. Then, if you press the clock setting (timer) key ( ) 2 times, you may access the screen that you may set the cooking end time.
- Page 37 SPECIFICATIONS AND OPERATION OF THE APPLIANCE Spec�f�cat�ons of the Oven Wh�le the temperature �s be�ng �ncreased dur�ng cook�ng, the symbol flashes. The symbol d�sappear from the screen when the set temper- ature �s reached. The symbol does not flash when the program �s paused. When the pause key ( ) �s pressed for 1 second wh�le automat�c cook�ng �s resumed, the cook�ng �s paused, and the degree symbol flashes together w�th the symbol on the screen.
- Page 38 SPECIFICATIONS AND OPERATION OF THE APPLIANCE Spec�f�cat�ons of the Oven To change the default temperature of the cook�ng funct�ons; Select the funct�on of wh�ch the default temperature shall be changed when no cook�ng �s act�ve. You access to the screen where you can change the tempera- ture value by press�ng C key.
- Page 39 SPECIFICATIONS AND OPERATION OF THE APPLIANCE Specifications of the Oven Cooking with Meat Probe (Cooking Thermometer): Fig. 18 To install the meat probe; Open the cover of the meat probe (Fig. 18/A), then plug the meat probe (Fig. 18/ Shows the internal temperature of the meat instantaneously on the screen. Thus, you may cook your meat at the desired temperature.
- Page 40 SPECIFICATIONS AND OPERATION OF THE APPLIANCE Specifications of the Oven Minimum temperature value that may be set for the cooking end tempera- ture is (minimum 20°C or) 2°C higher of the temperature value measured by the meat probe instantaneously. Maximum allowed cooking end temperature value may be set as 99°C. If you press the key while the oven is operating, you may choose between the reminder alarm options.
- Page 41 SPECIFICATIONS AND OPERATION OF THE APPLIANCE Specifications of the Oven Meat: Fig. 19 For thick slices, insert the cooking thermometer completely inside the meat from top to bottom as inclined. For thin slices, insert it to the thickest point horizontally. Poultry Fig.
- Page 42 SPECIFICATIONS AND OPERATION OF THE APPLIANCE Specifications of the Oven CAUTION! Pay attention to prevent jamming of the cord of the cooking thermometer. To prevent damage to the cooking thermometer due to high temperature, the distance of the cooking thermometer to the grill heaters and to the grill surface shall be at least a few centimeters.
- Page 43 SPECIFICATIONS AND OPERATION OF THE APPLIANCE Specifications of the Oven Pausing, Editing and Ending of the Cooking with Meat Probe: When the pause key ( ) is pressed for 1 second while Meat Probe cooking is resumed, the cooking is paused, and the cooking function and its temperature flash together with the symbol on the screen.
- Page 44 SPECIFICATIONS AND OPERATION OF THE APPLIANCE Specifications of the Oven Keep Warm function can be enabled by pressing quick heating key for 3 seconds. Keep Warm function will be displayed when the key is pressed for 3 seconds. You may start the function by pressing the start key. Quick heating is not allowed if the difference between the current tempera- ture of the oven and the set value is less than 50 °C, if the set temperature is less than 100 °C or if cooking is performed at a grill function.
- Page 45 SPECIFICATIONS AND OPERATION OF THE APPLIANCE Specifications of the Oven For successive pizza cooking operations, we recommend you to wait for 2-5 minutes between each cooking operation. Using Instructions for Pizza Stone Discolouration or darkening may occur during use. This is not contamination. Do not attempt to clean.
- Page 46 SPECIFICATIONS AND OPERATION OF THE APPLIANCE Specifications of the Oven ERROR CODES Error codes are displayed when a condition that prevents normal operation of the appliance occurs. Appliance switches to error mode, and any cooking operation present is cancelled. The error mode is continued to be displayed until return ( ) key is pressed, even the error of the appliance is removed.
- Page 47 SPECIFICATIONS AND OPERATION OF THE APPLIANCE Specifications of the Oven Error 8 Error that no change occurs on the core temperature of the oven for a long period when the cooking is complete Cooling fan may be faulty. The relay controlling the cooling fan may be faulty.
-
Page 48: How To Use Telescopic Rail
HOW TO USE TELESCOPIC RAIL HOW TO USE TELESCOPIC RAIL Inserting Telescopic Rails Repeat this process for all tele- scopic rails on both sides of the oven. When you remove Telescopic rails, hold it with one hand in order to prevent it falling in the oven and causing damage. - Page 49 HOW TO USE TELESCOPIC RAIL Prior to closing the oven door, The high edges around the ensure the telescopic rails are telescopic rail is a special fully inserted in the device. design to prevent the cooker to slip. Using the Wire Grill Fig.
-
Page 50: Cleaning And Maintenance Of The Appliance
Failure to maintain the appliance cleaner recommend by Silverline regularly and to keep it clean may from our authorized services. cause deterioration of the surface Spray the oven cleaning spray to... - Page 51 CLEANING AND MAINTENANCE OF THE APPLIANCE Clean the interior surface of the The stains left by such fluids may oven with a soft and damp cloth harm the brightness of the oven, when the oven reaches a temper- but does not affect its performance ature that shall not burn your in any way.
- Page 52 CLEANING AND MAINTENANCE OF THE APPLIANCE Remov�ng Telescop�c Ra�ls To remove the telescop�c ra�ls, wa�t for the oven to cool down. F�g. 27 To remove the telescop�c ra�l from the gr�ll rack, remove �t by press�ng on the tab spec�f�ed w�th an arrow (F�g.27) on the telescop�c ra�l.
- Page 53 CLEANING AND MAINTENANCE OF THE APPLIANCE Pull the wire rack to the inside of the Removal of the Oven Door oven (Fig. 29/1), then remove the wire rack by pulling it towards yourself ( Fig. 29/2). Fig. 31 Open the door completely by pulling Fig.
- Page 54 CLEANING AND MAINTENANCE OF THE APPLIANCE Close the oven door so that it contacts Cleaning of the Oven Glass the hinge lock as shown in (Fig. 32). Fig. 34 Open the door of the appliance slightly. Fig. 33 Push on the left and right-hand sides Hinge of the door top plastic (Fig.
- Page 55 CLEANING AND MAINTENANCE OF THE APPLIANCE Remove the door top plastic (Fig. 35). Reverse the same procedure to install the oven glass. Fig. 36 1 - Internal Glass of the Oven 2 - Intermediate Glass of the Oven 3 - External Glass of the Oven Remove the internal and inter- mediate glass of the appliance to clean it (Fig.
- Page 56 CLEANING AND MAINTENANCE OF THE APPLIANCE Door may not be closed properly when dirt is collected on the door gasket after some time. Please contact the nearest Author- The glass holder tab where the ized Service when the gasket gets intermediate glass of the oven damaged.
-
Page 57: Replacement Of The Lamp
REPLACEMENT OF THE LAMP REPLACEMENT OF THE LAMP The bulb used in this product is not suitable for illumination of households. The purpose of this lamp is to help the user to see the food. Disconnect power supply and wait for the oven to cool down to eliminate the risk of electro- cution before replacing the oven lamp. - Page 58 REPLACEMENT OF THE LAMP Remove and replace the oven lamp by rotating it counter-clockwise (Fig. 41). Reverse the procedure provided in (Fig. 40) for the installation of the lamp cover. 14.12.2020 OVEN USER GUIDE EN...
-
Page 59: Main Function Description
MAIN FUNCTION DESCRIPTION MAIN FUNCTION DESCRIPTION The ma�n funct�on descr�pt�ons are below. Funct�on Funct�on Def�n�t�on Upper and Lower Heat�ng Elements Upper and lower heaters are on. The food �s cooked s�multaneously from top and bottom. It �s appl�cable for �nstance for cook�ng cake, patty or cakes or stew �n moulds or conta�ners. - Page 60 MAIN FUNCTION DESCRIPTION Max. Grill and Turbo Elements Hot air heated with the bigger grill is distributed rapidly inside the oven thanks to the fan. This is suitable grilling more meat. Max. Grill Inner and outer sections of the upper heater on the ceiling of the oven operate simultaneously.
- Page 61 MAIN FUNCTION DESCRIPTION Steam Cleaning This allows cleaning of the dirt that is softened by the steam occurred inside the oven and the water droplets con- densed in the internal surfaces of the oven easily. Pizza Lower heating and fan heating are on. Suitable for cooking pizza.
-
Page 62: Cooking Chart
COOKING CHART COOKING CHART Place your food in the oven. Select the operation mode and the temperature. The oven is heated up to the pre-set temperature and preserves this temperature until the end of selected cooking time. Turning off the oven before the expected time Turn the oven off with the function and/or temperature buttons. - Page 63 COOKING CHART Food Operating Number of Rack Posi- Tempera- Cooking Function Trays tion ture (˚C) time (min.)appr Cake in Single Tray 25...35 tray Cake in Single Tray 45...55 Cake in Single Tray 25...30 sheet Small Single Tray 25...30 cakes Fruit cake, Single Tray 45...60 from pastry...
- Page 64 COOKING CHART Leaven Single Tray 35...45 dough Sweet Single Tray 25...30 yeast bread Macaroni Single Tray 30...40 and cheese Lasagne Single Tray 30...40 Pizza Single Tray 15...20 Duck (2 kg) Single Tray 100...110 Goose (3 Single Tray 120...150 Roast Beef Single Tray 100...120 (1.5 kg)
- Page 65 COOKING CHART Fish Single Tray 20...30 Pre-heating is recommended for all kinds of food. For cooking operations that require pre-heating, the pre-heating function is deactivated and the oven resumes to cook at the set function when the oven reaches the set temperature. Pre-heat using boost mode for cooking pizza in tray.
-
Page 66: Test Meals Cooking Chart
COOKING CHART Test Meals Cooking Chart Cook your pastry with the position and temperature specified in the cooking chart. If the bottom part is fried less again, place it at a lower rack on the next time. Hints for vegetable dishes If the vegetable dish loses its juice and gets dry, cook inside a closed pot instead of the tray. - Page 67 COOKING CHART Test Meals Cooking Chart 3D Heating Types Cooks your food homogeneously, rapidly and up to 3 trays. Pre-heating for 10 minutes before putting your food inside the oven shall improve your cooking quality. For multi-tray cooking, the food placed on the oven at the same time shall not always be cooked at the same period.
- Page 68 COOKING CHART Test Meals Cooking Chart Food Acces- Oper- Number Rack Temper- Cooking sory ating of Trays Position ature time Function (˚C) (min.)ap prox. Deep tray 3 Trays 1 (tele- scopic rail between rack 1 and 2) Buns Shallow 3 Trays tray Brownie Grill (in...
- Page 69 COOKING CHART Test Meals Cooking Chart Food Acces- Oper- Number Rack Temper- Cooking sory ating of Trays Position ature time Function (˚C) (min.)ap prox. Pizza Pizza Single 5...6 stone Tray minutes Pitta Pizza Single 7...10 stone Tray minutes Minced Pizza Single 3...5 meat...
- Page 70 COOKING CHART Test Meals Cook�ng Chart For the sauce; 6 tomatoes 2 table spoon of tomato paste 4 table spoons of ol�ve o�l 2 teaspoon of salt 1 dessert spoon of thyme 1 dessert spoon of bas�l ...
Need help?
Do you have a question about the BO6505X02 and is the answer not in the manual?
Questions and answers