SunTech Oscar 2 Manual
24-hour ambulatory bp monitoring system
Hide thumbs
Also See for Oscar 2:
- User manual (92 pages) ,
- Quick start manual (2 pages) ,
- Patient instructions (4 pages)
Table of Contents
Advertisement
Advertisement
Table of Contents

Related Manuals for SunTech Oscar 2


Summary of Contents for SunTech Oscar 2
- Page 1 24-Hour Ambulatory BP Monitoring System Page 1 of 79 80-0062-00-RevL 2020-9-14...
-
Page 2: User Manual
Changes This manual is identified as Part number: 80-0062-00. An updated version may be available for download from the SunTech Medical website. Should you notice errors or omissions in this manual, please notify us at: SunTech Medical 517 Airport Blvd, Morrisville, USA. -
Page 3: Table Of Contents
Conducting an Ambulatory Blood Pressure Study ..............21 Programming the Oscar 2 for an ABP Study ..............................21 Study Parameter Settings ....................................24 Fitting a Patient with the Oscar 2 and ABPM Cuff ............................26 Preparing and Educating the Patient ................................27 Starting the Study ......................................28 Finishing the Study ......................................28... - Page 4 Cleaning After Use ......................................69 Maintenance and Repairs After Use ................................70 Calibration Verification Procedure ..................................70 18. Limited Warranty ........................71 Oscar 2 Ambulatory Blood Pressure Monitoring System .......................... 71 19. Technical Assistance ........................72 20. Radio Frequency Compliance Requirements................73 21. Electromagnetic Compatibility System Requirements ...............74 22.
-
Page 5: Introduction To Ambulatory Blood Pressure Monitoring
Introduction to Ambulatory Blood Pressure Monitoring Ambulatory blood pressure monitoring (ABPM) is an accepted clinical tool for collecting multiple blood pres- sure measurements. ABPM data is intended to better assist clinicians with the diagnosis and management of hypertension by providing data related to: blood pressure variability, estimation of true blood pressure, overnight changes in blood pressure, blood pressure load, sleep blood pressure dipping, and morning surge in blood pressure . -
Page 6: Symbols Used In Labeling
Symbols Used in Labeling Symbol Description Standard/Source General Warning Sign ISO 7010-W001 Batch Code ISO 7000-2492 Caution ISO 7000-0434A Refer to Instruction Manual ISO 7010-M002 Authorized representative in the European Community ISO 15223-1 Industry Consult Instructions for Use ISO 7000-1641 This product meets the requirements of the applicable EU Directive Directives... -
Page 7: The Oscar 2 Abpm System
Device Operation The Oscar 2 monitor is worn by the patient on a waist belt and is connected to a cuff around the non-domi- nant upper arm. The cuff is inflated automatically at intervals which can be programmed during setup. Blood pressure is measured by the oscillometric method which senses pressure waves in the artery when occlud- ed by pressure in the cuff. -
Page 8: Products And Accessories
ABPM Cuff, Size 2 (26cm-34cm) 98-0239-02 ABPM Cuff, Size 3 (32cm-44cm) 98-0239-03 * See table “Oscar 2 ABPM System (Monitor Options)” to determine the part number and description for your Oscar 2 ABP Monitor. Oscar 2 ABPM Optional Accessories Item Description... -
Page 9: A Note About Hipaa
Biocompatibility and Applied Parts The ABPM cuff is the only Applied Part (AP) of the Oscar 2 system. All AP have been evaluated for biocom- patibility in conjunction with the applicable standards. - Page 10 Safety and Effectiveness Considerations The following safety and effectiveness issues are to be considered prior to the usage of the Oscar 2 monitor. NOTE: This device is defibrillator protected. No precautions specific to the Oscar 2 are required during defibrilla- tion, and defibrillation discharge has no effect on the Oscar 2.
- Page 11 EMISSIONS or decreased IMMUNITY of ME EQUIPMENT or ME SYS- TEM. WARNING: The Oscar 2 may be interfered with by other equipment even if the other equipment complies with CISPR Emission Requirements. WARNING: Performance can be affected by extremes of temperature, humidity and altitude.
- Page 12 SunTech Medical. CAUTION: The Oscar 2 does not contain any user serviceable internal parts and should only be repaired by an authorized SunTech Medical service representative. Do not service the product while in use.
- Page 13 system from a patient: CONTRAINDICATION: Do not use on patients with erratic, accelerated or mechanically controlled irregular heart rhythms, including patients with arrhythmias. CONTRAINDICATION: Do not use on patients with carotid or aortic valve stenosis. CONTRAINDICATION: The system is not applicable in generalized constriction or localized spasm of muscu- lar conduit arteries such as seen immediately after hypothermic cardiopulmonary bypass surgery or accom- panying Raynaud's phenomenon or intense cold.
-
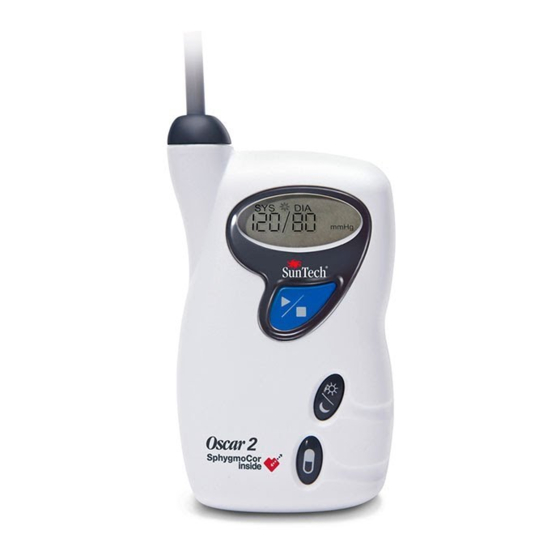
Page 14: Oscar 2 At A Glance
Oscar 2 At a Glance Device Start/Stop Button To Power On: Press the Start/Stop button. To Power Off: When not taking a reading, press and HOLD the Start/Stop button until you hear 8 beeps (approx. 5 seconds), then release. To Abort a Measurement: Press the Start/Stop button any time during a reading. -
Page 15: Button Functionality
30 minutes of the study. Setting Up The Oscar 2 System Setting up the Oscar 2 System involves powering the Oscar 2, installing AccuWin Pro 4 on a personal com- puter (PC), and connecting the Oscar 2 to the PC. -
Page 16: Installing Accuwin Pro 4
Communicating with the Oscar 2 To successfully complete an ambulatory blood pressure (ABP) study: Connect the Oscar 2 to the PC then program the study in the downloaded application from your PC. When the patient returns you will again use the application on your computer to retrieve the collected data. -
Page 17: True24 Mobile Application
The Oscar 2 will remain in pairing mode for approximately 3 minutes. • If no host is paired at the end of 3 minutes, the Oscar 2 will stop the process and exit pairing mode. • The pairing process may be restarted by performing step 1, above. -
Page 18: Logging In To Accuwin Pro 4
Figure 2: Press buttons indicated Logging in to AccuWin Pro 4 If your AccuWin Pro 4 administrator enables login security, you must enter a valid user name and password when you open AccuWin Pro 4 or change the current user. See Admin Tools for more information. If login security is not enabled, no login is necessary. -
Page 19: Changing The Current User
Changing the Current User To change the current user: From the Configure menu, select Admin Tools. Click Change User. Enter a valid user name. Enter a valid password. Click Login. Page 19 of 79 80-0062-00-RevL 2020-9-14... -
Page 20: Accuwin Pro 4 Layout
AccuWin Pro 4 Layout AccuWin Pro 4 gives you the flexibility to program the ABP monitor the way you want and the simplicity to collect and retrieve important test data. The toolbar provides easy, one-click access to frequently used func- tions. -
Page 21: Conducting An Ambulatory Blood Pressure Study
Conducting an Ambulatory Blood Pressure Study Programming the Oscar 2 for an ABP Study Preparing the monitor for an ABP study involves filling out an on-screen form to set the parameters for your study to be programmed into the monitor. You can also use a template to fill out the form. Templates help to ensure consistent programming and adherence to specific protocols. - Page 22 Enter the desired parameter settings in the Measurement Schedule (Figure 3). (See Parameter set- tings.) If the Oscar 2 has SphygmoCor Technology, central blood pressure readings can be turned on or off as desired. Click one of the following: •...
- Page 23 The form automatically populates with the template's settings. Click one of the following: • Program to transfer the information to the Oscar 2. An indicator bar shows the progress and disappears when programming is successfully completed. • Cancel to close the dialog box.
-
Page 24: Study Parameter Settings
From the Available Templates dialog box, select the template name, and then click Delete. At the prompt, click Yes to confirm deletion. To email a template: An email server must be specified before a Programming Template can be emailed. See Email Settings on page 61 for setup instructions. - Page 25 Advanced Tab UI Item Description Max Pressure Establishes the maximum inflation pressure for the monitor (options between 160 and 280 mmHg). Suggested setting is 30 mmHg above the highest expected systolic NOTE: The ABP monitor will not inflate to Max Pressure with each reading; instead it inflates to 30 mmHg above the previous systolic reading.
-
Page 26: Fitting A Patient With The Oscar 2 And Abpm Cuff
Fitting a Patient with the Oscar 2 and ABPM Cuff After you have successfully programmed the Oscar 2 using AccuWin Pro 4, you may begin fitting the patient with the monitor and a blood pressure cuff. Cuffs may be used on either arm. -
Page 27: Preparing And Educating The Patient
Insert the Oscar 2 into its pouch with the display showing through the window. Attach the pouch to the pa- tient using the belt (Figure 7). Figure 7: Fitting the ABPM Cuff to the Patient Preparing and Educating the Patient When conducting blood pressure measurements, with an oscillometric NIBP device, it is important to follow suitable procedures to ensure valid, accurate results. -
Page 28: Starting The Study
If you wish to finish the study before the patient returns, instruct the patient to turn off the monitor by holding down the Start/Stop button for five (5) seconds. The Oscar 2 will beep five (5) times and the display will turn off. -
Page 29: Notes On Blood Pressure Data
Retrieving Data from the ABP Monitor To retrieve the data: Connect the Oscar 2 to the computer. In AccuWin Pro 4, click the Retrieve toolbar button, or select Retrieve Data from the Monitor menu. The dialog box on the screen shows the progress as the data is transferred. After completion, a dialog box appears to confirm patient details. -
Page 30: Patients, Studies And Orders
open. Select the patient whose BP data you wish to review by clicking on the patient’s name. Click OK. If the patient has more than one ABP study, a second dialog box, Choose Date, appears. Select a study date and click OK. The patient’s data appears in the display area. You can now review the BP study or print a report. -
Page 31: Viewing An Ambulatory Blood Pressure Study
• Hourly Averages: Analysis of ABP study data including study comparison. • Summary: Interpretative summary settings and results for current study. Viewing an Ambulatory Blood Pressure Study In the upper portion of the ABP Data tab, a table displays the results for each of the BP measurements taken or attempted during the study. - Page 32 Central BP Data: The Central BP Data tab provides a detailed view of individual CBP measurements taken during the study. If your Oscar 2 is configured with the SphygmoCor Inside technology, you will be able to collect, display, and analyze these parameters. The tab will display the number, time and date of the selected...
-
Page 33: Reviewing An Ambulatory Blood Pressure Study
Figure 10: Explanation of Central Blood Pressure Waveform Characteristics AASI Graph The AASI Graph tab is optional, and can be enabled by selecting Ambulatory Arterial Stiffness Index on the Report>Configuration>Data (see Customizing and Configuring AccuWin Pro 4). The graph on this tab plots the diastolic on systolic BP values for each measurement captured in the study. Additionally, this tab lists the calculated AASI value, diastolic as a function of systolic, systolic as a function of diastolic, the correlation coefficient of the linear regression equation, and the coordinate of the average systolic and diastolic. -
Page 34: Entering Comments
BP reading within the context of the study. To assist the patient with tracking their activities, a patient diary template is available for printing from the Download Library on the SunTech Medical website. To enter a patient comment from the table: Highlight the reading to which you want to add a comment, and select the corresponding cell in the Comments column. - Page 35 To enter a comment from the graph: Select the reading in the ABP data graph to which you want to add a comment. This causes the corre- sponding row in the table to be highlighted. Right-click the mouse and select Set comment from the menu. Add a comment by typing or selecting from predefined list.
-
Page 36: Setting Bp Threshold Limits
Figure 14: Edit Awake/Asleep Time Setting BP Threshold Limits Users may select the thresholds used to calculate the blood pressure load and above threshold values for brachial and central BP parameters. There are two settings for thresholds: global and custom. Global thresh- olds apply to all patient files;... -
Page 37: Setting Pediatric Threshold Limits
Figure 15: Setting BP Thresholds Brachial Thresholds Brachial Thresholds can be set for Awake and Asleep systolic and diastolic BP. The default setting is a global threshold set to 140/90 mmHg for Awake periods and 120/80 mmHg for Asleep periods. If desired, you can set thresholds to match a published standard using the corresponding buttons: JNC7/AHA or ESH. -
Page 38: Defining Time-Slice Periods
To apply a pediatric threshold: Open a study in the ABP Data tab. Within the Overview Graph tab, navigate to the Threshold tab locat- ed to the right of the graph view. Click Pediatric Thresholds. Enter the patient’s gender and height. The height may be entered in centimeters (cm), inches, or feet/ inches. - Page 39 Figure 17: ABP Data Graph, Time-Slice Tab To create a time-slice: Open a study in the ABP Data tab. Within the Overview Graph tab, navigate to the Time-Slice tab located to the right of the graph view. (Figure 17). Click the New button. On the graph left-click and hold the mouse to select the starting time of the time-slice period then drag the mouse to the end time.
- Page 40 Figure 18: Time-Slice Settings Window To edit a time-slice: Open an ABP study and click the Time-Slice tab (Figure 17). Choose the time-slice from the drop-down menu. The time-slice period will be highlighted on the Over- view graph. Click Edit. The Time-Slice Settings box (Figure 18) will appear. Edit the name or the start and end times.
-
Page 41: Editing Patient Info And Physician Info
Figure 19: Deleting Time-Slice (Configuration Window) Editing Patient Info and Physician Info Patient and physician information may be entered when data is retrieved from the monitor or after the patient file is saved. To edit Patient Info (Figure 20) Click the Patient Info tab at the bottom of the screen. Click on the Edit button at the bottom of the screen. - Page 42 pretation. As an alternative to typing in the free text field for Current Medications, users may add Medication, Dosage, and Frequency to dictionaries that are stored within AccuWin Pro 4. Figure 21: Physician Info Tab To Add Medications (Figure 22) Type a medication into the drop-down titled Medication.
- Page 43 Abbreviation Meaning Every day Every hour Every night at bedtime Four times a day Every other day Every day after noon Every week Three times a day Figure 23: Medication Entry Abbreviation To locate and choose a previously stored entry: Either start to type an entry or choose the down arrow with your mouse.
-
Page 44: Viewing Dose Response Statistics
augmentation index at 75 bpm, and central augmentation pressure. Additionally, the following calculations are also provided on the Statistics tab: • BP Load: Blood pressure load characterizes the distribution of measurements in an ABPM study rela- tive to brachial systolic and diastolic thresholds indicative of hypertension. The percentage of readings above this threshold is the BP load which has been shown to predict target organ involvement.14 •... -
Page 45: Viewing Hourly Averages
Figure 24: Time-Slice Statistics Viewing Hourly Averages To display trends in a patient’s ABP study, click the Hourly Averages tab at the bottom of the window (Figure 25). The table shows the average BP readings for each hour the patient was tested. In addition to brachial systolic (SYS) and diastolic (DIA), and the heart rate (HR), the following statistical averages are provided: •... -
Page 46: Viewing The Interpretive Report Summary
Figure 25: Hourly Averages Viewing the Interpretive Report Summary This window (Figure 26) shows an interpretation of the ABPM data based on published guidelines. Because traditional BP guidelines might not apply to the 24-hour ABPM readings, AccuWin Pro 4 includes the recom- mendations specifically for evaluation of ABPM levels. -
Page 47: Comparing Two Studies
Figure 26: Summary Tab Comparing Two Studies To further enhance the utility of ABPM, you may want to measure the progress of a patient’s blood pressure by conducting multiple studies. AccuWin Pro 4 allows for the comparison of the hourly averages and statis- tics for two studies conducted on the same patient. -
Page 48: Creating Reports
Full report: All report pages. NOTE: All report pages include the SunTech Medical logo, patient demographics (all information from the Pa- tient Info tab), and test date. The footer of each page identifies the type of monitor used and the page number. - Page 49 • Choose one of the formats listed in the left pane. When you select a format, the pages included in that format are selected in the Report Pages box. • Create a new custom report format by clicking New Report. Enter the report format name. Select the pages from the Report Pages list on the right.
-
Page 50: Previewing The Report
• Reviewed Data: Shows all the BP readings captured during the study in table format as it is shown on the ABP Data tab within AccuWin Pro 4, excluding the event codes (EC column). The vertical black line between the # and Time columns indicates the asleep time period. A “>” symbol adjacent to the BP values indicates that it has exceeded the threshold. -
Page 51: Printing The Report
Figure 29: Report Print Preview Printing the Report AccuWin Pro 4 provides you with flexibility in printing the report. You can either: • Print the configured report by clicking the Print Report button on the toolbar or by going to the Report menu and selecting Print. -
Page 52: Overview Of Accuwin Pro 4 Report Symbols
The exclamation point is a permanent tag and is used when an accurate reading cannot be determined by the Oscar 2. > This symbol will appear to the left of the measurement if the reading results were above the set threshold. -
Page 53: Managing Patient Studies
13. Managing Patient Studies Opening a Patient Study This feature allows you to retrieve and view a patient study. From the toolbar, click the BP Data button or from the File menu, select Open. The Open ABP Study – Select Patient dialog box appears listing all available patient files. Select the patient whose BP data you wish to retrieve by clicking on the patient’s name or use the search button to locate the patient by any information relevant to the patient’s file. -
Page 54: Deleting A Patient Record
Configuring AccuWin Pro 4 on page 61). Deleting a Patient Record This feature allows you to delete one or more patient records at a time. Each patient record contains ALL ABPM studies for that patient; therefore ALL ABPM studies for that patient will be deleted when selected. To delete selected patient study(s): From the file menu click Patient Management. - Page 55 To move patients between groups: Click File then select Patient Management. Using the checkboxes to the left of the dialog box, select the patients that you would like to manage. Click Move Patient. Select the Group Name using the drop-down menu from the dialog box. Click OK.
-
Page 56: Customizing And Configuring Accuwin Pro 4
The template.xml file in the install directory can be modified to use placeholders for exporting study data in a configurable format. Reports AccuWin Pro 4 report templates can be modified and tailored to individual requirements. Contact SunTech Medical for information. XML Tags XML Tags can be used in the template.xml file and report templates to additional fields the exported docu-... -
Page 57: Data Settings
data displayed in output files. Data Settings The Data Settings tab (Figure 30) allows you to configure the following settings: Figure 30: Configuration Menu, Hardware Data Source: Select how Morning Surge, and Smoothness Index are displayed or calculated (i.e. using brachi- al or central BP values). -
Page 58: Display Settings
Figure 31: Configuration Menu, Data Settings Display Settings This feature allows you to customize the color scheme of the graphs and charts (Figure 32). Customizable palettes allow you to fine-tune the color scheme for optimum reproduction by your printer. Shading on the graph indicates the period of the study. -
Page 59: Diary Comment Settings
Figure 32: Configuration Window, Display Settings Diary Comment Settings You can use this feature to keep track of entries from patient diaries describing the patient’s activities during BP measurements. The entries in this window (Figure 33) are a default list which can be customized by add- ing, editing, or deleting entries. - Page 60 Figure 33: Configuration Window, Diary Comments To add a new diary comment: In the Diary Comments tab of the Configuration window, Click New. Type the text for the new diary comment. Click anywhere to exit the text entry window and store the diary comment. Click OK to save your changes and exit the Configuration window To delete a diary comment: In the Diary Comments tab of the Configuration window, select the diary comment that you want to...
-
Page 61: Email Settings
Email Settings The Email feature creates a new email message, attaches selected patient data files or programming tem- plates, and sends the email to a specified destination. Figure 34: Configuration Window, Email Settings To set up email for AccuWin Pro 4 (Figure 34): Choose the type of connection you are using by selecting LAN or Dial up. -
Page 62: Export Settings
Select which items will be included in your One Page report, Full Report, and Standard Report. Select or de-select the checkboxes on the right to make these changes (Figure 27). To create a new report, click New Report, enter a name, and select the pages you want to appear in the report. - Page 63 GDT Directory GDT Exchange directory settings. When AccuWin Pro 4 is started from the command line with the argument /GDT, the application will search the GDT Import Directory for the GDT Import File Name. NOTE: When started from the command line, the application should be started in the install directory. When GDT Export is selected, AccuWin Pro 4 will save the GDT Export File Name to the GDT Export Directo- Export AWP4 Settings AWP4 file output can be configured to use a standard encryption key (less secure) or custom encryption...
- Page 64 Figure 35: Export button settings Naming a file using placeholders. Placeholders entered in the file name field will be replaced with the value shown below. Data Field Placeholder Text Patient ID %PATID% First Name %FIRST Last Name %LAST% Date of Birth %DOB% Study Reference %STUDYREF%...
-
Page 65: Overview Of Event Codes
15. Overview of Event Codes Event Codes (EC) are used during the review of ABPM data. The codes are displayed in the table on the ABP Data tab and in the Reviewed and Omitted BP data report pages under the columns labeled EC. Event Codes describe the conditions under which the BP measurement was taken. - Page 66 Dose response sequence end Review full dose response sequence on Dose Response Statistics tab Event marked by patient In ABP table, select desired comment. Day to night mode switch If desired, adjust ABP Data graph to match the time marked by the patient. Night to day mode switch If desired, adjust ABP Data graph to match the time marked by the patient.
-
Page 67: Administrative Tools
16. Administrative Tools AccuWin Pro 4 includes administrative tools that implement additional security-related features. With Accu- Win Pro 4 Admin Tools, you can create new user accounts, change user access levels, reset user passwords, enable the login process, and enable automatic logoff. The available user roles are as follows: Administrative: Full access to entire functionality of AccuWin Pro 4, including editing Admin Tool set- tings. -
Page 68: Adding User Accounts
To enable login security: In the Admin Tools window, click the Use Passwords slider. A blue color indicates that the option is enabled. Click Done. To enable automatic logoff: In the Admin Tools window, check the Auto Logoff Enabled slider. In the Auto Logoff Minutes box that appears, enter the number of minutes that must elapse before an inactive user is automatically logged off. -
Page 69: Resetting User Passwords
Cleaning After Use Oscar 2 The Oscar 2 monitor cannot be sterilized. DO NOT immerse the monitor in any fluid, or attempt to clean with any liquid detergents, cleaning agents, or solvents. The following methods and cleaning agents have been tested and confirmed not to affect the device housing: •... -
Page 70: Maintenance And Repairs After Use
Calibration Verification Procedure It is recommended that you check the accuracy of the Oscar 2 once every two years. If needed, an authorized service center may recalibrate the pressure transducers in the monitor. To verify calibration, the Oscar 2 must first be placed into the proper mode. -
Page 71: Limited Warranty
CAUTION: Do not use the monitor if it has failed its diagnostic self-test, or if it displays a greater than zero pressure with no cuff attached. The values displayed by such a unit may be inaccurate. NOTE: To return the Oscar 2 to its normal operating mode, remove and re-insert one of the batteries. 18. Limited Warranty... -
Page 72: Technical Assistance
19. Technical Assistance For any questions, please reference the Help section within the software, this user manual, or our website. If these do not fully address your problem, please contact our service department. SunTech Medical 517 Airport Blvd, Morrisville, USA. Tel: 919.654.2300 800.421.8626... -
Page 73: Radio Frequency Compliance Requirements
Oscar 2. WARNING: The Oscar 2 should not be used adjacent to or stacked with other equipment. If adjacent or stacked use is necessary, the Oscar 2 should be observed to verify normal operation in the configuration in which it will be used. -
Page 74: Electromagnetic Compatibility System Requirements
The Oscar 2 is intended for use in a Home Healthcare Environment within the electromagnetic environment specified below. The customer or the user of the Oscar 2 should assure that it is used in such an environment. This equipment has been tested and found to comply with the limits for medical devices to IEC60601-1-2: 2014. - Page 75 Recommended separation distances between portable and mobile RF communications equipment and the Oscar 2 Rated maximum Separation distance according to frequency of transmitter (m) output power of...
- Page 76 For transmitters rated at a maximum output power not listed above, the recommended separation distance d in meters (m) can be estimated using the equation applicable to the frequency of the transmitter, where P is the maximum output power rating of the transmitter in watts (W) according to the transmitter manufacturer.
-
Page 77: Product Disposal
Battery Disposal The SunTech Medical Oscar 2 contains a small lithium ion battery on a Printed Circuit (PC) board that contain materials which may be hazardous to human health. The battery cannot be easily removed and therefore the Oscar 2 must be disposed of in an environmentally responsible way or returned to SunTech Medical. -
Page 78: References
Blood Pressure Monitoring 2004; 9(4): 219-223. Goodwin J, Bilous M, Winship S, Finn P, Jones S. Validation of the Oscar 2 oscillometric 24-h ambula- tory blood pressure monitor according to the British Hypertension Society protocol. Blood Pressure Monitoring 2004;... - Page 79 30 (1): 1-14. Schillaci G, Parati G. Ambulatory arterial stiffness index: merits and limitations of a simple surrogate measure of arterial compliance. Journal of Hypertension 2008; 26(2): 182-185. Mancia G, Grassi G. Mechanisms and clinical implications of blood pressure variability. Journal of Cardiovascular Pharmacology 2000;...
Need help?
Do you have a question about the Oscar 2 and is the answer not in the manual?
Questions and answers