Table of Contents
Advertisement
Part # 80-0002-01 REV A
TANGO
SERVICE MANUAL
SunTech Medical, Inc.
507 Airport Boulevard
Morrisville, North Carolina 27560-8200
United States of America
Toll free: 800.421.8626
Phone: 919.654.2300
Fax: 919.654.2301
SunTech Medical, Ltd.
Oakfields Industrial Estate
Stanton Harcourt Road
Eynsham, Oxon OX8 1TS
United Kingdom
Phone: (44)1865-884234
Fax: (44)1865-884235
®
+
Advertisement
Table of Contents

Related Manuals for SunTech Tango+


Summary of Contents for SunTech Tango+
- Page 1 ® TANGO SERVICE MANUAL SunTech Medical, Inc. 507 Airport Boulevard Morrisville, North Carolina 27560-8200 United States of America Toll free: 800.421.8626 Phone: 919.654.2300 Fax: 919.654.2301 SunTech Medical, Ltd. Oakfields Industrial Estate Stanton Harcourt Road Eynsham, Oxon OX8 1TS United Kingdom...
-
Page 2: Table Of Contents
MANUAL CONTENTS SECTION 1 Introduction SECTION 2 Tango Inputs & Outputs Inputs Outputs Combined Inputs & Outputs SECTION 3 Operation Modes & Menu System Normal Operation Maintenance Menu SECTION 4 Routine Maintenance Verification of Calibration Pressure Calibration Leak Rate Test Timeout Check Overpressure Check SECTION 5... -
Page 3: Introduction
TANGO STRESS TEST BLOOD PRESSURE MONITOR INTRODUCTION The SunTech Medical Tango Stress Blood Pressure Monitor is used to monitor blood pressure and heart rate during exercise testing. The Tango can be used as a stand alone monitor, or in conjunction with a host Stress Test system. The Tango consists of a Base unit, Pneumatic/K-Sound Patient Cable, and cuff. -
Page 4: Tango + Inputs & Outputs
Used only if the Tango is not using an external ECG source. 2.1.4 Front Panel Keypad. Five key membrane pad used to control the Tango operations. 2.1.5 +9.0 volt medical grade power supply, SunTech 19-0011-00. TANGO OUTPUTS 2.2.1 Cold cathode backlit LCD display. -
Page 5: Operation Modes & Menu System
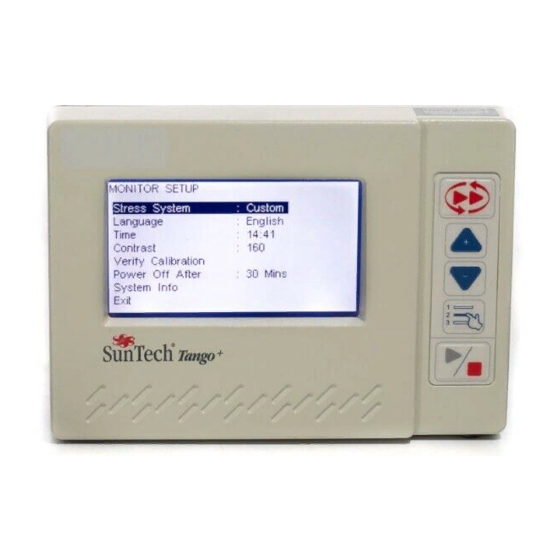
OPERATIONAL MODES & MENU SYSTEM DESCRIPTION Normal Operation - The Tango is a menu-driven system. All programming and operations are controlled by using the front panel keypad. The Tango program prompts the user when input is required, and provides instructions (via the LCD) for what should be done. Refer to the Tango User's Manual for detailed instructions on using the system under normal operational conditions. - Page 6 Test Serial Port: selecting this menu entry causes the monitor to send the string “Testing <linefeed><carriage return>” out of the serial port using the currently selected stress system protocol. 2. “Test Input Channels”. This option is provided for SunTech use only. 3. “Bootload”. This option is provided for SunTech use only.
-
Page 7: Routine Maintenance
ROUTINE MAINTENANCE PROCEDURES The following standard maintenance procedures are provided to ensure correct calibration of the Tango and correct operation of the basic patient safety systems of the Tango SunTech recommends that the calibration and safety systems are checked annually. -
Page 8: Verification Of Calibration
4.1.1 VERIFICATION OF PRESSURE CALIBRATION Equipment Required:- 1. Calibrated electronic manometer. 2. 500ml volume. 3. Hand Inflation Bulb with bleed valve. 4. Tubing, Tee pieces and miscellaneous connectors. 4.1.1.1 To perform a Calibration Verification, proceed as follows:- 4.1.1.2 Tee the manometer, the 500ml volume and the inflation bulb together and connect to the patient cable hose connection. -
Page 9: Pressure Calibration
4.1.2 PRESSURE CALIBRATION Equipment Required:- Calibrated electronic manometer 500ml volume Hand Inflation Bulb with bleed valve Tubing, Tee pieces and miscellaneous connectors 4.1.2.1 To perform a Pressure Calibration, proceed as follows:- 4.1.2.2 Tee the manometer, the 500ml volume and the inflation bulb together and connect to the patient cable hose connection. -
Page 10: Leak Rate Test
4.1.3 LEAK RATE TEST Equipment Required:- 1. Stop Watch. 2. 500ml volume. 3. Hand Inflation Bulb with bleed valve. 4. Tubing, Tee pieces and miscellaneous connectors. 4.1.3.1 To perform a Leak Rate test, proceed as follows:- 4.1.3.2 Tee the 500ml volume and the inflation bulb together and connect to the patient cable hose connection. -
Page 11: Timeout Check
4.1.4 TIMEOUT CHECK Equipment Required:- 1. Stop Watch. 2. 500ml volume. 3. Hand Inflation Bulb with bleed valve. 4. Tubing, Tee pieces and miscellaneous connectors. 4.1.4.1 To perform a Timeout Test, proceed as follows:- 4.1.4.2 Tee the 500ml volume and the inflation bulb together and connect to the patient cable hose connection. -
Page 12: Overpressure Check
4.1.5 OVERPRESSURE CHECK Equipment Required:- 1. 500ml volume 2. Hand Inflation Bulb with bleed valve 3. Tubing, Tee pieces and miscellaneous connectors 4.1.5.1 To perform an Overpressure Test, proceed as follows:- 4.1.5.2 Tee the 500ml volume and the inflation bulb together and connect to the patient cable hose connection. -
Page 13: Non-Routine Maintenance
Inspect each board for damage or contamination. Should any damage or liquid contamination be evident, the Tango should be re-assembled and returned to SunTech for board replacement and full re-test. Any dry contamination (eg dust, or small objects that may have fallen through the grill) may be removed, using a brush or gentle compressed air. -
Page 14: Pneumatic Inspection
Gently ease up the battery retaining spring lever until the battery can be extracted by sliding sideways towards the top edge of the circuit board. 5.3.5 Fit the new battery (SunTech part number 17-0012-00) by sliding it under the retaining clip until it clips securely into the plastic battery holder. 5.3.6 Re-fit the Pump &... -
Page 15: Disassembly & Re-Assembly Procedures
Disassembly and Re-assembly WARNING – When powered, hazardous voltages exist on the Tango main circuit board, in the vicinity of the backlight connector and backlight generator (center of the bottom edge of the pcb). To avoid risk of electrical shock, do not power the Tango main circuit board when any part of the enclosure has been removed. - Page 16 Refitting of boards is the reverse procedure to disassembly. Take particular care to ensure the correct insertion of the headers connecting the boards, especially the header connecting the main board to the pump and valve board. The pneumatic tubing must be arranged in the same positions as noted before disassembly.
-
Page 17: Appendix 1
Tango ECG Cable 58-0003-02 Tango Keypad 19-0011-00 9V Power Supply 32-0001-00 Overlay, Clear, LCD 97-0022-01 Pump, P05K 55-0093-00 Valve (control) 55-0043-05 Valve (dump) 17-0012-00 Battery, Lithium 39-0001-03 Enclosure, Tango , Front, Screen Printed SunTech 39-0002-13 Enclosure, Tango , Rear, Printed... -
Page 18: Tango + Exploded View (Front)
APPENDIX 2 TANGO EXPLODED VIEW (FRONT) -
Page 19: Tango + Exploded View (Rear)
APPENDIX 3 TANGO EXPLODED VIEW (REAR) -
Page 20: Key To Exploded Views
APPENDIX 4 KEY TO EXPLODED VIEWS Drawing Reference SunTech Quantity Part Description (97-0036-XX-AD) Part Number Main Circuit Board Assembly 92-0038-01 Patient Hose Connector, female, locking 55-0009-00 Keypad, 5 button 58-0003-02 39-0001-03 Tango Front Enclosure 39-0002-13 Tango Rear Enclosure 71-0001-00 Label, Tango Rear, English Screw, 4/40 x 1/4”... -
Page 21: Tango + Main Pcb Schematics
APPENDIX 5 TANGO MAIN PCB SCHEMATICS (Sheet 1) - Page 22 APPENDIX 5 TANGO MAIN PCB SCHEMATICS (Sheet 2)
- Page 23 APPENDIX 5 TANGO MAIN PCB SCHEMATICS (Sheet 3)
- Page 24 APPENDIX 5 TANGO MAIN PCB SCHEMATICS (Sheet 4)
- Page 25 APPENDIX 5 TANGO MAIN PCB SCHEMATICS (Sheet 5)
- Page 26 APPENDIX 5 TANGO MAIN PCB SCHEMATICS (Sheet 6)
- Page 27 APPENDIX 5 TANGO MAIN PCB SCHEMATICS (Sheet 7)
- Page 28 APPENDIX 5 TANGO MAIN PCB SCHEMATICS (Sheet 8)
- Page 29 APPENDIX 5 TANGO MAIN PCB SCHEMATICS (Sheet 9)
- Page 30 APPENDIX 5 TANGO MAIN PCB SCHEMATICS (Sheet 10)
- Page 31 APPENDIX 5 TANGO MAIN PCB SCHEMATICS (Sheet 11)
- Page 32 APPENDIX 5 TANGO MAIN PCB SCHEMATICS (Sheet 12)
-
Page 33: Tango + Pump & Valve Pcb Schematics
APPENDIX 6 TANGO PUMP & VALVE PCB SCHEMATICS... -
Page 34: Tango + Internal Ecg Pcb Schematics
APPENDIX 7 TANGO INTERNAL ECG PCB SCHEMATICS (Sheet 1) - Page 35 APPENDIX 7 TANGO INTERNAL ECG PCB SCHEMATICS (Sheet 2)
Need help?
Do you have a question about the Tango+ and is the answer not in the manual?
Questions and answers