Table of Contents
Troubleshooting

Related Manuals for Tennant S16


Summary of Contents for Tennant S16
- Page 1 (Battery) Sweeper Operator Manual Tennant True Parts ® IRIS a Tennant Technology ® North America / International 9045321 For the latest Parts Manuals and other Rev. 00 (09-2020) language Operator Manuals, visit: *9045321* www.tennantco.com/manuals...
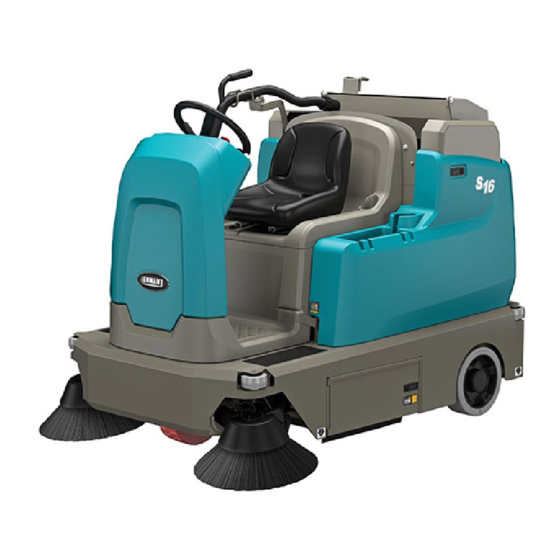
- Page 2 INTENDED USE The S16 is an industrial rider machine designed to sweep both rough and smooth hard surfaces (concrete, tile, stone, synthetic, etc) and carpeted surfaces (commercial grade nylon, polyester, and / or wool). Typical applications include schools, offi ce buildings, convention centers, airports, warehouses, manufacturing facilities, and retail centers.
-
Page 3: Table Of Contents
Lithium-Ion Battery Pack ......50 Turning On The Machine ......26 Charging The Batteries ......51 Brush Pressure ..........26 On-Board And Off-Board Battery Setting The Main Brush Pressure ....26 Charger Settings .........52 Sweeping ............27 Opportunity Charging (Lithium-Ion Stop Sweeping ..........28 Batteries Only)........53 S16 9045321 (09-2020) - Page 4 Adjusting The Side Brush Pattern(s) ..71 Skirts And Seals ..........72 Large Debris Trap Skirt ......72 Side Skirts ..........72 Side Recirculation Skirts ......73 Rear Skirt ..........73 Rear Recirculation Skirt ......73 Side Brush Dust Control Skirts (Option) ...73 Hopper Seals ...........74 Vacuum Seal ..........74 S16 9045321 (09-2020)
- Page 5 CONTENTS S16 9045321 (09-2020)
-
Page 6: Important Safety Instructions - Save These Instructions
CAUTION: To warn of unsafe practices a Tennant representative for information on how to that could result in minor or moderate disable the cellular communication functionality. personal injury. - Page 7 - Do not modify the machine from its original - Always follow safety and traffi c rules. design. - Report machine damage or faulty operation - Use Tennant supplied or approved immediately. replacement parts. - Wear personal protective equipment as 4.
- Page 8 - Block machine tires. - Tie machine down to truck or trailer. 7. When using Lithium-ion Battery Model: - Battery service to be performed by Tennant Service only. - Do not attempt to lift battery by hand or by any other unauthorized method.
- Page 9 Monte la barra support bar. la trémie. de apoyo. 1251172 Located on side of both lift arms (high dump Located on side brush machines only). plate(s) (machines equipped with optional side brush(es) only). S16 9045321 (09-2020)
- Page 10 No cargue las baterías si el cable está dañado. 1251173 Lisez le manuel avant d’utiliser la machine. Located on bottom of seat shroud plate. PARA SEGURIDAD Lea el manual antes de operar la máquina. Located on electrical panel. S16 9045321 (09-2020)
- Page 11 8. Consulte el manual del propietario para las instrucciones de elevación. 8. Reportez-vous au manuel du propriétaire pour les instructions de levage. 9. Service by Tennant Personnel only. 9. Servicio por técnicos de Tennant exclusivamente. 9. Service réservé au personnel Tennant. Tennant Co...
-
Page 12: Operation
D. Backup alarm / fl ashing light (Option) M. Left shroud E. Operator seat N. Main sweep brush access door F. Steering wheel O. Main sweep brush G. Right control panel P. Control pedals H. Left control panel S16 9045321 (09-2020) -
Page 13: Control Panels
T. Hopper safety button (High Dump Only) I. Battery indicator lights U. Indicators lights (Worn brush, Smart-Fill J. Main brush pressure indicator rights ABW (Automatic Battery Watering) tank low K. Main brush pressure button (Option), HEPA fi lter clogged (Option), and Fault indicators) S16 9045321 (09-2020) -
Page 14: Control Pedals
OPERATION CONTROL PEDALS A. Brake pedal B. Propel pedal C. Large debris trap pedal S16 9045321 (09-2020) -
Page 15: Symbol Definition
Left side brush (option) Hazard light Right side brush Circuit breaker Vacuum fan Jack point Raise hopper Battery charge Lower hopper Vacuum wand (option) Roll hopper roll out Hopper safety Roll hopper roll in Forward / Reverse S16 9045321 (09-2020) -
Page 16: Installing Batteries
RED TO POSITIVE (+) & BLACK TO NEGATIVE (−). IMPORTANT: Before charging, make sure that the charger setting is properly set for the battery type. 6. Reinstall the bracket onto the rear of the battery compartment. S16 9045321 (09-2020) -
Page 17: Operation Of Controls
10 hours past when the indicator discharge to a level that is unrecoverable. light is initially illuminated. See SMART-FILL ABW (AUTOMATIC BATTERY WATERING) SYSTEM in the MAINTENANCE section for instructions how to fi ll the tank. S16 9045321 (09-2020) -
Page 18: Hepa (High Efficiency Particulate Arrestance) Indicator (Machines Equipped With Hepa Filtration System Option Only)
FAULT INDICATOR The indicator light in the button will illuminate when The fault indicator illuminates when a fault code the 1-STEP button is activated. is detected. See FAULT / ALERT CODES AND INDICATORS for additional fault code information. S16 9045321 (09-2020) -
Page 19: Hopper Safety Button
Turn off the vacuum fan: Press the sweeping vacuum fan button. Both indicator lights will be off. NOTE: The side brush(es) cannot operate independently from the main brush. The main brush also comes on with the side brush(es) when the 1-Step button is pressed. S16 9045321 (09-2020) -
Page 20: Eco (Economy) Mode Button
fi lter when the 1-Step button is pressed to turn off the sweep systems. NOTE: Filter shaker will not function if hopper is raised. The hopper must be completely lowered for the fi lter shaker to function. S16 9045321 (09-2020) -
Page 21: Emergency Shut-Off Button
Only use this button in the event of an emergency. All Lights Off: Press the bottom of the operating / It is not intended for routine machine shutdown. hazard light switch. S16 9045321 (09-2020) -
Page 22: Propel Pedal
Open: Press the pedal when sweeping larger debris. The fl ap in front of the main sweeping brush will open. Close: Release the pedal and the fl ap will close, trapping larger debris to be swept into the hopper. S16 9045321 (09-2020) -
Page 23: Seat Support
Machines with deluxe seat option only: Pull and hold the operator seat release handle forward to unlock the seat before lifting the seat open. S16 9045321 (09-2020) -
Page 24: How The Machine Works
NOTE: The amount and type of soilage play an important role in determining the type of brush to use. Contact a Tennant representative for specifi c recommendations. Polypropylene Sand Wedge Main Brush −... -
Page 25: While Operating The Machine
0° C (32° F). FOR SAFETY: When using machine, do not sweep on ramp inclines that exceed 14.1% / 8° grade. Do not transport on ramp inclines that exceed 21.3% / 12° grade. S16 9045321 (09-2020) -
Page 26: Turning On The Machine
3. Turn on lights (if equipped). 4. Place the directional switch into the direction needed to travel. 5. Press the propel pedal to move the machine. NOTE: The machine will not travel unless the operator is sitting in the operator seat. S16 9045321 (09-2020) -
Page 27: Sweeping
fi re. Do not pick up. FOR SAFETY: When using machine, go slowly 4. If necessary, activate additional sweeping on inclines and slippery surfaces. functions required for the area to be cleaned. S16 9045321 (09-2020) -
Page 28: Stop Sweeping
3. Press the fi lter shaker button to clear dust and sweeping functions will stop after a short delay. debris from the fi lter. 4. Empty the debris hopper at the end of each shift or as needed. See EMPTYING THE HOPPER section of this manual. S16 9045321 (09-2020) -
Page 29: Emptying The Hopper
FOR SAFETY: When using machine, make sure adequate clearance is available before raising hopper. Do not raise hopper when machine is on an incline. NOTE: Be aware the minimum ceiling height needed to raise the hopper is 2220 mm (87.4 in). S16 9045321 (09-2020) - Page 30 10. Slowly drive the machine away from the debris site or container. 11. Stop the machine, then press and hold the hopper safety button and the bottom of the hopper raise/lower switch until the hopper is completely lowered. S16 9045321 (09-2020)
-
Page 31: Emptying The Hopper (Low Dump Machines)
FOR SAFETY: Before leaving or servicing machine, stop on level surface, turn off machine, and remove key. 5. Remove both pins from the hopper handle. 8. Pull on the hopper handle to roll the hopper out from the machine. S16 9045321 (09-2020) - Page 32 Reinstall the bins into the hopper. 11. When fi nished emptying the hopper, roll the hopper back into the machine until the retainer lever latches secure the hopper to the machine. 12. Lower the hopper handle to the lowest position. S16 9045321 (09-2020)
-
Page 33: Engaging The Hopper Support Bar
4. Completely lower the hopper. WARNING: Lift arm pinch point. Stay clear of hopper lift arms. 5. Lift the hopper support bar onto the top of the hopper lift cylinder. WARNING: Raised hopper may fall. Engage hopper support bar. S16 9045321 (09-2020) -
Page 34: Turning Off The Machine
(garden hose). Do Not clean the machine with a high pressure washer or other high pressure spray. FOR SAFETY: When servicing machine, do not power spray or hose off machine near electrical components. S16 9045321 (09-2020) -
Page 35: Fault / Alert Codes And Indicators
3 seconds for machine power to completely shut off. Then turn key switch back on again. Refer to the fault / alert indicators table to determine the cause and remedy for the fault / alerts. S16 9045321 (09-2020) -
Page 36: Machine Service Indicator Codes
Lithium-ion battery pack BMS CAN fault representative if problem persists. 0x0F103 Battery charger CAN communication fault 0xFF20 Main sweep board CAN fault 0x09F0 Propel communication lost warning NOTE: Contact a Tennant Service representative for all other fault codes. S16 9045321 (09-2020) -
Page 37: On-Board Battery Charger Service Indicator Codes
● ☼ ● ● ● 0xF102 Charger overheated. Let charger cool. Move to well ventilated area. If fault persists, contact service. ● ☼ ☼ ☼ ● 0xF103 Charger communication fault. Power cycle machine. If fault code persists, contact service. S16 9045321 (09-2020) -
Page 38: Lithium-Ion Battery System Service Indicator Codes
32°F/0°C before operating. If fault code repeats, contact service. 0x0D31 BMS Bus Bar temperature fault Stop operating or charging machine. 0x0D32 Allow battery to cool down. If fault 0x0D33 code repeats, contact service. S16 9045321 (09-2020) -
Page 39: Options
4. Use the vacuum wand to clean. 5. Wand Off: Return the vacuum wand to storage bracket and the vacuum wand will turn off. 6. Press bottom of vacuum wand switch to turn off the vacuum wand system. S16 9045321 (09-2020) -
Page 40: Adjusting Backup Alarm Volume (Option)
85−102 dB(A). To adjust the volume, lift the seat to the raised position, engage the seat support, and use the alarm volume knob to adjust the volume. Increase volume: Turn the knob clockwise. Decrease volume: Turn the knob counterclockwise. S16 9045321 (09-2020) -
Page 41: Machine Troubleshooting
Turn off machine. Extinguish fi re. If necessary, call emergency personnel. Poor vacuum wand Vacuum bag is damaged or full Replace vacuum bag vacuum performance Clogged hose Remove clog Torn seals on dry vacuum system Replace seals S16 9045321 (09-2020) -
Page 42: Hepa Filter System Troubleshooting
* Inspect all outer sweep compartment skirts Resume Sweeping Proceed to Step 8 * Remove main sweep brush and inspect sweep chamber skirts * Remove HEPA fi lter and inspect fan plate seals Resume Sweeping S16 9045321 (09-2020) -
Page 43: Maintenance
MAINTENANCE MAINTENANCE S16 9045321 (09-2020) -
Page 44: Maintenance Chart
Check electrolyte level Battery compart- Check for liquid. ment Drain if necessary 50 Hours Main brush Rotate end for end Vacuum wand Check or change bag (Option) vacuum bag Vacuum wand Check for damage or fan (Option) wear S16 9045321 (09-2020) - Page 45 Battery terminals Check and clean and cables Hopper lift arm Lubricate pivots (High Dump Machines Only) Tires Check for damage Hours and wear Vacuum wand fan Check motor motor(s) brushes HEPA vacuum fan Check motor motors brushes S16 9045321 (09-2020)
- Page 46 Distilled water. Special lubricant, Lubriplate EMB grease (Tennant part number 01433-1) SAE 90 weight gear lubricant HYDO Tennant True premium hydraulic fl uid or equivalent NOTE: More frequent maintenance intervals may be required in extremely dusty conditions. S16 9045321 (09-2020)
-
Page 47: Yellow Touch Points
STEERING CHAIN The steering chain is located directly above the drive wheel assembly. Check for damage or wear and lubricate the steering chain after every 200 hours. S16 9045321 (09-2020) -
Page 48: Hydraulics (High Dump Machines)
VI 163 or higher 1057708 19 L (5 gal) If using a locally-available hydraulic fl uid, be sure the specifi cations match Tennant hydraulic fl uid specifi cations. Substitute fl uids can cause premature failure of hydraulic components. ATTENTION! Hydraulic components depend on system hydraulic fl... -
Page 49: Batteries
NOTE: If machine is equipped with the automatic battery watering system, proceed to the SMART- FILL AUTOMATIC BATTERY WATERING SYSTEM. NOTE: Make sure the battery caps are in place while charging. There may be a sulfur smell after charging batteries. This is normal. S16 9045321 (09-2020) -
Page 50: Maintenance-Free Batteries
When removing or replacing the lithium- ion battery pack, use non-conductive lifting straps positioned at all four lift points with straps angled at 45° or greater when hoisting battery pack. • Contact Tennant Service for lithium-ion battery service and replacement. S16 9045321 (09-2020) -
Page 51: Charging The Batteries
5. Plug the charger AC power supply cord into a battery discharge indicator will automatically shut properly grounded outlet. off 5 minutes after the charge cycle has completed to conserve energy. To see the charge status, turn the key to the on position. S16 9045321 (09-2020) -
Page 52: On-Board And Off-Board Battery Charger Settings
Tennant. Profi le Setting Battery Description NOTE: The Tennant Service Diagnostic tool must Wet, Trojan 180-240 AH be used to change the on-board charger settings. Wet, Trojan 270-360 AH 1. To display the current profi le setting, press and Wet, TAB/Enersys 180-260 AH release the Select Charge Profi... -
Page 53: Opportunity Charging (Lithium-Ion Batteries Only)
If the charger is not connected and charging within this fi ve minutes, the BMS will shut off and the charger will not be able to charge. Reconnect the machine cable to the battery pack and remove it again to restart the BMS active period. S16 9045321 (09-2020) -
Page 54: Manual Battery Watering System
6. After adding water, reinstall the dust cap onto the battery fi ll hose and store the hand pump hose inside the battery compartment for future use. S16 9045321 (09-2020) -
Page 55: Smart-Fill Abw (Automatic Battery Watering) System
WATERING) INDICATOR. The ABW tank is located behind the shroud on the right side of the machine. Press the release and tilt the shroud, or lift the shroud, from the machine to access the automatic watering tank. S16 9045321 (09-2020) -
Page 56: Battery Compartment Drain Valve
FOR SAFETY: When servicing machine, wear personal protection equipment as needed. Avoid contact with battery acid. 3. Close the battery compartment drain valve after all liquid has drained from the battery compartment. S16 9045321 (09-2020) -
Page 57: Circuit Breakers, Fuses, And Relays
Circuit breakers 12 through 19 are located behind the steering shroud access panel. If the overload that caused the circuit breaker to trip is still present, the circuit breaker will continue to stop current fl ow until the problem is corrected. S16 9045321 (09-2020) -
Page 58: Fuses
(M3) is located in the vacuum wand compartment. Refer to the table below for the relays and circuits controlled. Relay Rating Circuit Controlled 36 VDC, 200 A Main Contactor 36 VDC, 25 A Charger Bypass 36 VDC, 25 A Vacuum Wand (option) S16 9045321 (09-2020) -
Page 59: Hepa (High Efficiency Particulate Arrestance) Filtration System (Option)
4. Turn on the machine, roll in the hopper, lower 3. Clean any debris from hopper. the hopper, and turn off the machine. 4. HEPA Machines: Use a garden hose to clean 5. Allow hopper to dry before using the machine. the hopper. S16 9045321 (09-2020) -
Page 60: Hopper Dust Filter
Reinstall the lint screen. 6. Reinstall the dust fi lter. 7. Disengage the hopper fi lter compartment prop arms, lower the hopper fi lter compartment, and secure the hopper fi lter compartment closed. S16 9045321 (09-2020) -
Page 61: Cleaning The Hopper Dust Filter (Machines Equipped With Standard Filtration System)
550 kPa (80 psi) of air pressure with a nozzle no smaller than 3 mm (0.13 in) and never hold the nozzle closer than 50 mm (2 in) to the fi lter. Do Not use air to clean the dust fi lter. HEPA S16 9045321 (09-2020) -
Page 62: Adjusting The Hopper Filter Cover Latches
If there is a fi re in the hopper, the Thermo-Sentry stops the vacuum fan and cuts off the air fl ow. There is also an audible alarm when the Thermo-Sentry is activated. The Thermo- Sentry automatically resets after cooling down. S16 9045321 (09-2020) -
Page 63: Replacing The Hepa Filter
4. Orient the new HEPA fi lter so the label is located at the top of the HEPA tray and the arrows on the label point out the direction of the airfl ow. 2. Remove the HEPA tray assembly from the hopper. S16 9045321 (09-2020) - Page 64 8. Reinstall the HEPA fi lter tray assembly into the machine. 6. Reinstall and tighten the hardware to secure the other end of the HEPA fi lter into the HEPA fi lter tray. S16 9045321 (09-2020)
-
Page 65: Main Sweep Brush
Refer to REPLACING OR ROTATING THE MAIN BRUSH. Replace the brushes when they no longer clean effectively or when brush worn icon is illuminated to alert that the brush needs to be changed. S16 9045321 (09-2020) - Page 66 6. Put the new or rotated end-for-end main brush on the fl oor next to the main sweep compartment. 7. Slide the main brush onto the drive plug. Rotate the brush until it engages the drive plug, and push it completely onto the plug. S16 9045321 (09-2020)
-
Page 67: Checking The Main Sweep Brush Pattern
6. The pattern check will run for approximately 10 seconds at which point the main brush will raise and the brush motor will turn off. The 1-Step LED indicator will stop fl ashing when the brush pattern check is completed. S16 9045321 (09-2020) -
Page 68: Adjusting The Main Sweep Brush Pattern
The LED indicator will continue fl ashing while the brush pattern check is in progress. NOTE: The pattern check sequence will be canceled if the 1-Step button is pressed at any time during the brush pattern check sequence. S16 9045321 (09-2020) -
Page 69: Side Brush(Es)
3. Remove the side brush and retainer from under the side brush assembly. S16 9045321 (09-2020) -
Page 70: Checking The Side Brush Pattern(S)
5. The side brush(es) will continue to lower until the actuator(s) is/are fully extended. S16 9045321 (09-2020) -
Page 71: Adjusting The Side Brush Pattern(S)
Turn the bottom star knob clockwise to decrease the brush pattern. 4. Tighten the upper star knob to secure the side brush pattern adjustment. 5. Recheck the side brush pattern(s). See CHECKING THE SIDE BRUSH PATTERN(S). Adjust the side brush patterns as necessary. S16 9045321 (09-2020) -
Page 72: Skirts And Seals
To change the large debris trap skirt: 1. Release the main sweeping brush compartment access door and open the door to access the main sweep brush compartment. 2. Remove the cotter pin/clevis pin securing the large debris trap skirt to the sweep head. S16 9045321 (09-2020) -
Page 73: Side Recirculation Skirts
The side skirts should slightly touch a fl at fl oor surface. Check the skirts for wear and damage daily. S16 9045321 (09-2020) -
Page 74: Hopper Seals
Check the seal for wear or damage after every 100 hours of operation. Check the skirts for wear and damage daily. S16 9045321 (09-2020) -
Page 75: Main Brush Door Seals (Machines Equipped With Hepa Filtration System Option Only)
The main brush drive belt is located on the main sweep brush head. Check the belt for damage and Check the vacuum wand fan for damage after wear after every 100 hours of operation. every 50 hours of operation. S16 9045321 (09-2020) -
Page 76: Replacing The Vacuum Wand Bag
1. Press the latch release to allow the vacuum wand housing cover to be opened. 2. Lift the vacuum wand housing cover open and use the prop rod to secure the cover open. 3. Remove the vacuum wand bag from the vacuum wand compartment. S16 9045321 (09-2020) -
Page 77: Pushing, Towing, And Transporting The Machine
MAINTENANCE TRANSPORTING THE MACHINE PUSHING, TOWING, AND TRANSPORTING THE MACHINE FOR SAFETY: When transporting Lithium- ion Battery Model, contact Tennant or your local regulatory authorities for proper transporting PUSHING OR TOWING THE MACHINE instructions. FOR SAFETY: When servicing the machine, 1. - Page 78 10. Ensure all tie-down straps are fully tightened the tie-downs to the trailer or truck to prevent and machine is completely secure on the the machine from moving. trailer or truck. S16 9045321 (09-2020)
-
Page 79: Machine Jacking
FOR SAFETY: When servicing machine, block machine tires before jacking machine up. Use a hoist or jack that will support the weight of the machine. Jack machine up at designated locations only. Support machine with jack stands. S16 9045321 (09-2020) -
Page 80: Storage Information
3. Disconnect batteries before storing. 4. Store the machine in a dry area with the sweep head in the raised position. NOTE: To prevent potential machine damage store machine in a rodent and insect free environment. S16 9045321 (09-2020) - Page 81 MAINTENANCE S16 9045321 (09-2020)
-
Page 82: Specifications
Values determined as per IEC 60335-2-72 Measure Sound pressure level LpA 67 dB Sound pressure uncertainty KpA 3 dB Sound power level LWA + Uncertainty KWA 91 dB + 2.98 dB Vibration - Hand-arm <2.5 m/s Vibration - Whole body <0.5 m/s S16 9045321 (09-2020) -
Page 83: General Machine Performance
Location Type Size Front (1) Solid 102 mm wide x 300 mm OD (4 in wide x 12 in OD) Rear (2) Solid 102 mm wide x 300 mm OD (4 in wide x 12 in OD) S16 9045321 (09-2020) -
Page 84: Machine Dimensions - Low Dump
MACHINE DIMENSIONS - LOW DUMP 1168 mm (46 in) 2095 mm (82.5 in) (Both High Dump and Low Dump) 1500 mm (59 in) Track Wheel base (at rear wheels) 1206 mm 1030 mm (40.5 in) (47.5 in) 1815 mm (71 in) S16 9045321 (09-2020) -
Page 85: Machine Dimensions - High Dump
SPECIFICATIONS MACHINE DIMENSIONS - HIGH DUMP 1168 mm (46 in) 1570 mm (61.8 in) Track Wheel base (at rear wheels) 1206 mm 1030 mm (40.5 in) (47.5 in) 1815 mm (71 in) S16 9045321 (09-2020) - Page 86 SPECIFICATIONS S16 9045321 (09-2020)
-
Page 87: Supervisor Controls
Supervisor Mode. 3. Continue holding the Eco mode button and the key switch to ON until both the right side brush button indicator light and left side brush button indicator light are fl ashing rapidly. S16 9045321 (09-2020) -
Page 88: Changing The Machine Speed
(battery until the Eco mode button is pressed. indicator light(s) fl ashing slowly) and the maximum transport speed setting (battery 6. Turn key switch OFF to exit the Supervisor indicator light(s) fl ashing rapidly). Mode. S16 9045321 (09-2020) -
Page 89: Index
Main Brush Pressure Button, 26 Lithium-Ion Battery System Service Indicator Right Side Brush Button, 19 Codes, 38 Vacuum Fan Button, 19 Machine Service Indicator Codes, 36 On-Board Battery Charger Indicator Codes, 37 Fault Indicator, 18 Filter Shaker Button, 20 S16 9045321 (09-2020) - Page 90 Manual Battery Watering System, 54 Indicators Motors, Electric, 58 Automatic Battery Watering Indicator (Option), 17 Battery Discharge Indicator, 17 Fault Indicator, 18 HEPA (High Effi ciency Particulate Arrestance) Indicator, 18 Worn Brush Indicator, 17 Installing Batteries, 16 S16 9045321 (09-2020)
- Page 91 Sweep Compartment HEPA Side Skirts (Ma- Poor Sweeping Performance (Troubleshooting), 41 chines Equipped With HEPA Filtration Sys- Poor Vacuum Wand Vacuum Performance (Trou- tem Option Only), 72, 74 bleshooting), 41 Power Type, 83 Pre-Operation Checklist, 25 Propel Pedal, 22 S16 9045321 (09-2020)
- Page 92 Entering The Supervisor Mode, 87 Sweeping, 27 Sweeping Functions Do Not Turn On (Trouble- shooting), 41 Switches Directional Switch, 21 Hopper Raise/Lower Switch, 29 Hopper Roll Switch, 29 Operating/Hazard Light Switch (Option), 21 Symbol Defi nition, 15 S16 9045321 (09-2020)
Need help?
Do you have a question about the S16 and is the answer not in the manual?
Questions and answers