Table of Contents
Advertisement
Advertisement
Table of Contents

Subscribe to Our Youtube Channel
Related Manuals for NCR EX15 POS


Summary of Contents for NCR EX15 POS
- Page 1 User Guide NCR EX15 POS (4505) Release 1.0 BCC5-0000-5295 Issue A...
- Page 2 NCR, therefore, reserves the right to change specifications without prior notice. All features, functions, and operations described herein may not be marketed by NCR in all parts of the world. In some instances, photographs are of equipment prototypes. Therefore, before using this document, consult with your NCR representative or NCR office for information that is applicable and current.
- Page 3 Audience This book is written for hardware installer/service personnel, system integrators, and field engineers. Notice: This document is NCR proprietary information and is not to be disclosed or reproduced without consent. Safety Requirements The NCR EX15 POS (4505) conforms to all applicable legal requirements. To view the...
- Page 4 Grounding Instructions In the event of a malfunction or breakdown, grounding provides a path of least resistance for electric current to reduce the risk of electric shock. This product is equipped with an electric cord having an equipment-grounding conductor and a grounding plug.
- Page 5 If you do not have access to a computer, you may leave a voice message at: 1-800-528- 8658 (USA), or (International) +1-770-623-7400. When leaving a message, please provide a phone number and/or an email address so NCR can contact you if additional details are needed.
- Page 6 • Description of the problem, including any system error codes, error condition, or guidance to the area of failure. The NCR Agent will provide you with a work order number, which serves as your Return Material Authorization (RMA). Please provide the RMA on the outside of the shipping box.
-
Page 7: Table Of Contents
Table of Contents Chapter 1: Product Overview Available Models Specifications Mounting Configurations Integrated Stand Tilt Angle Wall Mount Label Locations Chapter 2: Hardware Installation Installation Restrictions Ergonomic Workplace Installing the Terminal Connecting the Cables Routing the Cables Connecting AC Power Connecting to a Network Disconnecting the Power Supply Cable Installing the Transaction Printer... - Page 8 USB 3.0 Port USB 2.0 Port Network VGA Port Serial Connections COM Port Voltage Settings Serial Adapter Cable Pinouts – RJ50 to DB9 Accessing the Jumpers Removing the Stand Removing the Touch and LCD Assembly Chapter 3: Operation and Cleaning Touchscreens Projected Capacitive Touchscreen Using the PCap Touchscreen Cleaning the Touchscreen...
- Page 9 Chapter 5: Initial Terminal Imaging Introduction Imaging Procedure...
- Page 10 viii Revision Record Issue Date Remarks Nov 2018 First Issue...
-
Page 11: Chapter 1: Product Overview
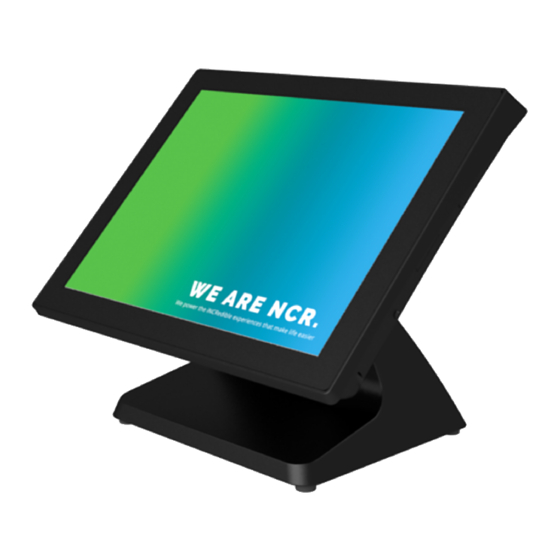
Product Overview Chapter 1: The NCR EX15 POS (4505) is an entry level integrated touch POS that delivers exceptional value and efficient performance in a sleek, compact design. It has a bezel– free projected capacitive display that supports 10–point multi–touch capability. ®... -
Page 12: Available Models
Available Models Model Description 4505-2004-0001 EX15 POS, 15" PCAP, 4GB Memory, 128GB SSD, POSReady 7 4505-2004-0002 EX15 POS, 15" PCAP, 4GB Memory, 128GB SSD, Windows 10 4505-2004-0003 EX15 POS, 15" PCAP, 4GB Memory, No Media, No OS Note: Storage devices, power cord, operating system, and peripherals are ordered as... -
Page 13: Specifications
Product Overview Specifications Feature Specifications ® ® Processor Intel Celeron J1900 2.0GHz/2.4GHz (burst) (Quad-core) Primary • LCD Panel: 15” LED-backlit display Display • Resolution: 1024 x 768 (default) • Brightness: 250 cd/m • Touchscreen: Flat Projected Capacitive (PCap) Touch (USB) Memory • Support for 204–pin DDR3L SODIMM, 1333/1600MTs unbuffered (one slot) •... - Page 14 Dallas iButton Reader Options • Addimat Key Reader Printer • 7167 POS Printer Options • 7197 POS Printer Scanner • 2357 Class Handheld Scanner Options Cash Drawer 2177-2001 Standard Duty Cash Drawer Options Note: The EX15 POS supports dual cash drawer configuration.
-
Page 15: Mounting Configurations
Product Overview Mounting Configurations Integrated Stand Tilt Angle When mounted on the integrated stand, the display may be tilted for the best viewing angle. The angle can be adjusted within 15 to 90 degrees up/down. -
Page 16: Wall Mount
Product Overview Wall Mount... -
Page 17: Label Locations
Product Overview Label Locations... -
Page 18: Chapter 2: Hardware Installation
• Install the EX15 POS near an electrical outlet that is easily accessible. Use the power cord as a power disconnect device. • Do not permit any object to rest on the power cord. Do not locate the EX15 POS where the power cord can be walked on. -
Page 19: Ergonomic Workplace
Hardware Installation Ergonomic Workplace The NCR EX15 POS (4505) has a high–brightness LCD with an anti–glare screen. For best results, please observe the following when considering the terminal workplace: • Avoid direct–glaring and reflective–glaring light. Locate the terminal in a controlled luminance surrounding. When installed next to windows position the terminal so it does not reflect the outside light. -
Page 20: Installing The Terminal
For installation procedures for the other mounting options, see their associated kit instructions. The EX15 POS comes fully assembled and ready to use. All that is required to install is connect the AC Power Cord, LAN Cable, and peripheral device cables. -
Page 21: Connecting The Cables
2-11 Hardware Installation Connecting the Cables The following are the default I/O ports for the NCR EX15 POS (4505). Port Port Name Description DC OUT 12 Vdc power output DC IN 19 Vdc power input COM 1/2/3/4 connectors Cash Drawer output E-SATAp E-SATA + USB connector USB 3.0... -
Page 22: Routing The Cables
Hardware Installation 2-12 Routing the Cables 1. Pivot the display toward the back. 2. Lay the terminal face down on a flat surface. Caution: Always use a soft material (cloth, foam) to protect the display screen when placing the terminal face down. - Page 23 2-13 Hardware Installation 3. Route the cables through the base of the stand, and then connect them to their assigned ports. For more information, refer to Connecting the Cables on page 11. 4. Position the cables on the back of the stand, and then return the terminal to its upright position.
-
Page 24: Connecting Ac Power
Connecting AC Power The NCR EX15 POS (4505) receives power from an external 19V power supply. Caution: The EX15 POS requires the 19V power supply that is shipped with the terminal. Use of other power bricks may cause damage to the unit. -
Page 25: Connecting To A Network
Depending on business configurations, connecting to a network may allow connection to the Internet. To connect the EX15 POS terminal to a network, connect the 10/100/1000 Ethernet cable to the LAN port on the terminal. The other end of the 10/100/1000 Ethernet cable should be connected into the network hub. -
Page 26: Disconnecting The Power Supply Cable
Hardware Installation 2-16 Disconnecting the Power Supply Cable The Power Supply Cable connector locks into position when connected to the terminal. It cannot be disconnected by simply pulling on the cable. To disconnect the Power Supply Cable, slide its overmold out from the DC IN port to unlock the connector, and then pull the connector away from the port. -
Page 27: Installing The Transaction Printer
2. Connect the other end of the Serial Adapter to one of the COM ports on the EX15. 3. Connect the Power Supply Cable to the printer. 4. Connect the AC Power Cord to the Power Supply and then to an AC outlet. Note: For more information on the POS printer, refer to printer documentations on https://info.ncr.com. -
Page 28: Installing The Cash Drawer
Hardware Installation 2-18 Installing the Cash Drawer The Cash Drawer can be connected to the Cash Drawer connector or to the transaction printer. -
Page 29: Installing The Second Cash Drawer
2-19 Hardware Installation Installing the Second Cash Drawer The terminal supports a 2-drawer configuration with a Dual Cash Drawer Cable. Connect this cable to the terminal or transaction printer cash drawer connector using the 24V Dual Cash Drawer Cable (1432-C829-0014). Note: This option is not available in Orderman Channel. -
Page 30: Installing The Scanner
Hardware Installation 2-20 Installing the Scanner The Handheld Scanner can be connected to any of the USB ports of the EX15 terminal. Note: For more information on the handheld scanner, refer to its documentations on the manufacturers' site, https://www.honeywellaidc.com/products/barcode-scanners/. Note: This option is not available in Orderman Channel. -
Page 31: Powering Up The Terminal
2-21 Hardware Installation Powering Up the Terminal 1. After installing the terminal, power up the system by pressing the Power Switch, which is located on the lower right side of the display. The system installs the system devices, system settings, and then reboots to continue setup. -
Page 32: Connector Pinouts
Hardware Installation 2-22 Connector Pinouts Note: This section discusses about connector pinouts as seen from the IO row. 19 Vdc Power Input Port Pin Diagram Signal Name COM Port (RJ50) Pin Diagram Signal Name RI/5V/12V... -
Page 33: Cash Drawer Port
2-23 Hardware Installation Cash Drawer Port Pin Diagram Signal Name COIL-DRIVER +SENSE +24V / +12v COIL-DRIVER 2 e-SATAp Port Pin Diagram Signal Name USB VBus USB D- USB D+ USB GND... -
Page 34: Usb 3.0 Port
Hardware Installation 2-24 USB 3.0 Port Pin Diagram Signal Name VBUS USB 2.0 Port Pin Diagram Signal Name VBUS Network Pin Diagram Signal Name BI_DA+ BI_DA- BI_DB+ BI_DB- BI_DC+ BI_DC- BI_DD+ BI_DD-... -
Page 35: Vga Port
2-25 Hardware Installation VGA Port Pin Diagram Signal Name GREEN BLUE RGND GGND BGND SGND HSYNC or CSYNC VSYNC... -
Page 36: Serial Connections
Hardware Installation 2-26 Serial Connections The EX15 POS provides four 10–pin RJ50 COM ports. COM Port Voltage Settings Set the COM Port voltage based on the voltage requirement of the peripheral to be attached. COM 1 By BIOS setting only For more information, refer to... -
Page 37: Serial Adapter Cable Pinouts - Rj50 To Db9
2-27 Hardware Installation Serial Adapter Cable Pinouts – RJ50 to DB9 DB9 port is available through the serial adapter cable. RJ50 Pin Signal Name DB9 Pin... -
Page 38: Accessing The Jumpers
Hardware Installation 2-28 Accessing the Jumpers To access the jumpers, follow these steps: Removing the Stand on the next page. Removing the Touch and LCD Assembly on page 31. -
Page 39: Removing The Stand
2. Lay the terminal face down on a flat surface. Caution: Always use a soft material (cloth, foam) to protect the display screen when placing the terminal face down. 3. If the EX15 POS is installed with a customer display, disconnect the Customer Display cables from the terminal. - Page 40 Hardware Installation 2-30 4. Remove the four screws that secure the stand to the back of the display. 5. Remove the stand and lay it down on a flat surface.
-
Page 41: Removing The Touch And Lcd Assembly
Removing the Stand on page 29. Note: If the EX15 POS is installed with a Customer Display, disconnect the Customer Display Cables before removing the stand. 2. Remove the four screws on the back cover. 3. While holding the unit together, turn it over so that it is facing up and its peripheral... - Page 42 Hardware Installation 2-32 4. Lift the bottom part of the Touch and LCD Assembly, rotate towards the back, and place right beside the unit. Caution: At this point, the Touch, LCD Backlight, LVDS, and Speaker cables are still connected to the motherboard. To avoid damage, be careful not to pull too much on the cables.
- Page 43 2-33 Hardware Installation 5. When replacing the Touch and LCD Assembly and the Motherboard, disconnect the following cables from the motherboard. When servicing other components, it is not required to disconnect the cables from the motherboard.
-
Page 44: Chapter 3: Operation And Cleaning
Since most surface contamination do not cause interference to the touchscreen the NCR EX15 POS (4505) can be used in public or severe environmental conditions. Using the PCap Touchscreen The PCap touchscreen responds to the lightest touches. Touching with a single finger resembles the left mouse button. -
Page 45: Magnetic Stripe Reader
3-35 Operation and Cleaning Magnetic Stripe Reader The NCR EX15 POS (4505) includes an MSR option. The MSR comes with ISO Track 1/2/3 single/dual/triple track support and interfaces through a USB connection in the display head. The card reading is bi-directional and can be mounted on the right side of the display. -
Page 46: Dallas Ibutton Reader
3-36 Dallas iButton Reader The NCR EX15 POS (4505) offers a Dallas iButton Reader as a kit. It reads the unique registration number or ID code of Dallas Touch Memory Buttons, which is used for employee login to the POS software application. -
Page 47: Addimat Key Reader
Operation and Cleaning Addimat Key Reader The NCR EX15 POS (4505) offers an Addimat Key Reader as a kit. It reads the unique registration number or ID code of Addimat Key Sticks, which is used for employee login to the POS software application. -
Page 48: Cleaning The Cabinet
Operation and Cleaning 3-38 Cleaning the Cabinet 1. Disconnect the unit from the power outlet before cleaning. 2. Use a cloth lightly dampened with a mild detergent. 3. Do not use alcohol (methyl, ethyl, or isopropyl) or any strong dis-solvent. Do not use thinner or benzene, abrasive cleaners, or compressed air. -
Page 49: Chapter 4: Bios Setup
BIOS Setup Chapter 4: Entering BIOS Setup 1. Connect an alphanumeric USB keyboard to the terminal. 2. Apply power to the terminal. 3. When the terminal boots, press [F2] to display the BIOS setup. Selecting Menu Options The following keyboard controls are used to select the menu options and to make changes to their values. -
Page 50: Setting The Lcd Brightness
4-40 BIOS Setup Setting the LCD Brightness 1. Select Advanced→Video Configuration. - Page 51 BIOS Setup 4-41 2. Select Brightness Control Level, and then select a brightness level.
-
Page 52: Setting The Serial Port (Com 1) Voltage
4-42 BIOS Setup Setting the Serial Port (COM 1) Voltage 1. Select Advanced→S10 FINTEX F81866A. - Page 53 BIOS Setup 4-43 2. Select Voltage Selector, and then select OK.
- Page 54 Initial Terminal Imaging Chapter 5: Introduction Factory default HDD/SSD images for the EX15 POS are distributed on bootable auto- imaging USB Flash Drive media. The following procedures describe how to apply/restore an image on the terminal. Warning: Using this procedure will replace any previously stored OS images.
Need help?
Do you have a question about the EX15 POS and is the answer not in the manual?
Questions and answers