
Related Manuals for Sandstrom SDABTIP12


Summary of Contents for Sandstrom SDABTIP12
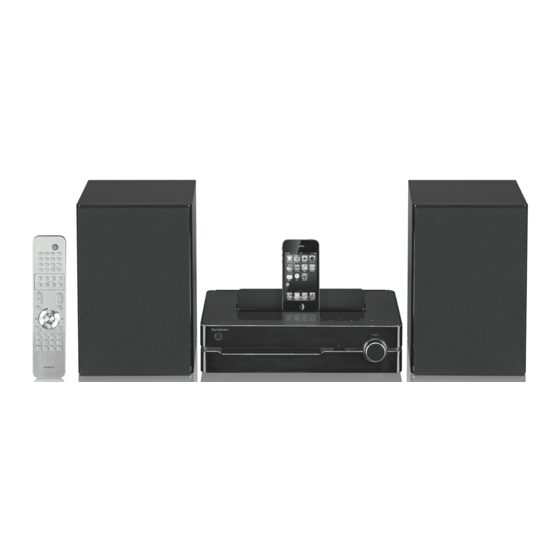
- Page 1 Instruction Manual Wireless DAB Hi-Fi with a 30-pin dock for iPad, iPhone and iPod SDABTIP12 (iPod and iPhone are not included)
-
Page 3: Table Of Contents
Contents Safety Warnings ........................5 Unpacking ..........................7 Product Overview .........................8 Front View ...............................8 Rear View .................................8 Top View ................................9 Remote Control ........................10 Operating Your Remote Control ..................12 Remote Control Operation Range ..................12 Connections ........................13 Speaker Connections ..........................13 Using the AUX Connection ........................13 Connecting the Aerial .......................... - Page 4 FM Operation ........................21 Scanning for Radio Stations ........................21 Searching for a Station Automatically ....................21 Searching for a Station Manually ......................21 Searching Mode ............................21 For Better Reception ..........................21 Audio Mode ..............................22 Presetting Stations ............................ 22 Recalling a Preset Station ........................
-
Page 5: Safety Warnings
Safety Warnings • Read all the instructions carefully before Ventilation using the unit and keep them for future • To prevent the risk of electric shock or reference. fire hazard due to overheating, ensure • Retain the manual. If you pass the unit that curtains and other materials do not onto a third party make sure to include this obstruct the ventilation vents. - Page 6 CAUTION RISK OF ELECTRIC SHOCK DO NOT OPEN The lightning flash with arrowhead symbol, within an equilateral triangle, is intended to alert the user to the presence of uninsulated “dangerous voltage” within the unit’s enclosure that may be of sufficient magnitude to constitute a risk of electric shock.
-
Page 7: Unpacking
Thank you for purchasing your new Sandstrøm Wireless DAB Hi-Fi with a 30-pin dock for iPad, iPhone and iPod We recommend that you spend some time reading this instruction manual in order that you fully understand all the operational features offered. You will also find some hints and tips to help you resolve any issues. -
Page 8: Product Overview
Product Overview Front View VOLUME 1. STANDBY Button 2. CD Tray • Switches the unit between the ON 3. Remote Sensor and STANDBY modes. Receives signals from the remote • Indicator lights up red when the unit control. is in STANDBY mode. 4. -
Page 9: Top View
Top View 1. Docking Cover Icon Flips open the docking cover. Stops playback. 2. iPod/iPhone/iPad Docking Icon • Skips backwards to the beginning of 3. USB Socket the track or to the previous track. 4. LED Display • Allows fast reversing of the current Icon track. -
Page 10: Remote Control
Remote Control 1. STANDBY Button Switches the unit between the ON and STANDBY modes. 2. 0-9 Buttons Selects a soundtrack. Button Ejects a disc from CD compartment. 4. PROG Button • Programmes soundtracks. PROG • Presets radio stations. PRESET – TU–... - Page 11 Button • Skips backwards to the beginning of the track or to the previous track. • Allows fast reversing of the current track. Button • Skips forwards to the next track. • Allows fast forwarding of the current track. PROG PRESET 19.
-
Page 12: Operating Your Remote Control
Operating Your Remote Control 1. Press and slide the back cover to open the battery compartment of the remote control. 2. Insert two AAA size batteries (not included). Make sure the (+) and (–) ends of the batteries match the (+) and (–) ends indicated in the battery compartment. -
Page 13: Connections
Connections Speaker Connections Connect the speaker cables at the back of the speakers to the SPEAKER OUT (L/R) Sockets at the rear of the unit. AC ~ SPEAKER OUT Using the AUX Connection Use a RCA stereo audio cable (not included) to connect to the main an auxiliary equipment unit’s AUX IN sockets. -
Page 14: Connecting To The Mains Supply
Connecting to the Mains Supply • This unit is designed to operate with an AC 230V ~50Hz power supply. • Connecting the unit to any other power source may cause damage to the unit. Unwind the mains cable to its full length. Connect the mains plug to a mains socket. Make sure the mains plug is fully inserted into the mains socket. -
Page 15: General Operation
General Operation Powering ON/OFF When you first connect the unit to the mains socket, the unit will be in STANDBY mode and the STANDBY button will be red. • Press the STANDBY button on the unit or the remote control to switch the unit on. The STANDBY button will light up blue. -
Page 16: Auto Setting The Clock
Auto Setting the Clock In DAB/FM mode, press RDS/INFO button repeatedly until RDS CLOCKS shows on the display. Once RDS CLOCKS has been selected, the clock will automatically update. Manual Setting of the Clock Manual Setting of the clock can only be done in STANDBY mode. 1. -
Page 17: System Reset
Use the sleep timer to turn the system off after a certain number of minutes in play mode. By setting the sleep timer, you can fall asleep to music and know that your system will turn off by itself rather than play all night. 1. -
Page 18: Dab Operation
DAB Operation DAB Auto Scan The auto scan will search for all DAB Band III channels. After the scan has finished, the first alphanumerically found station will be automatically selected. Full auto scan will not replace the DAB stations in the memory. If you want to remove all the previously scanned stations, a system reset is required. -
Page 19: Recalling A Preset Station
2. Press the PRESET+/– buttons to select your desired station preset number. 3. Press the PROG button to confirm your station, the display will show “STORE”. Recalling a Preset Station Once you have saved a station to one of the preset buttons, you can recall it by pressing the 0-9 buttons in pairs (e.g. - Page 20 Service Name Describes the type of service the station provides, e.g. news. DLS (Dynamic Label Segment) Dynamic label segment is a scrolling message that the broadcaster may include with their transmissions. The message usually includes information, such as programme details etc. DAB –...
-
Page 21: Fm Operation
FM Operation Scanning for Radio Stations The unit will automatically select a FM radio station with a good signal. 1. Select the TUNER mode by tapping the icon repeatedly on the unit or pressing the FM/DAB button on the remote control until the display reads “TUNER”. 2. -
Page 22: Audio Mode
Audio Mode To listen to radio stations in either Stereo or Mono mode: 1. In FM mode, press the MENU button on the remote control and then press the buttons to select SCAN. Press the ENTER button to confirm. buttons to select STEREO and MONO. Press the ENTER button to 2. -
Page 23: Fm Display Modes
FM Display Modes Every time you press the RDS button, the display will cycle through the following display modes: the Station Name, PTY, Frequency, RDS CLOCK or TEXT. The information is displayed on the lower segment of the display. Station Name Station Name When an RDS station is received, the name of that station will be displayed. -
Page 24: Cd/Mp3/Wma Operation
CD/MP3/WMA Operation icon repeatedly on the unit or press the DISC button on the remote control to Tap the select DISC mode. Playback 1. Tap the icon on the unit or press the button on the remote control and the disc tray will open automatically. -
Page 25: Random Playback
Random Playback All the tracks on the disc can be played in a random order. During playback, press the SHUFFLE button on the remote control. “SHUFFLE” will • show on the display. • Tap the icons on the unit or press the buttons on the remote control to play the next random track. -
Page 26: Ipod/Iphone/Ipad Operation
iPod/iPhone/iPad Operation Using the iPod/iPhone/iPad dock you can use the unit to play music files stored on your iPod/iPhone/iPad. This unit can support the following iPod/iPhone/iPad models. Type Support Model iPhone • iPhone • iPhone 3G/3GS • iPhone 4/4S iPod • iPod touch 1 Generation (with 30-pin dock... -
Page 27: Control Iphone/Ipod Menu
Turn the VOLUME + / – dial on the unit or press the VOLUME + / – buttons on the • remote control to adjust the volume. • Tap the icon on the unit or press the button on the remote control to go to the previous iPhone/iPod menu. -
Page 28: Bluetooth Operation
Bluetooth Operation The unit has a Bluetooth function that can receive a signal within 8 metres. Pairing the unit with a Bluetooth device to listen to music: 1. During ON mode, tap the icon on the unit or press the DOCK/BT button on the remote control to select BT mode. -
Page 29: Aux Operation
AUX Operation There are AUX IN (L/R) sockets located at the rear of the unit. Analogue audio sound signals from other sources can be connected to the unit through these sockets. 1. Connect to another audio device using the AUX IN (L/R) sockets via a RCA stereo audio cable (not included). -
Page 30: Maintenance
Maintenance Cleaning the Unit Ensure the unit is fully unplugged from the mains socket before cleaning. • To clean the unit, wipe the case with a slightly moist, lint-free cloth. • Do not use any cleaning fluids containing alcohol, ammonia or abrasives. •... -
Page 31: Hints And Tips
Hints and Tips If a problem occurs, it may often be due to something very minor. The following table contains various tips: Menu Description No power • Ensure the mains cable is connected securely at both ends. • Make sure that the ON mode is selected. The remote control • Use the remote control near the unit. - Page 32 Menu Description The unit doesn’t • Make sure the iPod/iPhone/iPad is connected properly. play iPhone/iPod/ • Standby mode may be activated; press the STANDBY iPad files or doesn’t button again. function as expected • Make sure the iPod/iPhone/iPad is switched on. • Vibrations may have caused the iPod/iPhone/iPad to come loose from the docking station.
-
Page 33: Specifications
Specifications SDABTIP12 Model Disc Format CD, CD-R, CD-RW, MP3, WMA Terminals: iPod/iPhone/iPad Docking, CD Tray x 1, USB 2.0 x 1, AUX IN (L/R) Sockets x 1, Aerial Socket x 1 Frequency Range FM: 87.5 – 108 MHz DAB: 174 – 240MHz... - Page 35 For general information about this appliance and handy hints and tips, please visit www.knowhow.com/knowledgebank or call 0844 5611234. Visit Partmaster.co.uk today for the easiest way to buy electrical spares and accessories. With over 1 million spares and accessories available we can deliver direct to your door the very next day.
- Page 36 DSG Retail Ltd. (co. no. 504877) Maylands Avenue, Hemel Hempstead, , HP2 7TG, UK Herts. IB-SDABTIP12-130624V4...
Need help?
Do you have a question about the SDABTIP12 and is the answer not in the manual?
Questions and answers