Table of Contents
Advertisement
Advertisement
Table of Contents

Related Manuals for Sandstrom VALVE SHBRDAB14


Summary of Contents for Sandstrom VALVE SHBRDAB14
- Page 1 Instruction Manual Valve Hi-Fi System SHBTDAB14...
-
Page 3: Table Of Contents
Contents Safety Warnings ........................5 Unpacking ..........................7 Product Overview .........................8 Front View ...............................8 Rear View .................................8 Remote Control .............................9 Operating Your Remote Control ..................10 Remote Control Operation Range ..................11 Connections ........................12 1. Connecting the DAB/FM Aerial ......................12 2. Speaker Connections .......................... 12 3. - Page 4 RDS (Radio Data System) Reception .................20 CD Operation ........................20 Compatible Disc Types ..........................20 CD Playing ..............................21 To Skip Search or Search and Play ....................... 21 Program Play ............................... 21 Playing Repeatedly (CD disc) ........................ 22 Text Display During Playback (CD disc) ..................... 22 MP3 Disc Playing ........................23 Text Display During Playback (MP3/WMA discs) ................
-
Page 5: Safety Warnings
Safety Warnings • Read all the instructions carefully before Ventilation using the unit and keep them for future • To prevent the risk of electric shock or reference. fire hazard due to overheating, ensure • Retain the manual. If you pass the unit that curtains and other materials do not onto a third party make sure to include this obstruct the ventilation vents. - Page 6 Batteries CAUTION • Batteries used in the remote control for this RISK OF ELECTRIC SHOCK DO NOT OPEN unit are easily swallowed by young children The lightning flash with arrowhead and this is dangerous. symbol, within an equilateral triangle, is • Keep loose batteries away from young intended to alert the user to the children and make sure that the battery...
-
Page 7: Unpacking
Thank you for purchasing your new Sandstrøm Valve Hi-Fi System. We recommend that you spend some time reading this instruction manual in order that you fully understand all the operational features it offers. You will also find some hints and tips to help you resolve any issues. Read all the safety instructions carefully before use and keep this instruction manual for future reference. -
Page 8: Product Overview
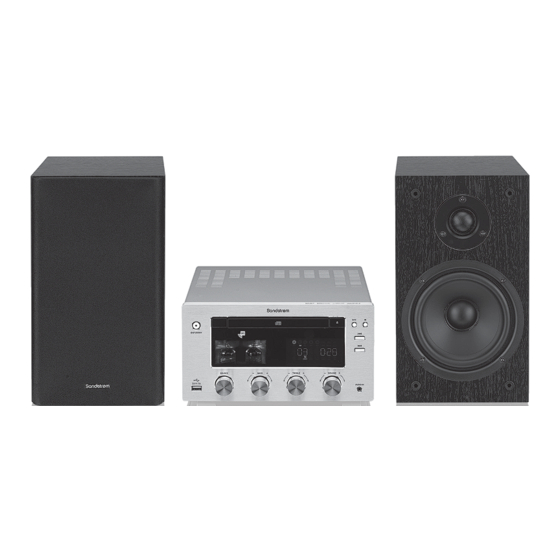
Product Overview Front View 6 7 8 1. Standby Button NFC (Near Field Communication) area 3. Disc Tray 4. Bluetooth indicator light 5. Remote Sensor Open/Close Button Play/Pause Button Stop Button 12 13 14 15 1A USB Socket 10. SOURCE Dial Rear View 11. -
Page 9: Remote Control
Remote Control Button Standby Bluetooth Button 3. CD/USB Button 4. ALBUM/PRESET/ Button Button 6. ALBUM/PRESET/ Button 7. AUX Button 8. REPEAT/SHUFFLE Button 9. INFO Button 10. + Volume Up Button 11. EQ Button 12. CLOCK Button 13. FM/DAB Button Button Button 16. -
Page 10: Operating Your Remote Control
Operating Your Remote Control 1. Press and hold the button at the back of the remote control to open the back cover. 2. Insert two AAA size batteries with correct polarity (+/–) as included. 3. Replace the back cover. Handling the Battery • Improper or incorrect use of batteries may cause corrosion or battery leakage, which could cause fire, personal injury or damage to property. -
Page 11: Remote Control Operation Range
Remote Control Operation Range Point the remote control to the unit no more than 6 Remote sensor meters from the remote control sensor and within 60° horizontally and 20° vertically of the front of the unit. The operating distance may vary according to the brightness of the room. -
Page 12: Connections
Connections 1. Connecting the DAB/FM Aerial Connect the supplied FM/DAB Antenna to the FM/DAB Antenna socket on the rear of the unit by turning the Antenna screw cap clockwise. • Do not overtighten, this could damage the Antenna. • To avoid noise, keep Antenna away from the unit, the connecting cables and the mains cable. -
Page 13: Connecting Auxiliary Equipment
3. Connecting Auxiliary Equipment Connect the AUX IN terminals on the rear of the unit to the AUX output terminals on the auxiliary equipment with an audio cable illustrated below. Auxiliary Equipment Turn the SOURCE dial on the unit or press the AUX button on the remote control to •... -
Page 14: Connecting To The Mains Supply
4. Connecting to the Mains Supply Connect the AC~ socket on the main unit to power plug to the wall outlet with the mains cable. • Be sure to unplug the power plug from the wall outlet when going out or when the unit is not in use for an extended period of time. -
Page 15: Setting The Clock
Setting the Clock Setting the Clock Manually 1. In standby mode, press and hold the CLOCK button to activate the clock setting mode, “24” begins to blink on the LCD display. 2. Set the 12/24 hour format with the + / – buttons. 3. -
Page 16: Sound Quality
Sound Quality Adjusting the Volume To increase or decrease the volume, turn the – VOLUME + dial on the unit or press the + / – buttons on the remote control. Mute sound During play, press the button to mute or unmute sound. Adjusting the Bass Turn the –... -
Page 17: Dab Radio Operation
DAB Radio Operation Be sure to unplug the power plug from the wall outlet when going out or when the unit is not in use for an extended period of time. Store DAB radio stations automatically 1. Turn the SOURCE dial on the unit or repeatedly press the FM/DAB button on the remote control to select DAB source. -
Page 18: Dab Information Display
DAB Information Display You can view the DAB service information in the following modes. Depending on the DAB radio station you are tuning to, some information modes may be unavailable. Repeatedly press the INFO button on the remote control to view the following information. Station Name When an RDS station is received, the name of that station will be displayed. -
Page 19: Fm Radio Operation
FM Radio Operation • Make sure that you have correctly connected and fully extended the antenna. • You can program a maximum of 20 FM radio stations. Tuning in a Station 1. Turn the SOURCE dial on the unit or repeatedly press the FM/DAB button on the remote control to select the tuner source. -
Page 20: Rds (Radio Data System) Reception
RDS (Radio Data System) Reception Many FM stations are broadcasting added data compatible with RDS (Radio Data System). This radio set offers convenient functions using such data. Repeatedly press the INFO button on the remote control to select the information that displayed as follows. -
Page 21: Cd Playing
CD Playing 1. Turn the SOURCE dial on the unit or repeatedly press the CD/USB button on the remote control to select the disc source. 2. Press the button on the unit to open the disc door and place the disc on the disc tray (with the printed side up). -
Page 22: Playing Repeatedly (Cd Disc)
Playing Repeatedly (CD disc) • ONE and ALL Repeat Play can be set by pressing the mode button (REPEAT/SHUFFLE). First press : To repeat the same track, the words “TRK” will blink and “REP” will stay lit. : To repeat playing all tracks on a disc, the words “TRK” and “REP ALL” Second press will stay lit. -
Page 23: Mp3 Disc Playing
MP3 Disc Playing MP3/WMA music playback from CD maybe be affected due to the type and format of disc or condition of the recording. If you are having trouble playing a certain disc, it is recommended to use USB input instead for best MP3/WMA playback. 1. -
Page 24: Playing Repeatedly (Mp3/Wma Disc)
Playing Repeatedly (MP3/WMA disc) • ONE and ALL Repeat Play can be set by pressing the mode button (REPEAT/SHUFFLE). First press : To repeat the same track, the words “TRK” will blink and “REP” will stay lit. Second press : To repeat playing album, the words “ALB” will blink and “TRK”, “REP ALL”... -
Page 25: Using The Usb
Using the USB By connecting a USB mass storage device (including USB flash memory, USB flash players or memory cards) to this unit, you can enjoy the device’s stored music through the unit. 1. Insert the USB device’s USB plug into the socket on the rear of unit. -
Page 26: About Nfc
• If the signal strength is weak, your Bluetooth receiver may disconnect, but it will re-enter pairing mode automatically. • This unit supports A2DP (Advanced Audio Distribution Profile). About NFC Near Field Communication (NFC) makes connecting and sharing easy and fun. Devices and accessories that support NFC are connected wirelessly when you touch them together. -
Page 27: Setting The Daily On Timer
Setting the Daily on Timer You can use the setting timer to make the unit automatically turn on at a certain time everyday from standby. When the setting timer is on, the timer indicator “ ” will be displayed. But the clock must be correctly set for the timer to operate correctly. 1. -
Page 28: Maintenance
Maintenance Cleaning the Unit Ensure the unit is fully unplugged from the mains socket before cleaning. • To clean the unit, wipe the case with a slightly moist, lint-free cloth. • Do not use any cleaning fluids containing alcohol, ammonia or abrasives. •... -
Page 29: Hints And Tips
Hints and Tips If a problem does occur, it may often be due to something very minor. The following table contains various tips. Problem Cause / Solution The unit does not power on • Make sure the mains plug is secure in the mains socket, and that the mains socket has power. -
Page 30: Specifications
Specifications System Section Model SHBTDAB14 Power Supply 220V-240V ~ 50/60Hz Power Consumption 70 W ≤ 1% Unit Dimension 245 (W) x 300 (D) x 138 (H) mm Speakers Section Impedance 4 Ω Output Power 2 x 75 Watts RMS Speaker Box Dimension 158 (W) x 207 (D) x 270 (H) mm Radio Section DAB 174.928 –... - Page 32 For general information about this appliance and handy hints and tips, please visit www.knowhow.com/knowledgebank or call 0344 561 1234. Notes for battery disposal The batteries used with this product contain chemicals that are harmful to the environment. To preserve our environment, dispose of used batteries according to your local laws or regulations.
Need help?
Do you have a question about the VALVE SHBRDAB14 and is the answer not in the manual?
Questions and answers