Table of Contents
Advertisement
Quick Links
Backbox Mounting
View Shown with Hole Plug Installed.
Open Faceplate then Remove Nut from the Inside.
Tool Required to Remove Hole Plug:
11/32" or 9mm Socket & Socket Wrench
5.118 [130.00]
19.685 [500.00]
3.937 [100.00]
9.843 [250.00]
3.602 [91.50]
Ø0.41 [Ø10.5]
Knock Out
Ø0.63 [Ø16.0]
Tool Required for Knock Out Removal:
1) Hammer
2) Blade Screwdriver
1.6 mm Thick
Electro-Galvanized Steel Constructed Backbox with
Silver Hammertone Polyester PowderCoat
Ø0.41 [Ø10.5]
Knock Out
3.602 [91.50]
12.567 [319.19]
1.969 [50.00]
5.118 [130.00]
1.969 [50.00]
Armored Cord Handset to USB to Analog Audio Module
Tool Provided for Terminal Block Screw:
1) #00 size Phillips Screw Driver
Red Wire to J4 (Position 1)
Yellow Wire to J4 (Position 2)
Green Wire to J4 (Position 3)
Black Wire to J4 (Position 4)
Armored Cord Wires End
© 2020, CyberData Corporation, ALL RIGHTS RESERVED
Knock Out
Keyholes & Holes Fits Up to
1/4"- 20 Thread Size
Stud Anchor/Screw/Bolt
(Optional) SPAR II - RTFM Access Hole
T15H Security Torx Screw Installed from the Inside
Ø1.30 [Ø33.0]
Conduit Hole Fits
One Inch EMT Fitting
Replaceable Coverplate
with Handsfree Kit (P/N: 081136A)
(Sold Separate) for Handsfree Operation
Knock Out
9.114 [231.50]
13.780 [350.00]
4.016 [102.00]
Last Updated 08/04/2020
J4
1
2
3
4
5
6
7
8
9
10
931352B
The IP Endpoint Company
Getting Started
Take the following into consideration before you install this product:
•
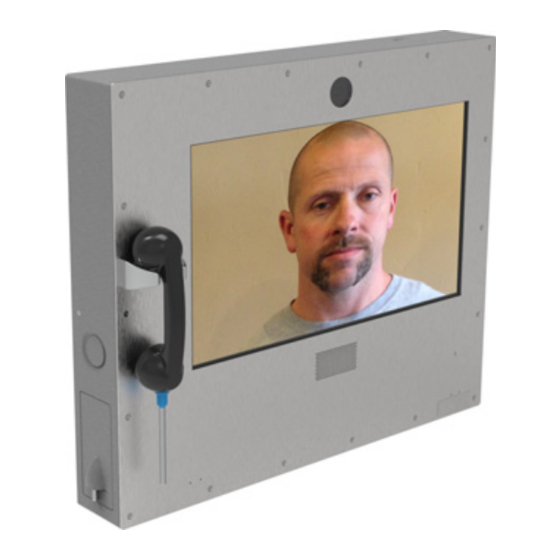
When this secure phone case is used, the touch screen capability of the DX phone is disabled.
•
Due to the size and mass of this product, it is important that the Backbox is safely installed according to these installation
instructions.
•
Make sure that the type of wall is capable of supporting the system and use screws that are suitable for that type of wall.
•
The system must be installed by qualified personnel in accordance with state and local building regulations.
•
Also see the
•
Locate the provided Security Torx Driver Bit (usually taped right next to the Hookswitch on the Faceplate).
•
Tool required to remove Security Torx Screws (an Electric Hand Drill or Powered Screwdriver)
•
WARNING: To prevent injury, this apparatus must be securely attached to the floor/wall in accordance with the installation
instructions.
•
WARNING: The PoE connector is intended for intra-building connections only and does not route to the outside plant.
•
WARNING: This enclosure is not rated for any AC voltages!
Hookswitch Wires to USB to Analog Audio Module Connections
Contacting CyberData
Corporate Headquarters
CyberData Corporation
3 Justin Court
Monterey, CA 93940, USA
Phone: 831-373-2601
Fax: 831-373-4193
http://www.cyberdata.net/
Quick Reference
Quick Reference
Installation Quick Reference
DX80 Secure Phone
011416
(on the other page).
J1
USB - A Plug
Plug in to Connector Panel
on DX80
10
USB - B Plug
9
Plug in to (J1)
8
USB - A to B Cable
7
6
5
4
3
2
1
SOCKET
J4
FACTORY PRE-INSTALLED
WIRES TO SOCKET
Sales: 831-373-2601 ext. 334
Support: 831-373-2601 ext. 333
Support Website:
http://support.cyberdata.net/
RMA Department: 831-373-2601 ext. 136
RMA Email: RMA@CyberData.net
RMA Status:
http://support.cyberdata.net/
Warranty Information:
http://support.cyberdata.net/
931352B
HOOKSWITCH
ASSEMBLY
WIRES TO SOCKET
PLUG
FACTORY DISCONNECTED
***
RE-CONNECT BEFORE FASTEN
FACEPLATE TO BACKBOX
© 2020, CyberData Corporation, ALL RIGHTS RESERVED
Advertisement
Table of Contents

Related Manuals for CyberData DX80


Summary of Contents for CyberData DX80
- Page 1 The system must be installed by qualified personnel in accordance with state and local building regulations. 2) Blade Screwdriver • Also see the Install the DX80 Phone to Enclosure (on the other page). (Optional) SPAR II - RTFM Access Hole •...
- Page 2 © 2020, CyberData Corporation, ALL RIGHTS RESERVED 931352B Quick Reference Quick Reference 931352B © 2020, CyberData Corporation, ALL RIGHTS RESERVED...
- Page 3 Install the DX80 Phone to Enclosure Tool Required to Remove Knock Outs (KO): IEC Power Cord 1) Hammer 2) Screw Driver the Other Through Any Available 3) Plier Conduit Hole Exit to Power Source Knock Outs (KO) & Keyhole Fit:...
Need help?
Do you have a question about the DX80 and is the answer not in the manual?
Questions and answers