Advertisement
Table of Contents
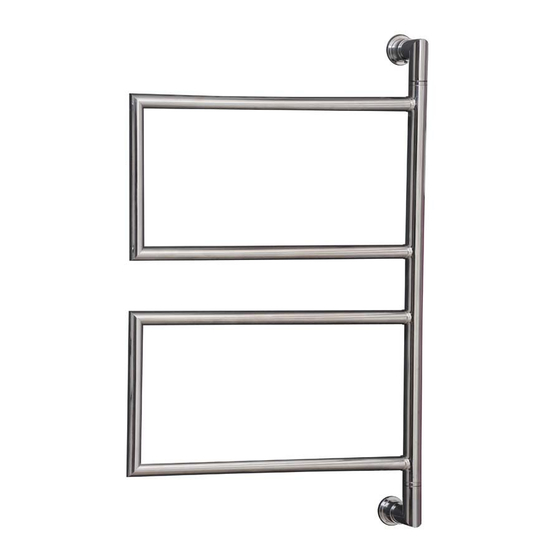
Kado Aspect Swivel Heated Towel Rail Wall Mount
Installation INSTRUCTIONS
•
Slide Towel Rail (4) into Wall Bracket (1) and
Hold unit in postion, with a pencil outline both
brackets and remove from wall.
• Feed existing wall cable through bottom Wall
Bracket (1),using a pencil and Wall Bracket (1) mark the
centre of each screw hole and cross if it for accuracy
• Drill a hole for the Screws(3)and insert nylon plug into tiled wall
(if applicable). Installer may choose to use alternative screws
to suit the application. Installer MUST use a DIAMOND HEAD
drill bit.
A QUALIFIED ELECTRICIAN MUST THEN CONNECT
TOWEL RAIL ELEMENT TO EXISTING WALL CABLE.
• Using a pencil and the Top Wall Bracket (1) mar aa
centrefor each screw hole, and cross for accuracy. Drill holes for
the screws (3), & insert nylon plugs into tiled wall (if applicable).
• When the Top Wall Bracket (1) is in place, slide the
Towel Rail (4) into position towards the wall.
DO NOT OVERTIGHTEN SCREW - LEAVE SLIGHT
ADJUSTMENT OF THE FLANGE (SLACK) TO
ENABLE MOVEMENT WHEN THE TOWEL RAIL IS
POSITIONED.
Bottom Bracket With Cable
4
6
2
5
Plumbers, please ensure a copy of the Installation
Instructions are left with the end user for future reference
635mm x 400mm Chrome
k
40mm
Approx.
3
Screw
Cord
1
50mm
3
Screw
Please read instructions carefully.
• Insert Grub Screw (5) into Wall Brackets (1)
• With the Allen Key provided, tighten the Grub Screw
until tight to ensure that towel rail stays in position.
• Push down on cover plate (6)and secure in place.
WARNING
TOWEL RAILS MUST ALWAYS BE INSTALLED WITH THE
ELEMENT PLACED AT THE BOTTOM FOR CORRECT HEAT
TRANSFER.
Please ensure that the measurements are taken
accurately and that the screw is in a stud or noggin to
provide support. Do not overtighten screws.
Please ensure a DIAMOND HEAD drill bit is used to drill
screw and cord holes into tiled wall.
Hydrotherm take pride in the fact that all rails are
individually hand made. Due to this fact some
measurements may not be exact. PLEASE READ
INSTRUCTIONS CAREFULLY and do not force towel rail
into bracket if position of wall ange is not accurate.
TOP Bracket
5
2
6
4
1 Wall Bracket x 2
2
Bracket Arm
3
Wall Screw**
Towel Rail
4
5
Allen Key & Grub Screw
6 Cover Plate
**INSTALLER MAY CHOOSE NOT TO USE SCREW IF NOT
SUITABLE FOR APPLICATION
Installation Instructions
3
Screw
1
3
Screw
40mm
WARNING
Advertisement
Table of Contents

Related Manuals for Reece Kado Aspect


Summary of Contents for Reece Kado Aspect
- Page 1 Installation Instructions Kado Aspect Swivel Heated Towel Rail Wall Mount 635mm x 400mm Chrome INSTALLATION INSTRUCTIONS • Slide Towel Rail (4) into Wall Bracket (1) and • Insert Grub Screw (5) into Wall Brackets (1) Hold unit in postion, with a pencil outline both brackets and remove from wall.
- Page 2 Installation Instructions KADO LUSSI WALL MOUNT HTR Installation instructions Kado Aspect Swivel Heated Towel Rail Wall Mount Kado Aspect Swivel Heated Towel Rail Wall Mount 635mm x 400mm Chrome 635mm x 400mm Chrome WARNING This product must be installed by a qualified electrician in accordance with AS/NZS 3000 wiring rules. Switch off the electrical supply at the mains before installation and maintenance.
Need help?
Do you have a question about the Kado Aspect and is the answer not in the manual?
Questions and answers