Table of Contents
Advertisement
Quick Links
Advertisement
Table of Contents

Related Manuals for Chamberlain 8550W


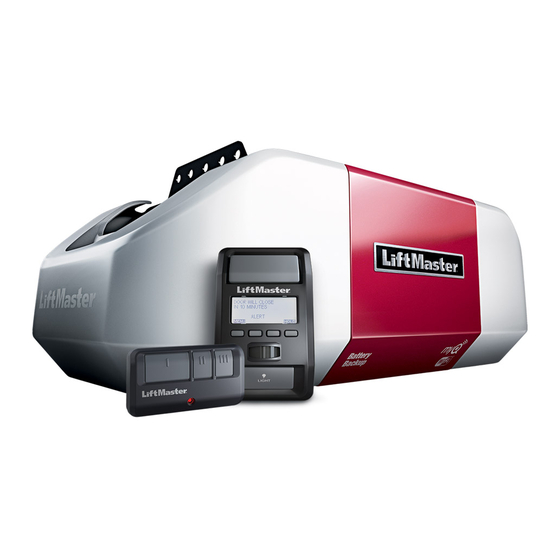
Summary of Contents for Chamberlain 8550W
- Page 3 ® Serial Number: Product S/N: Date of Purchase: Product S/N ® Serial Number...
- Page 4 Check Signal Strength. If you see: Wi-Fi signal is strong. The garage door opener will connect to your Wi-Fi network. Wi-Fi signal is weak. The garage door opener may connect to your Wi-Fi network. If not, try one of the options below to improve the Wi-Fi signal: No Wi-Fi signal.
- Page 5 5/32 3/16 7/16 5/16 7/16 9/16...
- Page 6 Provided Not Provided...
- Page 7 Provided Provided...
- Page 8 Models 8550W, 8550WL, 8550WLB, (Packed with the garage door opener) sprocket cover) 8550WLB-267, WLED, and WLED-267 (2) Model 8557W (1) Model 8557W (1) Models 8550W, 8550WL, 8550WLB, 8550WLB-267, WLED, and WLED-267 Hex Screw Washered Bolt #8x3/8" 5/16"-18x1/2" Model 8557W Lock Nut...
- Page 9 (To motor unit) Spring Trolley Nut Nut ring slot Nut Ring Nut Ring BEFORE AFTER RELEASE 1" 1-1/4" (2.5 cm) (3.18 cm)
- Page 10 HARDWARE Washered Bolt Lock Nut 5/16"-18x1/2" (Mounted in the (Mounted in the garage garage door opener) door opener) Hex Screws 8-32x1" Washered Bolt 5/16"-18x1/2" Washers Lock Models 8587W and 8587WLB only Chain Spreader 6-Tooth Chain Spreader 8-Tooth Sprocket Sprocket Motor Unit Mounting Plate Motor Unit Mounting Plate...
- Page 11 1/2" (13 mm) Hex Bolt Lock 1/4"-20x5/8" Washer Screw #8-32x3/8" Washerd Bolt 5/16"-18x1/2"...
- Page 13 OPTIONAL Unfinished CEILING Ceiling MOUNT FOR HEADER Header Wall BRACKET Vertical Centerline of Garage Door Structural Supports Level (Optional) Header Wall 2" (5 cm) Track Highest Point of Travel Door Sectional door with curved track...
- Page 14 HARDWARE Lag Screw 5/16"-9x1-5/8" Header (Finished Ceiling) Bracket Ceiling Mounting Holes 6" (15 cm) Maximum Door Spring Vertical Centerline of (Header Wall) Vertical Garage Door Centerline of Wall Mount Garage Door Lag Screw 2x4 Structural 5/16"-9 x 1-5/8" Header Support Bracket (Header Wall) (Garage Door)
- Page 15 HARDWARE Clevis Pin 5/16" x 2-3/4" Ring Fastener Ring Fastener Connected Disconnected Clevis Pin 5/16" X 2-3/4"...
- Page 16 HARDWARE Lock Washer 5/16" Hex Bolt 5/16"- 18x7/8" Nut 5/16"-18 FIGURE 2 FIGURE 1 Unfinished Ceiling Finished Ceiling Not Provided FIGURE 3 (Not Provided) Lag Screws 5/16"- 18x1-7/8" Measure Distance Hex Bolt 5/16"- 18x7/8", Lock Washer 5/16", Nut 5/16"-18...
- Page 17 Trolley Release Arm...
- Page 18 HARDWARE Self-Threading Screw 1/4"-14 x 5/8" FIGURE 2 FIGURE 1 Vertical Reinforcement Vertical Reinforcement Vertical Centerline Vertical Centerline of Garage Door of Garage Door Bolt 5/16"-18 x 2" (Not provided) Door Bracket Lock Washer 5/16" Door Bracket Self-Threading Screw Nut 5/16"-18 1/4"-14 x 5/8"...
- Page 19 HARDWARE Clevis Pin 5/16" x 1-1/4" Hex Bolt 5/16"-18 x 7/8" Lock Washer 5/16" Clevis Pin 5/16" x 1" Ring Fastener Nut 5/16"-18 CORRECT INCORRECT Straight Straight Curved Door Arm Door Curved Door Door (Groove facing out) Ring Fastener Nut 5/16"-18 Clevis Pin 5/16"...
- Page 20 Wall 7/16" (11 mm) GANG BOX DRYWALL Drywall Anchor 6-32 x 1" 6AB x 1" DRYWALL Drywall Anchor HARDWARE GANG BOX 6AB x 1" Screw Screw 6-32 x 1" (2) 6AB x 1" (2) 6-32 x 1" Drywall Anchors (2)
- Page 21 7/16" (11 mm) Staple...
- Page 22 Safety Reversing Sensor Safety Reversing Sensor 6" (15 cm) max. above floor 6" (15 cm) max. above floor Invisible Light Beam Protection Area...
- Page 23 HARDWARE Carriage Bolt Wing Nut 1/4"-20 x 1/2" 1/4"-20 (Not provided) (Not provided) No more than 6 inches (15 cm) Wing Nut No more 1/4"-20 Carriage Bolt than 6 inches Lens 1/4"-20 x 1/2" (15 cm) Carriage Bolt Wing Nut 1/4"-20 x 1/2"...
- Page 24 (Not provided) Staple 7/16" (11 mm) Wing Nut 1/4"-20 Carriage Bolt 1/4"-20 x 1/2"...
- Page 25 Pre-installed Safety reversing wires 7/16" sensor wires (11 mm) Not Provided Safety reversing Pre-installed wires sensor wires Yellow (for example) White Purple (for example) White/Black Yellow Purple (for example) (for example) Yellow Purple 7/16" (11 mm) To insert or remove the wires from the terminal, push in the tab with a screwdriver tip.
- Page 26 TYPICAL WIRING PERMANENT WIRING Ground Tab Green Ground Black Wire Screw Ground Wire Black White Wire Wire...
- Page 27 If the receiving sensor is in direct sunlight, switch it with sending sensor so it is on the opposite side of the door. (invisible light beam) Green LED Amber LED SENDING SENSOR RECEIVING SENSOR...
- Page 28 PROGRAMMING BUTTONS UP Button Adjustment Button DOWN Button DOWN (Close) UP (Open)
- Page 29 PROGRAMMING BUTTONS UP Button Adjustment Button DOWN Button...
- Page 31 Battery Status LED...
- Page 32 Battery Status LED...
- Page 35 Learn Button An LED on the garage door opener will indicate Wi-Fi status. See table below. Navigation To stop the Smart Control Buttons Panel LCD from displaying "CONNECT myQ APP": On the Smart Control Panel ® press MENU, select PROGRAM and press press BACK, then press EXIT to return to the main screen.
- Page 36 Camera Reset Button...
- Page 37 Screen Push Bar Navigation Buttons LIGHT button Motion Sensor...
- Page 38 Display the temperature in Fahrenheit or Celsius and show/hide the temperature. Select a language. Set duration for garage door opener light to stay on after operation, selectable range of 1-1/2 to 4-1/2 minutes. Turn the Motion sensor off/on, and turn the entry light feature off/on. Adjust the contrast of the screen.
- Page 39 LEARN Button LEARN LED Press to continue. Press to continue. LEARN Button Black Adjustment Button Reset Button...
- Page 40 Manual release...
Need help?
Do you have a question about the 8550W and is the answer not in the manual?
Questions and answers