Table of Contents
Advertisement
Quick Links
Advertisement
Table of Contents
Troubleshooting

Subscribe to Our Youtube Channel
Related Manuals for Dell EMC Storage NX3230


Summary of Contents for Dell EMC Storage NX3230
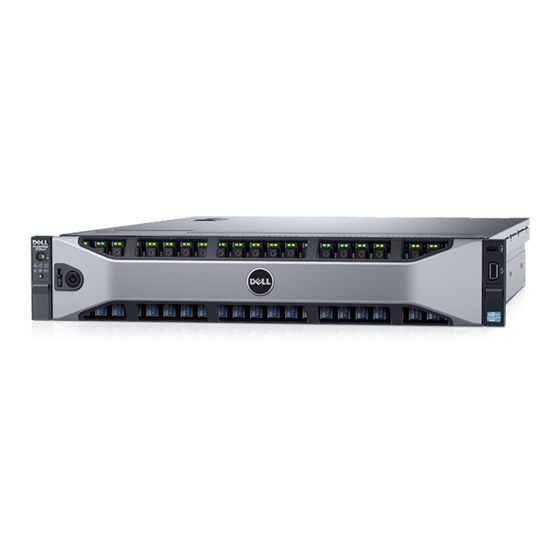
- Page 1 Dell Storage NX3230 Systems Owner's Manual...
- Page 2 註、警示與警告 註: 「註」表示可以幫助您更有效地使用產品的重要資訊。 警示: 「警示」表示有可能會損壞硬體或導致資料遺失,並告訴您如何避免發生此類問題。 警告: 「警告」表示可能的財產損失、人身傷害或死亡。 版權所有 © 2017 Dell Inc. 或其子公司。版權所有,翻印必究。Dell、EMC 與其他商標均為 Dell Inc. 或其子公司的商標。其他商標為 其各自所有者的商標。 2017 - 04 修正版 A01...
-
Page 3: Table Of Contents
目錄 1 About your system........................7 Back-panel features and indicators............................. 7 Front-panel features and indicators............................ 8 前面板上的診斷指示燈。..............................9 Hard drive indicator codes..............................10 iDRAC Direct LED 指示燈代碼............................11 NIC 指示燈代碼................................... 12 Power supply unit indicator codes............................. 12 找出系統服務標籤................................14 2 說明文件資源..........................15 3 Technical specifications...................... - Page 4 Removing the system cover.............................. 46 安裝系統機箱蓋.................................. 46 Inside the system................................. 47 Cooling shroud..................................47 卸下散熱護罩................................48 Installing the cooling shroud............................48 System memory...................................49 一般記憶體模組安裝指引............................49 Mode-specific guidelines.............................. 50 Sample memory configurations........................... 50 卸下記憶體模組................................52 安裝記憶體模組................................53 Hard drives................................... 54 Removing a 3.5-inch hard drive blank........................55 Installing a 3.5-inch hard drive blank...........................56 Removing a 2.5 inch hard drive blank (rear)......................56 Installing a 2.5 inch hard drive blank (rear)........................
- Page 5 PCIe card holder.................................. 89 Removing the PCIe card holder...........................90 Installing PCIe card holder............................90 Opening and closing the PCIe card holder latch......................91 Cable retention bracket..............................92 Removing the cable retention bracket........................92 Installing the cable retention bracket.......................... 93 Power supply units................................93 Hot spare feature................................
- Page 6 故障排除 系統 啟動故障..............................124 故障排除外部連線................................124 故障排除影像子系統................................ 125 故障排除 USB 裝置................................125 故障排除 iDRAC Direct(USB XML 組態)........................126 故障排除 iDRAC Direct(筆電連線)..........................126 故障排除序列 I/O 裝置..............................127 故障排除 NIC..................................127 故障排除受潮的系統................................ 127 故障排除受損的系統................................ 128 故障排除系統電池................................129 故障排除電源供應器................................ 129 故障排除電源問題..............................130 電源供應器問題................................130 Troubleshooting cooling problems........................... 130 故障排除散熱風扇................................
-
Page 7: About Your System
About your system Back-panel features and indicators 圖 1. Back-panel features and indicators 表 1. Back-panel features and indicators Item Indicator, button, or Icon Description connector System identification button The identification buttons on the front and back panels can be used to locate a particular system within a rack. -
Page 8: Front-Panel Features And Indicators
Item Indicator, button, or Icon Description connector Four integrated connectors that include: • Two 10/100/1000 Mbps NIC connectors • Two 100 Mbps/1 Gbps/10 Gbps SFP+/10 GbE T connectors Power supply unit (PSU1) 750 W, or 1100 W Power supply unit (PSU2) 750 W or 1100 W vFlash media card slot Allows you to insert a vFlash media card. -
Page 9: 前面板上的診斷指示燈
註: Quick Sync (optional) By default, the Quick Sync option is not available for the Dell Storage NX3230 system. Indicates a Quick Sync enabled system. The Quick Sync feature is optional and requires a Quick Sync bezel. This feature allows management of the system using mobile devices. -
Page 10: Hard Drive Indicator Codes
圖示 說明 狀況 更正措施 電力指示燈 如果系統遇到電力問題(例如:電 若為特定問題,請檢查系統事件記錄或系統訊息。如果 壓超出範圍、電源供應器 (PSU) 或 是因為 PSU 有問題,請檢查 PSU 上的 LED。重新插接 穩壓器故障),指示燈會閃爍琥珀 PSU。如果無法解決問題,請參閱「取得說明」一節。 色。 溫度指示燈 如果系統遇到散熱問題 (例如:周圍 請確保沒有下列狀況 : 溫度超出範圍、風扇故障),指示燈 散熱風扇已卸下或故障。 • 會閃爍琥珀色。 系統機箱蓋、散熱護罩、EMI 填充面板、記憶體模 • 組擋片或背填充支架被移除。 環境溫度過高。 • 外部空氣流通受阻。 • 請參閱「取得說明」一節。 記憶體指示燈 如果發生記憶體錯誤,指示燈會閃 請檢查系統事件記錄或系統訊息,確認故障記憶體的位 爍琥珀色。... -
Page 11: Idrac Direct Led 指示燈代碼
Drive-status indicator pattern (RAID only) Condition Drive ready for insertion or removal. 註: The drive status indicator remains off until all hard drives are initialized after the system is turned on. Drives are not ready for insertion or removal during this time. Flashes green, amber, and then turns off Predicted drive failure Flashes amber four times per second... -
Page 12: Nic 指示燈代碼
NIC 指示燈代碼 每個 背面板上的 NIC 具備指示燈,可提供有關網路活動與連結狀態的資訊。活動 LED 指示 NIC 目前連線與否。連結 LED 指示網路 連線的速度。 圖 4. NIC 指示燈 1. 連結指示燈 2. 活動指示燈 表 7. NIC 指示燈 慣例 狀況 Status (狀態) 連結與活動指示燈熄滅 NIC 未連接至網路 連結指示燈為綠色 NIC 以最大連接埠速度連接至有效的網路 (1 Gbps 或 10 Gbps)。 連結指示燈為琥珀色... - Page 13 圖 5. AC PSU status indicator 1. AC PSU status indicator/handle 表 8. AC PSU status indicators Convention Power indicator Condition pattern Green A valid power source is connected to the PSU and the PSU is operational. Flashing green When the firmware of the PSU is being updated, the PSU handle flashes green. Flashing green and When hot-adding a PSU, the PSU handle flashes green five times at 4 Hz rate and turns turns off...
-
Page 14: 找出系統服務標籤
圖 6. DC PSU status indicator 1. DC PSU status indicator 表 9. DC PSU status indicators Convention Power indicator pattern Condition Green A valid power source is connected to the PSU and that the PSU is operational. Flashing green When hot-adding a PSU, the PSU indicator flashes green. -
Page 15: 說明文件資源
設定 Dell Storage 網路連接儲存系 資訊,請參閱 統 。 設定您的系統 如需有關設定、管理、更新及還原系統的資訊, www.dell.com/storagemanuals 系統 請參閱 Dell EMC Network Attached Storage 使用 Windows Storage Server 2016) 的系統管理 員指南 。 如需有關 iDRAC 功能、設定與登入 iDRAC,以及 www.dell.com/idracmanuals 遠端管理系統的資訊,請參閱 Integrated Dell Remote Access Controller 使用者指南。 如需瞭解遠端存取控制器管理員 (RACADM) 子命... - Page 16 如需瞭解 Dell PowerEdge RAID 控制器 (PERC) 的 www.dell.com/storagecontrollermanuals RAID 控制器 功能和部署 PERC 卡的相關資訊,請參閱儲存控 制器的說明文件。 瞭解事件與錯誤訊息 如需瞭解如何查看由監視系統元件的系統韌體和 www.dell.com/ 代理程式所產生之事件與錯誤訊息,請參閱 openmanagemanuals>OpenManage Software 《Event and Error Message Reference Guide for (OpenManage 軟體) 14th Generation Dell EMC PowerEdge Servers》(第 14 代 Dell EMC PowerEdge 伺服器的事件與錯誤 訊息參考指南)。 說明文件資源...
-
Page 17: Technical Specifications
Technical specifications 表 10. Processor specifications Processor Processor type One or two Haswell processor E5-2600 v3 product family 表 11. Power specifications Power AC power supply (per power supply) Wattage 750 W, or 1100 W Heat dissipation 2891 BTU/hr maximum (750 W power supply) 註: Heat dissipation is calculated using the power 2843 BTU/hr maximum (750 W Titanium power supply) - Page 18 Memory Support for advanced ECC or memory optimized operation Memory module sockets Twenty-four 288-pin Memory module capacities LRDIMMs 32 GB quad-ranked RDIMMs 4 GB single-ranked, 8 GB, or 16 GB dual-ranked Minimum RAM 4 GB with a single processor 8 GB with a dual processor (minimum one memory module per processor) Maximum RAM Up to 768 GB with a dual processor...
- Page 19 Physical Width 48.2 cm (18.98 inch) Depth 75.58 cm (29.75 inch) Maximum configuration weight • 30.4 kg (67.02 lb) (2.5-inch hard drive systems) • 36.5 kg (80.47 lb) (3.5-inch hard drive systems) Empty weight • 19 kg (41.89 lb) (2.5-inch hard drive systems) •...
- Page 20 Environmental Temperature Storage –40°C–65°C (–40°F–149°F) Continuous operation (for altitude less than 950 m or 3117 ft) 10°C to 35°C (50°F to 95°F) with no direct sunlight on the equipment. Fresh air For information on fresh air, see Expanded Operating Temperature section. Maximum temperature gradient (operating and storage) 20°C/h (36°F/h) Relative humidity...
- Page 21 Environmental Corrosive dust • Air must be free of corrosive dust. 註: Applies to data center and non-data center • Residual dust present in the air must have a deliquescent environments. point less than 60% relative humidity. Gaseous contamination 註: Maximum corrosive contaminant levels measured at ≤50% relative humidity.
-
Page 22: 初始系統設定與組態
初始系統設定與組態 Setting up your system Complete the following steps to set up your system: 步驟 1. Unpack the system. 2. Install the system into the rack. For more information about installing the system into the rack, see your system Rack Installation Placemat at Dell.com/poweredgemanuals. -
Page 23: 遠端管理您的系統
遠端管理您的系統 要使用 iDRAC 執行頻外系統管理,請設定 iDRAC 的遠端協助工具、設定管理站及受管系統,以及設定支援的網頁瀏覽器。如需更多 資訊,請參閱 Integrated Dell Remote Access Controller 使用者指南,網址是:Dell.com/idracmanuals。 您也可以透過使用 Dell OpenManage Server Administrator (OMSA) 軟體和 OpenManage Essentials (OME) 系統管理控制台,自遠端監 控及管理伺服器。如需更多資訊,請參閱 Dell.com/openmanagemanuals > OpenManage Server Administrator 或 Dell.com/ openmanagemanuals > OpenManage Essentials。 Methods to download firmware and drivers You can download the firmware and drivers from the Dell Support site available at Dell.com/DHMSmanuals. -
Page 24: 預裝作業系統管理應用程式
預裝作業系統管理應用程式 管理預裝作業系統應用程式的選項 您的系統有下列選項可用來管理預裝作業系統應用程式: 系統設定 • • Boot Manager • Dell Lifecycle Controller 開機前執行環境 (PXE) • 系統設定 使用 System Setup 畫面,您可以設定系統的 BIOS 設定、iDRAC 設定、和裝置設定。 註: 選定欄位的說明文字依預設會在圖形化瀏覽器中顯示。若要在文字瀏覽器中檢視說明文字,請按下 F1。 您可以用兩種方法存取系統設定: 標準圖形瀏覽器 — 預設為啟用。 • 文字瀏覽器 — 瀏覽器以 Console Redirection (主控台重新導向) 啟用。 • 檢視系統設定 若要檢視「系統設定」畫面,請執行下列步驟:... -
Page 25: 系統 Bios
系統 BIOS 您可以使用系統 BIOS 畫面來編輯特定功能,例如開機順序、系統密碼、設定密碼、設定 RAID 模式、以及啟用或停用 USB 連接 埠。 檢視系統 BIOS 若要檢視「系統 BIOS」畫面,請執行下列步驟: 步驟 1. 開啟或重新啟動您的系統。 2. 在看到以下訊息時,立即按下 F2: F2 = System Setup 註: 如果在您按下 F2 之前,作業系統便已開始載入,請等候系統完成開機,然後再重新啟動系統並重試。 3. 在 System Setup Main Menu (系統設定主選單) 畫面上,按一下 System BIOS (系統 BIOS)。 系統... - Page 26 2. 在看到以下訊息時,立即按下 F2: F2 = System Setup 註: 如果在您按下 F2 之前,作業系統便已開始載入,請等候系統完成開機,然後再重新啟動系統並重試。 3. 在 System Setup Main Menu (系統設定主選單) 畫面上,按一下 System BIOS (系統 BIOS)。 4. 在「系統 BIOS」畫面上,按一下「開機設定」。 開機設定詳細資料 關於此工作 以下說明 Boot Settings (開機設定) 畫面的詳細資訊: 選項 說明 可讓您設定系統的開機模式。 Boot Mode 警示: 如果未在相同的開機模式中安裝作業系統,切換開機模式可能會使系統無法啟動。 如果作業系統支援...
- Page 27 步驟 1. 在系統設定功能主選單畫面上,按一下系統 BIOS > 開機設定。 2. 按一下 Boot Option Settings (開機選項設定) > Boot Sequence (開機順序)。 3. 使用方向鍵選取開機裝置,然後使用加號 (+) 和減號 (-) 鍵順序向上或向下移動裝置的排序。 4. 按一下結束,然後按一下是,以在結束時儲存設定值。 網路設定 您可以使用 Network Settings (網路設定) 畫面來修改 PXE 裝置設定。網路設定選項僅適用於 UEFI 模式。 註: BIOS 無法在 BIOS 模式中控制網路設定;在 BIOS 開機模式中是由網路控制器的選用開機 ROM 負責處理網路設定。 檢視網路設定...
- Page 28 設定詳細資訊 UEFI iSCSI 以下說明 UEFI ISCSI Settings(UEFI ISCSI 設定)畫面的詳細資訊: 選項 說明 iSCSI Initiator 名 指定的 iSCSI Initiator 名稱(iqn 格式)。 稱 iSCSI 裝置 n(n=1 啟用或停用 iSCSI 裝置。停用時,系統會自動為 iSCSI 裝置建立 UEFI 開機選項。 至 4) System Security 您可以使用 System Security(系統安全性) 畫面來執行特定功能,例如設定系統密碼、設定密碼和停用電源按鈕。 檢視系統安全性 若要檢視「系統安全性」畫面,請執行下列步驟: 步驟...
- Page 29 選項 說明 設定系統在 AC 電源恢復後延遲多久才啟動。此選項預設為「立即」。 AC Power Recovery Delay 於 AC Power Recovery Delay(交流電源恢復延遲) 選取 User Defined(使用者定義) 選項,設定 User User Defined Delay (60s to Defined Delay(使用者定義延遲)。 240s) 提供不同等級的 UEFI 變數安全性。若設為「標準」(預設值),在作業系統中會依照 UEFI 規格存取 UEFI 變數。 UEFI Variable 若設為 Controlled (管制),則選取的 UEFI 變數在環境中會受到保護,且新的 UEFI 開機項目會強制列在目前 Access 開機順序的最後面。...
- Page 30 步驟 1. 若要進入 System Setup,請在開啟或重新啟動系統後,立即按下 F2 鍵。 2. 在 System Setup Main Menu ( 系統設定主選單 ) 畫面上,按一下 系統 BIOS > 的系統安全性。 3. 在 System Security 畫面中,確認 Password Status 已設為 Unlocked。 4. 在 System Password 欄位中,輸入您的系統密碼,然後按下 Enter 或 Tab 鍵。 指定系統密碼時,請遵循以下準則: 密碼長度不超過...
- Page 31 若您變更系統與設定密碼,之後會出現訊息提示您重新輸入新密碼。若您刪除系統與設定密碼,之後會出現訊息提示您確認是否 刪除。 6. 按下 Esc 鍵返回「系統 BIOS」畫面。再次按下 Esc 鍵,之後會出現訊息提示您儲存變更。 以已啟用的設定密碼作業 如果設定密碼設定為 已啟用 , 在修改系統設定選項前輸入正確的設定密碼。 如果您未能在三次嘗試內輸入正確的密碼,系統會顯示下列訊息: Invalid Password! Number of unsuccessful password attempts: <x> System Halted! Must power down. 即使您關閉並重新啟動系統,直到輸入正確的密碼前,錯誤訊息將持續存在於畫面上。下列選項為例外: 如果 System Password (系統密碼) 並未設定為 Enabled (已啟用),也並未透過 Password Status (密碼狀態) 選項鎖定時,您 •...
- Page 32 選項 說明 指定系統製造商名稱。 System Manufacturer 指定系統製造商的聯絡資訊。 System Manufacturer Contact Information 指定系統複雜的可程式化邏輯裝置 (CPLD) 韌體的目前版本。 System CPLD Version 指定系統韌體 UEFI 遵循等級。 UEFI Compliance Version Memory Settings 您可以使用記憶體設定畫面來檢視所有記憶體設定,以及啟用或停用特定記憶體功能,例如系統記憶體測試及節點交錯。 檢視記憶體設定 若要檢視 Memory Settings (記憶體設定) 畫面,請執行下列步驟: 步驟 1. 開啟或重新啟動您的系統。 2. 在看到以下訊息時,立即按下 F2: F2 = System Setup 註: 如果在您按下...
- Page 33 選項 說明 註: Dell Fault Resilient Mode (Dell 錯誤回復模式) 選項會建立能進行錯誤回復的記憶體區域。支援此功 能的作業系統可使用此模式載入重要應用程式,或讓作業系統核心提供最大系統可用性。 指定是否支援非統一記憶體架構 (NUMA)。若將此欄位設為 Enabled (啟用),則安裝對稱式記憶體組態時支 Node Interleaving 援記憶體交錯。若將此欄位設為「已停用」,則系統支援 NUMA (非對稱) 記憶體組態。此選項預設為「已停 用」。 可指定 Snoop Mode (監測模式) 選項。Snoop Mode 的可用選項為 Home Snoop 、Early Snoop 及 Cluster Snoop Mode on Die。此選項預設為 Early Snoop (初期監測)。只有在 Node Interleaving (節點交錯) 設為 Disabled (停 用) 時,才可使用此欄位。...
- Page 34 選項 說明 DCU IP Prefetcher 啟用或停用資料快取裝置 (DCU) IP 預先擷取器。此選項預設為「已啟用」。 可讓您執行停用記憶體保護技術。此選項預設為「已啟用」。 Execute Disable 可讓您提高系統的能源效率。其採用作業系統核心暫止演算法,駐留系統中的部分邏輯處理器,讓對應的處 Logical Processor 理器核心轉換為低電力閒置狀態。只有在作業系統支援時,才能啟用這個選項。此選項預設為 Disabled (停 Idling 用)。 讓您在 POST 期間,根據系統的電源和熱傳導能力,重新設定處理器的散熱設計功率 (TDP) 等級。TDP 會驗 Configurable TDP 證冷卻系統所需的最大散熱量。此選項預設為「額定」。 註: 此選項僅存在於特定的處理器庫存單元 (SKU)。 啟用或停用 X2Apic 模式。 X2Apic Mode 控制渦輪加速介入方式。請僅在 System Profile 設為 Performance 時,才啟用此選項。 Dell Controlled Turbo 註:...
- Page 35 SATA 設定詳細資料 關於此工作 以下說明 SATA Settings(SATA 設定)畫面的詳細資訊: 選項 說明 可讓嵌入式 SATA 選項設為 Off、ATA、AHCI 或 RAID 模式。此選項預設為 AHCI。 Embedded SATA 在 POST 期間,將 Sends Security Freeze Lock (傳送安全凍結鎖定) 命令傳送至嵌入式 SATA 磁碟機。此選項 Security Freeze 僅適用於 ATA 和 AHCI 模式。 Lock 在 POST 期間,啟用或停用嵌入式 SATA 磁碟機的命令。 Write Cache 可設定所選裝置的磁碟機類型。如果是...
- Page 36 選項 說明 選項 說明 指定選取裝置的磁碟機機型。 Model 指定連接 SATA 連接埠的磁碟機類型。 Drive Type 容量 指定硬碟機總容量。對於卸除式媒體裝置 (例如光碟機) 並不會定義此欄位。 可設定所選裝置的磁碟機類型。如果是 ATA 模式的 Embedded SATA settings (嵌入式 SATA 設定),則將此 Port F 欄位設為 Auto (自動) 以啟用 BIOS 支援。將其設定為「關閉」即可關閉 BIOS 支援。 在 AHCI 或 RAID 模式中,BIOS 支援永遠都會啟用。 選項...
- Page 37 Integrated Devices 您可使用 Integrated Devices (整合式裝置) 畫面來檢視並設定所有整合式裝置的設定,包括影像控制器、整合式 RAID 控制器及 USB 連接埠。 檢視整合式裝置 若要檢視「整合式裝置」畫面,請執行下列步驟: 步驟 1. 開啟或重新啟動您的系統。 2. 在看到以下訊息時,立即按下 F2: F2 = System Setup 註: 如果在您按下 F2 之前,作業系統便已開始載入,請等候系統完成開機,然後再重新啟動系統並重試。 3. 在 System Setup Main Menu (系統設定主選單) 畫面上,按一下 System BIOS (系統 BIOS)。 4. 在「系統 BIOS」畫面上,按一下「整合式裝置」。 整合式裝置詳細資訊...
- Page 38 選項 說明 啟用或停用支援需要大量記憶體的 PCIe 裝置。此選項預設為「已啟用」。 Memory Mapped I/O above 4 GB 可在您的系統上啟用或停用可用的 PCIe 插槽。插槽停用功能可控制已安裝在指定插槽的 PCIe 卡組態。只有 Slot Disablement 在已安裝的周邊裝置插卡導致作業系統無法開機,或是導致系統啟動延遲時,才能停用插槽。如果停用插 槽,Option ROM 和 UEFI 驅動程式也都會停用。 Serial Communication 您可以使用 Serial Communication (序列通訊) 畫面來檢視序列通訊埠的屬性。 檢視序列通訊 若要檢視「序列通訊」畫面,請執行下列步驟: 步驟 1. 開啟或重新啟動您的系統。 2. 在看到以下訊息時,立即按下 F2: F2 = System Setup 註: 如果在您按下...
- Page 39 選項 說明 可在作業系統載入時,啟用或停用 BIOS 主控台重新導向。此選項預設為「已啟用」。 Redirection After Boot System Profile Settings 您可使用 System Profile Settings(系統設定檔設定) 畫面來啟用特定系統效能設定,例如電源管理。 檢視系統設定檔設定 若要檢視「系統設定檔設定」畫面,請執行下列步驟: 步驟 1. 開啟或重新啟動您的系統。 2. 在看到以下訊息時,立即按下 F2: F2 = System Setup 註: 如果在您按下 F2 之前,作業系統便已開始載入,請等候系統完成開機,然後再重新啟動系統並重試。 3. 在 System Setup Main Menu (系統設定主選單) 畫面上,按一下 System BIOS (系統 BIOS)。 4.
- Page 40 選項 說明 動態模式可讓處理器在執行時期最佳化核心和非核心電源資源。Energy Efficiency Policy (能源效率原則) 選 項的設定,會影響以省電或效能最佳化為目的的非核心頻率最佳化。 可讓您選取 Energy Efficient Policy (能源效率原則) 選項。 Energy Efficient Policy CPU 會使用設定來控制處理器的內部行為,並決定是否針對更高效能或更佳省電效果。 註: 如果系統中安裝了兩個處理器,則會出現 Number of Turbo Boost Enabled Cores for Processor 2 Number of Turbo Boot Enabled (處理器 2 的啟用渦輪加速核心數目) 項目。 Cores for 控制處理器...
-
Page 41: Idrac 設定公用程式
選項 說明 啟用或停用 In-System Characterization。此選項預設為「已停用」。另外兩個選項為 Enabled 和 Enabled - In-System Characterization No Reboot。 註: In-System Characterization (系統內特性化) 預設設定會隨未來的 BIOS 版本改變。 啟用時,將會在 POST 期間偵測到系統組態中的相關變更時執行 In-System Characterization (ISC),以最佳化 系統電源和效能。執行 ISC 約需要 20 秒的時間,且 ISC 結果必須經過系統重設才會套用。Enabled - No Reboot 選項會執行 ISC 並持續運作,而等到下次執行系統重設時才套用 ISC 結果。Enabled 選項會執行 ISC 並強制執行即時的系統重設,以套用... -
Page 42: Boot Manager
註: 某些平台組態可能不支援 Dell Lifecycle Controller 提供的完整功能集。 如需更多有關設定 Dell Lifecycle Controller、設定硬體與韌體、和部署作業系統的資訊,請參閱 Dell Lifecycle Controller 的說明文件, 位於 Dell.com/idracmanuals。 Boot Manager Boot Manager (開機管理程式) 畫面可讓您選取開機選項和診斷公用程式。 檢視 Boot Manager 若要進入 Boot Manager: 步驟 1. 開啟或重新啟動您的系統。 2. 看到以下訊息時,按下 F11: F11 = Boot Manager 如果在您按下 F11 之前,您的作業系統就已開始載入,請讓系統完成啟動,然後再重新啟動您的系統並重試。 Boot Manager 主選單... -
Page 43: Installing And Removing System Components
Installing and removing system components This section provides information about installing and removing the system components. 主題: 安全說明 • • Before working inside your system • After working inside your system 建議的工具 • • Front bezel (optional) • Removing the system cover 安裝系統機箱蓋... -
Page 44: Before Working Inside Your System
Before working inside your system 事前準備作業 Follow the safety guidelines listed in the Safety instructions section. 步驟 1. Turn off the system, including any attached peripherals. 2. Disconnect the system from the electrical outlet and disconnect the peripherals. 3. If installed, remove the front bezel. 4. -
Page 45: Removing The Front Bezel
Removing the front bezel 步驟 1. Unlock the bezel lock at the left end of the bezel. 2. Lift the release latch next to the bezel lock. 3. Pull the left end of the bezel, unhook the right end and remove the bezel. 圖... -
Page 46: Removing The System Cover
Removing the system cover 事前準備作業 1. Follow the safety guidelines listed in the Safety instructions section. 2. If installed, remove the optional bezel. 步驟 1. Rotate the latch release lock counter clockwise to the unlocked position. 2. Lift the latch toward the back of the system. The system cover slides back and the tabs on the system cover disengage from the slots on the chassis. -
Page 47: Inside The System
Inside the system 警示: 許多維修僅可由獲得認可的維修技術人員來完成。您只能依照產品說明文件中的授權說明或在線上或電話服務和支援團隊 的指導下,執行故障排除和簡單的維修。由未經 Dell 授權的維修造成的損壞不在保固範圍之內。請閱讀並遵循隨產品寄送的安 全指示。 圖 8. Inside the system— 12 HDD system 1. cooling-fan in the cooling-fan assembly (6) 2. processor (2) 3. DIMMs (24) 4. internal USB port 5. HDD backplane (back) 6. vFlash media slot 7. -
Page 48: 卸下散熱護罩
卸下散熱護罩 事前準備作業 警示: 許多維修僅可由獲得認可的維修技術人員來完成。您只能依照產品說明文件中的授權說明或在線上或電話服務和支援團隊 的指導下,執行故障排除和簡單的維修。由未經 Dell 授權的維修造成的損壞不在保固範圍之內。請閱讀並遵循隨產品寄送的安 全指示。 警示: 請勿在冷卻罩移除時操作系統。系統可能快速變成過熱狀態,造成系統關機並使資料遺失。 1. 請遵循「安全指示」一節所列的安全指南。 2. 請遵循「拆裝電腦內部元件之前」一節列出的程序。 3. 如果已安裝,請卸下全長的 PCIe 卡。 步驟 握住接觸點,將散熱護罩從系統提起取出。 後續步驟 1. 安裝散熱護罩。 2. 如有需要,請安裝全長 PCIe 卡。 3. 請遵循「拆裝系統內部元件之後」一節列出的程序。 相關工作 Before working inside your system After working inside your system 相關參考... -
Page 49: System Memory
相關參考 安全說明 System memory The system supports DDR4 registered DIMMs (RDIMMs) and load reduced DIMMs (LRDIMMs). System memory holds the instructions that are executed by the processor. 註: MT/s indicates DIMM speed in MegaTransfers per second. Memory bus operating frequency can be 1866 MT/s, 2133 MT/s, or 2400 MT/s depending on the following factors: •... -
Page 50: Mode-Specific Guidelines
在遵循其他記憶體規則的情況下,可以混用不同容量的記憶體模組 (例如,可以混用 4 GB 和 8 GB 記憶體模組)。 • 不支援在系統中混用超過兩種記憶體模組容量。 • 每顆處理器一次裝入四條記憶體模組 (每通道一條 DIMM),可發揮最大效能。 • 相關參考 Mode-specific guidelines Mode-specific guidelines Four memory channels are allocated to each processor. The allowable configurations depend on the memory mode selected. 註: You can mix x4 and x8 DRAM based DIMMs to support RAS features. However, all guidelines for specific RAS features must be followed. - Page 51 System DIMM size Number of DIMM rank, organization, and DIMM slot population capacity (in (in GB) DIMMs frequency A1, A2, A3, A4, A5, A6, A7, A8, A9, A10, A11, 16 GB DIMMs must be installed in slots numbered A1, A2, A3, A4, A5, A6, A7, and A8 and 8 GB DIMMs must be installed in slots A9 and A11.
-
Page 52: 卸下記憶體模組
System DIMM size Number of DIMM rank, organization, and DIMM slot population capacity (in (in GB) DIMMs frequency 2R, x8, 1866 MT/s A1, A2, A3, A4, A5, A6, A7, A8, A9, A10, A11, A12, B1, B2, B3, B4, B5, B6, B7, B8, B9, B10, B11, B12 2R, x4, 2400 MT/s A1, A2, A3, A4, A5, A6, B1, B2, B3, B4, B5,... -
Page 53: 安裝記憶體模組
圖 9. 卸下記憶體模組 a. 記憶體模組 b. 記憶體模組插槽 c. 記憶體模組插槽退出拉桿 (2) 後續步驟 1. 安裝記憶體模組。 註: 如果您要永久卸下記憶體模組,請安裝記憶體模組擋片。 2. 安裝散熱護罩。 3. 請遵循「拆裝系統內部元件之後」一節列出的程序。 相關工作 Before working inside your system After working inside your system 相關參考 安全說明 安裝記憶體模組 事前準備作業 註: 即使系統已關機經過一段時間,但記憶體模組有時溫度仍可能很高,因此不該觸碰。請待記憶體模組冷卻後,再進行後續處 理。請從邊緣拿起記憶體模組,避免碰到記憶體模組上的元件或金屬接點。 警示: 許多維修僅可由獲得認可的維修技術人員來完成。您只能依照產品說明文件中的授權說明或在線上或電話服務和支援團隊 的指導下,執行故障排除和簡單的維修。由未經 Dell 授權的維修造成的損壞不在保固範圍之內。請閱讀並遵循隨產品寄送的安 全指示。... -
Page 54: Hard Drives
警示: 請從邊緣拿起記憶體模組,確定不要碰到記憶體模組中央或金屬接點。 2. 將記憶體模組插槽的退出拉桿往外打開,使記憶體模組得以插入插槽。 3. 將記憶體模組的邊緣連接器與記憶體模組插槽的對準點對齊,然後將記憶體模組插入插槽中。 警示: 請勿用力按壓記憶體模組中央;請平均施力按壓記憶體模組兩端。 註: 記憶體模組插槽有一個對準點,讓您只能以單一方向將記憶體模組安裝在插槽中。 4. 用拇指按壓記憶體模組,直到插槽拉桿穩固地卡入到位。 記憶體模組正確插入插槽時,記憶體模組插槽上的拉桿應對齊其他已安裝記憶體模組的插槽上的拉桿。 圖 10. 安裝記憶體模組 a. 記憶體模組 b. 對準點 c. 記憶體模組插槽退出拉桿 (2) 後續步驟 1. 請遵循「拆裝系統內部元件之後」一節列出的程序。 2. 按 F2 進入 System Setup(系統設定),然後檢查 System Memory(系統記憶體)設定。 系統應該已經變更該值,以反映出安裝的記憶體。 3. 如果值不正確,則一或多個記憶體模組可能並未正確安裝。請確定記憶體模組均已穩固裝入記憶體模組插槽。 4. 在系統診斷程式中執行系統記憶體測試。 相關工作 Before working inside your system After working inside your system 相關參考... -
Page 55: Removing A 3.5-Inch Hard Drive Blank
註: Do not mix enterprise-class hard drives with entry hard drives. Choosing the right drive type depends on the usage pattern. Improper use of entry hard drives (workload rating exceeds 55TB/year) will lead to significant risk and increase the drives failure rate. For more information on these hard drives, see the 512e and 4Kn Disk Formats whitepaper and 4K Sector HDD FAQ document at Dell.com/poweredgemanuals. -
Page 56: Installing A 3.5-Inch Hard Drive Blank
相關參考 安全說明 Installing a 3.5-inch hard drive blank 事前準備作業 1. Follow the safety guidelines listed in the Safety instructions section. 2. If installed, remove the front bezel. 步驟 Insert the hard drive blank into the hard drive slot until the release button clicks into place. 圖... -
Page 57: Installing A 2.5 Inch Hard Drive Blank (Rear)
圖 13. Removing and installing a 2.5 inch hard drive blank (rear) a. hard drive blank (rear) 相關參考 安全說明 Installing a 2.5 inch hard drive blank (rear) 事前準備作業 1. Follow the safety guidelines listed in the Safety instructions section. 步驟 Insert the hard drive blank into the hard drive slot until it clicks into place. -
Page 58: Removing A Hot Swappable Hard Drive Or Solid State Drive
Removing a hot swappable hard drive or solid state drive 事前準備作業 警示: Many repairs may only be done by a certified service technician. You should only perform troubleshooting and simple repairs as authorized in your product documentation, or as directed by the online or telephone service and support team. -
Page 59: Installing A Hot Swappable Hard Drive
Installing a hot swappable hard drive 事前準備作業 警示: 許多維修僅可由獲得認可的維修技術人員來完成。您只能依照產品說明文件中的授權說明或在線上或電話服務和支援團隊 的指導下,執行故障排除和簡單的維修。由未經 Dell 授權的維修造成的損壞不在保固範圍之內。請閱讀並遵循隨產品寄送的安 全指示。 警示: Use only hard drives that have been tested and approved for use with the hard drive backplane. 警示: Combining SAS and SATA hard drives in the same RAID volume is not supported. 警示: When installing a hard drive, ensure that the adjacent drives are fully installed. -
Page 60: Removing Hard Drive From Hard-Drive Carrier
圖 17. Installing a 1.8-inch hot swappable uSATA SSD 1. release button 2. SSD carrier 3. SSD carrier handle 相關工作 Installing hard drive into hard-drive carrier 相關參考 安全說明 Removing hard drive from hard-drive carrier 事前準備作業 警示: 許多維修僅可由獲得認可的維修技術人員來完成。您只能依照產品說明文件中的授權說明或在線上或電話服務和支援團隊 的指導下,執行故障排除和簡單的維修。由未經 Dell 授權的維修造成的損壞不在保固範圍之內。請閱讀並遵循隨產品寄送的安 全指示。... -
Page 61: Installing Hard Drive Into Hard-Drive Carrier
圖 18. Removing and installing hard drive from hard-drive carrier a. Hard drive b. Tab on the hard-drive carrier (4) c. Hard-drive carrier 後續步驟 Follow the procedure listed in After working inside your system section in this document. 相關工作 Before working inside your system After working inside your system 相關參考... -
Page 62: Cooling Fans
After working inside your system 相關參考 安全說明 Cooling fans Your system supports six hot-swappable cooling fans. 註: If there is an issue with a particular fan, the fan number is referenced by the system management software, allowing you to easily identify and replace the proper fan by noting the fan numbers on the cooling-fan assembly. Removing a cooling fan 事前準備作業... -
Page 63: Installing A Cooling Fan
後續步驟 1. Replace the cooling fan. See the Installing a cooling fan section in this document. 2. Complete the tasks listed in the After working inside your system section in this document. 相關工作 Before working inside your system Installing a cooling fan After working inside your system 相關參考... -
Page 64: Installing The Cooling Fan Assembly
步驟 1. Unlock the cooling fan assembly from the chassis by lifting the release levers. 2. Lift the cooling fan assembly out of the chassis. 圖 20. Removing the cooling fan assembly 1. cooling fan assembly 2. cooling fan (6) 3. -
Page 65: Expansion Cards And Expansion Card Riser
警示: Ensure that the cables are correctly installed and retained by the cable retention bracket before installing the cooling fan assembly. Incorrectly installed cables may get damaged. 步驟 1. Align the slots on the cooling fan assembly with the guide pins on the chassis. 2. -
Page 66: Expansion Card Installation Guidelines
Expansion card installation guidelines Depending on your system configuration: The following PCI Express generation 3 expansion cards are supported: 表 24. Supported expansion cards Riser PCIe slot Processor connection Height Length Link width Slot width Processor 2 Low Profile Half Length Processor 2 Low Profile Half Length... -
Page 67: Removing An Expansion Card From Expansion Card Riser 2 Or 3
Card priority Card type Slot priority Max allowed NX3230 NX3230 Integrated slot Removing an expansion card from expansion card riser 2 or 事前準備作業 警示: 許多維修僅可由獲得認可的維修技術人員來完成。您只能依照產品說明文件中的授權說明或在線上或電話服務和支援團隊 的指導下,執行故障排除和簡單的維修。由未經 Dell 授權的維修造成的損壞不在保固範圍之內。請閱讀並遵循隨產品寄送的安 全指示。 1. Follow the safety guidelines listed in the Safety instructions section. 2. - Page 68 圖 22. Removing an expansion card from expansion card riser 2 or 3 1. expansion card 2. expansion card latch 3. expansion card riser 4. power connector (for GPU cards) 5. expansion card connector 後續步驟 1. Install an expansion card into the expansion card riser. 2.
-
Page 69: Installing An Expansion Card Into The Expansion Card Riser 2 Or 3
Installing an expansion card into the expansion card riser 2 or 3 事前準備作業 1. Follow the safety guidelines listed in the Safety instructions section. 2. Follow the procedure listed in the Before working inside your system section. 警示: 許多維修僅可由獲得認可的維修技術人員來完成。您只能依照產品說明文件中的授權說明或在線上或電話服務和支援團隊 的指導下,執行故障排除和簡單的維修。由未經 Dell 授權的維修造成的損壞不在保固範圍之內。請閱讀並遵循隨產品寄送的安 全指示。... -
Page 70: Removing An Expansion Card From The Expansion Card Riser 1
5. expansion card connector 後續步驟 1. Follow the procedure listed in the After working inside your system section. 2. Install any device drivers required for the card as described in the documentation for the card. 相關工作 Before working inside your system After working inside your system 相關參考... -
Page 71: Installing An Expansion Card Into The Expansion Card Riser 1
圖 24. Removing an expansion card from expansion card riser 1 1. tab A 2. expansion card riser 1 cage 3. expansion card connector 4. tab B 5. latch 6. expansion card 後續步驟 1. Install the expansion card. 2. Install the expansion card riser. 3. -
Page 72: Removing The Riser 1 Blank
2. Press tab A and rotate the latch clockwise. 3. Press tab B and rotate the latch down. 4. Holding the card by its edges, position the card so that the card-edge connector aligns with the expansion card connector. 5. Insert the card-edge connector firmly into the expansion card connector until the card is fully seated. 6. -
Page 73: Installing The Riser 1 Blank
步驟 Press tabs on the riser 1 blank and push the riser 1 blank out of the chassis. 圖 26. Removing and installing the riser 1 blank a. slot on the chassis b. tab (2) c. riser 1 blank 相關工作 Before working inside your system 相關參考... - Page 74 步驟 Holding the slots on the expansion card riser, lift the riser from the riser connector on the system board. 註: To remove expansion card risers 2 and 3, hold the edges of the expansion card riser. 註: To ensure proper system cooling, the riser 1 blank must be installed in the riser 1 slot. Remove the riser 1 blank only if you are installing riser 1.
- Page 75 c. expansion card slot 3 圖 29. Removing and installing the expansion card riser 2 1. power connector (for GPU cards) 2. expansion card riser 2 3. riser guide-back 4. expansion card riser 2 connector 5. riser guide-front 圖 30. Identifying connectors on the expansion card riser 2 a.
- Page 76 圖 31. Removing and installing the expansion card riser 3 1. riser guide-front 2. power connector (for GPU cards) 3. expansion card riser 3 4. riser guide-back 5. expansion card riser 3 connector 圖 32. Identifying connectors on the expansion card riser 3 (default) a.
-
Page 77: Installing Expansion Card Risers
圖 33. Identifying connectors on the expansion card riser 3 (alternate) a. expansion card slot 6 b. power connector (for GPU cards) 後續步驟 1. If applicable, remove or install an expansion card on the riser. 2. If applicable, replace the expansion card riser. 3. -
Page 78: Sd Vflash Card (Optional)
相關工作 Before working inside your system After working inside your system 相關參考 安全說明 SD vFlash card (optional) An SD vFlash card is a Secure Digital (SD) card that plugs into the SD vFlash card slot in the iDRAC port card. It provides persistent on- demand local storage and a custom deployment environment that enables automation of server configuration, scripts, and imaging. -
Page 79: Installing The Vflash Media Unit
步驟 1. Remove the screw securing the vFlash media unit to the chassis. 2. Remove the cable from the vFlash media unit and the backplane. 3. Slide the vFlash media unit toward the front of chassis and lift it out of the system. 圖... -
Page 80: Integrated Storage Controller Card
步驟 1. Slide in and align the vFlash media unit with the vFlash media slot on the back of the chassis. 2. Connect the cable to the vFlash media unit. 3. Replace the screw securing the vFlash media unit to the chassis. 後續步驟... -
Page 81: Installing Integrated Storage Controller Card
圖 36. Removing and installing integrated storage controller card 1. Integrated storage controller cable 2. Integrated storage controller card 3. Integrated storage-controller card connector on the system 4. Integrated storage controller card holder board 後續步驟 1. Replace the expansion-card riser 1. 2. -
Page 82: Network Daughter Card
警示: 許多維修僅可由獲得認可的維修技術人員來完成。您只能依照產品說明文件中的授權說明或在線上或電話服務和支援團隊 的指導下,執行故障排除和簡單的維修。由未經 Dell 授權的維修造成的損壞不在保固範圍之內。請閱讀並遵循隨產品寄送的安 全指示。 步驟 1. Align the end of the integrated storage-controller card opposite the connector with the integrated storage-controller card holder. 2. Lower the connector side of the integrated storage-controller card into the integrated storage-controller card connector on the system board. -
Page 83: Installing The Network Daughter Card
圖 37. Removing the NDC 1. captive screw socket (2) 2. connector on the system board 3. captive screw (2) 4. touch point (2) 5. network daughter card (NDC) 6. back panel slot for Ethernet connectors 後續步驟 1. Install the NDC. 2. - Page 84 警示: 許多維修僅可由獲得認可的維修技術人員來完成。您只能依照產品說明文件中的授權說明或在線上或電話服務和支援團隊 的指導下,執行故障排除和簡單的維修。由未經 Dell 授權的維修造成的損壞不在保固範圍之內。請閱讀並遵循隨產品寄送的安 全指示。 步驟 1. Orient the network daughter card (NDC) so that the Ethernet connectors fit through the slot in the back panel. 2. Align the captive screws on the card with the captive screw sockets on the system board. 3.
-
Page 85: 處理器和散熱器
處理器和散熱器 請在下列情況中使用以下程序: 卸下及安裝散熱器 • 安裝額外的處理器 • 更換處理器 • 註: 為確保系統能正確散熱,您必須將處理器空板安裝在空的處理器插槽中。 Removing a processor 事前準備作業 警示: 許多維修僅可由獲得認可的維修技術人員來完成。您只能依照產品說明文件中的授權說明或在線上或電話服務和支援團隊 的指導下,執行故障排除和簡單的維修。由未經 Dell 授權的維修造成的損壞不在保固範圍之內。請閱讀並遵循隨產品寄送的安 全指示。 註: 這是現場可更換單元 (FRU)。只能由 Dell 認可的維修技術人員執行拆卸和安裝程序。 註: If you are upgrading your system, download the latest system BIOS version from Dell.com/support and follow the instructions included in the compressed download file to install the update on your system. - Page 86 圖 39. Processor shield 1. close first socket release lever 2. lock icon 3. processor 4. open first socket release lever 5. unlock icon Installing and removing system components...
-
Page 87: 安裝處理器
圖 40. Removing a processor 1. close first socket-release lever 2. pin-1 indicator of processor 3. processor 4. slot (4) 5. processor shield 6. open first socket-release lever 7. socket 8. socket keys (4) 後續步驟 1. Replace the processor(s). 2. Install the heat sink. 3. - Page 88 3. 準備 Phillips 2 號螺絲起子。 4. 如果您要升級系統,請從 Dell.com/support 下載最新版本的系統 BIOS,並遵循壓縮下載檔案中隨附的說明,在系統上安裝更 新。 註: 您也可以使用 Lifecycle Controller 來更新系統 BIOS。 5. 卸下散熱護罩。 註: 如果適用,請關閉散熱護罩上的擴充卡閂鎖以釋放全長插卡。 6. 如果已連接,從擴充卡上拔下纜線。 7. 如果已安裝,請卸下擴充卡提升板。 註: 即使系統已關機經過一段時間,但散熱片和處理器有時溫度仍可能很高,因此不該觸碰。請待散熱片和處理器冷卻後,再進 行後續處理。 警示: 除非打算移除處理器,否則請勿將散熱片從處理器上拆下。散熱片是維持正常散熱條件的必要零件。 註: 如果您只要安裝一個處理器,必須將它安裝在插槽 CPU1。 步驟 1. 拆開新處理器的包裝。 註: 如果處理器之前用於其他系統中,請使用無塵擦拭布拭除處理器上殘留的任何散熱膏。 2. 找到處理器插槽。 3.
-
Page 89: Pcie Card Holder
圖 41. 安裝處理器 1. 插槽釋放拉桿 1 2. 處理器的插腳 1 邊角 3. 處理器 4. 插槽 (4) 5. 處理器護蓋 6. 插槽釋放拉桿 2 7. 處理器插槽 8. 彈片 (4) 後續步驟 註: 請確定您在安裝處理器後安裝散熱器。散熱片是維持正常散熱條件的必要零件。 1. 安裝散熱器。 2. 如果已移除、重新安裝 PCIe 擴充卡提升板。 3. 如果已中斷連線,請重新連接纜線至擴充卡。 4. 請遵循「拆裝系統內部元件之後」中列出的程序。 5. 在開機期間,按下 F2 以進入 System Setup (系統設定),然後確認處理器資訊與新的系統組態是否相符。 6. -
Page 90: Removing The Pcie Card Holder
Removing the PCIe card holder 事前準備作業 1. Ensure that you read the Safety instructions section in this document. 2. Complete the tasks listed in the Before working inside your system section in this document. 3. If installed, remove the full-length PCIe card. 警示: 許多維修僅可由獲得認可的維修技術人員來完成。您只能依照產品說明文件中的授權說明或在線上或電話服務和支援團隊... -
Page 91: Opening And Closing The Pcie Card Holder Latch
警示: 許多維修僅可由獲得認可的維修技術人員來完成。您只能依照產品說明文件中的授權說明或在線上或電話服務和支援團隊 的指導下,執行故障排除和簡單的維修。由未經 Dell 授權的維修造成的損壞不在保固範圍之內。請閱讀並遵循隨產品寄送的安 全指示。 警示: Do not use your system without the PCIe card holder installed. The PCIe card holder is necessary to ensure proper system cooling. 步驟 1. Align the PCIe card holder with the notches and tabs on the PSU cage. 2. -
Page 92: Cable Retention Bracket
後續步驟 Complete the tasks listed in After working inside your system section in this document. 相關工作 Before working inside your system After working inside your system 相關參考 安全說明 Cable retention bracket Cable retention bracket provides support to the installed cables. The cable retention bracket also helps to prevent the cables from moving out of place, which may result in loose connections and reduced air flow inside the server. -
Page 93: Installing The Cable Retention Bracket
後續步驟 1. Replace the cable retention bracket. See Installing the cable retention bracket section in this document. 2. Complete the tasks listed in After working inside your system section in this document. 相關工作 Before working inside your system After working inside your system Installing the cable retention bracket 相關參考... -
Page 94: Hot Spare Feature
Spare feature is disabled. When the Hot Spare feature is enabled, one of the PSUs will be put into standby when system utilization is low in order to maximize efficiency. 註: If two PSUs are used, they must be of the same maximum output power. 註: For AC PSUs, use only PSUs with the Extended Power Performance (EPP) label on the back. -
Page 95: Installing The Power Supply Unit Blank
圖 45. Removing the PSU blank a. PSU blank b. PSU bay 後續步驟 Install the PSU or PSU blank. 相關參考 安全說明 Installing the power supply unit blank Install the power supply unit (PSU) blank only in the second PSU bay. 事前準備作業... -
Page 96: Removing An Ac Power Supply Unit
圖 46. Installing the PSU blank a. PSU blank b. PSU bay 相關參考 安全說明 Removing an AC power supply unit 事前準備作業 警示: 許多維修僅可由獲得認可的維修技術人員來完成。您只能依照產品說明文件中的授權說明或在線上或電話服務和支援團隊 的指導下,執行故障排除和簡單的維修。由未經 Dell 授權的維修造成的損壞不在保固範圍之內。請閱讀並遵循隨產品寄送的安 全指示。 警示: The system needs one power supply unit (PSU) for normal operation. On power-redundant systems, remove and replace only one PSU at a time in a system that is powered on. -
Page 97: Installing An Ac Power Supply Unit
圖 47. Removing an AC PSU 1. release latch 2. PSU cable connector 3. PSU 4. power connector 5. PSU handle 後續步驟 • If applicable, install the AC PSU. • If applicable, install the PSU blank. 相關參考 安全說明 Installing an AC power supply unit 事前準備作業... -
Page 98: Wiring Instructions For A Dc Power Supply Unit
圖 48. Installing an AC PSU 1. release latch 2. PSU cable connector 3. PSU 4. power connector 5. PSU handle 相關參考 安全說明 Wiring instructions for a DC power supply unit Your system supports up to two –(48–60) V DC power supply units (PSUs). 註: 如為使用... -
Page 99: Removing A Dc Power Supply Unit
Required wires • One UL 10 AWG, 2 m maximum (stranded) black wire [–(48–60) V DC] • One UL 10 AWG, 2 m maximum (stranded) red wire (V DC return) • One UL 10 AWG, 2 m maximum green/yellow, green with a yellow stripe, stranded wire (safety ground) Removing a DC power supply unit 事前準備作業... -
Page 100: 系統電池
3. If installed, remove the PSU blank. 4. Verify that both the PSUs are of the same type and have the same maximum output power. 註: 最大輸出功率 (單位為瓦數) 列在電源供應器的標籤上。 步驟 1. Slide the PSU into the chassis until the PSU is fully seated and the release latch snaps into place. 註: If you have unlatched the cable management arm, relatch it. -
Page 101: Replacing System Battery
Replacing system battery 事前準備作業 1. Follow the safety guidelines listed in the Safety instruction section. 2. Follow the procedure listed in the Before working inside your system section. 3. Remove the cooling shroud. 註: 如果新電池安裝不正確,可能會有爆炸的危險。請僅以相同或由製造廠商推薦的同類型電池來更換原有的電池。如需更多資 訊,請參閱系統隨附的安全資訊。 警示: 許多維修僅可由獲得認可的維修技術人員來完成。您只能依照產品說明文件中的授權說明或在線上或電話服務和支援團隊 的指導下,執行故障排除和簡單的維修。由未經 Dell 授權的維修造成的損壞不在保固範圍之內。請閱讀並遵循隨產品寄送的安 全指示。... -
Page 102: Hard Disk Drive Backplane
安全說明 跳線與連接器 Hard disk drive backplane The Dell Storage NX3230 system supports 3.5 inch (x12) SAS/SATA backplane, plus 2.5 inch (x2) SAS/SATA backplane (back). Removing HDD backplane 事前準備作業 1. Ensure that you read the Safety instructions section in this document. - Page 103 圖 53. Removing and installing the 3.5 inch (x12) SAS/SATA backplane—NX3230 1. release tab (2) 2. SAS cable A2 3. SAS cable A1 4. left ear control panel cable 5. backplane signal cable 6. backplane power cable (2) 7. SAS cable A0/B0 8.
- Page 104 圖 54. Cabling diagram—3.5 inch (x12) SAS/SATA backplane—NX3230 (option 1) 1. hard-drive backplane 2. system board 3. backplane signal connector 0 4. backplane signal connector 1 5. integrated storage controller card Installing and removing system components...
-
Page 105: Installing Hdd Backplane
圖 55. Cabling diagram—3.5 inch (x12) SAS/SATA backplane—NX3230 (option 2) 1. hard-drive backplane 2. system board 3. backplane signal connector 0 4. backplane signal connector 1 5. hard-drive mid plane 6. integrated storage controller card 7. backplane signal connector 2 相關工作... -
Page 106: Removing The Optional Hdd Backplane (Back)
警示: 許多維修僅可由獲得認可的維修技術人員來完成。您只能依照產品說明文件中的授權說明或在線上或電話服務和支援團隊 的指導下,執行故障排除和簡單的維修。由未經 Dell 授權的維修造成的損壞不在保固範圍之內。請閱讀並遵循隨產品寄送的安 全指示。 警示: To prevent damage to the control panel flex cable, do not bend the control panel flex cable after it is inserted into the connector. 步驟 1. Use the hooks on the chassis as guides to align the HDD backplane. 2. -
Page 107: Installing The Optional Hdd Backplane (Back)
圖 56. Removing and installing the optional 2.5 inch (x2) HDD backplane—NX3230 1. SAS cable 2. release pin 3. HDD connector (2) 4. power cable 5. backplane signal cable 相關工作 Before working inside your system 相關參考 安全說明 Installing the optional HDD backplane (back) 事前準備作業... -
Page 108: Control Panel
3. Release the release pin to lock the backplane to the chassis. 4. Reconnect all the cables to the backplane. 後續步驟 1. Install both the HDDs in their original location. 2. Complete the tasks listed in the After working inside your system section in this document. 相關工作... -
Page 109: Installing The Control Panel
圖 57. Removing and installing the control panel—NX3230 1. screw (3) 2. control panel 3. hard-drive backplane 4. connector 5. plastic pull tab 後續步驟 1. Replace the control panel. See Installing the Control Panel section in this document. 2. Complete the tasks listed in After working inside your system section in this document. 相關工作... -
Page 110: Removing The I/O Panel
3. Push the cable until the cable passes completely through the channel. 4. Tighten the screws to secure the control panel to the chassis. 註: You must route the cable properly to prevent it from being pinched or crimped. 5. Connect the cable connector to the HDD backplane by pushing on the center of the connector. 後續步驟... -
Page 111: Installing The I/O Panel
圖 58. Removing and installing the I/O panel —NX3230 1. I/O panel cable 2. hard-drive backplane 3. screw (3) 4. I/O panel 5. chassis 後續步驟 1. Replace the I/O panel. See the Installing the I/O Panel section in this document. 2. -
Page 112: System Board
2. Push the cable until the cable passes completely through the channel. 警示: To prevent damage to the I/O cable, you must release the locking tab before removing or installing the I/O cable from the connector on the hard-drive backplane. 3. - Page 113 card retention bracket heat sink(s)/heat-sink blank(s) k. processors(s)/processor blank(s) 警示: To prevent damage to the processor pins when replacing a faulty system board, ensure that you cover the processor socket with the processor protective cap. memory modules and memory module blanks m.
-
Page 114: Installing System Board
c. release pin 後續步驟 1. Replace the system board. See the Installing the system board section in this document. 2. Complete the tasks listed in the After working inside your system section in this document. 相關工作 Before working inside your system Installing system board After working inside your system 相關參考... - Page 115 5. Import your new or existing iDRAC Enterprise license. For more information, see the Integrated Dell Remote Access Controller User's Guide, at Dell.com/esmmanuals. 6. Ensure that you: Use the Easy Restore feature to restore the Service Tag. For more information, see the Easy Restore section in this document. b.
-
Page 116: 可信賴平台模組
可信賴平台模組 可信賴平台模組 (TPM) 是一種專用的微處理器,其設計為在裝置中內建密碼編譯金鑰,以確保硬體安全。而軟體可使用可信賴平台 模組來驗證硬體裝置。這是因為每個 TPM 晶片在生產時,都會燒錄唯一的 RSA 祕密金鑰,所以能夠執行平台驗證。 警示: 請勿嘗試將可信賴平台模組 (TPM) 從主機板卸下。安裝 TPM 後,此模組便會透過密碼編譯繫結至該特定主機板。任何嘗 試卸下已安裝 TPM 的動作都會導致密碼編譯繫結中斷,而無法重新安裝或安裝在其他主機板上。 註: 此為現場可更換單元 (FRU)。必須由 Dell 認證維修技術人員執行卸除和安裝程序。 安裝可信賴平台模組 事前準備作業 警示: 許多維修僅可由獲得認可的維修技術人員來完成。您只能依照產品說明文件中的授權說明或在線上或電話服務和支援團隊 的指導下,執行故障排除和簡單的維修。由未經 Dell 授權的維修造成的損壞不在保固範圍之內。請閱讀並遵循隨產品寄送的安 全指示。 警示: 請勿嘗試從主機板卸下可信賴平台模組 (TPM)。一旦安裝 TPM,此模組便會透過密碼編譯繫結至該特定主機板。任何嘗 試卸下已安裝 TPM 的動作都會破壞密碼編譯繫結,且此模組無法重新安裝或安裝在其他主機板上。 1. 請遵循「安全指示」一節所列的安全指南。 2. -
Page 117: 為 Bitlocker 使用者初始化 Tpm
相關參考 安全說明 System board jumper settings 為 BitLocker 使用者初始化 TPM 步驟 初始化 TPM。 如需有關初始化 TPM 的詳細資訊,請參閱 http://technet.microsoft.com/en-us/library/cc753140.aspx。 TPM 狀態變更為已啟用 , 啟動。 為 TXT 使用者初始化 TPM 步驟 1. 在啟動系統時,按 <F2> 進入 System Setup(系統設定)。 2. 在 System Setup Main Menu (系統設定主選單) 畫面上,按一下 System BIOS (系統 BIOS) → System Security Settings (系 統安全性設定)。... -
Page 118: Using System Diagnostics
Using system diagnostics If you experience a problem with your 系統, run the system diagnostics before contacting Dell for technical assistance. The purpose of running system diagnostics is to test your 系統 hardware without using additional equipment or risking data loss. If you are unable to fix the problem yourself, service and support personnel can use the diagnostics results to help you solve the problem. -
Page 119: System Diagnostic Controls
System diagnostic controls Menu Description Configuration Displays the configuration and status information of all detected devices. Results Displays the results of all tests that are run. System health Provides the current overview of the system performance. Event log Displays a time-stamped log of the results of all tests run on the system. This is displayed if at least one event description is recorded. -
Page 120: 跳線與連接器
跳線與連接器 本主題提供有關系統跳線的特定資訊。它也提供部分有關跳線和交換器的基本資訊並說明系統內各種主機板的連接器。主機板上的 跳線有助於停用系統和設定密碼。您必須清楚主機板上的連接器才能正確安裝元件和纜線。 主題: • System board jumper settings • System board connectors • Disabling forgotten password System board jumper settings For information on resetting the password jumper to disable a password, see the Disabling a Forgotten Password section. 表 26. System board jumper settings Jumper Setting Description... -
Page 121: System Board Connectors
System board connectors 圖 61. System board jumpers and connectors 表 27. System board jumpers and connectors Item Connector Description J_BP_SIG1 Backplane signal connector 1 J_PS_2 PSU 2 connector J_BP_SIG0 Backplane signal connector 0 J_BP0 Backplane power connector 0 J_SATA_CD Optical drive SATA connector J_SATA_TBU Tape backup unit SATA connector... -
Page 122: Disabling Forgotten Password
Item Connector Description J_TPM_MODULE Trusted Platform Module connector J_RISER_2AX Riser 3 connector J_RISER_1AX Riser 1 connector J_RISER_2BX Riser 2 connector J_RISER_1BX Riser 1 connector J_RISER_3AX Riser 3 connector J_QS Quick Sync bezel connector J_RISER_3BX Riser 3 connector J_SATA_B Internal SAS connector J_STORAGE Mini PERC connector J_USB_INT... - Page 123 步驟 1. Turn off the system, including any attached peripherals, and disconnect the system from the electrical outlet. 2. Remove the system cover. 3. Move the jumper on the system board jumper from pins 4 and 6 to pins 2 and 4. 4.
-
Page 124: Troubleshooting Your 系統
Troubleshooting your 系統 Safety first — for you and your 系統 警示: 許多維修僅可由獲得認可的維修技術人員來完成。您只能依照產品說明文件中的授權說明或在線上或電話服務和支援團隊 的指導下,執行故障排除和簡單的維修。由未經 Dell 授權的維修造成的損壞不在保固範圍之內。請閱讀並遵循隨產品寄送的安 全指示。 註: Solution validation was performed by using the factory shipped hardware configuration. 主題: 故障排除 系統 啟動故障 • 故障排除外部連線 • 故障排除影像子系統 • 故障排除 USB 裝置 •... -
Page 125: 故障排除影像子系統
故障排除影像子系統 事前準備作業 註: 請確定已在 iDRAC 圖形使用者介面 (GUI) 的 Virtual Console (虛擬主控台) 下方選取 Local Server Video Enabled (啟用本 機伺服器視訊) 選項。如果未選取這個選項,本機視訊便停用。 步驟 1. 檢查監視器的纜線連接 (電源及顯示器)。 2. 檢查從系統接到顯示器的影像介面纜線連接。 3. 執行適當的診斷測試。 結果 如果測試成功執行,則問題與視訊硬體無關。 後續步驟 如果測試失敗,請參閱「取得說明」一節。 相關參考 取得說明 故障排除 USB 裝置 事前準備作業 註: 請按照步驟 1 至 6 來進行 USB 鍵盤或滑鼠的故障排除。在其他 USB 裝置方面,請至步驟 7。 步驟... -
Page 126: 故障排除 Idrac Direct(Usb Xml 組態
後續步驟 如果故障排除失敗,請參閱「取得說明」一節。 相關參考 取得說明 System board jumper settings 故障排除 iDRAC Direct(USB XML 組態) 如需有關 USB 儲存裝置和伺服器組態的資訊,請參閱 Integrated Dell Remote Access Controller 使用者指南,網址是:Dell.com/ idracmanuals。 步驟 1. 確定您的 USB 儲存裝置已連線到正面的 USB 管理連接埠(標識為 圖示)。 2. 確定您的 USB 儲存裝置已設定只有一個分割區的 NTFS 或 FAT32 檔案系統。 3. 確認 USB 儲存裝置的設定正確。有關設定 USB 儲存裝置的更多資訊,請參閱 Integrated Dell Remote Access Controller 使用者指 南,網址是:Dell.com/idracmanuals。... -
Page 127: 故障排除序列 I/O 裝置
故障排除序列 I/O 裝置 事前準備作業 步驟 1. 關閉系統和連接到序列埠的任何周邊裝置。 2. 將序列介面纜線替換成正常的作業纜線,然後啟動系統和序列裝置。 如果問題已解決,請將介面纜線更換為正常的作業纜線。 3. 關閉系統 和序列裝置,並將序列裝置替換為相容的裝置。 4. 啟動系統 和序列裝置。 後續步驟 如果無法解決問題,請參閱「取得說明」一節。 相關參考 取得說明 故障排除 NIC 步驟 1. 執行適當的診斷測試。如需更多資訊,請參閱「使用系統診斷」一節,瞭解有哪些診斷測試可用。 2. 重新啟動系統,並檢查與 NIC 控制器有關的任何系統訊息。 3. 檢查 NIC 控制器上適當的指示燈。 如果連結指示燈未亮起,則纜線連接可能鬆脫。 • 如果活動指示燈未亮起,表示網路驅動程式檔案可能損壞或遺失。 • 如有必要,請安裝或更換驅動程式。如需更多資訊,請參閱 NIC 說明文件。 嘗試使用另一已知良好的網路纜線。... -
Page 128: 故障排除受損的系統
步驟 1. 關閉系統和連接的周邊裝置,然後從電源插座上拔下電源線。 2. 卸下系統機箱蓋。 3. 從系統卸下以下元件 (如果已安裝): 電源供應器 • 光碟機 • 硬碟機 • 硬碟背板 • USB 記憶體鑰匙 • 硬碟托架 • 散熱護罩 • 擴充卡提升板 (如果已安裝) • 擴充卡 • 散熱風扇組件 (如果已安裝) • 散熱風扇 • 記憶體模組 • 處理器和散熱器 • 主機板 • 4. 讓系統徹底晾乾至少 24 小時。 5. -
Page 129: 故障排除系統電池
記憶體模組 • 硬碟承載器或固定框架 • 硬碟背板 • 4. 確定所有纜線都已正確連接。 5. 安裝系統護蓋。 6. 執行適當的診斷測試。如需更多資訊,請參閱「使用系統診斷」一節。 後續步驟 如果無法解決問題,請參閱「取得說明」一節。 相關參考 Using system diagnostics 取得說明 故障排除系統電池 事前準備作業 警示: 許多維修僅可由獲得認可的維修技術人員來完成。您只能依照產品說明文件中的授權說明或在線上或電話服務和支援團隊 的指導下,執行故障排除和簡單的維修。由未經 Dell 授權的維修造成的損壞不在保固範圍之內。請閱讀並遵循隨產品寄送的安 全指示。 註: 如果系統長時間關閉 (長達幾週或幾個月),NVRAM 可能會遺失其系統組態資訊。這種情況是由電池故障所造成。 註: 某些軟體可能會導致系統時間加快或變慢。如果系統在除 System Setup (系統設定) 中記錄的時間以外均運作正常,則造成 問題的原因可能是軟體,而非電池故障。 步驟 1. 在 System Setup(系統設定)中重新輸入時間和日期。 2. -
Page 130: 故障排除電源問題
故障排除電源問題 步驟 1. 按下電源按鈕,確保您的系統已開啟。如果按下電源按鈕時電源指示燈未亮起,請用力按下電源按鈕。 2. 插上其他正常的電源供應器,確認主機板並未故障。 3. 確定沒有連線鬆脫的狀況。 例如,電源線鬆脫。 4. 確定電源符合適行標準。 5. 確定沒有短路的現象。 6. 請合格的技師檢查線路電壓,確定電壓符合所需的規格。 電源供應器問題 步驟 1. 確定沒有連線鬆脫的狀況。 例如,電源線鬆脫。 2. 確定電源供應器 (PSU) 處理或 LED 亮起,表示電源供應器運作正常。 如需更多有關電源供應器指示燈的資訊,請參閱「電源指示燈代碼」一節。 3. 如果您最近曾升級您的 系統,確定電源供應器有足夠的電源可支援新的系統。 4. 如果您具有備援電源供應器組態,請確定兩個電源供應器都有相同的類型和瓦特數。 您可能需要升級至較高的電源供應器瓦特數。 5. 確定您只使用背面貼有 Extended Power Performance (EPP) 標籤的電源供應器。 6. -
Page 131: 故障排除散熱風扇
From RACADM commands: 1. Run the command racadm help system.thermalsettings For more information, see the Integrated Dell Remote Access User’s Guide at Dell.com/idracmanuals. 故障排除散熱風扇 事前準備作業 警示: 許多維修僅可由獲得認可的維修技術人員來完成。您只能依照產品說明文件中的授權說明或在線上或電話服務和支援團隊 的指導下,執行故障排除和簡單的維修。由未經 Dell 授權的維修造成的損壞不在保固範圍之內。請閱讀並遵循隨產品寄送的安 全指示。 註: 系統管理軟體會參考風扇號碼。在特定風扇發生問題的情況下,您只需留意風扇散熱風扇組件上的號碼,便可以輕易地識別 並裝回它。 1. 請遵循「安全指示」一節列出的安全指南。 2. 請遵循「拆裝電腦內部元件之前」一節列出的程序。 步驟 1. 重新安裝風扇或風扇的電源線。 2. -
Page 132: 故障排除內部 Usb 鑰匙
註: 請查看系統事件記錄檔或系統訊息,找出故障記憶體模組的位置。請重新安裝記憶體裝置。 8. 在插槽中重設記憶體模組。 9. 安裝系統護蓋。 10. 進入 System Setup (系統設定),然後檢查系統記憶體設定。 如果問題未解決,請執行步驟 11 。 11. 卸下系統護蓋。 12. 如果診斷測試或錯誤訊息指出特定記憶體模組發生故障,請將該模組替換或更換為已知功能正常的記憶體模組。 13. 若要對未指定的故障記憶體模組進行故障排除,請將第一個 DIMM 插槽中的記憶體模組更換為相同類型和容量的模組。 如果螢幕上顯示錯誤訊息,可能表示安裝的 DIMM 類型出現問題、DIMM 未正確安裝,或是 DIMM 故障。請按照螢幕上的指示來 解決問題。 14. 安裝系統護蓋。 15. 在系統啟動期間,觀察顯示的任何錯誤訊息以及系統正面的診斷指示燈。 16. 如果記憶體問題仍然存在,請對每個已安裝的記憶體模組重複步驟 12 到步驟 15。 後續步驟 如果無法解決問題,請參閱「取得說明」一節。 相關參考... -
Page 133: Troubleshooting An Sd Card
Troubleshooting an SD card 事前準備作業 警示: 許多維修僅可由獲得認可的維修技術人員來完成。您只能依照產品說明文件中的授權說明或在線上或電話服務和支援團隊 的指導下,執行故障排除和簡單的維修。由未經 Dell 授權的維修造成的損壞不在保固範圍之內。請閱讀並遵循隨產品寄送的安 全指示。 註: Certain SD cards have a physical write-protect switch on the card. If the write-protect switch is turned on, the SD card is not writable. 步驟 1. Enter System Setup, and ensure that the Internal SD Card Port is enabled. 2. -
Page 134: Troubleshooting A Storage Controller
後續步驟 如果無法解決問題,請參閱「取得說明」一節。 相關參考 取得說明 Using system diagnostics Troubleshooting a storage controller 警示: 許多維修僅可由獲得認可的維修技術人員來完成。您只能依照產品說明文件中的授權說明或在線上或電話服務和支援團隊 的指導下,執行故障排除和簡單的維修。由未經 Dell 授權的維修造成的損壞不在保固範圍之內。請閱讀並遵循隨產品寄送的安 全指示。 註: When troubleshooting a SAS or PERC controller, see the documentation for your operating system and the controller. 1. Run the appropriate diagnostic test. See the Using system diagnostics section. 2. -
Page 135: 故障排除處理器
3. 卸下系統護蓋。 4. 確定每個擴充卡都已穩固地插入連接器。 5. 安裝系統護蓋。 6. 開啟系統和連接的周邊裝置。 7. 如果問題未解決,請關閉系統和連接的周邊裝置,然後從電源插座上拔下系統。 8. 卸下系統護蓋。 9. 卸下安裝在系統中的所有擴充卡。 10. 安裝系統護蓋。 11. 執行適當的診斷測試。請參閱「使用系統診斷」一節。 如果測試失敗,請參閱「取得說明」一節。 12. 對您在步驟 8 卸下的每個擴充卡執行下列步驟: a) 關閉系統和連接的周邊裝置,然後從電源插座上拔下系統。 b) 卸下系統護蓋。 c) 重新安裝其中一個擴充卡。 d) 安裝系統護蓋。 e) 執行適當的診斷測試。請參閱「使用系統診斷」一節。 後續步驟 如果無法解決問題,請參閱「取得說明」一節。 相關參考 Using system diagnostics 取得說明 故障排除處理器... -
Page 136: Warning Messages
Warning messages A warning message alerts you to a possible problem and prompts you to respond before the system continues a task. For example, before you format a hard drive, a message warns you that you may lose all data on the hard drive. Warning messages usually interrupt the task and need you to respond by typing y (yes) or n (no). -
Page 137: 取得說明
取得說明 主題: 與 Dell 公司聯絡 • • Documentation feedback • Quick Resource Locator 與 Dell 公司聯絡 Dell 提供多種線上及電話支援服務的選擇。如果無法連線到網際網路,您可以在購買發票、裝箱單、帳單、或 Dell 產品目錄中找到聯 絡資訊。所提供的服務因國家/地區和產品而異,您所在的地區可能並未提供某些服務。如有銷售、技術支援或客戶服務問題要聯 絡 Dell 公司: 步驟 1. 前往 Dell.com/support。 2. 從頁面右下角的下拉式選單選取國家/地區。 3. 如需自訂支援: a) 在 Enter your Service Tag (輸入服務標籤) 欄位中輸入系統服務標籤。 b) 按一下... - Page 138 圖 62. Quick resource locator 取得說明...
Need help?
Do you have a question about the Storage NX3230 and is the answer not in the manual?
Questions and answers