Advertisement
Quick Links
In the event of a missing or broken piece, call the Outdoor Living Today Customer Support Line @ 1-888-658-1658 with-
in 30 days of the delivery of your purchase. It is our commitment to you to courier replacement parts, free of charge,
within 10 business days of this notification. Replacement parts will not be provided free of charge after the 30 day
grace period.
All structures purchased from Outdoor Living Today are covered for a period of one year for defects in manufacturing
and workmanship. Costs incurred for customer installations are not included.
Failure to use supplied parts included in this kit could result in poor product performance and may void your warranty.
Please contact Outdoor Living Today's Customer Toll Free Line if you plan to deviate from our written instructions.
Toll Free 1-888-658-1658
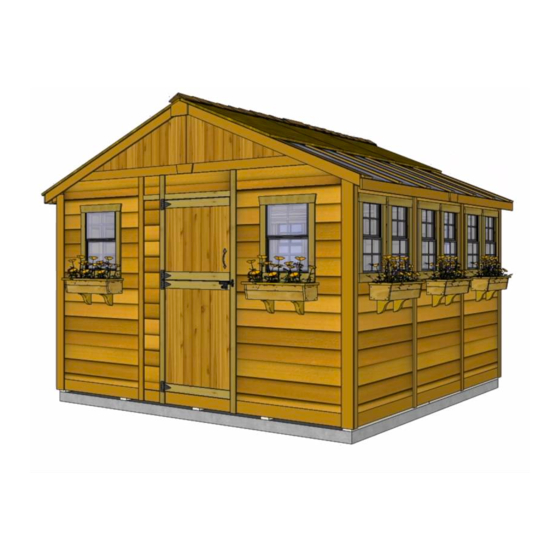
12x12 Sunshed Garden
Shed Interior Wall Kit
Assembly Manual
Thank you for purchasing a 12x12 Sunshed
Garden Shed Interior Wall Kit. Please take the
time to identify all the parts prior to assembly.
Customer agrees to hold Outdoor Living Today and any Authorized
Dealers free of any liability for improper installation, maintenance and
repair.
www.outdoorlivingtoday.com
Page 1
Oct 7th, 2019
sales@outdoorlivingtoday.com
Version #1
Advertisement

Subscribe to Our Youtube Channel
Related Manuals for OLT SSGS1212


Summary of Contents for OLT SSGS1212
- Page 1 Version #1 12x12 Sunshed Garden Oct 7th, 2019 Shed Interior Wall Kit Assembly Manual Thank you for purchasing a 12x12 Sunshed Garden Shed Interior Wall Kit. Please take the time to identify all the parts prior to assembly. Customer agrees to hold Outdoor Living Today and any Authorized Dealers free of any liability for improper installation, maintenance and repair.
- Page 2 Thank you for purchasing our 12x12 Sunshed Garden Shed Interior Wall. Please take the time to identify all the parts prior to assembly. A. Ceiling Section Steps 1A: Ceiling Gable Cleats - 2 pcs @3/4” x 2 1/2” x 30"& 2 pcs @71” 2A: Ridge Cap Sleeves- 2 pcs (3 1/2”w x 4 1/4”...
- Page 3 12X12 Sunshed Interior Wall Kit HARDWARE PACKAGE Hardware Kit (Provided) 4” 2 1/2” BR1 - Square Drive Bit S1 - 2 1/2” Screws - 8 Pcs 1 1/4” BT2 - Torx Drive Bit S2 - 1 1/4” Screws - 190 Pcs Black Headed SB1 - 3/4”...
- Page 4 A. Ceiling Section Exploded view of all parts necessary to complete Interior Ceiling Section. Please Identify all parts prior to starting your project. Ceiling Section Exploded Ceiling Plywood - 1A: Ceiling Gable Center Long- 1 pc Cleats Ceiling Plywood- (L/R) Long Ceiling Plywood - (L/R) Short -2 pcs Interior Soffits -...
- Page 5 1” gap Lift up one of the Ridge Cap Sleeves Parts 2A - Ridge Cap Sleeve Hardware and position over ridge board. Leave 1” (3 1/2” x 4 1/4” x 66 1/4”) x 1 S2 - 1 1/4” Screws gap from gable wall. Screw from underside (3 1/2”...
- Page 6 Locate long ceiling plywood (43” wide) and position up against rafter and ceiling gable cleat. Position squarly and attach with 1 1/4” screws. Parts Hardware 3A - Long Ceiling Plywood S2 - 1 1/4” Screws (left or right) x 12 total (3/8”...
- Page 7 Parts Hardware Attach remaining long ceiling plywood 3A - Center Ceiling Plywood S2 - 1 1/4” Screws to rafters as per Step 4. (3/8” x 43” x 72 1/2”) x 1 x 12 total Parts Lift up outside short ceiling plywood Hardware 5A - Short Ceiling Plywood (43”...
- Page 8 Parts Hardware Attach final ceiling plywood panel 5A - Short Ceiling Plywood S2 - 1 1/4” Screws to rafters as per previous steps. (3/8” x 43” x 32 1/2” long) x 1 x 8 total Long Ceiling Trim Locate long ceiling trim and posi- tion over ceiling seam evenly to cover Parts gap.
- Page 9 Locate short ceiling trim and position over ceiling seam evenly to cover gap. Attach with 4 finishing nails per piece. Short Ceiling Trim Parts 7A - Short Ceiling Trim (1/4” x 2 1/2” x 30 7/8”) x 2 Hardware N1 - 1 1/2” Finishing Nail 8 total Torx Bit Required for Step 13 BT2 - Torx Drive Bit...
- Page 10 Tight against Polygal Tight against Polygal Support Cleat Flush Soffit Tight against Polygal Support Cleats Flush Parts Hardware Interior Soffits sit tight up against polygal roof 9A - Interior Soffit N1 - 1 1/2” Nails and support cleats. Soffits may need to cut short to (1/2”...
- Page 11 Siding gap on left side. Pre-drill siding with 1/8” drill bit. Locate solid left wall panel (42 3/4” wide). Parts Hardware The left panel will have wall siding recessed on 2B - Solid Side Wall -Left S2 - 1 1/4” Screws the left side as illustrated above.
- Page 12 Pre-drill siding with 1/8” drill bit. There are 2 Solid Center Wall Panels that are identical. The second panel is used in Step 23 on the rear wall. Parts Hardware 3B - Solid Side Wall -Center S2 - 1 1/4” Screws (45 1/4”w x 74 1/2”h) x 1 x 6 total Pre-drill siding...
- Page 13 Pre-drill siding with 1/8” drill bit. Hardware Parts S2 - 1 1/4” Screws 5B - Double Window Wall x 6 total Center Panel (45 1/4”w x 74 1/2”h) x 1 Parts Hardware 6B - Single Window Wall S2 - 1 1/4” Screws Rear Panel x 6 total (45”w x 74 1/2”) x 1...
- Page 14 Pre-drill siding with 1/8” drill bit. Parts Hardware 6B - Single Window Wall S2 - 1 1/4” Screws Rear Panel x 6 total (45”w x 74 1/2”) x 1 Toll Free 1-888-658-1658 www.outdoorlivingtoday.com sales@outdoorlivingtoday.com Page 14...
- Page 15 Pre-drill siding with 1/8” drill bit. Parts Hardware 7B - Solid Rear Wall -Center S2 - 1 1/4” Screws (45 1/4”w x 74 1/2”h) x 1 x 6 total Parts Hardware 8B - Single Window Wall S2 - 1 1/4” Screws Front Panel x 6 total (45”w x 74 1/2”) x 1...
- Page 16 Parts Hardware 8B - Single Window Wall S2 - 1 1/4” Screws Front Panel x 6 total (45”w x 74 1/2”) x 1 Pre-drill siding with 1/8” drill bit. Parts Hardware 9B - Narrow Front Wall Panel S2 - 1 1/4” Screws (11 3/4”w x 74 1/2”h ) x 1 x 6 total Toll Free 1-888-658-1658...
- Page 17 Notch Lift up front center gable panel and slide notch up against roof ridge board. There are matching sets of front and rear gable panels. They are interchangable for Gable siding overhangs wall siding Steps 28-32. Pre-drill siding with 1/8” drill bit. Left Front Gable Panel Once gable panel is aligned correctly, attach in 4 locations as illustrated above with 1 1/4: screws.
- Page 18 Pre-drill siding Gable siding overhangs wall siding with 1/8” drill bit. When positioned correctly, gable siding will overhang window wall siding with plywood back- Hardware ing pushed tight together. Attach with 4 - 1 1/4” S2 - 1 1/4” Screws screws.
- Page 19 Hardware Parts Attach rear gable panels S2 - 1 1/4” Screws 10B - Rear Gable Center Panel as per Steps 28-31. x 12 total (45 1/4”w ” x 27 1/2”) x 1 11B - Rear Gable Left Panel (45 1/4”w ” x 19 1/4”) x 1 11B - Rear Gable Right Panel (45 1/4”w ”...
- Page 20 Replace Top Plate 3/8” overhang Position replacement top plate Parts Hardware 12B - Top Plate for Bottom N1 - 1 1/2” Finishing Nails on bottom and attach with 6 - 1 1/2” Dutch Door x 6 total nails. (3/4” x 3 1/2” x 31 1/2”) x 1 Top Plate Flush Position top door plywood over...
-
Page 21: Trim Section
C. Trim Section Parts 1C - Vertical Door Stop- Jamb (7/8” x 2” x 72 1/2”) x 1 Hardware 2C - Vertical Door Stop- Narrow Wall Locate all 3 door stops. Start S2 - 1 1/4” Screws (7/8” x 1/2” x 72 1/2”) x 1 on the door jamb side, position 2”... - Page 22 Trim with filler attached on back Trim on narrow wall side Position top horizontal trim on door header tight against vertical trim already attached. Horizontal trim will have an additional piece of wood already attached to the reverse face to Hardware make it sit flush on the wall.
- Page 23 Parts Hardware Position and attach the 4 side wall 9C - Vertical Side Wall Trims N1 - 1 1/2” Finishing Nails trims on side wall seams and attach (1/4” x 2” x 73 1/2”) x 4 x 24 total with 6 - 1 1/2” nails. 22.5 deg.
- Page 24 Attach rafter bottom trims to cover Parts Hardware rafters with cedar trim. Position under 11C - Rafter Bottom Trims N1 - 1 1/2” Finishing Nails (1/2” x 1 1/2” w x 31 3/4”) x 3 the rafter and nail with 4-5 nails per x 24 total piece.
- Page 25 Pre-drill siding with 1/8” drill bit. Attach barrel bolt to door plywood. Male bolt attached to top Parts Hardware while female to bottom door. Attach 14C - Barrel Bolt / door handle to top door. Use 3/4” SB1 - 3/4” Black Head Screws Door Handle black headed screws for both pieces.
Need help?
Do you have a question about the SSGS1212 and is the answer not in the manual?
Questions and answers