Table of Contents
Advertisement
CALIBRATION PROCEDURE
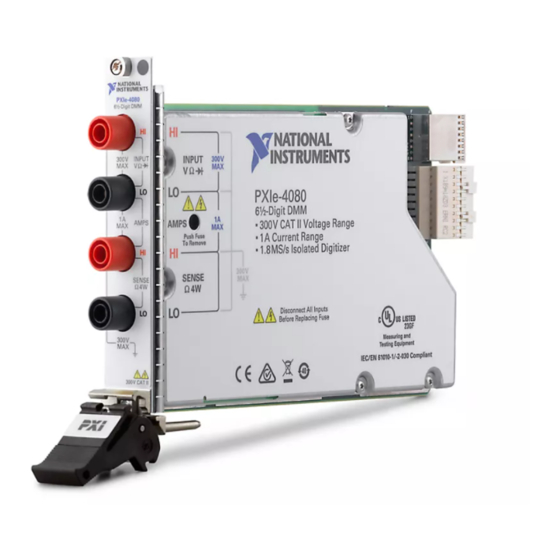
PXIe-4080/4082
PXIe, 6½-Digit, ±300 V, Onboard 1.8 MS/s Isolated Digitizer, L and C
Measurement Support, PXI Digital Multimeter
This document contains the verification and adjustment procedures for the PXIe-4080/4082.
Refer to
ni.com/calibration
Contents
Required Software.....................................................................................................................2
Related Documentation.............................................................................................................2
Password................................................................................................................................... 2
Calibration Interval................................................................................................................... 2
Test Equipment..........................................................................................................................2
Calibration Procedures.............................................................................................................. 3
Initial Setup............................................................................................................................... 4
Test Conditions..........................................................................................................................4
As-Found and As-Left Limits................................................................................................... 5
Verification................................................................................................................................5
Verifying DC Voltage........................................................................................................5
Verifying AC Voltage........................................................................................................7
Verifying 4-Wire Resistance........................................................................................... 10
Verifying 2-Wire Resistance........................................................................................... 11
Verifying DC Current......................................................................................................14
Verifying AC Current......................................................................................................16
Verifying Capacitance and Inductance............................................................................17
Adjustment.............................................................................................................................. 18
Adjusting DC Voltage..................................................................................................... 18
Adjusting Resistance.......................................................................................................19
Adjusting AC Voltage..................................................................................................... 23
Adjusting Current............................................................................................................25
Adjusting Capacitance and Inductance........................................................................... 26
Completing the Adjustment Procedures......................................................................... 27
Reverification..........................................................................................................................27
Worldwide Support and Services............................................................................................ 27
for more information about calibration solutions.
Advertisement
Table of Contents

Related Manuals for National Instruments PXIe-4080


Summary of Contents for National Instruments PXIe-4080
-
Page 1: Table Of Contents
CALIBRATION PROCEDURE PXIe-4080/4082 PXIe, 6½-Digit, ±300 V, Onboard 1.8 MS/s Isolated Digitizer, L and C Measurement Support, PXI Digital Multimeter This document contains the verification and adjustment procedures for the PXIe-4080/4082. Refer to ni.com/calibration for more information about calibration solutions. -
Page 2: Required Software
Required Software Calibrating the PXIe-4080/4082 requires you to install the following software on the calibration system: • NI-DMM version 15.2 or later You can download all required software from ni.com/downloads. Related Documentation For additional information, refer to the following documents as you perform the calibration procedure: •... -
Page 3: Calibration Procedures
Initial Setup - Set up the test equipment. • Verification Procedures - Verify the existing operation of the device. This step confirms whether the device is operating within its specified range prior to calibration. PXIe-4080/4082 Calibration Procedure | © National Instruments | 3... -
Page 4: Initial Setup
Plug the PXI Express chassis and the calibrator into the same power strip to avoid ground loops. • Power on and warm up both the calibrator and the PXIe-4080/4082 for at least 60 minutes before beginning this calibration procedure. •... -
Page 5: As-Found And As-Left Limits
Plug in the shorting bar across the HI and LO terminals on the PXIe-4080/4082. Wait two minutes for thermal EMF to stabilize. Reset the PXIe-4080/4082. Initialize the PXIe-4080/4082 for DC Voltage with a range of 100 mV and resolution of 6.5 digits. Verify the accuracy for each configuration in the following table: Acquire the measurement at each specified range and input resistance. - Page 6 -2 mV 2 mV Remove the shorting bar from the PXIe-4080/4082. Set the calibrator to Standby Connect the PXIe-4080/4082 to the calibrator using low thermal EMF cables according to the following figure. Figure 1. Voltage Connection Configuration OUTPUT SENSE NI DMM...
-
Page 7: Verifying Ac Voltage
-300 V -300.017 -299.984 -300.005 -299.995 You have completed verifying the DC voltage mode of the PXIe-4080/4082. Select one of the following options: • If you want to continue verifying other modes, go to the Verifying AC Voltage section. •... - Page 8 Figure 1. on page 6. Reset the PXIe-4080/4082. Initialize the PXIe-4080/4082 for AC Voltage with a range of 50 mV and resolution of 6.5 digits. Verify the accuracy for each configuration in the following table: Set the PXIe-4080/4082 to the listed configuration and commit.
- Page 9 218.743 219.257 219 V 100 kHz 217.845 220.155 70 V 300 kHz 67.750 72.250 You have completed verifying the AC voltage mode of the PXIe-4080/4082. Select one of the following options: PXIe-4080/4082 Calibration Procedure | © National Instruments | 9...
-
Page 10: Verifying 4-Wire Resistance
Verifying 4-Wire Resistance Complete the following steps to verify 4-wire resistance: Set the calibrator to Standby Connect the PXIe-4080/4082 to the calibrator using low thermal EMF cables, as shown in the following figure. Figure 2. 4-Wire Resistance Connection Configuration OUTPUT... -
Page 11: Verifying 2-Wire Resistance
Close the calibration session with the Action set to Save Verifying 2-Wire Resistance Complete the following steps to verify 2-wire resistance: Plug in the shorting bar across the HI and LO terminals on the PXIe-4080/4082. PXIe-4080/4082 Calibration Procedure | © National Instruments | 11... - Page 12 2010 Remove the shorting bar from the PXIe-4080/4082. Set the calibrator to Standby Connect the PXIe-4080/4082 to the calibrator using low thermal EMF cables, as shown in Figure 1. on page 6. Wait two minutes for thermal EMF to stabilize.
- Page 13 For the 1 MΩ and 100 kΩ measurements, subtract the corresponding 0 Ω measurement as an offset null. 10. Connect the PXIe-4080/4082 to the calibrator using low thermal EMF cables, as shown in the following figure. Figure 3. 2-Wire Resistance Low Range Connection Configuration...
-
Page 14: Verifying Dc Current
Complete the following steps to verify DC current: Unplug all cables from the PXIe-4080/4082. Reset the PXIe-4080/4082. Initialize the PXIe-4080/4082 for DC current with a range of 20 mA and resolution of 6.5 digits. Verify the accuracy for each configuration in the following table: Acquire the measurement at each specified range. - Page 15 -0.1798970 -0.1800106 -0.1799894 900 mA 0.899320 0.900680 0.899942 0.900058 -900 mA -0.900680 -0.899320 -0.900058 -0.899942 You have completed verifying the DC current of the PXIe-4080/4082. Select one of the following options: PXIe-4080/4082 Calibration Procedure | © National Instruments | 15...
-
Page 16: Verifying Ac Current
Figure 4. on page 15. Reset the PXIe-4080/4082. Initialize the PXIe-4080/4082 for AC Current with a range of 10mA and a resolution of 6.5 digits. Verify the accuracy for each configuration in the following table: Set the PXIe-4080/4082 to the listed configuration and commit. -
Page 17: Verifying Capacitance And Inductance
Configure the device as indicated in DMM Range and take a measurement. Compare the acquired value to the specified tolerances. Repeat the previous steps for each standard listed in the table. PXIe-4080/4082 Calibration Procedure | © National Instruments | 17... -
Page 18: Adjustment
Close the calibration session with the Action set to Save Adjustment This section explains how to adjust the PXIe-4080/4082. You can choose to perform these adjustment procedures with or without performing the verification procedure first. Note Repeat the verification procedures after you perform these adjustment procedures. -
Page 19: Adjusting Resistance
Function: DC Volts • Range: 100 mV • Input Resistance: >10 GΩ You have completed adjusting the DC voltage mode of the PXIe-4080/4082. Proceed to one of the following sections: • Adjusting Resistance • Adjusting AC Voltage • Adjusting Current If you are not performing additional adjustments, proceed to the Completing the Adjustment Procedures section to commit the calibration constants. - Page 20 Adjusting AC Voltage section. Complete the following steps to adjust the resistance of the device: Connect the PXIe-4080/4082 to the calibrator using low thermal EMF cables as shown in Figure 2. on page 10.
- Page 21 Output 0 Ω on the calibrator with External Sense turned on and Compensation set to None 10. Call the niDMM Cal Adjust Offset VI or the niDMM_CalAdjustOffset function for each range in the following table. PXIe-4080/4082 Calibration Procedure | © National Instruments | 21...
- Page 22 11. Call the niDMM Cal Adjust Misc VI or the niDMM_CalAdjustMisc function with Type set to NIDMM_EXTCAL_MISCCAL_VREF_RESISTANCE 12. Disconnect all inputs from the PXIe-4080/4082 and plug in the shorting bar between the HI and LO terminals. 13. Wait two minutes for the thermal EMF to stabilize.
-
Page 23: Adjusting Ac Voltage
Adjusting Current section. Complete the following steps to adjust the AC voltage of the device: Reset the calibrator. Connect the PXIe-4080/4082 to the calibrator as shown in Figure 1. on page 6. Call the niDMM Cal Adjust Misc VI or the niDMM_CalAdjustMisc function with... - Page 24 50 kHz 100 kHz 200 kHz 300 kHz 500 kHz AC Volts 50 V 50 V 1 kHz 5 kHz 20 kHz 50 kHz 100 kHz 200 kHz 300 kHz 10 V 500 kHz 24 | ni.com | PXIe-4080/4082 Calibration Procedure...
-
Page 25: Adjusting Current
Call the niDMM_Cal Adjust Misc VI or the niDMM_CalAdjustMisc function with Type set to NIDMM_EXTCAL_MISCCAL_VOLTAGE_AC_FILTER Self-calibrate the PXIe-4080/4082. You have completed adjusting the AC voltage modes of the PXIe-4080/4082. Proceed to one of the following sections: • Adjusting Current •... -
Page 26: Adjusting Capacitance And Inductance
-1 A Self-calibrate the PXIe-4080/4082. You have completed adjusting the current modes of the PXIe-4080/4082. To continue adjusting other modes, proceed to the Adjusting Capacitance and Inductance section. If you are finished adjusting modes, proceed to the Completing the Adjustment Procedures section to commit the calibration constants. -
Page 27: Completing The Adjustment Procedures
Proceed to the Completing the Adjustment Procedures section to commit the calibration constants. Completing the Adjustment Procedures To complete the adjustment procedure for the PXIe-4080/4082 and close the session, call the niDMM Close Ext Cal VI or the niDMM_CloseExtCal function with the following parameter: •... - Page 28 NI trademarks. Other product and company names mentioned herein are trademarks or trade names of their respective companies. For patents covering NI products/technology, refer to the appropriate location: Help»Patents in your software, the file on your media, or the National Instruments Patent Notice at . You can find patents.txt ni.com/patents...
Need help?
Do you have a question about the PXIe-4080 and is the answer not in the manual?
Questions and answers