Table of Contents

Related Manuals for Jaypro Elite Series


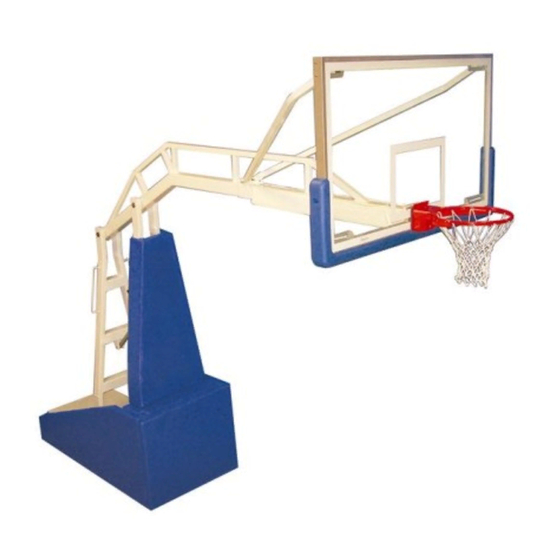
Summary of Contents for Jaypro Elite Series
- Page 1 ELITE S AYPRO ERIES DJUSTABLE ORTABLE ACKSTOPS Installation and Operating Instructions Applicable Part Numbers/Models: PBEL54: Jaypro Elite 5400 PBEL66: Jaypro Elite 6600 PBEL96: Jaypro Elite 9600 JSL-Inst039 www.jayprosports.com...
- Page 2 860.440.0628 (ENG.) 860.447.3001 (LOCAL) SHEET: REV. COPYRIGHT 2006 JAYPRO SPORTS, LLC. THIS PRINT IS THE PROPERTY OF JAYPRO SPORTS, LLC. JAYPRO SPORTS, LLC, 976 HARTFORD TURNPIKE, WATERFORD, CT 06385 USA ALL RIGHTS RESERVED AND MAY NOT BE REPRODUCED WITHOUT WRITTEN PERMISSION...
- Page 3 860.440.0628 (ENG.) 860.447.3001 (LOCAL) SHEET: REV. COPYRIGHT 2006 JAYPRO SPORTS, LLC. THIS PRINT IS THE PROPERTY OF JAYPRO SPORTS, LLC. JAYPRO SPORTS, LLC, 976 HARTFORD TURNPIKE, WATERFORD, CT 06385 USA ALL RIGHTS RESERVED AND MAY NOT BE REPRODUCED WITHOUT WRITTEN PERMISSION...
- Page 4 860.440.0628 (ENG.) 860.447.3001 (LOCAL) SHEET: REV. COPYRIGHT 2006 JAYPRO SPORTS, LLC. THIS PRINT IS THE PROPERTY OF JAYPRO SPORTS, LLC. JAYPRO SPORTS, LLC, 976 HARTFORD TURNPIKE, WATERFORD, CT 06385 USA ALL RIGHTS RESERVED AND MAY NOT BE REPRODUCED WITHOUT WRITTEN PERMISSION...
-
Page 5: Table Of Contents
ELITE Series Adjustable Portable Backstop Instructions Table of Contents Safety ........................ 2 Specifications ....................2 Introduction ..................... 3 Required Tools ....................3 Included Hardware & Components ............4 5.1 Miscellaneous Hardware ..............4 5.2 Locator Kit ....................4 5.3 Anchor Kit (PBELKIT) ................4 5.4 Backboard .................... -
Page 6: Safety
ELITE Series Adjustable Portable Backstop Instructions Safety IMPORTANT: LIFT-ASSIST SPRINGS UNDER EXTREME TENSION. DO NOT ADJUST SPRINGS WITHOUT CONSULTING MANUAL, SEE SECTION 12 (PAGE 25). IMPORTANT: DO NOT REMOVE SAFETY STRAP OR QUICK-RELEASE PIN UNTIL THE BACKBOARD AND RIM HAVE BEEN INSTALLED. FAILURE TO COMPLY MAY RESULT IN SEVERE OR FATAL INJURY AS WELL AS SIGNIFICANT DAMAGE TO SURROUNDING STRUCTURES. -
Page 7: Introduction
ELITE Series Adjustable Portable Backstop Instructions Introduction This guide describes the installation and use of the ELITE Series Adjustable Portable Backstops, models PBEL54, PBEL66, and PBEL96. The sections of this guide that detail the initial setup of the backstops is written with experienced mechanical contractors/installers in mind. -
Page 8: Included Hardware & Components
Before continuing, please verify that you have all the required hardware (included w/ unit) for installation and setup. If any of the following items are missing, contact the Jaypro Sports customer support team, Monday through Friday, 8:30AM to 5:00 PM (EST), at 1-800-243-0533. -
Page 9: Backboard
ELITE Series Adjustable Portable Backstop Instructions Figure 5-5: FP-90 Floor Anchor (1X) Figure 5-6: ½"-13 Eyebolt w/ shoulder (1X) Figure 5-7: Shackle (2X) Figure 5-8: Twisted chain (8”) 5.4 Backboard Figure 5-9: Backboard (72" board supplied w/ PBEL96 & PBEL 66, 54" with PBEL54) -
Page 10: Rim
ELITE Series Adjustable Portable Backstop Instructions Figure 5-18: 3/8”-16 x 1” Carriage Bolt (2X) Figure 5-19: 3/8” Split Washer (2X) Figure 5-20: 3/8”-16 Flanged Hex Nuts (4X) 5.6 Rim Figure 5-21: Breakaway Rim (1X, model varies) Figure 5-22: Nylon Net Tie (1X) Figure 5-23: 3/8”-16 Flanged Hex Nuts (4X) - Page 11 ELITE Series Adjustable Portable Backstop Instructions Figure 6-1: Lower feet using supplied socket wrench. Figure 6-2: Lower feet until bottom horizontal 2" x 4" ‘s are level. 2. Attach left and right backboard support arms to slots in boom using the 5/16”-18 x 3/4”...
- Page 12 ELITE Series Adjustable Portable Backstop Instructions Figure 6-3: Install backboard support arms to slots in boom. 3. Support backboard such that the mounting holes in the bottom middle of frame are in line with the bolt pattern on the end of the boom (Figure 6-4).
- Page 13 ELITE Series Adjustable Portable Backstop Instructions 8. Remove front cover from supplied rim. 9. Fasten rim to board using the 3/8”-16 x 3¾” hex bolts (4X), 3/8” flat washers (8X), 3/8” split washers (4X), and 3/8” flanged nuts (4X) as shown in Figure 6-6.
- Page 14 ELITE Series Adjustable Portable Backstop Instructions Figure 6-5: Installation of backboard to boom. - 10 of 27- JSL-Inst039 www.jayprosports.com...
- Page 15 ELITE Series Adjustable Portable Backstop Instructions Figure 6-6: Attach rim to board. - 11 of 27- JSL-Inst039 www.jayprosports.com...
-
Page 16: Unpacking
ELITE Series Adjustable Portable Backstop Instructions Unpacking WARNING: DO NOT REMOVE SAFETY STRAP OR QUICK-RELEASE PIN UNTIL THE BACKBOARD AND RIM HAVE BEEN INSTALLED. FAILURE TO COMPLY MAY RESULT IN SEVERE OR FATAL INJURY AS WELL AS SIGNIFICANT DAMAGE TO SURROUNDING STRUCTURES. -
Page 17: Set Foot Stops
ELITE Series Adjustable Portable Backstop Instructions Set Foot Stops WARNING: DO NOT STAND DIRECTLY BEHIND UPRIGHTS WHEN RAISING OR LOWERING THE BACKSTOP. SEE Figure 8-1 FOR DETAILS ON WHERE TO SAFELY POSITION YOURSELF WHEN RAISING/LOWERING THE BACKSTOP. WARNING: BE SURE THAT AREA WITHIN 8 FEET (2.5 METERS) IS CLEAR OF BYSTANDERS BEFORE RAISING OR LOWERING. - Page 18 ELITE Series Adjustable Portable Backstop Instructions 2. ONLY IF BACKBOARD IS INSTALLED, remove the quick-release pin from the height adjuster mechanism (Figure 7-1). 3. Stand to one side of the unit and lift one of the two handles on the lower upright (Figure 8-2).
- Page 19 ELITE Series Adjustable Portable Backstop Instructions c. You may need to rotate the stops until the setscrews are facing outward to tighten screws. d. Tighten setscrews as much as possible without damaging hex socket. Figure 8-3: Tighten set screws on foot stops.
-
Page 20: Padding Installation
ELITE Series Adjustable Portable Backstop Instructions Padding Installation Padding should be installed after the foot stops have been set (see section 8 above). 9.1 Included Padding Figure 9-1: Front Pad, (1X) Figure 9-2: Side Pads (1X Right, 1X Left) PBEL54/PBEL66... -
Page 21: Padding Installation
ELITE Series Adjustable Portable Backstop Instructions Figure 9-5: U-Clip (PBEL54: 10X, PBEL66/96: 8X) Figure 9-6: L-Clip (2X, PBEL66/96 Only) Figure 9-7: Wood screws – ¼” x 1” (20X) 9.2 Padding Installation 2. Install the left and right side pads. a. Properly locate the side pads by aligning the holes on the inside faces of the pads with the hubs on the sides PBEL base frame (Figure 9-8). - Page 22 ELITE Series Adjustable Portable Backstop Instructions Figure 9-9: Fasten side pads to base frame with U-Clips. 3. Install the front pad (PBEL54): a. Lower the unit by retracting the feet until the front wheels are on the ground. b. Support the front pad against the front of the base frame such that the top is flush with the tops of the side pads.
- Page 23 ELITE Series Adjustable Portable Backstop Instructions a. Mark the locations for the L-Clips on the rear of the front pad according to the diagram below (Figure 9-11): L-Clip Holes U-Clip Holes Figure 9-11: Location of holes for J- & L-Clips b.
- Page 24 ELITE Series Adjustable Portable Backstop Instructions Figure 9-12: L-Clips fastened to the front pad. c. Place the rear of the front pad against the front of the base frame with the clips above each of the front horizontal 2x4’s. d. Slide the pad downward until the L-Clips are ftted securely over the top 2x4.
-
Page 25: Installing Floor Anchor And Locator Bushings
ELITE Series Adjustable Portable Backstop Instructions 10 Installing Floor Anchor and Locator Bushings The holes for the floor anchor and locator bushings are located in reference to both the baseline of the court as well as the centerline perpendicular to the baseline. - Page 26 ELITE Series Adjustable Portable Backstop Instructions Figure 10-1: PBEL54 Locating and anchor holes. Figure 10-2: PBEL66 Locating and anchor holes. - 22 of 27- JSL-Inst039 www.jayprosports.com...
- Page 27 ELITE Series Adjustable Portable Backstop Instructions Figure 10-3: PBEL96 Locating and anchor holes. - 23 of 27- JSL-Inst039 www.jayprosports.com...
-
Page 28: Raising/Lowering Backstop
ELITE Series Adjustable Portable Backstop Instructions 11 Raising/Lowering Backstop WARNING: DO NOT STAND DIRECTLY BEHIND UPRIGHTS WHEN RAISING OR LOWERING THE BACKSTOP. SEE Figure 8-1 FOR DETAILS ON WHERE TO SAFELY POSITION YOURSELF WHEN RAISING/LOWERING THE BACKSTOP. WARNING: BE SURE THAT AREA WITHIN 8 FEET (2.5 METERS) IS CLEAR OF BYSTANDERS BEFORE RAISING OR LOWERING. -
Page 29: Lowering Backstop
12 Spring Adjustments WARNING: DO NOT REMOVE SPRINGS UNDER ANY CIRCUMSTANCES. IF YOU SUSPECT THAT A SPRING IS DAMAGED AND REQUIRES REPLACEMENT CONTACT JAYPRO IMMEDIATELY AT (800) 243-0533. WARNING: WHEN ADJUSTING THE SPRINGS ALWAYS ENSURE THAT THE LOCKNUTS ARE NEVER LOOSENED TO THE POINT WHERE NO THREADS ARE VISIBLE. -
Page 30: Maintenance
13 Maintenance Your ELITE series portable backstop is designed to provide years of play; however, it is recommended that they be inspected at least once every season, for signs of excessive wear. Key areas to inspect include (but are not limited to): ... - Page 31 Doublecheck that the board and rim are level and plumb and verify that all bolted connections are well fastened. If you require additional information or support maintaining your backstops, please contact the Jaypro Sports customer support team, Monday through Friday, 8:30AM to 5:00 PM (EST), at 1-800-243-0533. - 27 of 27- JSL-Inst039 www.jayprosports.com...
Need help?
Do you have a question about the Elite Series and is the answer not in the manual?
Questions and answers