Heatsail DOME User Manual
Hide thumbs
Also See for DOME:
- User manual (160 pages) ,
- User manual (60 pages) ,
- User manual (108 pages)

Subscribe to Our Youtube Channel
Related Manuals for Heatsail DOME


Summary of Contents for Heatsail DOME
- Page 1 U S E R M A N U A L For the most recent version of this manual check our website. www.sutherlandfurniture.com Do not discard this manual, it contains your device’s serial number.
-
Page 3: Table Of Contents
I N TR OD UC T I ON ELE C TR I CAL SA F E T Y P ROC E D U RE S OP ER ATI ON A L SA F E T Y M A I N TE NA N C E WA R R AN T Y C O ND I T ION S A PP L I CA B L E L AW AS S EM BLY A ND WI RIN G IN ST RU C T IO NS... - Page 4 If you decide to sell the DOME, transfer it to another user or leave it behind when moving, this manual must be made available to the new user.
- Page 5 User manual Operating, maintenance and installation guide. Attention Please read through these instructions carefully before using your DOME. Do not discard this manual, as it contains your device’s serial number. User manual...
-
Page 6: Electrical Safety Procedures
Electrical safety procedures & requirements The use of the DOME requires an electrical installation with reliable safety grounding. The installation’s electrical safety can only be guaranteed if the device has been correctly connected to a grounding (earthing) system built in accordance with the safety instructions. A preliminary inspection is absolutely essential. - Page 7 This product is not intended to be operated by children, to be played with or to be played on. The DOME must be kept out of reach of anyone incapable of assessing the risks which can arise from the (im- proper) use of electrical equipment.
-
Page 8: Maintenance
The same also applies to the glass casing. Always ensure that the DOME is anchored on a flat surface before use. Always keep the DOME free of snow. The dome is not allowed for use in greenhouses or building sites. - Page 9 3.2. Replacing the bulb Your DOME is supplied with a R7S 230V/120 Watt (78mm) halogen bulb as standard. The maximum permitted output power of the bulb is 120 Watt. The electrical supply must be disconnected via the installation’s breaker switch before the bulb can be replaced.
-
Page 10: Warranty Conditions
Warranty conditions 4.1. Warranty Your DOME comes with a two year, limited warranty. The original invoice will serve as your proof of purchase. This warranty does not affect the buyer’s rights by virtue of the national legislation regarding the sale of consumer goods. -
Page 11: A Pp L I Ca B L E L Aw
The warranty can only be initiated after written permission has been granted. Heatsail declines any form of liability for any possible damage and/or in- jury which has been either directly or indirectly caused to people, animals or objects as a result of non-compliance with the instructions in the user manual and which specifically concern the warnings in relation to the in- stallation, use and maintenance of the device. -
Page 12: Assembly And Wiring Instructions
(27 lbs/each) allen wrench grounding hardware (M6 nut, 3x lock washers) Requirements To safely build your DOME, you will need the following tools: Protective work gloves A stable ladder An phillips or cross-tip Box-end wrench or wrench... - Page 13 Use a ladder to take out the curved tube S T E P 2 Lift the box and set aside. Place the DOME on the top section of the box and set aside for now. NOTE: Do not carry the DOME by holding the cable.
- Page 14 Take the metal box. Position so that the opening is on the far side. NOTE: Before continuing, be sure you place the metal box where you want the DOME installed for permanent mounting. 11 12 13 Level 1 S T E P 6 Stack the first level of bricks as shown in the image.
- Page 15 Stack the first three ballast weights as shown on top of the first row of bricks. 11 12 13 Level 2 Build a second level of bricks. Ensure you repeat the order (shown at right). The stack orientation is important! 11 12 13 S T E P 7 Place the last three ballast...
- Page 16 DO NOT tighten it fully at this time. S T E P 9 Side Take the cover and close the box. It will only fit one way. Ensure alignment tabs are properly oriented and it is fully seated. Alignment tabs Heatsail DOME®...
- Page 17 S T E P 1 0 Secure the metal cover with the two M6 screws (See Step 4) with the allen wrench. S T E P 1 1 a If you opted for a DOME with extended height, insert extension piece as shown.
- Page 18 S T E P 1 3 Using a mechanical lift, two strong friends, or the shipping box (as shown below) to lift the DOME hood in preparation for following steps. TIP: Use a piece of tape to hold the exposed wires at the end of the power cable together.
- Page 19 S T E P 1 4 Insert the curved tube and attach it to the short vertical tube extending upwards from the base. S T E P 1 5 Insert the cable into the tube. Keep pushing until you can reach it through the opening at the bottom of the metal box.
- Page 20 Rotate the arc of the pole directly above the DOME. Insert and push the power cable through the pole as you lift the DOME to meet the mounting bracket to the pole. (shown at right). S T E P 1 7 a Affix the DOME using three of the M6 allen set screws.
- Page 21 Grounding Grounding Power cable Power cable Grounding S T E P 1 8 Fuse Holder Fuse Holder Power cable Fuse Holder Remove the rear cover from the electrical box using a phillips screwdriver. Insert the cable through the cable guide on the rear cover of the electrical box.
- Page 22 Attach the two grounding wires (green and yellow) from the tube and from the control box to the stud, layering the lock washers and wires as shown. Fasten with the supplied M6 nut, using M10 wrench or socket. Heatsail DOME®...
- Page 23 S T E P 2 3 Drill a hole in the mounting surface and anchor your DOME with the correct supplied screw according to the surface material. NOTE: We have provided an assortment of floor screws for most the most common surface materials.
- Page 24 S T E P 2 7 Look identify protective plate, remove cutting the three zip ties. Ensure that all decals on the bottom of the plate and heating element are removed, if present. Enjoy your brand new DOME! Heatsail DOME®...
-
Page 25: Op Er Ati On
Located on the back of the panel of the When you switch on the DOME, it takes up to 30 minutes before the base of the DOME. DOME reaches its full temperature. When switched off, it may take up to 40 minutes before the DOME has completely cooled down. -
Page 26: Tr O Ub L E S H Oot I N G
Troubleshooting The light does not work Switch off power. Lift the glass of the the DOME upwards. Insert a rigid item (like a screwdriver) underneath the glass to keep it up. You can now access the halogen bulb. Verify it is well-seated and not broken. If you need to replace the bulb, replace it with a standard R7S 78mm, 230V/120W bulb. - Page 27 (2) Send a signal to the receiver with the remote by clicking one of the buttons on the remote control. If this is first use of the DOME, please be sure that the protective film on the battery of the remote is removed.
- Page 28 Heatsail DOME®...
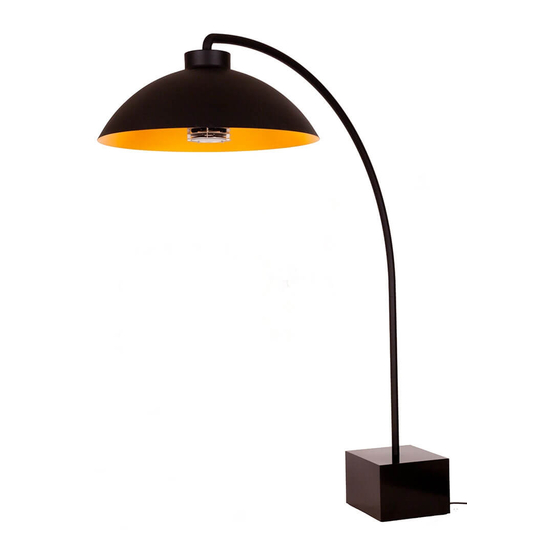
- Page 29 DOME TIMELESS LIGHTING WITH HEATING FOR YOUR GARDEN OR TERRACE RUSTPROOF & LOW ENERGY USAGE MINIMUM OF WEATHERPROOF ZERO CO2 EMISSION MAINTENANCE User manual...
- Page 30 +32 3 502 99 88 +1 214 638 4161 info@heatsail.com hospitality@sutherlandfurniture.com www.heatsail.com www.sutherlandfurniture.com US Office HEATSAIL USA Inc. 10440 N Central Expresway Dallas, Texas 75231 United States sales@heatsail.com www.heatsail.com S E R I A L N U M B E R...
Need help?
Do you have a question about the DOME and is the answer not in the manual?
Questions and answers