Table of Contents
Advertisement
Quick Links
Advertisement
Table of Contents

Related Manuals for Electrolux EOB2100CCX


Summary of Contents for Electrolux EOB2100CCX
- Page 1 EOB2100CCX EOB2100COX Oven User Manual...
-
Page 2: Table Of Contents
12. TROUBLESHOOTING..................18 WE’RE THINKING OF YOU Thank you for purchasing an Electrolux appliance. You’ve chosen a product that brings with it decades of professional experience and innovation. Ingenious and stylish, it has been designed with you in mind. So whenever you use it, you can be safe in the knowledge that you’ll get great results every time. - Page 3 ENGLISH usage. Always keep the instructions in a safe and accessible location for future reference. 1.1 Juveniles and vulnerable people safety The juveniles aged under 8 years shall not use this • appliance. This appliance can be used by juveniles aged from 8 years and above and persons with reduced physical, sensory or mental capabilities or lack of experience and knowledge if they have been...
-
Page 4: Safety Instructions
WARNING: Ensure that the appliance is switched off • before replacing the lamp to avoid the possibility of electric shock. Do not use the appliance before installing it in the • built-in structure. Do not use a steam cleaner to clean the appliance. - Page 5 ENGLISH 2.2 Electrical connection Cable types applicable for installa‐ WARNING! tion or replacement for Europe: Risk of fire and electric H07 RN-F, H05 RN-F, H05 RRF, H05 shock. VV-F, H05 V2V2-F (T90), H05 BB-F • All electrical connections should be made by a qualified electrician.
- Page 6 • Do not put flammable products or • Make sure the appliance is cold. items that are wet with flammable There is the risk that the glass panels products in, near or on the appliance. can break. • Replace immediately the door glass WARNING! panels when they are damaged.
-
Page 7: Installation
ENGLISH 3. INSTALLATION WARNING! Refer to Safety chapters. 3.1 Building In min. 550 min. 560 min. 550 min. 560 3.2 Securing the oven to the cabinet... -
Page 8: Product Description
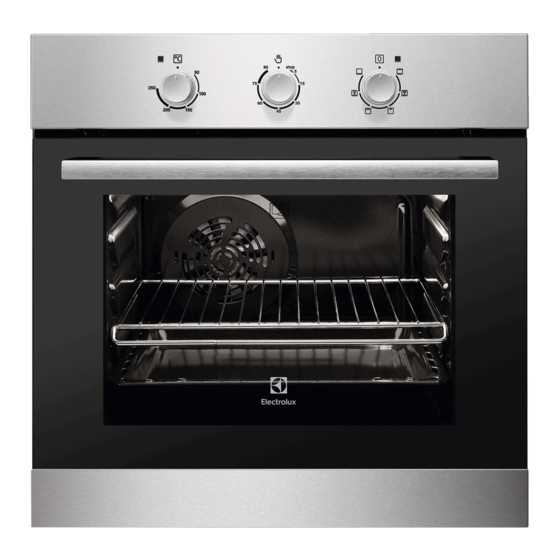
4. PRODUCT DESCRIPTION 4.1 General overview Control panel Temperature indicator / symbol Knob for the temperature Knob for the timer Knob for the oven functions Power lamp / symbol Air vents for the cooling fan Heating element Lamp Shelf positions 4.2 Accessories... -
Page 9: Clock Functions
ENGLISH 6.1 Activating and deactivating 1. Turn the knob for the oven functions to select an oven function. the appliance 2. Turn the knob for the temperature to select a temperature. It depends on the model if 3. To deactivate the appliance, turn the your appliance has lamps, knobs for the oven functions and knob symbols or... -
Page 10: Using The Accessories
8. USING THE ACCESSORIES Deep pan: WARNING! Push the deep pan between the guide Refer to Safety chapters. bars of the shelf support. 8.1 Inserting the accessories Wire shelf: Push the shelf between the guide bars of the shelf support and make sure that the feet point down. - Page 11 ENGLISH 10.3 Cooking meat and fish • Moisture can condense in the appliance or on the door glass panels. • Use a deep pan for very fatty food to This is normal. Always stand back prevent the oven from stains that can from the appliance when you open the be permanent.
- Page 12 Food Top / Bottom Heat Fan Cooking Time Com‐ (min) ments Tempera‐ Shelf po‐ Tempera‐ Shelf po‐ ture (°C) sition ture (°C) sition Fruit cake 50 - 60 In a 26 cm cake mould Sponge 90 - 120 In a 26 cm cake (Fat‐...
- Page 13 ENGLISH Bread and pizza Food Top / Bottom Heat Fan Cooking Time Com‐ (min) ments Tempera‐ Shelf po‐ Tempera‐ Shelf po‐ ture (°C) sition ture (°C) sition White 60 - 70 1 - 2 pieces, bread 500 gr per piece Rye bread 190 30 - 45 In a bread...
- Page 14 Food Top / Bottom Heat Fan Cooking Time Com‐ (min) ments Tempera‐ Shelf po‐ Tempera‐ Shelf po‐ ture (°C) sition ture (°C) sition Pork 90 - 120 On a wire shelf and a deep Veal 90 - 120 On a wire...
- Page 15 ENGLISH Fish Food Top / Bottom Heat Fan Cooking Time Com‐ (min) ments Tempera‐ Shelf po‐ Tempera‐ Shelf po‐ ture (°C) sition ture (°C) sition Trout / 2 (1 and 40 - 55 3 - 4 fishes bream Tuna fish / 2 (1 and 35 - 60 4 - 6 fillets...
-
Page 16: Care And Cleaning
Food Quantity Tempera‐ Time (min) Shelf po‐ ture (°C) sition Pieces 1st side 2nd side Rolled 1000 30 - 40 20 - 30 joints (tur‐ key) Chicken 1000 25 - 30 20 - 30 (cut in two) Chicken 15 - 20... - Page 17 ENGLISH 11.4 Cleaning the oven door The oven door has two glass panels. You can remove the oven door and the internal glass panel to clean it. The oven door can close if you try to remove the internal glass panel before you remove the oven door.
-
Page 18: Troubleshooting
11.5 Replacing the lamp 7. First lift carefully and then remove the glass panel. Put a cloth on the bottom of the interior of the appliance. It prevents damage to the lamp glass cover and the cavity. WARNING! Danger of electrocution! Disconnect the fuse before you replace the lamp. - Page 19 ENGLISH Problem Possible cause Remedy Steam and condensation You left the dish in the Do not leave the dishes in settle on the food and in oven for too long. the oven for longer than 15 the cavity of the oven. - 20 minutes after the cooking process ends.
- Page 20 www.electrolux.com...
- Page 21 ENGLISH...
- Page 22 www.electrolux.com...
- Page 23 ENGLISH...
- Page 24 www.electrolux.com/shop...
Need help?
Do you have a question about the EOB2100CCX and is the answer not in the manual?
Questions and answers