Sony UP-D711MD Instructions For Use Manual
Digital graphic printer
Hide thumbs
Also See for UP-D711MD:
- Instructions for use manual (20 pages) ,
- Setup manual (7 pages) ,
- Manual (243 pages)

Related Manuals for Sony UP-D711MD


Summary of Contents for Sony UP-D711MD
- Page 1 4-417-500-16 (1) 2017-08 Digital Graphic Printer Instructions for Use Before operating the unit, please read this manual thoroughly and retain it for future reference. UP-D711MD © 2012 Sony Corporation...
- Page 2 Indications for Use/Intended Use Symbols on the product The Sony UP-D711MD printer is a compact, medical Safety sign grade black and white digital printer. It is designed to be Follow the warnings in the instructions for integrated into digital radiology imaging systems such...
- Page 3 IEC 60601-1 interference at his own expense. standards. If in doubt, consult qualified Sony service You are cautioned that any changes or modifications not personnel.
- Page 4 Important EMC notices for use in medical environments • The UP-D711MD needs special precautions regarding EMC and needs to be installed and put into service according to the EMC information provided in the instructions for use. • Portable and mobile RF communications equipment, such as cellular phones, can affect the UP-D711MD.
- Page 5 Guidance and manufacturer’s declaration – electromagnetic immunity The UP-D711MD is intended for use in the electromagnetic environment specified below. The customer or the user of the UP-D711MD should assure that it is used in such an environment. IEC 60601 Compliance Immunity test Electromagnetic environment –...
- Page 6 Guidance and manufacturer’s declaration – electromagnetic immunity The UP-D711MD is intended for use in the electromagnetic environment specified below. The customer or the user of the UP-D711MD should assure that it is used in such an environment. IEC 60601 Compliance Immunity test Electromagnetic environment –...
- Page 7 Recommended separation distances between portable and mobile RF communications equipment and the UP-D711MD The UP-D711MD is intended for use in an electromagnetic environment in which radiated RF disturbances are controlled. The customer or the user of the UP-D711MD can help prevent electromagnetic interference...
-
Page 8: Table Of Contents
Table of Contents Getting Started Overview ..............9 Location and Function of Parts and Controls ..9 Front Panel ............9 Rear Panel ............10 Checking the accessories ........11 Connections ............11 Connecting to the USB Connector ....12 Connecting the DC Cable .........12 Installing the Printer Driver ......12 Paper ..............13 Paper You Can Use ...........13 Loading Paper in the Unit ........13... -
Page 9: Getting Started
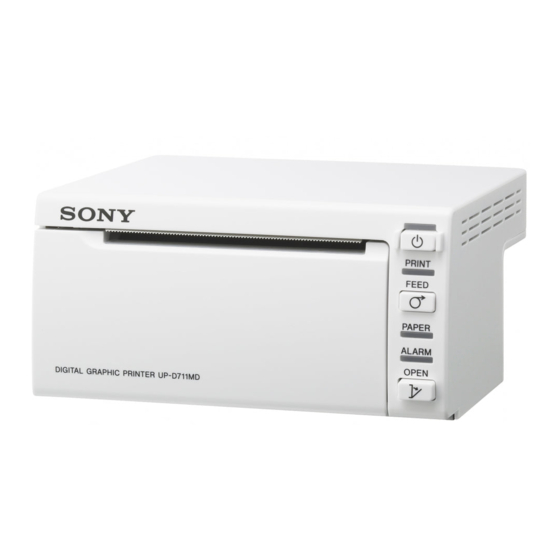
Getting Started Location and Function of Parts and Controls For more details, see the referenced page numbers Overview enclosed in parentheses ( ). This unit is a printer that prints images by heating a thermal head, according to the input image data, and Front Panel pressing the head against special thermal printing paper to print the image on the paper. -
Page 10: Rear Panel
Paper cutter Use of power supply devices other than the above may Cuts the paper as each image is printed. result in fire or electric shock. Class I devices should only be connected to a power About the lamp indicators outlet that is properly earthed to avoid the risk of electric The lamp lights or blinks to show the state of the printer. -
Page 11: Checking The Accessories
Checking the Connections accessories With the DC cable disconnected from the external power supply, connect the USB connecting cable between the Check the accessories. unit and computer, then connect the DC cable. For Thermal head cleaning sheet (1) details about the unit connection, refer to the manuals for the computer or other peripheral devices. -
Page 12: Connecting To The Usb Connector
Connecting to the USB Connector Note Do not allow the connected computer to enter Standby (Suspend) or Sleep mode while the printer is turned on, UP-D711MD as this may cause the printer to stop operating properly. (USB) connector Insert the connector with the (USB) mark facing up. -
Page 13: Paper
Paper Loading Paper in the Unit Use only Sony UPP-84S/84HG paper designed for use with this unit. High print quality cannot be guaranteed if When loading paper in the unit, be sure to note the any other paper is used with this unit, and such paper caution graphic symbols on the unit. -
Page 14: Loading Paper
Loading Paper Load the paper in the orientation shown in the diagram. Printing is not possible if the paper is reversed. Press the 1 On/standby switch to turn the unit on. The 1 On/standby lamp lights green. The PAPER lamp lights orange if no paper is loaded. -
Page 15: Operation
Cutting Paper Operation Hold the printer firmly, then pull the paper diagonally upwards and cut it as shown in the figure. Printing Before Starting a Print Job Always check the following points: • Unit connected correctly? (page 12) • Printer driver installed? (page 12) •... -
Page 16: Others
• Do not place the unit in a location subject to strong Others light, such as a halogen lamp. • Do not place the unit in an excessively hot or humid place. Avoid locations near radiators or air ducts, or places subject to direct sunlight or excessive dust, humidity, mechanical shock or vibration. -
Page 17: Cleaning The Cabinet
Press the OPEN button to open the door. Cleaning the Cabinet Note Before cleaning the printer, be sure to turn off the power and disconnect the power cord. When the cabinet becomes dirty When solvents such as benzene or thinner, or acid, alkaline or abrasive detergent, or chemical cleaning cloths are used on the printer surface, the surface finish may be damaged. -
Page 18: Cleaning The Platen Roller
Press and hold the FEED button until the PAPER Clean the platen roller gently using a soft cloth lamp lights. moistened with ethyl alcohol. The unit starts cleaning the thermal head. When the cleaning sheet stops and the alarm sounds, the cleaning is completed. Press the OPEN button to open the door and remove the cleaning sheet. -
Page 19: Specifications
Repeat steps 3 and 4 until the platen roller becomes Specifications clean. After the platen roller has been dried completely, Power Requirements close the door by pushing it. 12 V to 24 V DC Input Current 6 A to 3 A Operating Temperature 5 °C to 35 °C (41 °F to 95 °F) Operating Humidity... -
Page 20: Troubleshooting
• Jammed paper visible? tPress the OPEN button to open the door, remove the printout or • SONY WILL NOT BE LIABLE FOR DAMAGES the paper roll, and then gently OF ANY KIND INCLUDING, BUT NOT pull the jammed paper out of the LIMITED TO, COMPENSATION OR unit. -
Page 21: Lamp Indicators
If the error persists, press 1 On/standby switch to turn the unit off, then turn the external device off, disconnect the USB cable and the DC cable, then consult your Sony dealer. -
Page 22: Index
Index Cleaning cabinet 17 platen roller 18 thermal head 17 Connections 11 Getting Started 9 Lamp 21 Location and function of parts and controls front panel 9 rear panel 10 Overview 9 Paper feeding 15 loading 14 notes on storing and handling 13 paper you can use 13 Precautions on installation 16...
Need help?
Do you have a question about the UP-D711MD and is the answer not in the manual?
Questions and answers