Table of Contents
Advertisement
Advertisement
Table of Contents

Related Manuals for Anritsu Site Master S113B


Summary of Contents for Anritsu Site Master S113B
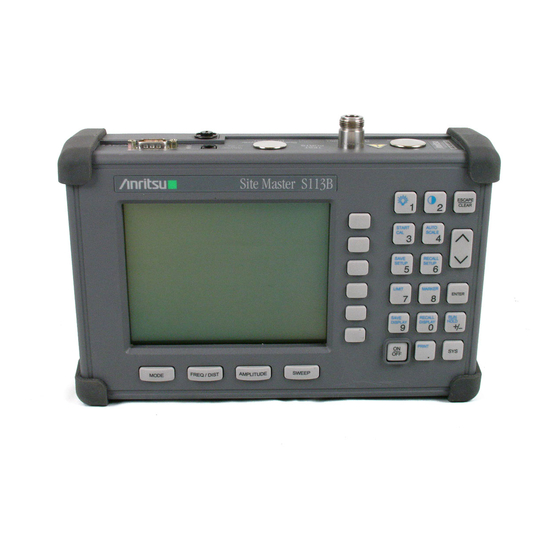
- Page 1 Anritsu S113B Site Master Specs Provided by www.AAATesters.com Site Master S113B, S114B, S331B, S332B, Antenna, Cable and Spectrum Analyzer User's Guide Hand-Held Tester for Transmission Lines and other RF Components Color Front Cover only P/N: 00986-00028...
- Page 3 WARRANTY The Anritsu product(s) listed on the title page is (are) warranted against defects in materials and workmanship for one year from the date of shipment. Anritsu's obligation covers repairing or replacing products which prove to be defec- tive during the warranty period. Buyers shall prepay transportation charges for equipment returned to Anritsu for warranty repairs.
-
Page 5: Table Of Contents
Table of Contents Chapter 1 - General Information Introduction ........1-1 Description . - Page 6 Saving a Display to Memory ......4-4 Recalling a Display From Memory ......4-4 SWR (Return Loss) and Cable Loss Measurement .
- Page 7 Fault Location Software ......5-5 Smith Chart Software ......5-5 Saving a Plot as a Windows Metafile or as a Spreadsheet File .
-
Page 8: Chapter 1 - General Information
Chapter 1 General Information Introduction This chapter provides a description, performance specifications, optional accessories, pre- ventive maintenance, and calibration requirements for the Site Master models S113B, S114B, S331B, and S332B. Throughout this manual, the term Site Master will refer to the models S113B, S114B, S331B, and S332B. -
Page 9: Options
· Option 5 — Add RF Wattmeter Power Monitor Optional Accessories · Anritsu Precision N (m) Open/Short/Load, 42 dB, Part No. OSLN50LF · Anritsu Precision N (f) Open/Short/Load, 42 dB, Part No. OSLNF50LF · Anritsu Precision N (m) Short/Open, Part No. 22N50 ·... -
Page 10: Performance Specifications
Chapter 1 · Armored Test Port Extension Cable, 3.0 meter, N (m) to N (m), Part No. 15NN50-3.0A · Armored Test Port Extension Cable, 5.0 meter, N (m) to N (m), Part No. 15NN50-5.0A · Armored Test Port Extension Cable, 1.5 meter, N (m) to 7/16 DIN (f), Part No. - Page 11 Chapter 1 General Information Table 1-1. Performance Specifications (1 of 2) Specifications are valid when the unit is calibrated at ambient temperature after a 5 minute warmup. Description Value Site Master: Frequency Range: S113B, S114B 5 to 1200 MHz S331B, S332B 25 to 3300 MHz Frequency Accuracy (RF Source Mode) 75 parts per million @ 25°C*...
- Page 12 Chapter 1 Table 1-2. Performance Specifications (2 of 2) Frequency Span S114B 0 Hz (zero span) 100 kHz to 1200 MHz S332B 0 Hz (zero span) 100 kHz to 3000 MHz Sweep Time 0.5 sec. Resolution Bandwidth 10 kHz, 30 kHz, 100 kHz, 1 MHz ,+/- 20% (-3 dB width) Video Bandwidth (Range –3 dB)
-
Page 13: Preventive Maintenance
Chapter 1 General Information Preventive Maintenance Site Master preventive maintenance consists of cleaning the unit and inspecting and clean- ing the RF connectors on the instrument and all accessories. Clean the Site Master with a soft, lint-free cloth dampened with water or water and a mild cleaning solution. -
Page 14: Calibration
Annual Verification Anritsu recommends an annual calibration and performance verification of the Site Master and the OSL calibration components by local Anritsu service centers. Anritsu service cen- ters are listed in Table 1-2 on the following page. The Site Master itself is self-calibrating, meaning that there are no field-adjustable compo- nents. - Page 15 Chapter 1 General Information Table 1-2. Anritsu Service Centers UNITED STATES CHINA KOREA ANRITSU COMPANY ANRITSU BEIJING SERVICE CENTER ANRITSU CORPORATION LTD. 685 Jarvis Drive Beijing Fortune Building #901 Daeo Bldg. 26-5 Morgan Hill, CA 95037-2809 416W, 5 Dong San Huan Bei Lu...
-
Page 16: Chapter 2 - Getting Started
The Nickel Metal Hydride (NiMH) Battery supplied with the Site Master is shipped in a discharged state. Before using the Site Master, the internal battery must first be charged for three hours, either in the Site Master or in the optional battery charger (Anritsu part num- ber: 2000-1029). -
Page 17: Battery Charge Indicator
A blinking red light indicates less than 13 VDC is being supplied to the charger stand. Check that the correct AC charger adapter is connected to the charger stand. If a battery fails to charge, contact your nearest Anritsu Service Center. You can charge the battery anytime. However, NiMH battery will last longer and perform better if allowed to completely discharge before recharging. -
Page 18: Discharging The Nimh Battery
· Use only Anritsu approved battery packs. · Recharge the battery only in the Site Master or in an Anritsu approved charger. · When the Site Master or the charger is not in use, disconnect it from the power source. - Page 19 Chapter 2 Getting Started · Temperature extremes will affect the ability of the battery to charge: allow the battery to cool down or warm up as necessary before use or charging. · Storing the battery in extreme hot or cold places will reduce the capacity and lifetime of the battery.
-
Page 20: Chapter 3 - Functions And Operations
The Site Master can also be powered by a 12.5 Vdc external source. The external source can be either the Anritsu AC-DC Adapter (P/N 40-115) or 12.5 Vdc Automotive Cigarette Lighter Adapter (P/N 806-62). Both items are standard accesso- ries. -
Page 21: Test Connector Panel
Power Serial RS232 DB9 interface to a COM port on a personal computer (for use with the Interface Anritsu Software Tools program) or to a supported printer. RF output, 50 W impedance, for reflection measurements. RF Out RF In RF input for spectrum analysis measurements. -
Page 22: Keypad Controls
Chapter 3 Functions and Operations Keypad Controls This section contains an alphabetical listing of the Site Master front panel keypad controls along with a brief description of each. More detailed descriptions of the major function keys follow. Turns the liquid crystal display (LCD) back-lighting ON or OFF. (Leaving back lighting off conserves battery power.) LCD Contrast adjust. - Page 23 Chapter 3 Functions and Operations Turns the Site Master on or off. When turned on, the system state at the last turn-off is restored. If the key is held down, the factory preset ESCAPE/CLEAR state is restored. PRINT Prints the current display to the selected printer via the RS232 serial port. RECALL Recalls a previously saved trace from memory.
- Page 24 Chapter 3 Functions and Operations SWEEP Displays the Sweep function soft key menu for the current operating mode. Displays the System menu softkey selections. Up/Down Increments or decrements a parameter value or chooses an item from a list Arrow Key which can then be selected with the key.
-
Page 25: Soft Keys
Chapter 3 Functions and Operations Soft Keys Each keypad key opens a set of soft key selections. Each of the soft keys has a correspond- ing soft key label area on the display. The label identifies the function of the soft key for the current Mode selection. - Page 26 Chapter 3 Functions and Operations MODE=DTF: FREQ/DIST AMPLITUDE SWEEP RESOLU- SOFTKEYS: TION SINGLE BOTTOM SWEEP LIMIT TRACE DTF AID ON/OFF MATH LIMIT EDIT LIMIT BEEP MORE LOSS PROP CABLE WINDOW BACK Figure 3-5. Distance to Fault Mode Soft Key Labels...
- Page 27 Chapter 3 Functions and Operations FREQ/DIST AMPLITUDE SWEEP MODE=SPECTRUM ANALYZER: SOFTKEYS: CENTER LEVEL SPAN SCALE LIMIT START ON/OFF HOLD FULL LIMIT CONT/ STOP EDIT SINGLE ZERO METHOD MEASURE BACK Figure 3-6. Spectrum Analyzer Mode Soft Key Labels...
- Page 28 Chapter 3 Functions and Operations FREQ/DIST Displays the frequency or distance menu depending on the measurement mode. Frequency Provides for setting sweep frequency end points when mode is selected. FREQ Menu Selected frequency values may be changed using the keypad or Up/Down arrow key.
- Page 29 Chapter 3 Functions and Operations NOTE: Using windowing: The theoretical requirement for inverse FFT is for the data to extend from zero frequency to infinity. Side lobes appear around a discontinuity due to the fact that the spectrum is cut off at a finite frequency. Windowing reduces the side lobes by smoothing out the sharp transitions at the beginning and end of the frequency sweep.
- Page 30 Chapter 3 Functions and Operations D i s t a n c e T o F a u l t - 1 0 - 1 5 - 2 0 - 2 5 - 3 0 R e t u r n L o s s ( d B ) - 3 5 - 4 0 - 4 5...
- Page 31 Chapter 3 Functions and Operations D i s t a n c e T o F a u l t - 1 0 - 1 5 - 2 0 - 2 5 - 3 0 R e t u r n L o s s ( d B ) - 3 5 - 4 0 - 4 5...
- Page 32 Chapter 3 Functions and Operations Choosing FREQ/DIST in Spectrum Analyzer mode causes the soft keys, below, to be dis- played and the corresponding values to be shown in the message area. ¾ Sets the center frequency of the Spectrum Analyzer display . En- CENTER ter a value using the Up/Down arrow key or keypad, press to accept,...
- Page 33 Chapter 3 Functions and Operations AMPLITUDE Displays the amplitude or scale menu depending on the measurement mode. Amplitude Provides for changing the display scale. Selected values may be changed using Menu the Up/Down arrow key or keypad. Choosing AMPLITUDE FREQ measurement modes causes the soft keys, below, to be displayed and the corresponding values to be shown in the message area.
- Page 34 Chapter 3 Functions and Operations SWEEP Displays the Sweep function soft key menu for the current operating mode. Sweep Menu Provides for changing the display resolution, single or continuous sweep, and access to the Trace Math functions. Choosing measurement modes causes the soft keys SWEEP FREQ below to be displayed.
- Page 35 Chapter 3 Functions and Operations MARKER Choosing MARKER causes the soft keys, below, to be displayed and the corre- sponding values to be shown in the message area. Selected frequency marker or distance marker values may be changed using the keypad or Up/Down arrow key.
- Page 36 Chapter 3 Functions and Operations Displays the System menu softkey selections. — Displays a second level of functions. OPTIONS — Displays a second level of functions. CLOCK — Start an instrument self test. SELF TEST STATUS — Displays instrument status. OPTIONS —...
-
Page 37: Power Monitor Menu
Chapter 3 Functions and Operations Power Monitor Menu Selecting from the Mode menu causes the soft keys, described below, POWER MONITOR to be displayed and the corresponding values shown in the message area. UNITS — Toggles between dBm and Watts. —... -
Page 38: Printing
Chapter 3 Functions and Operations Printing Printing is accomplished by selecting an available printer and pressing the print key as de- scribed below. Refer to the particular printer operating manual for specific printer settings. Printing a Screen Step 1. Connect the printer as shown in Figure 3-11. SEIKO PRINTER Site Master S332B... -
Page 39: Printer Switch Settings
Chapter 3 Functions and Operations Step 4. Press the soft key and select from the displayed menu of supported PRINTER printers. Step 5. Press the PRINT key. (Figure 3-13). PRINTER Site Master S332B ESCAPE CLEAR PRINTER START AUTO SCALE CHANGE DATE SAVE RECALL... -
Page 40: Symbols
Integrator Failure Lock fail indication. Check battery. (If the Site Master fails to lock with a fully charged battery, call your Anritsu Service Center.) When calibration is performed, the Site Master stores the ambient temper- ature. If the temperature drifts outside the specified range, this indicator will flash. -
Page 41: Error Codes
Ambient temperature is not within the specified operating range. If the RANGE temperature is within the specified operating range and the condition persists, call your Anritsu Service Center. Note: A listing of current Anritsu service centers is given in Table 1-2 , page 1-8. 3-22... -
Page 42: Range Errors
Chapter 3 Functions and Operations Range Errors A listing of Range Error messages is given in Table 3-3. Table 3-3. Range Error Messages (1 of 2) Error Message Description RANGE The start (F1) frequency is greater than the stop (F2) frequency. ERROR:F1 >... - Page 43 Chapter 3 Functions and Operations Table 3-3. Range Error Messages (2 of 2) Description Error Message CANNOT ZERO Attempting to perform a Power Monitor zero adjust function with an INPUT SIGNAL input of greater than –20 dBm. TOO HIGH POWER MONITOR Attempting to enter Power Monitor mode with no option 5 installed.
-
Page 44: Using The Soft Carrying Case
Using the Soft Carrying Case The soft carrying case has been designed such that the strap can be unsnapped to allow the case to be easily oriented horizontally; thus allowing the Anritsu controls to be more easily accessed (Figure 3-15). -
Page 45: Chapter 4 - Measurements
Chapter 4 Measurements Introduction This chapter provides a description of the Site Master measurement functions and examples of frequency domain, distance domain, and spectrum analysis measurements. Measurement Functions Site Master operation is divided into four measurement modes: frequency domain, distance domain, spectrum analysis, and power monitor. -
Page 46: Power On Procedure
Built-in energy conservation features allow battery life to be extended over an eight-hour workday. The Site Master can also be powered by a 12.5 Vdc external source. The external source can be either the Anritsu AC-DC Adapter (P/N 40-115) or 12.5 Vdc Automotive Cigarette Lighter Adapter (P/N 806-62) provided. -
Page 47: Selecting The Frequency Range
Chapter 4 Measurements Selecting the Frequency Range The following procedure selects the frequency range for the calibration. Step 4. Press the FREQ/DIST key. Step 5. Press the soft key. Step 6. Enter 2, 5 or a user-defined frequency using the key pad or the Up/Down arrow key. -
Page 48: Saving The Setup
Chapter 4 Measurements Saving the Setup Step 20. To save the configuration in one of the 10 available user setup locations, press SAVE SETUP and use the key pad or the Up/Down arrow key to select a loca- tion (1 - 10), then press ENTER Recalling a Setup The following procedure recalls a setup from memory. - Page 49 Chapter 4 Measurements Figure 4-2. Return Loss Measurement Mode Calibration Results Figure 4-3. SWR Measurement Mode Calibration Results NOTES: For best calibration results–compensation for all measurement system uncertainties–ensure that the Open/Short/Load is at the end of the test port or optional extension cable;...
-
Page 50: Swr (Return Loss) And Cable Loss Measurement
Site Master Model S113B, S114B, S331B, or S332B · Precision Open/Short, Anritsu 22N50 or Precision Open/Short/Load, Anritsu OSLN50LF · Precision Load, Anritsu SM/PL · Test Port Extension Cable, Anritsu 15NNF50-1.5A Device-Under-Test Specification Type Typical Loss @1.5m Return Loss 0.3 dB @300 MHz 0.4 dB @600 MHz ³... -
Page 51: Performing A Calibration
For best results, use a phase stable Test Port Extension Cable (see Optional Accessories). If you use a typical laboratory cable to extend the Anritsu test port to the device-under-test, cable bending subsequent to the Open/Short/Load cal- ibration will cause uncompensated phase reflections inside the cable. -
Page 52: Swr Or Return Loss Measurement
Chapter 4 Measurements SWR or Return Loss Measurement Step 15. Disconnect the Load and connect the test port extension cable to the Site Master test port. Step 16. Connect the Load to the open end of the test port extension cable as shown in Figure 4-4. -
Page 53: Setting The Markers
Chapter 4 Measurements Setting the Markers The following procedure sets the markers. Step 22. Press the MARKER key to call up the Markers menu. Step 23. Press the soft key to select the M1 marker function. Press the soft key EDIT and enter 5, 0, 0 using the keypad or Up/Down arrow key. -
Page 54: Cable Loss Measurement
Chapter 4 Measurements Cable Loss Measurement The following frequency domain measurement is an example of a Cable Loss measurement made over a selectable frequency range. Step 26. Disconnect the load from the end of the cable and replace it with a short. Step 27. - Page 55 Chapter 4 Measurements Step 36. Repeat steps 1 and 2 for marker M2. Set M2 to 900 MHz (Figures 4-7 depicts a Cable Loss measurement). Figure 4-7. Cable Loss Measurement Results NOTE: Refer to page 4-4 for instructions on saving and recalling a setup or display. 4-11...
-
Page 56: Dtf Measurement
Site Master Model S113B, S114B, S331B, or S332B · Precision Open/Short, Anritsu 22N50 or Precision Open/Short/Load, Anritsu OSLN50LF · Precision Load, Anritsu SM/PL · Test Port Extension Cable, Anritsu 15NNF50-1.5A Device-Under-Test Specification Type Typical Loss @1.5m 0.3 dB @300 MHz 0.4 dB @600 MHz 15NNF50-1.5A 0.86... -
Page 57: Performing A Calibration
For best results, use a phase stable Test Port Extension Cable (see Optional Accessories). If you use a typical laboratory cable to extend the Anritsu test port to the device-under-test, cable bending subsequent to the Open/Short/Load cal- ibration will cause uncompensated phase reflections inside the cable. -
Page 58: Dtf Measurement (Determining The Length Of The Cable)
Chapter 4 Measurements DTF Measurement (Determining the Length of the Cable) Step 15. Disconnect the Load and connect the test port extension cable to the Site Master test port. Step 16. Connect the Short to the open end of the test port extension cable. Setting the Amplitude Scale Step 17. - Page 59 Chapter 4 Measurements Figure 4-8. DTF - SWR Measurement Results (cable length) Figure 4-9. DTF - RETURN LOSS Measurement Results (cable length) 4-15...
-
Page 60: Dtf Measurement (Determining The Quality Of The Cable.)
Chapter 4 Measurements DTF Measurement (Determining the quality of the cable.) NOTE: If cable length measurement has not been done, calibration must be done be- fore determining the quality of the cable (steps 1-15). Step 24. Disconnect the Short and connect the Load to the test port extension cable Setting the Amplitude Scale Step 25. - Page 61 Chapter 4 Measurements Figure 4-10. DTF - SWR Measurement Results (cable quality) Figure 4-11. DTF - RETURN LOSS Measurement Results (cable quality) 4-17...
-
Page 62: Making Power Measurements
Chapter 4 Measurements Making Power Measurements Power measurement is accomplished using a broadband (1 MHz to 3000 MHz) RF detector, P/N 5400-71N50. The power monitor displays measured power in dBm or Watts. Entering Power Monitor Mode Step 1. Press the key. -
Page 63: Making A Measurement With The Spectrum Analyzer
Chapter 4 Measurements Making a Measurement with the Spectrum Analyzer Making a measurement with the Anritsu Site Master S114B and S332B is similar to using conventional spectrum analyzers. Users need simply to power-on and tune the Spectrum Analyzer to locate and display a signal on the screen. Once a signal is displayed the user can measure the signal input in four simple steps to determine the frequency and amplitude of the signal. -
Page 64: Set The Frequency Span
Chapter 4 Measurements Set the frequency span Step 9. Press the SPAN soft key. Step 10. Enter 1, 5 using the Up/Down arrow key or the keypad and press to set ENTER the span to 15 MHz (Figure 4-12). Figure 4-12. 15 MHz Frequency Span Setting the marker Step 11. -
Page 65: Set The Reference Level
Chapter 4 Measurements Figure 4-13. Activated normal marker Set the Reference Level Step 1. Press the key. AMPLITUDE LIMIT Step 2. Press REF LEVEL soft key and use the Up/Down arrow key or the keypad to en- ter -, 1, 0 (the peak value found above) to set the reference level to -10 dBm. Step 3. -
Page 66: Chapter 5 - Software Tools Program
Chapter 5 Software Tools Program Description The Site Master Software Tools program provides the means for transferring the measured trace, along with any applied markers and/or a limit, to the screen of an MS-DOS based personal computer (PC) running Windows 95/98/NT. Requirements The Site Master Software Tools program is a standard Windows program and will run on any computer that will run Windows 95/98/NT. - Page 67 Chapter 5 Software Tools Program Step 6. Choose Port Settings, then change to the following settings if necessary. Baud Rate: 9600 Data Bits: Parity: None Stop Bits: Flow Control: None Step 7. Choose and verify the COM Port Base Address and IRQ. Click Resource when done.
-
Page 68: Software Installation
The Site Master Software Tools program is a conventional Microsoft Windows program. Installation is similar to all other such programs. For users new to Windows, a detailed pro- cedure is given below. Step 9. Insert the Anritsu Site Master Software Tools For Windows disk in the CDROM drive. Step 10. Select under the Start menu. -
Page 69: Capture Multiple Traces To A Database
Chapter 5 Software Tools Program Capture multiple traces to a database Step 1. Connect the supplied cable as shown in Figure 5-2. Serial Interface Site Master S332B ESCAPE CLEAR START AUTO SCALE SAVE RECALL SETUP SETUP LIMIT MARKER ENTER COM port SAVE RECALL DISPLAY... -
Page 70: Program Operation
Chapter 5 Software Tools Program Program Operation The captured trace on the PC can be scaled and have its limit line, markers, and properties changed. (Click on the icon, or select under the Plot Properties Plot Properties View menu to make these changes.) The operation of the various menus that allow these opera- tions to be accomplished is straightforward. -
Page 71: Saving A Plot As A Windows Metafile Or As A Spreadsheet File
Chapter 5 Software Tools Program Saving a Plot as a Windows Metafile or as a Spreadsheet File Plots can be saved as Windows metafile (.wmf) or as a text file (.txt). The metafile may be imported into graphic programs and a text file can be imported into a spreadsheet program, but they cannot be reloaded into the Site Master Software Tools program. -
Page 72: Printing
Chapter 5 Software Tools Program Each cable/antenna tends to have a unique Distance-To-Fault (DTF) “Signature” because differing cable electrical lengths, cable types, dielectric thickness variations, and the posi- tions of components (connectors, adapters, and lightning arresters) will cause different re- flections at differing positions in the transmission line. -
Page 73: Appendix A Reference Data
Appendix A Reference Data Coaxial Cable Technical Data Table A-1 provides a standard listing of common coaxial cables along with their “Relative Propagation Velocity” and “Nominal Attenuation in dB/m @1000 MHz” values. Table A-1. Coaxial Cable Technical Data (1 of 2) Nominal Attenuation Relative Propagation Velocity (V Cable Type... - Page 74 Appendix A Reference Data Table A-1. Coaxial Cable Technical Data (2 of 2) Nominal Attenuation Relative Propagation Velocity (V Cable Type dB/m @ 1000 MHz LMR600 0.870 0.087 LMR900 0.870 0.056 LMR1200 0.880 0.044 LMR1700 0.890 0.033 HCC12-50J 0.915 0.042 HCC78-50J 0.915 0.042...
Need help?
Do you have a question about the Site Master S113B and is the answer not in the manual?
Questions and answers