Table of Contents
Advertisement
Quick Links
Advertisement
Table of Contents

Related Manuals for Balluff MATRIX VISION mvBlueGEMINI


Summary of Contents for Balluff MATRIX VISION mvBlueGEMINI
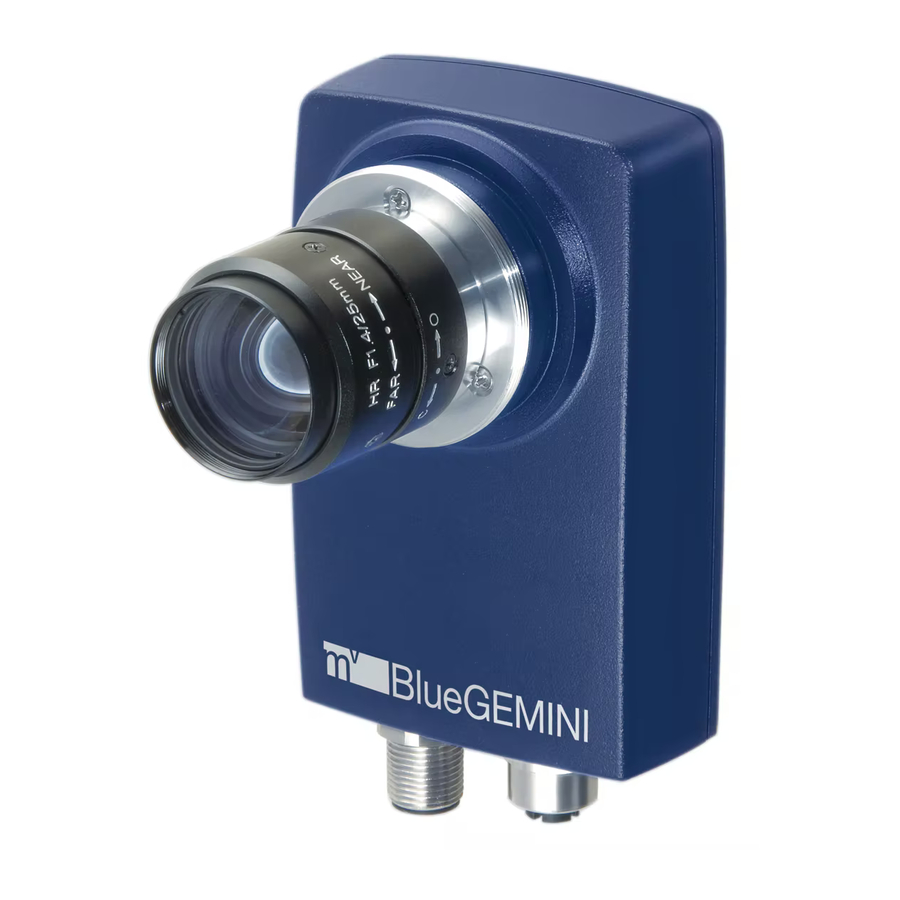
- Page 1 mvBlueGEMINI Technical Manual (EN) Version: 2.6 Date: 21.11.2019...
-
Page 2: Table Of Contents
mvBlueGEMINI Technical Manual (EN) v2.6 Table of contents Imprint ....................3 Address ..........................3 Revisions .................... 4 Notes, Warnings, Attentions ............. 5 Declaration of Conformity statement ................5 About this user manual ..............7 Proper use ..................8 Scope of delivery ................9 Accessories ........................ - Page 3 mvBlueGEMINI Technical Manual (EN) v2.6 First steps ..................18 Connect the smart camera .................... 18 Connect with the smart camera ..................18 8.2.1 If you wish to access ICS in another subnetwork ............20 How to continue? ......................20 Updates .....................
-
Page 4: Imprint
mvBlueGEMINI Technical Manual (EN) v2.6 Imprint 1.1 Address MATRIX VISION GmbH Talstrasse 16 DE - 71570 Oppenweiler Phone: +49-7191-9432-0 Fax: +49-7191-9432-288 Website: http://www.matrix-vision.de E-Mail: info@matrix-vision.de All material in this publication is subject to change without notice and is copyright MATRIX VISION GmbH. -
Page 5: Revisions
mvBlueGEMINI Technical Manual (EN) v2.6 Revisions Rev. Date Description 21.11.2019 • Updated minimum requirements for browsers. 18.07.2019 Keine Änderungen. 08.03.2019 • Updated "Resetting the smart camera". 25.10.2018 • Updated minimum requirements for browsers. 25.04.2018 No changes. 30.11.2017 • Moved chapters "Communication via RS232" and "Communication via UDP"... -
Page 6: Notes, Warnings, Attentions
mvBlueGEMINI Technical Manual (EN) v2.6 Notes, Warnings, Attentions NOTE A note indicates important information that helps you optimize usage of the products. WARNING A warning indicates how to avoid either potential damage to hardware or loss of data. ATTENTION An attention indicates a potential for property damage, personal injury, or death. All due care and attention has been taken in preparing this manual. - Page 7 mvBlueGEMINI Technical Manual (EN) v2.6 NOTES, WARNINGS, ATTENTIONS...
-
Page 8: About This User Manual
mvBlueGEMINI Technical Manual (EN) v2.6 About this user manual Purpose of This manual provides you with an overview of the smart camera's technical data this manual and the handling of the camera. For a quick summary of the product, we recommend that you read the manual in the specified order. -
Page 9: Proper Use
mvBlueGEMINI Technical Manual (EN) v2.6 Proper use The mvBlueGEMINI is a Smart Camera for creating inspection applications for different industrial areas. The camera provides a user interface for connecting the camera via your web browser over network. Furthermore you create and configure inspection programs with the user interface software "mvIMPACT Configuration Studio (mvIMPACT-CS)". -
Page 10: Scope Of Delivery
mvBlueGEMINI Technical Manual (EN) v2.6 Scope of delivery The scope of delivery includes the following components: • camera hardware • already installed configuration software mvIMPACT-CS (mvIMPACT Configuration Studio) For connecting the camera, you will need the following accessories: • a suitable power supply (via suitable power supply unit or via suitable M12 cable conntected to suitable power supply) •... -
Page 11: Technical Data
mvBlueGEMINI Technical Manual (EN) v2.6 Technical data 7.1 Dimensional drawing 12 mm TECHNICAL DATA... -
Page 12: Connections
mvBlueGEMINI Technical Manual (EN) v2.6 7.2 Connections 7.2.1 PWR/IO Manufacturer Binder Description Flanschstecker, M12 x 1, 10,5 mm Number of contacts Area M12-A Order code 09 3491 550 12 713/763 Figure 1 Power / IO connector Signal Color VIN_L+ brown VIN_L- blue RS232RX... - Page 13 mvBlueGEMINI Technical Manual (EN) v2.6 Signal Color SPSIO5 gray/pink red/blue 7.2.1.1 Pinning of the fitting cable KS-M12-PWR-IO Color white brown green yellow gray pink blue black violet gray/pink red/blue 7.2.1.2 Characteristics of the I/Os • SPSIO0 - SPSIO5 are digital in-/outputs. Each of them could be used as an input, output, trigger line or for controlling flash lights.
- Page 14 mvBlueGEMINI Technical Manual (EN) v2.6 Digital input Delay time typ. 3.3 µs Measurement conditions: V = 24V Digital output Delay time typ. 6.3 µs = 1MΩ Measurement conditions: V = 24V; R NOTE Delay time can increase with higher load. TECHNICAL DATA...
-
Page 15: Lan
mvBlueGEMINI Technical Manual (EN) v2.6 7.2.2 LAN Manufacturer Binder Description x-coded flange receptacle Number of contacts Area M12-D, M12-X Order code 99 3782 210 08 Serien 825/876 Figure 2 x-coded flange receptacle Signal MDX0+ MDX0- MDX1+ MDX1- MDX3+ MDX3- MDX2- MDX2+ NOTE The Ethernet signals are galvanically isolated from the camera electronics. -
Page 16: Led States
mvBlueGEMINI Technical Manual (EN) v2.6 7.3 LED states 7.3.1 PWR (Power) Color Description Green Power on Green flashing FPGA loaded. Once software is running: Software is in Configruation mode. Green permanent Inspection programm is running. Red flashing Software updating. WARNING DO NOT disconnect from power supply. -
Page 17: Image Sensor
mvBlueGEMINI Technical Manual (EN) v2.6 7.4 Image sensor CMOS Model G / C Resolution 1280 x 1024 MPixel Shutter type Pipelined / Global Sensor size 1/1.8" Unit cell size [µm] 5.3 x 5.3 Exposure time 10 µs - 1 s 10 bit (10-8 companding) →... -
Page 18: Hardware
mvBlueGEMINI Technical Manual (EN) v2.6 7.5 Hardware • FPGA/SoC with Dual-Core Cortex-A9 each with 800 MHz • 1 GB DDR3 SDRAM memory • 4 GB NAND Flash • Connections: o 1 GBit Ethernet LAN, o 6 digital in-/outputs (valid modes: input, output, trigger, flash) •... -
Page 19: First Steps
mvBlueGEMINI Technical Manual (EN) v2.6 First steps 8.1 Connect the smart camera Figure 3 Connector side • Connect the smart camera with the local network using the NET (2) connector . • Power the camera using the connector PWR/IO (1). •... - Page 20 mvBlueGEMINI Technical Manual (EN) v2.6 • Microsoft Edge version 40 and above NOTE JavaScript must be enabled in the web browser. NOTE If you connect the smart camera to your PC or laptop directly and cannot access the smart camera via the web broser, then you have to switch of your Wi-Fi or internet connection. Some internet service providers forward local address requests, which they do not know, to own addresses.
-
Page 21: If You Wish To Access Ics In Another Subnetwork
mvBlueGEMINI Technical Manual (EN) v2.6 Menu" → "System Settings" → "System" in the "mvIMPACT Configuration Studio (mvIMPACT-CS) User Manual"). • updates For updating the smart camera drop the update file in this folder (see chapter "Updates"). NOTE If you cannot access the shared folders, please have a look a the appendix "Troubleshooting Table"... -
Page 22: Updates
mvBlueGEMINI Technical Manual (EN) v2.6 Updates 9.1 Update software Periodically, we publish software updates on our website. The updates contain bug fixes, performance optimization, or functional extensions. NOTE We recommend updating the smart camera from time to time to derive maximum benefit from the smart camera. -
Page 23: Resetting The Smart Camera
mvBlueGEMINI Technical Manual (EN) v2.6 10 Resetting the smart camera 10.1 Making a factory reset In case you want to reset the smart camera, MATRIX VISION provides a factory reset script, which is available online. Factory reset means, that 1. all inspection programs and 2. -
Page 24: Resetting User Passwords
mvBlueGEMINI Technical Manual (EN) v2.6 3. Copy the factory reset script file into the folder updates. The reset process will start automatically, which can take up to 5 minutes. The LED status indicator "PWR (Power)" will flash red during the update process and the smart camera is not available. WARNING Do not switch off the smart camera during the reset process. -
Page 25: Appendix
mvBlueGEMINI Technical Manual (EN) v2.6 11 Appendix 11.1 Troubleshooting Table Error Cause Action No connection to Incorrect network Check and implement the measures defined in the the camera configuration "Notes on network connections" chapter. possible Alternative access to the camera (direct connection): 1. - Page 26 mvBlueGEMINI Technical Manual (EN) v2.6 Error Cause Action 4. Close the windows and restart the PC 5. Retry the previously described way No connection to Incorrect configuration If you still cannot get an connection to the camera as the camera of PC - described before, it could be possible, that your possible...
- Page 27 mvBlueGEMINI Technical Manual (EN) v2.6 Error Cause Action C:\Users\war>nbtstat -c Ethernet: Node IpAddress: [0.0.0.0] Scope Id: No names cache Local Area Connection: Node IpAddress: [169.254.93.40] Scope Id: [] NetBIOS Remote Cache Name Table Name Type Host Address Life [sec] -------------------------------- ---------------------------- GEMINI-NNNNNN <20>...
-
Page 28: Notes On Network Connections
mvBlueGEMINI Technical Manual (EN) v2.6 Error Cause Action Not every Connection to the FTP Possible approaches: inspection result server is too slow. 1. Export only reports without images. is transferred to 2. A faster connection to the FTP Server. the FTP server. 3. -
Page 29: Terms (Simplified Description)
mvBlueGEMINI Technical Manual (EN) v2.6 11.2.2 Terms (simplified description) • Switch is a simple distributor of network packages in a subnet. Both mDNS packages as well as packages directly on another computer are permitted. • Router separates subnets, i.e. a router can forward queries from one subnet to another subnet. NAT is generally used, i.e. - Page 30 mvBlueGEMINI Technical Manual (EN) v2.6 11.2.3.3 Server and client live in different IP subnets The mDNS packages are not transmitted beyond subnet boundaries as standard. The possible solutions are: • An additional (Linux) computer, which connects both subnets, i.e. has access to both subnets and is configured so that it forwards mDNS queries to the other subnet (=Avahi reflector), is required.
-
Page 31: Server And Client Separated By A Firewall
mvBlueGEMINI Technical Manual (EN) v2.6 11.2.4 Server and client separated by a firewall In this case, the server and client are in different IP subnets without loss of generality. 11.2.4.1 Static port forwarding The easiest access to a smart camera behind a firewall is established by port forwarding. In this case, the firewall forwards all queries on one of its ports to a specific smart camera port, i.e. - Page 32 mvBlueGEMINI Technical Manual (EN) v2.6 11.2.4.3 OpenVPN as a bridge between two subnets An OpenVPN server functions as a bridge and connects two subnets (see http://www.heise.de/netze/artikel/Bridge-Modus-224072.html https://docs.openvpn.net/how-to- tutorialsguides/virtual-platforms/site-to-site-layer-2-bridging-using-openvpn-access-server/). In this case, the two Open VPN servers must be configured so that they transmit direct network packages as well as mDNS broadcasts.
- Page 33 mvBlueGEMINI Technical Manual (EN) v2.6 Versions with OpenVPN bridge APPENDIX...
-
Page 34: Choice Of The Right Lens And Lighting System
mvBlueGEMINI Technical Manual (EN) v2.6 11.3 Choice of the right lens and lighting system 11.3.1 Find the correct lens Lenses are the starting point of the image processing signal path and shape the light information. The better the optics and the more time you've invested in this issue, the better the source material for the image processing. - Page 35 mvBlueGEMINI Technical Manual (EN) v2.6 • Aperture an opening through which light travels (narrow aperture = less light) a scale indicates the f-number (high value = narrow aperture) has direct impact on the imaging quality (determines resolution and depth of field). Calculate the image Using the formula for a single lens is the easiest way to calculate an image.
- Page 36 mvBlueGEMINI Technical Manual (EN) v2.6 Choice of the lens You can calculate further parameters using the following formula (the focal length with the given object distance, or with the given focal length the object distance): Figure 4 Focal length formula f = g * B / (G + B) If the size of the sensor (B), the size of the object (G), and the object distance (g) are known, you can calculate the needed focal length.
- Page 37 mvBlueGEMINI Technical Manual (EN) v2.6 Because single lenses have strong aberrations, several lenses are used to compensate these errors. The wavelength of the light has a great influence on the image. For each wavelength, the image quality is good and/or is sharp in different spots. By the use of the mentioned corrections with several lenses, it is tried to consolidate these levels.
- Page 38 mvBlueGEMINI Technical Manual (EN) v2.6 e = g + h + b h equals 0 with a single lens. Figure 6 Setting level The parameter h is usually not known. With lenses, normally used in combination with the mvBlueGEMINI, h is usually very small. For this reason, the formula without h is used in test setup concepts.
- Page 39 mvBlueGEMINI Technical Manual (EN) v2.6 The resolution - a little physics Actually, you have to consider the wavelength of the light, because the light makes the image. The wavelength of the visible light is between 0.4 µm and 0.6 µm. The smallest imaged point results from the aperture which will never be smaller than 0.5 µm.
-
Page 40: Find The Correct Lighting System
mvBlueGEMINI Technical Manual (EN) v2.6 11.3.2 Find the correct lighting system Besides optics, the illumination is an important point, which is critical for good results in the image processing. The golden rule is: create contrast. A lighting system can be homogeneous or structured. Following table shows the effects and the characteristics of lighting systems: Effects Light specifications... - Page 41 mvBlueGEMINI Technical Manual (EN) v2.6 11.3.2.1 Direction of the light Figure 7 Direction of the light Source: https://wiki.zimt.uni- siegen.de/fertigungsautomatisierung/index.php/Beleuchtungstechniken_f%C3%BCr_die_industriell e_Bildverarbeitung According to the direction, there are different possible uses: Direction Angle Applications Specialty • • Background Bright transparent and opaque as well as uniformly bright, high- lighting field...
- Page 42 mvBlueGEMINI Technical Manual (EN) v2.6 Direction Angle Applications Specialty • • also suitable for rough, poorly possible with coaxial mirror reflecting surfaces lighting • • Dark emphasizing shapes, scratches, difficult with dirt field cracks, etc. • determines both, engraved and raised structures •...
- Page 43 mvBlueGEMINI Technical Manual (EN) v2.6 11.3.2.3 Further factors Further factors of lighting systems are: • wavelength o color • type of lamp o incandescent lamp o discharge lamp o LED • long-term behavior o aging o pollution • short-term behavior o AC/DC supply o radio-frequency operation o flash...
Need help?
Do you have a question about the MATRIX VISION mvBlueGEMINI and is the answer not in the manual?
Questions and answers