Advertisement
Available languages
Available languages
is a pending or registered trademark used under license from Electrolux Home
Products, Inc.
For service assistance and product information, please call: 1-800-968-9853.
Curtis International Ltd.
7045 BECKETT DRIVE, UNIT 15, MISSISSAUGA, ON, L5S 2A3 www.curtisint.com
Made In China
USER MANUAL
EFMIS155
BEVERAGE
CENTER
4.4 Cu.Ft.
125 L
Advertisement
Chapters

Related Manuals for Frigidaire EFMIS155


Summary of Contents for Frigidaire EFMIS155
- Page 1 Electrolux Home Products, Inc. For service assistance and product information, please call: 1-800-968-9853. Curtis International Ltd. 7045 BECKETT DRIVE, UNIT 15, MISSISSAUGA, ON, L5S 2A3 www.curtisint.com Made In China USER MANUAL EFMIS155...
-
Page 2: Table Of Contents
TABLE OF CONTENTS PRODUCT INTRODUCTION............1 INSTALLATION................2-8 DEFROSTING..................9 CLEANING AND MAINTENANCE..........9 LED LIGHT REPLACEMENT............10 TROUBLESHOOTING..............11 SAFETY WARNING..............12-13 PRODUCT SPECIFICATIONS........... 14... -
Page 3: Product Introduction
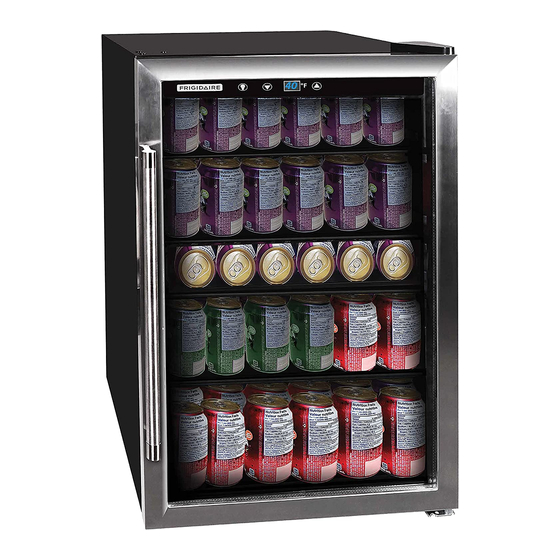
PRODUCT INTRODUCTION Adjustable Electronic Thermostat with Digital Display LED Interior Light Control LED Interior Light Adjustable Tempered Glass Shelves Adjustable Front Leveling Legs Reversible Double Pane Glass Door with Stainless Steel Frame Stainless Steel Handle... -
Page 4: Installation
INSTALLATION STOP Follow the Instructions Below Prior to Using the Beverage Center ! Do not plug the beverage center into a power outlet until it has been resting in its upright position for at least six (6) hours. If the beverage center has been laid on its side, placed upside down or tilted more than 45°... - Page 5 INSTALLATION POWER SUPPLY Fig. A This beverage center is equipped with a 115V/60Hz single phase motor. Do not use a ground-fault circuit interrupter (GFCI) outlet to connect the unit. (Fig. A.) The power plug is a standard grounded three-prong non-polarized flush mount, RESET which allows for easier connection to power outlets.
- Page 6 INSTALLATION HANDLE INSTALLATION TOOLS NEEDED: Phillips screwdriver #2. IMPORTANT: NEVER LAY THE BEVERAGE CENTER ON ITS BACK. The compressor and motor components are installed at the back of the unit and may easily be damaged if the beverage center is placed on its back. IMPORTANT: DO NOT USE STAINLESS STEEL HANDLE TO MOVE OR LIFT THE UNIT.
- Page 7 INSTALLATION DOOR REVERSAL INSTRUCTIONS TOOLS NEEDED: Phillips screwdriver #2 or 5/16" (8 mm) socket tool and thin screwdriver. The beverage center is shipped with the door hinge brackets attached on the right side. The door may be reversed to allow opening from the left side. If you plan on reversing the door hinges, DO NOT plug the beverage center into the power outlet.
- Page 8 INSTALLATION DOOR REVERSAL INSTRUCTIONS Remove screw and re-insert into the opposite side Remove Metal Switch Axel Base Bracket Insert Position With the unit on its side, remove the bottom metal Gently place the beverage on opposite side to base bracket with nylon washer. Unscrew the axle complete the door reversal.
- Page 9 INSTALLATION USING YOUR BEVERAGE CENTER Startup Connect the power cord to a standard wall outlet. Do not use a GFCI outlet to connect the unit (see page 4). After connection, you will immediately hear a short beep. Temperature - Adjustable Thermostat Control The default temperature is 43ºF.
- Page 10 INSTALLATION LED LIGHT Press the button to turn the LED light on and off. To enhance the lifespan of the LED light and conserve energy, it is recommended to predominantly utilize the light for loading and selecting beverages. SHUTDOWN If the beverage center will not be in use for a long period of time, disconnect it from the power outlet, clean inside thoroughly and leave the door open to prevent mildew.
-
Page 11: Defrosting
DEFROSTING Frost may develop on the interior back panel of the unit when the temperature setting is very low and the unit is not fully stocked with beverages. The presence of frost may force the unit to run continuously and thus increase internal temperature. To defrost the beverage center: 1. -
Page 12: Led Light Replacement
LED LIGHT REPLACEMENT TOOLS NEEDED: Phillips screwdriver and flashlight to illuminate the work area. If the LED light is not illuminating, the light most likely needs to be replaced. Replacement LED lights may be purchased from Customer Service NOTE: The replacement light is NOT available from home LED Light improvement, hardware or discount stores. -
Page 13: Troubleshooting
TROUBLESHOOTING Problem Recommended Adjustment The beverage center doesn’t work. • Check for power failure. • Verify unit is plugged into a standard power outlet and not a GFCI outlet (see page 4). • Check if control panel is on. The beverage center is too cold. •... -
Page 14: Safety Warning
SAFETY WARNINGS Before you use your beverage center, please read this owner’s manual carefully. Use this appliance only for its intended purpose as described in this owner’s manual. DANGER - Risk of child entrapment. Before you throw away your old refrigerator or freezer: •... - Page 15 SAFETY WARNINGS REMOVE BEVERAGE CENTER DOOR BEFORE DISPOSING OF UNIT. SUFFOCATION HAZARD: The shelves should remain in the beverage center for disposal. This deters children from climbing into the unit, becoming trapped and potentially suffocating. All safety precautions must be followed.
-
Page 16: Product Specifications
EFMIS155 PRODUCT SPECIFICATIONS CAPACITY OF BEVERAGE CENTER IN CU FT:4.4 CU FT SHELF MATERIAL:GLASS TEMPERATURE CONTROL TYPE:ELECTRONIC TEMPERATURE CONTROL TEMPERATURE RANGE IN FAHRENHEIT ANDCELSIUS:40℉-61℉/4℃-16℃ DIMENSIONS DEPTH (EXCLUDING HANDLES)(IN):21.07 DEPTH (INCLUDING HANDLES)(IN):22.72 DEPTH (LESS DOOR) (IN):19.02 ... - Page 17 Electrolux Home Products, Inc. Pour obtenir assistance et information appelez: 1-800-968-9853. Curtis International Ltd. 7045 BECKETT DRIVE, UNIT 15, MISSISSAUGA, ON, L5S 2A3 www.curtisint.com Fabriqué En Chine MANUEL DE L’UTILISATEUR EFMIS155...
- Page 18 TABLE OF CONTENTS INTRODUCTION DU PRODUIT........... INSTALLATION................2-9 DEGIVRAGE..................10 NETTOYAGE ET ENTRETIEN........... REMPLACEMENT LED LIGHT..........DEPANNAGE................12 AVERTISSEMENT DE SECURITE........13-14 CARACTÉRISTIQUES DU PRODUIT........15...
- Page 19 PRODUCT INTRODUCTION Thermostat électronique réglable avec affichage numérique Commande de lumière intérieure LED Lumière intérieure LED Étagères en verre trempé réglables Pattes de nivellement avant réglables Porte vitrée réversible double vitrage avec cadre en acier inoxydable Poignée en acier inoxydable...
-
Page 20: Installation
INSTALLATION STOP Suivez les instructions ci-dessous avant d’utiliser le centre de boissons! Ne branchez pas le centre de boissons dans une prise de courant jusqu’à ce qu’il se repose en position verticale pendant au moins six (6) heures. Si le centre de boissons a été posé sur le côté, placé à l’envers ou incliné à plus de 45 °... - Page 21 INSTALLATION POWER SUPPLY Ce centre de boissons est équipé d’un moteur monophasé 115V/60Hz. Fig. A N’utilisez pas de sortie de disjoncteur de défaut de terre (GFCI) pour raccorder l’ appareil. (Fig. A.) RESET La prise d’alimentation est un montage encastré standard à trois broches non TEST polarisé, qui permet une connexion plus facile aux prises de courant.
- Page 22 INSTALLATION INSTALLATION DE LA POIGNÉE OUTILS NÉCESSAIRES: Tournevis cruciforme #2. IMPORTANT: NE POSEZ JAMAIS LE CENTRE DE BOISSONS SUR SON DOS. Le compresseur et les composants du moteur sont installés à l’arrière de l’appareil et peuvent facilement être endommagés si le centre de boissons est placé sur son dos. IMPORTANT: NE PAS UTILISER DE POIGNÉE EN ACIER INOXYDABLE POUR DÉPLACER OU SOULEVER L’APPAREIL.
- Page 23 INSTALLATION OUTILS NÉCESSAIRES: Tournevis cruciforme #2 ou outil à douille de 8 mm (5/16 po) et tournevis mince à fiathead. Le centre de boissons est livré avec les supports de charnière de porte attachés sur le côté droit. La porte peut être inversée pour permettre l’ouverture du côté gauche. Si vous prévoyez d’inverser les charnières de la porte, ne branchez pas le centre de boissons dans la prise de courant.
- Page 24 INSTALLATION Remove screw and re-insert into the opposite side Retirer le métal Commutateur Axel Support de base Insérer position Placez délicatement la boisson sur le côté opposé pour Avec l ’ unité sur le côté, retirez le support de base terminer l’inversion de la porte.
- Page 25 INSTALLATION UTILISATION DE VOTRE CENTRE DE BOISSONS Branchez le cordon d’alimentation à une prise murale standard. N’utilisez pas de prise GFCI pour raccorder l’appareil (voir page 4). Après la connexion, vous entendrez immédiatement un bip court. Température - Commande de thermostat réglable La température par défaut est de 43ºF.
- Page 26 INSTALLATION SCHÉMA DE CHARGEMENT Bidons standard de12onces Le centre de boissons accueille ROW 1 126 boissons (bidons standard 30 cans (Upright) de 12 onces). Pour accueillir toutes les ROW 2 boissons 126, positionner les 30 cans (Upright) étagères en verre et charger ROW 3 les boissons comme illustré: 18 cans (Laying Down)
- Page 27 INSTALLATION LUMIÈRE LED Appuyez sur la touche bouton pour allumer et éteindre le voyant LED. Pour améliorer la durée de vie de la lumière LED et économiser l’énergie, il est recommandé d’ utiliser principalement la lumière pour le chargement et la sélection des boissons. FERMETURE Si le centre de boissons ne sera pas utilisé...
-
Page 28: Degivrage
Dégivrage Le givre peut se développer sur le panneau arrière intérieur de l’appareil lorsque le réglage de la température est très faible et que l’appareil n’est pas entièrement approvisionné en boissons. La présence de givre peut forcer l’appareil à fonctionner continuellement et ainsi augmenter la température interne. - Page 29 REMPLACEMENT DE LA LUMIÈRE LED OUTILS NÉCESSAIRES: Tournevis Phillips et lampe de poche pour éclairer la zone de travail. Si la lumière LED n’est pas éclairante, la lumière doit probablement être remplacée. NOTE: La lumière de remplacement n’est pas disponible de l’amélioration de l’ LED Light habitat, le matériel ou les magasins discount.
-
Page 30: Depannage
Dépannage Problème Ajustement recommandé Le centre de boissons ne fonctionne pas. • Vérifiez la coupure de courant. • Vérifiez que l’appareil est branché à une prise de courant standard et non à une prise GFCI (voir page 4). • Vérifiez si le panneau de commande est allumé. Le centre de boissons est trop froid. - Page 31 Avertissements de sécurité Avant d’utiliser votre centre de boissons, veuillez lire attentivement ce manuel de l’ utilisateur. Utilisez cet appareil uniquement pour son usage prévu, comme décrit dans ce manuel d’utilisation. DANGER - Risque de piégeage des enfants. Avant de jeter votre ancien réfrigérateur ou congélateur: •...
- Page 32 Avertissements de sécurité • PRUDENCE – Risque d’incendie ou d’explosion. Réfrigérant inflammable utilisé. Consultez le manuel de réparation/guide du propriétaire avant d’essayer de réparer ce produit. Toutes les précautions de sécurité doivent être respectées. • PRUDENCE – Risque d’incendie ou d’explosion dû à la perforation de tuyaux frigorifiques; Suivez attentivement les instructions de manipulation.
-
Page 33: Caractéristiques Du Produit
EFMIS155 CARACTÉRISTIQUES DU PRODUIT CAPACITÉ DU CENTRE DE BOISSONS EN FT CU:4.4 CU FT MATÉRIEL D’ÉTAGÈRE:VERRE TYPE DE CONTROLE DE TEMPERATURE:CONTRÔLE ÉLECTRONIQUE DE LA TEMPÉRATURE PLAGE DE TEMPÉRATURE EN FAHRENHEIT ET CELSIUS:40℉-61℉/4℃-16℃ DIMENSIONS PROFONDEUR (À L’EXCLUSION DES POIGNÉES)(IN):21.07 ...
Need help?
Do you have a question about the EFMIS155 and is the answer not in the manual?
Questions and answers
Do I push the up or down arrow to lower temp. Display is unreadable