Table of Contents
Advertisement
Quick Links
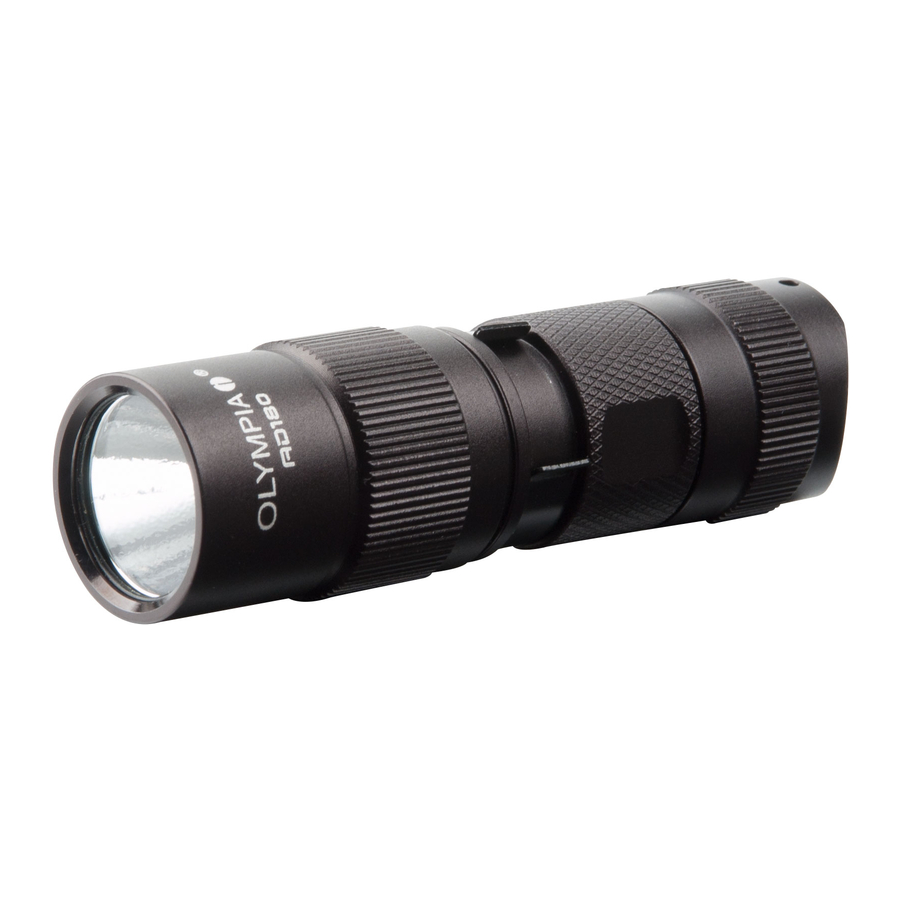
Olympia AD180
Cree® XP-G LED
Flashlight
User Guide
Congratulations on your purchase of the
Olympia AD180 Cree® XP-G LED high-
performance flashlight. This product is designed
to provide you with the best possible functionality.
Clip
The AD180 utilizes Cree
is geared for optimum brightness and efficiency.
It's constructed in aircraft-grade aluminum with
premium Type II hard anodized, anti-abrasive
finish. The lightweight, compact design makes
it a functional light for multiple uses including
hunting, hiking, camping, caving, general
Head
household use, recreational activities, rugged
sports or emergency situations. Please take a
few moments to read this user guide to ensure
that you get the best performance and years of
trouble-free service.
Clip
Product Description
Clip
Head
Head
Battery Installation
1. Unscrew the tail switch cap and insert
1xCR123 (non-rechargeable) / 1x16340
Clip
(rechargeable) *battery. The (+) terminal on the
batteries should face toward the flashlight's
head.
Clip
2. Replace the tail switch cap and be sure to
tighten snugly, but do not over tighten as this
could strip the threads in the cap. Turn on the
flashlight as indicated in any of the options
Head
listed in the table that follows. Note: If the tail
cap is not tightened snugly; the flashlight
Body
Head
will not turn on.
3. When the battery life is nearly depleted, your
flashlight will blink to indicate new batteries
are needed.
Clip
Head
*Non-rechargeable battery included
Flashlight Operation
Your Olympia AD180 Cree® XP-G LED high-
performance flashlight has a push-button tail
switch for on/off operation and is equipped with
1) Momentary and 2) Continuous light options.
It also has 5 light modes to suit your varied
needs. See table instructions to access these
functionalities:
Tail
LED technology that
®
Cap
Switch
Body
Lanyard
Hole
Tail
Cap
Switch
Body
Body
Lanyard
Hole
Tail
Cap
Switch
Body
Lanyard
Hole
Tail
Cap
Switch
Body
Lanyard
Hole
Momentary-on
Lighting
Continuous
Lighting
Lighting Modes
High Beam
Mid Beam
Low Beam
Strobe
SOS
Memory function
Tail
Cap
Your Olympia AD180 Cree® XP-G LED flashlight
Switch
automatically memorizes the last light setting/
mode used when the flashlight next is turned
on. i.e., after being in any one of the five light
settings (HighMiddleLowStrobeSOS) for
3 seconds, the last one used will be memorized.
Lanyard
Hole
Maintenance and Precautions
1. Do not disassemble the sealed head. Doing
so can cause damage to the flashlight and will
void the warranty.
2. Use high-quality batteries or you run the risk
of the flashlight being damaged by electrolyte
Tail
leakage or battery breakage.
Cap
3. If the flashlight will not be used for a long time,
Switch
remove the batteries to avoid damage caused
from battery leakage.
4. Lubricate the O-rings regularly using a
Q-tip
®
or petroleum jelly to the contacts to prevent
Lanyard
Hole
corrosion. Doing so will keep the flashlight
properly sealed against water. If the O-rings are
damaged after prolonged use, replace them.
5. Clean the flashlight contacts periodically
especially if the light flickers or does not light
up. There are different reasons for a flickering or
non-working light:
A: The batteries may need to be replaced.
Solution: Replace old/defective batteries with
new ones (be sure to double check correct
installation of + and - terminals).
B: The threads, PCB board contact or other
contacts are dirty.
Solution: Use a Q-tip
of alcohol to clean the contact points.
If the above methods do not work, please refer to
the warranty policy listed in this user guide.
Warning
!
The AD180 is a high-intensity lighting device and
capable of causing eye damage. Please avoid
shining the light directly into the eyes.
Lighting Operation Modes
Press the push-button tail switch
half-way to activate the light
Press the tail switch push-button to
completely turn on the flashlight.
The light will stay on until the push-
button is turned off.
There are five types of light output:
HighMiddle
LowStrobeSOS
Press the tail push-button to switch
Accessing the 5 Lighting Modes
Press the push-button tail
Press the push-button tail
Press the push-button tail
switch 3 times
Press the push-button tail
switch 4 times
Press the push-button tail
switch 5 times
. Apply a small dab of silicone grease
to apply a tiny amount
®
momentarily.
to each mode
switch once
switch twice
Advertisement
Table of Contents

Related Manuals for Olympia AD180 Cree XP-G LED


Summary of Contents for Olympia AD180 Cree XP-G LED
- Page 1 Memory function trouble-free service. Tail Clip Your Olympia AD180 Cree® XP-G LED flashlight Switch automatically memorizes the last light setting/ Product Description mode used when the flashlight next is turned Tail Clip on.
- Page 2 WORK PERFORMED SERVICE CENTERS NOT AUTHORIZED BY GIANT Package includes INTERNATIONAL LTD. ARE NOT COVERED. • 1 Olympia AD180 Cree® XP-G LED Obtaining Service • 1 Lanyard • 1 Belt clip To obtain warranty service, call 1-866-537-0384 • 2 spare O-rings or email us at support@giantintl.com in the USA...
Need help?
Do you have a question about the AD180 Cree XP-G LED and is the answer not in the manual?
Questions and answers