Table of Contents
Advertisement
Quick Links
1. Product Overview
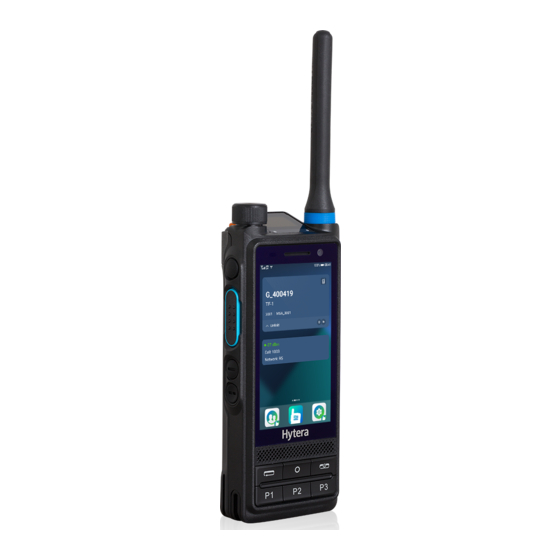
1.1 Product Layout
1.2 Programmable Keys
For enhanced convenience, the product provides the programmable keys including SK2, SK3, TK, P1,
P2, and P3. The TK is programmed with Emergency feature by default (short press: Emergency On;
long press: Emergency Off).
To set up other shortcuts, tap
, and then go to Settings > Programmable keys.
Advertisement
Table of Contents

Related Manuals for Hytera PTC680FXB1


Summary of Contents for Hytera PTC680FXB1
- Page 1 1. Product Overview 1.1 Product Layout 1.2 Programmable Keys For enhanced convenience, the product provides the programmable keys including SK2, SK3, TK, P1, P2, and P3. The TK is programmed with Emergency feature by default (short press: Emergency On; long press: Emergency Off). To set up other shortcuts, tap , and then go to Settings >...
-
Page 2: Before Use
2. Before Use 2.1 Attaching the Antenna Do not hold the terminal by the antenna and swing it. This may affect the antenna performance and shorten the life span of the antenna. (Optional) Place the color ring (for identification purpose) on the antenna connector. Put the antenna on the antenna connector. -
Page 4: Attaching The Belt Clip
2.3 Attaching the Belt Clip Align the rails on the belt clip with the grooves on the battery. Press the belt clip downwards into place. To remove the belt clip, press and hold the spring when sliding the belt clip out of the grooves on the battery. -
Page 5: Charging The Battery
2.5 Charging the Battery Use the approved charger to charge the battery. Read the Safety Information Booklet before charging. The remaining lithium-ion battery power is limited to 30% pursuant to the new lithium battery shipment regulation approved by International Air Transport Association (IATA). Before initial use, fully charge the battery to ensure optimum performance. -
Page 6: Basic Operations
3. Basic Operations 3.1 Turning the Terminal On or Off To turn the terminal on, press and hold the Power/End Call key until the splash screen appears. To turn the terminal off, do as follows: 1. Press and hold the Power/End Call key until the power-off selection screen appears. 2. -
Page 7: Status Indications
3.4.2 Status Indications 3.4.2.1 LCD Icons Type Main Screen Terminal Status Screen 3G/4G cellular network is available. Network and The terminal is connected to the WLAN network. signal The number of bars indicates the signal strength of the BB network. - Page 8 Type Main Screen Terminal Status Screen The NB network is turned off. In direct mode (DMO): The terminal is in standby state. In trunking mode(TMO): The terminal detects no signal. The number of bars indicates the signal strength of the NB network.
-
Page 9: Led Indications
3.4.2.2 LED Indications LED Indicator 1 LED Indicator Terminal Status Flashes green rapidly The terminal is being turned on. Flashes orange slowly The terminal is registering in TMO. Flashes green slowly The terminal is standby after registering. Glows red The terminal is transmitting. The calling terminal is establishing a HOOK call in TMO. -
Page 10: Control Center
3.4.4 Control Center The control center allows you to adjust the brightness, and turn on or off the handy features. To access the control center, swipe up from the bottom edge of any screen. To edit the switches of features displayed on the control center, press 3.4.5 Notification Center The notification center allows you to view notifications and search for apps, contacts or messages. -
Page 11: App Center
3.4.6 APP Center To access apps, swipe right from the left edge of the home screen, and then swipe up or down to view all apps. 3.4.7 Locking or Unlocking the Screen When the screen is not in use, you can lock it to avoid unintended operations and increase battery life. When the screen is locked, you can still initiate emergency calls, answer calls, and receive messages and notifications. - Page 12 In NB&BB mode, both the top screen and main screen are on. The terminal can access both private and public network services. In NB mode, only the top screen is on. The terminal accesses only private network services. The NB mode includes DMO and TMO.
-
Page 13: Call Services
4. Call Services 4.1 Private Network Call 4.1.1 Group call Initiating a Group Call You can make a group call through one of the following ways: Preset Contact Press the Smart Knob. Rotate the knob to select the required talk group. Press and hold the PTT key. -
Page 14: Receiving An Individual Call
Contact List > Private. Tap the required individual contact. Press and hold the PTT key. Manual Dialing Enter the required individual number. Select "Private". Press and hold the PTT key. In the dialing interface, you can also enter the required individual number, and then press and hold the PTT key to initiate the call. -
Page 15: Emergency Call
4.1.3 Emergency Call In case of an emergency, you can initiate an emergency call to ask for help from other personnel or the control center. An emergency call has the highest priority and can disrupt other calls with lower priority. To initiate an emergency call, do one of the following: ... - Page 16 4.2 Public Network Call (Phone Call) 4.2.1 Initiating a Phone Call You can make a phone call through one of the following ways: Contact List 1. Tap > Private. 2. Tap the required phone contact. 3. Tap Manual Dialing Enter the required phone number.
- Page 17 When the screen is locked with password or pattern, do as follows: 1. Tap and drag it to the lateral oblique direction. 2. Tap "Emergency" and enter the emergency phone number. 3. Tap...
-
Page 18: Message Services
5. Message Services The Message feature allows you to exchange the text messages, status messages and multimedia messages (MMS) with other terminals through Status Message (TMO only): frequently used messages predefined by your dealer and not editable. The terminal sends status message over the NB network to a private network number. ... - Page 19 To add the message to the favorite list, tap More > Favorite. To view the favorite messages, tap "My favorites". To view the message details such as message type and sending time, tap More > View details. This device complies with Part 15 of the FCC Rules. Operation is subject to the following two conditions: (1) this device may not cause harmful interference, and (2) this device must accept any interference received, including interference that may cause undesired operation.
Need help?
Do you have a question about the PTC680FXB1 and is the answer not in the manual?
Questions and answers