
Subscribe to Our Youtube Channel
Related Manuals for Omnicomm LLS 20230


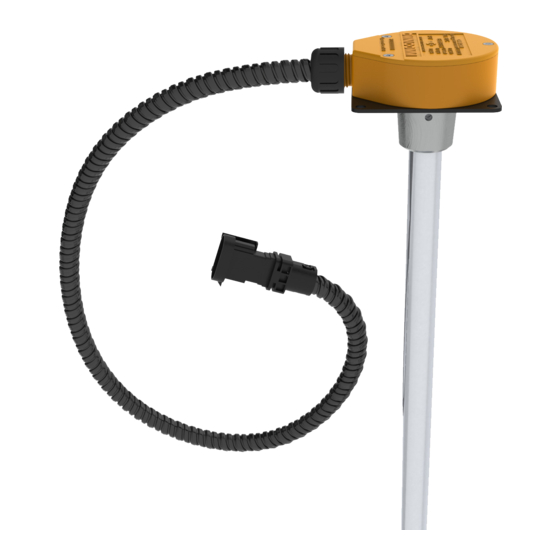
Summary of Contents for Omnicomm LLS 20230
- Page 1 Omnicomm LLS 20230 Fuel Tankers Installation Guide IG LLS 20230: Installation, Launch, Setup, and Control Guide 17.04.2019...
-
Page 2: Table Of Contents
Product Cutting to Match the Specific Fuel Tank Setting the Product with Omnicomm Configurator Empty/Full Calibration Configuring General Settings Installation and Deinstallation Product Installation Installing BIS 20240 (for LLS 20230) Connection Requirements for Cable Laying Installing the Fuse Calibrating Fuel Tank Commissioning of Installed and Connected Equipment... - Page 3 Appendix J. Sealants Recommended for Installation of the LLS Fuel Level Sensors Appendix K. Measuring Part Strengthening for LLS Fuel Level Sensors Appendix L. Installing LLS 20230 Fuel Level Sensors 3 to 6 m in Length Appendix M. Strengthening Flange for LLS 20230 Fuel Level Sensor...
-
Page 4: General
General This manual outlines the rules and procedures for installation, start-up, setting and connection of fuel level sensor LLS 20230 (hereinafter - product), as well as calibration procedure for a fuel tank with an installed sensor. The Omnicomm LLS 20230 fuel level sensor is installed on special types of equipment or on stationary fuel tanks and storages, which require equipment explosion protection and have the “0ExiaIIBT6X”... -
Page 5: Abbreviations And Symbols
Abbreviations and Symbols Abbreviations and Symbols BIS 20240 — stabilitron-based spark protection unit; PS — power supply; OS — operating system; PC — personal computer; Software — software; VH — vehicle; L — LLS fuel level sensor working length (mm); L1 —... -
Page 6: Selection Of Location To Install The Product
Abbreviations and Symbols Selection of Location to Install the Product 1) The product should be installed, depending on geometric shape of the tank, at the locations shown in the figures (Figure 1, Figure 2, Figure 3). Product installation at these locations ensures fuel level independence of vehicle inclination. 2) If the Product cannot be installed in any of places specified in Figures (Figure 1, Figure 2, Figure 3), the installation place must be as close to any of the specified as possible. -
Page 7: Selection Of Location To Install Bis 20240 (Lls20230)
BIS 20240 with an external device (e.g. FMS). Note. Connection of BIS 20240 with fuel level sensor LLS 20230 should be made only by cable KTZ-XX produced by Omnicomm, where XX – cable length (which can be chosen within the range from 10 to 25m). - Page 8 Abbreviations and Symbols 2) Prepare the fuel tank for fitting works following the manufacturer's specification and other safety regulations appropriate to this type of works. 3) Determine the fuel tank type and prepare it accordingly. Fuel tank types: a. Plastic or metal tank with the wall thickness under 3 mm The tanks which shape corresponds with the figure (Figure 2) should be prepared in accordance with Appendix E.
- Page 9 Abbreviations and Symbols It is not recommended to use self-tapping screws to fix the product onto a metal or plastic tank with the wall sickness under 3mm. This type of fixation cannot ensure reliability of product attachment to the tank. b.
-
Page 10: Product Cutting To Match The Specific Fuel Tank
Abbreviations and Symbols c. Plastic tank with wall thickness over 3 mm Drill holes in the tank: the central hole - by a bi-metal crown ø35mm and mounting holes - by a drill ø4mm as shown in the figure (Figure 9). Product Cutting to Match the Specific Fuel Tank 1) Measure the depth of the tank by moving a measuring bar down into the central hole intended for the sensor. -
Page 11: Setting The Product With Omnicomm Configurator
Setting the Product with Omnicomm Configurator Connect the Product to the PC following the connection diagram (see Appendix E), using the REUSABLE TOOL-UNU (Figure 11) or Omnicomm UNU-USB (Figure 12). -
Page 12: Empty/Full Calibration
Abbreviations and Symbols Run Omnicomm Configurator. In the window (Figure 13) select equipment — “Sensor”. If the message “Equipment not found” is displayed in the main window, try changing connection configuration or operation mode. Empty/Full Calibration Perform calibration with fuel which the fuel level sensor will operate in. -
Page 13: Installation And Deinstallation
Installation and Deinstallation “Settings” tab, “Configurable Parameters” section: “Network address” (1 to 254) – set the sensor network address. If several sensors are connected to one external device, each of them should have unique network addresses. “Max. level (1…4095)” — select the maximum sensor reading. Default value – 4,095. “Min. - Page 14 Installation and Deinstallation For tanks which shape corresponds with the figure (Figure 2), installation should be carried out in accordance with Appendix E. 1) Put the gasket included into the product delivery set on the measuring part of the product (Figure 24). 2) Install the product into the tank.
- Page 15 Installation and Deinstallation ensure that there are no fuel wave shocks during sharp acceleration and breaking operation of the vehicle. For this purpose, it is recommended to install the products near wave suppressing partitions, or the measuring part of the LLS fuel level sensor should be reinforced in one of the following ways: with steel pins (Figure 16, Figure 17);...
-
Page 16: Installing Bis 20240 (For Lls 20230)
Installing BIS 20240 (for LLS 20230) IMPORTANT! Strengthening the measuring part of the LLS fuel level sensors is only allowed for removable filler caps. Refer to the Appendices K, L for the detailed description of methods for strengthening the measuring part of the LLS fuel level sensors. -
Page 17: Connection
The Products must be connected to an external device as per the connection diagrams (see Appendix G). Two LLS 20230 fuel level sensors can be connected to one BIS 20240 spark protection unit with the KTZ splitter and two KTZ cables (Figure 41), provided that BIS 20240 voltage is at least 12 V (when connecting BIS 20240 to the on-board power supply, FTC AVL unit, or third-party AVL unit). -
Page 18: Installing The Fuse
Connection 6) Ensure that cable laying routes are free of heated parts and units of the vehicle to avoid cable insulation fusing. 7) The purposes of connector pin-outs and cable wire colors are illustrated below (Figure 21). GND supply circuit (white wire) of BIS 20240 must be connected to the vehicle body only. -
Page 19: Calibrating Fuel Tank
Calibration of the tank with one Omnicomm LLS sensor: 1. Empty the fuel tank 2. Connect the Omnicomm LLS fuel level sensor to a PC or tablet PC with a UNU device or UNU-USB, as illustrated in Figures (Figure 11, Figure 12) 3. -
Page 20: Commissioning Of Installed And Connected Equipment
“Export” window will open. Specify the Omnicomm LLS sensor number to display in Omnicomm Online. Calibration of a tank with several Omnicomm LLS 20230 sensors will be similar to calibrating a tank with one sensor. Before you start the calibration, add the required number of Omnicomm LLS sensors and enter their network addresses. -
Page 21: Installing Protective Sealings On Connectors
Connection For Omnicomm LLS 20230 sensors the bolt or self-tapping screw may be sealed: 1. Install the bolt or self-tapping screw through a hole in the seal 2. Close the seal cover with a snap 3. Add the seal and cover numbers to the report Installing Protective Sealings on Connectors 1. -
Page 22: List Of Commissioning Documents And Document Processing Procedure
Connection List of Commissioning Documents and Document Processing Procedure 1) Once the product is sealed, an Installation Certificate is produced. The Certificate should contain the following information: - customer company name (company that requested installation); - contractor company name (company that performed installation); - installation date;... -
Page 23: Appendix A. Terms And Definitions
Connection Appendix A. Terms and Definitions Working length of the product – length L shown in the figure (Figure 24). Scale – virtual component of the product representing a ranked row of marks corresponding to a sequential row of magnitudes of physical quantities along with associated numbering. -
Page 24: Appendix B. Required Equipment And Tools
Connection Appendix B. Required Equipment and Tools Table 1: Name Quantity IM Section Note Tools: Bimetal crown ø35 mm 1 pce Shank for the crown 1 pce Metal drill ø7 mm or ø4 1 pce ø7 mm for rivets, ø4 mm for bolts Measuring bar 1 pce... - Page 25 IM Section Note Tools: IBM Personal Computer, 1 pce compatible with OS Windows XP Omnicomm 1 pce Produced by Omnicomm Configurator UNU device (with a wire 1 pce Produced by Omnicomm set) UNU USB device 1 pce Produced by Omnicomm...
-
Page 26: Appendix C. Installing Nut-Type Rivets
Connection Appendix C. Installing Nut-Type Rivets Screw the rivet on the shaft of the nut riveter (Figure 25). The rivet should be screwed to the full depth. Install the rivet in the hole (Figure 26), so that it is strictly perpendicular to the plate of the sensor and the wall of the tank and any skewing is avoided. - Page 27 Connection Unscrew the nut riveter shaft out of the rivet (Figure 27). Unscrew the riveter pin from them rivet (Figure 28).
- Page 28 Connection Checks rivet installation quality. To do so, take the bolt included into the installation elements kit and exercise a test bolt driving. If the bolt is tight to drive or cannot be driven to the maximal depth, it is necessary to drill the rivet out and install a new one.
-
Page 29: Appendix D. Connecting The Product To A Pc
Connection Appendix D. Connecting the Product to a PC... - Page 30 Connection Appendix E. Procedure for Circular Tank Preparation for Product Installation and Installation Process Mark the holes for mounting the product taking into account the tank curvature. Place the bolt into the hole for product mounting so that the bolt is perpendicular to the surface of the tank (Figure 33).
- Page 31 Connection Visually check the leak tightness of the connection. If there are gaps between the gasket and the tank, fill them out with Sealant.
-
Page 32: Appendix F. Bis 20240 Installation Dimensions
Connection Appendix F. BIS 20240 Installation Dimensions... -
Page 33: Appendix G. Diagram Of Product(S) Connection With An External Device
Connection Appendix G. Diagram of Product(s) Connection with an External Device The GND power supply circuit (white wire) of BIS 20240 should be connected to the vehicle's body or to the battery, using the BR15 galvanic isolation unit. The GND power supply circuit (white wire) of BIS 20240 should be connected to the vehicle's body or to the battery, using the BR15 galvanic isolation unit. - Page 34 Connection The GND power supply circuit (white wire) of BIS 20240 should be connected to the vehicle's body or to the battery, using the BR15 galvanic isolation unit. Note. This connection diagram applies to connection of 2 to 4 Products to one external device.
-
Page 35: Appendix I. Example Of Setting Offset Values And Measurement Range
Connection Appendix I. Example of Setting Offset Values and Measurement Range Initial data: Fuel tank with the installed Product (Figure 43) Fuel tank depth: 700 mm Sensor working length: 680 mm It is required to set the product in such a way that the fuel level is measured in millimeters with the scale factor of 0.5 mm. -
Page 36: Appendix H. Diagrams For Connection To Installed Terminating Resistors
Connection Appendix H. Diagrams for Connection to Installed Terminating Resistors Note. Terminating resistors must be installed as close to external device/Product connectors as possible. External device may include a terminating resistor. In such cases it is not required to install a terminating resistor from the external device side. Presence of a terminating resistor in the external device is determined on the basis of the external device documentation. - Page 37 Connection Note. The number of products connected to one external device in this diagram is from 2 to 31. External device may include a terminating resistor. In such cases it is not required to install a terminating resistor from the external device side. Presence of a terminating resistor in the external device is determined on the basis of the external device documentation.
- Page 38 Connection...
-
Page 39: Appendix J. Sealants Recommended For Installation Of The Lls Fuel Level Sensors
Connection Appendix J. Sealants Recommended for Installation of the LLS Fuel Level Sensors The list of sealants is given in accordance with the operational recommendations. 1. PERMATEX™ MotoSeal® Black gasoline-proof sealant 2. ABRO™ Black silicone sealant 3. ABRO™ Red silicone sealant 4. -
Page 40: Appendix K. Measuring Part Strengthening For Lls Fuel Level Sensors
Connection Appendix K. Measuring Part Strengthening for LLS Fuel Level Sensors IMPORTANT! Strengthening the measuring part of the LLS fuel level sensors is only allowed for removable filler caps. Option 1. Strengthening the measuring part of LLS fuel level sensors using steel pins and collars. - Page 41 Connection 3. Drill holes for the DIN 975 threaded pins as illustrated in Figure (Figure 45). The dimensions provided are for reference only and depend on the specific design of the filler cap. All types of work associated with making holes, cutting, welding, and soldering should be performed in a well-ventilated area, at a safe distance from combustibles and lubricants.
- Page 42 Connection 5. Install and secure the LLS fuel level sensor on the filler cap, according to the Section. 6. Install three threaded pins as illustrated in Figure (Figure 46). 7. Determine the length (L1) of the DIN 975 M6 threaded pin, as illustrated in Figure (Figure 47).
- Page 43 Connection Attach the threaded part of the Ø16 collar to the Ø16 threaded pin. Attach the threaded part of the Ø20 collar to the measuring part of the LLS fuel level sensor. Determine the L1 length, by inserting any Ø3…4 stud into the threaded holes of the clamps, and comparing the dimensions (linear and angular) indicated in fig.
- Page 44 Connection 4. Perform welding works as illustrated in Figures (Figure 50, Figure 51), following angle dimensions illustrated in Figure (Figure 49). All types of work associated with making holes, cutting, welding, and soldering should be performed in a well-ventilated area, at a safe distance from combustibles and lubricants.
- Page 45 Connection reinforced structure installed. Option 3. Strengthening the measuring probe of LLS fuel level sensors with a flange. See Appendix M.
-
Page 46: Appendix L. Installing Lls 20230 Fuel Level Sensors 3 To 6 M In Length
Figure (Figure 52). Measure 50 mm from the end of each part and make marks. Put the nut, the ring, and the coupling on the fuel level sensor LLS 20230; put the nut and the ring on the sensor extension part (Figure 53). - Page 47 Connection Set the rings and the coupling according to the marks. Consecutively tighten the nuts by a nut wrench of the size 32, holding the coupling. Make sure that there is no backlash or rotation between the tubes of the sensor. Attention! It is prohibited to carry the fuel level sensor LLS, holding it by the sensor extension part (Figure 57).
- Page 48 Connection...
-
Page 49: Appendix M. Strengthening Flange For Lls 20230 Fuel Level Sensor
Connection Appendix M. Strengthening Flange for LLS 20230 Fuel Level Sensor... - Page 50 www.omnicomm-world.com...
Need help?
Do you have a question about the LLS 20230 and is the answer not in the manual?
Questions and answers