Advertisement
Available languages
Available languages
Quick Links
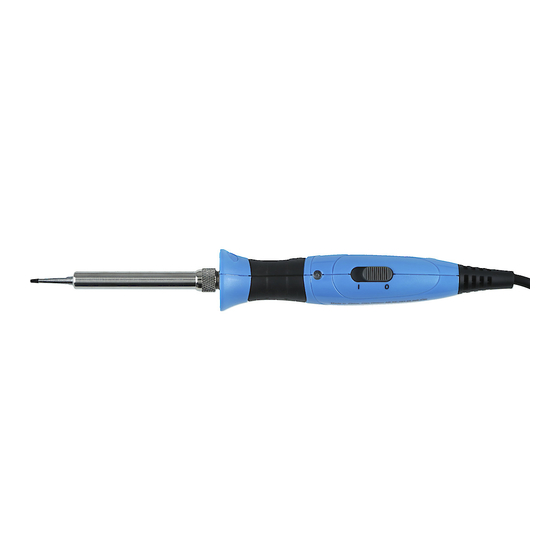
Soldering Iron
Art.no 41-1363
Model
KK-015P
41-1364
KK-030P
Please read the entire instruction manual before using the product and
then save it for future reference. We reserve the right for any errors in
text or images and any necessary changes made to technical data.
In the event of technical problems or other queries, please contact
our Customer Services.
Safety
Warning: The tip of the soldering iron gets very hot. There is a risk of burns.
WARNING – FIRE HAZARD!
Things to think about before using the soldering iron:
•
Be careful when using it in the vicinity of combustible materials.
•
Never use it where flammable or explosive substances are used
or stored.
•
Heat can spread and ignite combustible materials which are not
within sight.
•
Never leave the product unattended when it is connected to
the power supply.
•
Never expose it to rain or moisture.
•
Always place it on the included stand when it is not in use.
•
Make sure that you work on a heat-resistant and fireproof surface.
•
Let it cool down naturally in the air after use. Never try to cool it
down in any other way.
•
Never immerse it in water or other liquid.
•
This appliance is not intended for use by persons (including children)
whose physical, sensory or mental capabilities, or lack
of experience and knowledge, prevents them from using
the appliance safely without supervision or instruction.
•
Children shall not play with the appliance.
•
If the mains lead is damaged in any way it must be replaced by
a qualified electrician.
GREAT BRITAIN • CUSTOMER SERVICE tel. 020 8247 9300 e-mail customerservice@clasohlson.co.uk internet www.clasohlson.co.uk postal 10 – 13 Market Place, Kingston Upon Thames, Surrey, KT1 1JZ
Operating instructions
1. Check that the contact surfaces of the tip are clean and undamaged.
2. Plug the mains lead into a wall socket. Note: The soldering iron
should only be connected to a 230 V, 50 Hz electrical outlet.
3. Turn the soldering iron
on by setting the power
switch to the I position.
The light in front of
the switch will come on.
4. Place the soldering iron onto the included stand and let it
warm up (2–3 min).
5. "Tin" the hot tip of the soldering iron by coating it with solder.
6. Use the soldering iron to heat up the soldering surfaces,
not the solder.
7. Apply a sufficient amount of solder to the joint and then let
the joint cool down.
8. Clean the tip of the soldering iron by wiping it on a wet sponge
while it is still hot.
9. Turn the soldering iron off by setting the power switch to the 0 position.
Unplug the soldering iron from the wall socket and let it cool naturally.
Care and maintenance
•
Unplug the soldering iron and let it cool completely before putting
it away for storage.
•
If the soldering iron is not to be used for an extended period, it should
be unplugged and stored in a dry location out of reach of children.
Changing the tip
1. Always unplug the soldering iron and let it cool before changing
the tip.
2. Release the locking
collar by turning
the lock nut anti-
clockwise.
3. Remove the locking collar and extract the tip.
4. Insert a new tip, refit the locking collar and
tighten the lock nut.
Responsible disposal
This symbol indicates that this product should not
be disposed of with general household waste. This
applies throughout the entire EU. In order to prevent any
harm to the environment or health hazards caused by
incorrect waste disposal, the product must be handed
in for recycling so that the material can be disposed of
in a responsible manner. When recycling your product,
take it to your local collection facility or contact the place
of purchase. They will ensure that the product is
disposed of in an environmentally sound manner.
Specifications
41-1363
41-1364
Rated voltage 230 V, 50 Hz
Rated voltage 230 V, 50 Hz
Power
15 W
Power
Mains lead
1.3 m
Mains lead
30 W
1.3 m
Advertisement

Summary of Contents for Cocraft KK-015P
- Page 1 Changing the tip 1. Always unplug the soldering iron and let it cool before changing 1. Check that the contact surfaces of the tip are clean and undamaged. Art.no 41-1363 Model KK-015P the tip. 2. Plug the mains lead into a wall socket. Note: The soldering iron 41-1364 KK-030P should only be connected to a 230 V, 50 Hz electrical outlet.
- Page 2 Användning Spetsbyte 1. Dra ut stickproppen ur vägguttaget och låt lödpennan svalna innan 1. Se till att spetsens kontaktytor är hela och rena. Art.nr 41-1363 Modell KK-015P du byter spets. 2. Anslut lödpennans stickpropp till ett vägguttag. Obs! Lödpennan 41-1364 KK-030P får endast anslutas till ett vägguttag med 230 V, 50 Hz.
-
Page 3: Stell Og Vedlikehold
1. Trekk alltid støpselet ut av strømuttaket og la loddepennen 1. Påse at kontaktflatene på spissen er hele og rene. Art.nr 41-1363 Modell KK-015P avkjøles før skifte av spiss. 2. Koble støpselet til et strømuttak. Obs! Produktet skal kun kobles... -
Page 4: Tekniset Tiedot
Käyttö Kärjen vaihtaminen 1. Irrota pistoke pistorasiasta ja anna juotoskynän jäähtyä ennen 1. Varmista, että kärjen kontaktipinnat ovat ehjät ja puhtaat. Tuotenro 41-1363 Malli KK-015P kärjen vaihtamista. 2. Liitä juotoskynän pistoke pistorasiaan. Huom.! Juotoskynän saa 41-1364 KK-030P 2. Irrota lukkoholkki liittää... - Page 5 Benutzung Austausch der Spitze 1. Vor dem Austauschen der Spitze immer den Netzstecker ziehen 1. Sicherstellen, dass die Kontaktflächen der Spitze unbeschädigt Art.nr 41-1363 Modell KK-015P und das Gerät abkühlen lassen. und sauber sind. 41-1364 KK-030P 2. Den Stecker des Lötkolbens an eine Steckdose anschließen.


