Table of Contents
Advertisement
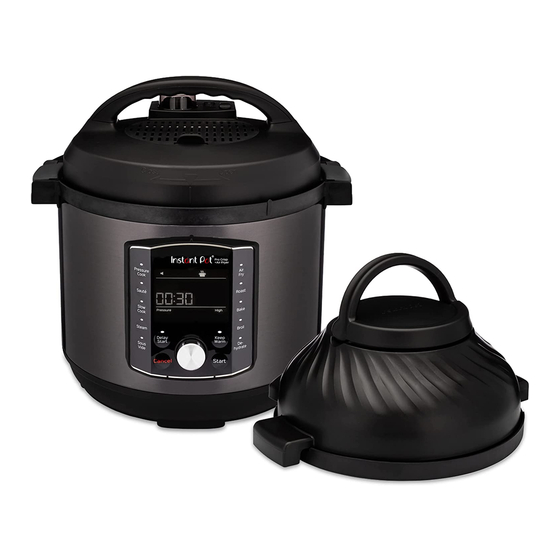
PRO CRISP
MULTI-USE PRESSURE COOKER + AIR FRYER
User manual
Important safeguards
Products, parts and
accessories
Get started
Pressure cooking 101
Releasing pressure
Control panel
Pressure control features
Cooking
Care, cleaning and storage
Troubleshooting
Warranty
Contact
Register your product today at instantpot.com/support/register.
Download the Instant Pot App for 1000+ recipes at instantpot.com/app.
Advertisement
Table of Contents

Related Manuals for Instant Pot PRO CRISP


Summary of Contents for Instant Pot PRO CRISP
- Page 1 Products, parts and accessories Get started Pressure cooking 101 Releasing pressure Control panel Pressure control features Cooking Care, cleaning and storage Troubleshooting Warranty Contact Register your product today at instantpot.com/support/register. Download the Instant Pot App for 1000+ recipes at instantpot.com/app.
-
Page 2: Important Safeguards
INSTRUCTIONS MAY RESULT IN INJURY AND/OR PROPERTY DAMAGE. 02 Use only the Instant Pot Pro Crisp pressure cooking lid or air fryer lid with the Instant Pot Pro Crisp multicooker base. Using any other lids may cause injury and/or damage. - Page 3 IMPORTANT SAFEGUARDS 06 Heat from an external source will damage the appliance. • DO NOT place the appliance on or close to a hot stove, a heated oven, or upon another appliance. • DO NOT use the appliance near water or flame. •...
- Page 4 See Pressure control features: sealing ring; • DO NOT attempt to force the pressure cooking lid off the Instant Pot multicooker base. 12 When pressure cooking food with a doughy or thick texture, or a high fat/oil content, contents may splatter when opening the pressure cooking lid.
- Page 5 IMPORTANT SAFEGUARDS 14 When using the air fryer lid, do not overfill the air fryer basket. Overfilling may cause food to contact the heating element, which may result in fire and/or personal injury. 15 DO NOT touch accessories during or immediately after cooking. To avoid personal injury, •...
- Page 6 To prevent personal injury and damage to the appliance, only replace the sealing ring with an authorized Instant Pot sealing ring. 25 Avoid contact with moving parts as this may result in injury.
- Page 7 IMPORTANT SAFEGUARDS 26 DO NOT attempt to repair, replace or modify components of the appliance, as this may cause electric shock, fire or injury, and will void the warranty. 27 DO NOT tamper with any of the safety mechanisms, as this may result in injury or property damage.
-
Page 8: Special Cord Set Instructions
1500 W 120 V ~ 60 Hz 8 Quarts / 7.6 Litres 26.2 lbs / 11.88 kg Pro Crisp AF 8 Pro Crisp AF 8 With Pressure Cooker Lid: in: 14.78 L × 12.57 W × 14.17 H cm: 37.55 L × 31.94 W × 36 H With Air Fryer Lid: in: 14.78 L ×... -
Page 9: Table Of Contents
Table of contents IMPORTANT SAFEGUARDS ..................2 Special cord set instructions ...................8 Product specifications .....................8 Find your model name and serial number ............8 Product, parts and accessories ................11 Top of pressure cooking lid ..................11 Bottom of pressure cooking lid ................11 Air fryer lid .......................12 Multicooker base ....................13 Accessories ......................13... - Page 10 Table of contents Anti-block shield ....................28 Sealing ring ......................28 Float valve .......................29 Cooking with the pressure cooking lid ..............30 Pressure Cook ......................31 Slow Cook .......................33 Steam ........................34 Sous Vide ........................35 Keep Warm ......................38 Cooking without a lid ....................39 Sauté...
-
Page 11: Product, Parts And Accessories
Product, parts and accessories See Care, cleaning and storage: Removing and installing parts to find out how everything fits together. Top of pressure cooking lid Steam release Steam release cover assembly Steam release valve Steam release pipe Float valve Lid fin Quick release switch Lid handle Lid fin... -
Page 12: Air Fryer Lid
Product, parts and accessories Air fryer lid Top of air fryer lid Lid handle Lid position marker Air intake Air vent Lid fins Bottom of air fryer lid Element cover Heating element (Beneath element cover) Lid power pins Inner pot Easy-grip silicone handles Instant Tip: Stovetop-friendly... -
Page 13: Multicooker Base
Product, parts and accessories Multicooker base Base power pad Outer pot Lid holder Condensation rim Condensation collector Multicooker handle Control panel Stainless-steel exterior Heating element (interior) Power cord (rear) Accessories Protective pad and storage cover Broil/dehydrating tray Multi-functional rack Multi-level air fryer basket Air fryer basket base Illustrations in this document are for reference only and may differ from the actual product. -
Page 14: Get Started
05 You may be tempted to put the Pro Crisp on your stovetop — but don’t do it! Place the multicooker base on a stable, level surface, away from combustible material and external heat sources. -
Page 15: Initial Test Run (Water Test)
Do you have to do the water test? No — but getting to know the ins and outs of your new Pro Crisp prepares you for success in the kitchen! Take a few minutes to get to know how this baby works. - Page 16 Get started DANGER DO NOT attempt to remove the lid while the float valve is up and NEVER attempt to force the lid open. Contents are under extreme pressure. Float valve must be down before attempting to remove the lid. Failure to follow these instructions may result in serious personal injury and/or property damage CAUTION Pressurized steam releases through the...
-
Page 17: Pressure Cooking 101
Pressure cooking uses steam to raise the boiling point of water above 100ºC / 212ºF. These high temperatures allow you to cook food way faster than normal. (Behind the magic curtain) When pressure cooking, the Instant Pot Pro Crisp goes through 3 stages. Pre-heating What you see What you don’t see... -
Page 18: Releasing Pressure
Releasing pressure You must release pressure after pressure cooking before attempting to open the lid. Follow your recipe’s instructions to choose a venting method, and always wait until the float valve drops into the lid before opening. Pressurized Depressurized WARNING Steam ejected from the steam release Do not cover or obstruct the steam valve is hot. - Page 19 Releasing pressure Natural Release (NR or NPR) Cooking stops gradually. As the temperature within the multicooker drops, the Instant Pot Pro Crisp depressurizes naturally over time. What to do What to expect Your meal continues to cook even after the Smart After cooking finishes, leave Program ends.
- Page 20 Releasing pressure NOTICE Do not use QR when cooking fatty, oily, thick or high-starch foods (e.g., stews, chilis, pasta and congee) or when cooking foods that expand when cooked (e.g., beans and grains). Timed Natural Release The carryover cooking continues for a specific amount of time, then stops quickly when you release the remaining pressure.
-
Page 21: Control Panel
Control panel Shows the status of various settings. See Control panel: Status icons for Status icons details. Cooking Shows when the multicooker is in Pre-heating, Cooking, or Keep Warm. See progress bar Control panel: Cooking progress bar for details. Pressure cooking lid Air fryer lid •... -
Page 22: Status Icons
The display shows On during the pre-heating stage to let you know that it’s working on it! When the Pro Crisp reaches the set pressure level or temperature, the progress bar blinks to show that Cooking has begun. The display counts down the cooking time, and highlights the selected pressure or temperature level. -
Page 23: Status Messages
Standby mode — the Pro Crisp awaits your commands! The Pro Crisp is in the Pre-heating stage. The display shows Hot when the Pro Crisp reaches the perfect temperature during Sauté. After the message disappears, the timer starts counting the cooking time. - Page 24 Control panel Setting Description Adjust and save custom Once a Smart Program is selected, changes to the cooking time, cooking temperature and pressure level are saved once the Smart Program times and begins. temperatures. Default time Time range 10 minutes to 24 hours 6 hours (06:00) (00:10 to 24:00) You can use Delay Start with:...
-
Page 25: Pressure Control Features (Your Little Bag Of Tricks!)
Try not to remove the lid unnecessarily! When it’s plugged in, the Pro Crisp plays a little jingle when you open and close the lid :) Removing the lid... -
Page 26: Quickcool
Pressure control features QuickCool™ For the fastest Natural Release after pressure cooking, use the QuickCool tray*. What we love about it What you should know about it The metal portion of the lid gets extremely hot, so don’t remove the It’s a huge timer saver —... -
Page 27: Steam Release Assembly
Pressure control features Seal Seal Vent Vent Seal Position Vent Position See Releasing pressure: Venting methods for safe depressurization techniques. Steam release assembly The steam release assembly must be fully installed before use. Steam release cover Steam release valve Steam release pipe What we love about it What you should know about it When releasing pressure, steam travels up from the... -
Page 28: Anti-Block Shield
DO NOT use it. Replace the sealing ring every 12 to 18 months or sooner, and only use authorized Instant Pot sealing rings. Failure to follow these instructions may cause food to discharge, which may lead to personal injury or property damage. -
Page 29: Float Valve
The float valve and silicone cap work together to seal in pressurized steam. These parts must be installed before use. Do not attempt to operate the Instant Pot without the float valve properly installed. Do not touch the float valve during use. -
Page 30: Cooking With The Pressure Cooking Lid
Cooking with the pressure cooking lid The Instant Pot Pro Crisp is amazingly versatile in the kitchen. No matter what kind of cooking you want to do, the Pro Crisp has your back! You can even make changes to the cooking time, pressure level and temperature after a program has started. -
Page 31: Pressure Cook
Pressure cooking liquids should be water-based, like broth, stock, soup or juice. If you're using canned, condensed or cream-based soup, add liquid as directed below. Instant pot size Minimum liquid for pressure cooking* 8 Quarts / 7.6 Litres 2 cups (500 mL / ~16 oz) *Unless otherwise specified in recipe. - Page 32 Cooking with the pressure cooking lid Jump start magic! For best results, always follow an authorized Instant Pot recipe or the tried, tested and true pressure cooking timetables. Time range Default time Default pressure 0 minutes to 8 hours 35 minutes...
-
Page 33: Slow Cook
4 hours 30 minutes to 24 hours High (04:00) (00:30 to 24:00) Stage 1: Setting up the Pro Crisp Stage 2: Slow cooking for slow cooking 01 Select Slow Cook. 01 Add food and liquid ingredients to the 02 Press the dial to select the default time, inner pot according to your recipe. -
Page 34: Steam
To set a delay start 06 When the Pro Crisp reaches the target timer, see Control panel: Settings. temperature the progress bar moves over to Cooking. -
Page 35: Sous Vide
Keep Warm. A delay start timer can be set to automatically start steaming while you're painting, party planning, scrolling through the Official Instant Pot Facebook Community, or busy with other dishes. To set a delay start timer, see Control panel: Settings. - Page 36 03 Move the quick release switch to the 02 Remove the lid and carefully immerse Vent position. the sealed pouches. Stage 2: Setting up the Pro Crisp for The food in the pouches should be sous vide cooking submerged, so add heated water to 01 Select Sous Vide.
- Page 37 02 Empty the inner pot, then place it back into the multicooker base. 03 Use the Pro Crisp’s Sauté program to give your meal a good high-heat sear, or, use a cast iron pan, browning torch, or a grill — anything hot to lock in that moisture! 04 Cover your meat with foil and let it rest for 5-20 minutes, depending on its size.
-
Page 38: Keep Warm
Cooking with the pressure cooking lid Keep Warm Perfect to reheat meals or warm food for long periods of time. Default Temperature Default time Time range temperature range High 10 hours 30 minutes to 10 hours High Custom: (10:00) (00:30 to 10:00) 25 to 90°C 77 to 194°F 01 Press Keep Warm. -
Page 39: Cooking Without A Lid
1 minute to 1 hour High (00:30) (00:01 to 01:00) Custom: Levels 1-6 Stage 1: Setting up the Pro Crisp for 05 Press Start to begin. The display sautéing shows On and the cooking progress bar shows Pre-heating. 01 Insert the inner pot into the Stage 2: Sautéing... - Page 40 Cooking without a lid Deglazing Sautéing meat and vegetables before pressure cooking is the perfect way to boost flavors, as sugars caramelize from the high heat of the Sauté Smart Program. Deglazing the inner pot lets you unlock those flavors in amazing sauces, gravies and more. To deglaze, remove food items from the inner pot and add a thin liquid, like water, broth, or wine to the hot surface.
-
Page 41: Cooking With The Air Fryer Lid
Cooking with the air fryer lid When cooking with the air fryer lid, you will have to lift it off the multicooker base occasionally. Always make sure to place the hot lid on the protective pad provided, not directly on your counter. Place hot lid on cover Flip it over to store Using the air frying accessories... - Page 42 Cooking with the air fryer lid Do this… And get something like this! Place food on the bottom The air flow is diverted, so you will get less crisp. of the multi-level air fryer basket, then cover with the Great for dehydrating! broil/dehydrating tray.
-
Page 43: Air Fry, Roast And Bake
Cooking with the air fryer lid Air Fry, Roast and Bake Using the air fryer lid is an amazing way to ramp up your meal's flavor and texture. Whether you want to pressure cook first and use the air fryer lid to crisp up your dish, or if you’d prefer to cook your meal just using the air fryer lid —... - Page 44 Leave approximately 1”/ 2.5 cm of space around all pour in the loose batter. sides of the baking dish to allow heat to circulate evenly. Stage 1: Setting up the Pro Crisp for Stage 2: Adding food cooking 01 When the air fryer lid reaches the...
-
Page 45: Cooking Tips
• Patting dry moist food items before cooking prevents excess steam and splatter and gives you crispier results. Check out the cooking timetables, download the Instant Pot app, or, visit our recipe site for fun, easy-to-follow recipes. Cooking times are a recommendation only. -
Page 46: Broil And Dehydrate
Make fruit leather, dehydrated vegetable chips and all kinds of jerky. Always follow a trusted recipe when dehydrating meat. 03 Press the dial to select the default Stage 1: Setting up the Pro Crisp for cooking temperature, or, turn it to adjust the cooking temperature. -
Page 47: Care, Cleaning And Storage
Care, cleaning and storage Clean your Instant Pot Pro Crisp and its parts after each use. Failure to follow these cleaning instructions may result in catastrophic failure, which may lead to property damage and/or severe personal injury. Always unplug your multicooker and let it cool to room temperature before cleaning. - Page 48 Care, cleaning and storage Parts Cleaning methods and instruction Clean with a barely-damp cloth and mild dish soap, then use a clean, barely-damp sponge to remove the soap residue. DO NOT machine wash or submerge in water or other liquid. •...
-
Page 49: Storing The Air Fryer Lid
Care, cleaning and storage WARNING The multicooker base contains electrical components. To avoid fire, electric leakage and/or personal injury, make sure the multicooker base always stays dry. • DO NOT immerse the multicooker base in water or other liquid or attempt to cycle it through the dishwasher. -
Page 50: Removing And Installing Parts
Care, cleaning and storage Removing and installing parts Silicone sealing ring Install the sealing ring Place the sealing ring over the sealing ring Remove the sealing ring rack and firmly press it into place. Make Grip the edge of the silicone and pull the sure there’s no puckering. - Page 51 Care, cleaning and storage Steam release assembly Anti-block shield Remove the steam release assembly Remove the anti-block shield Remove the steam release cover, then Grip the lid like a steering wheel and use pull the steam release valve up and off the your thumbs to press firmly against the steam release pipe.
- Page 52 Care, cleaning and storage Float valve and silicone cap Install the float valve Drop the narrow end of the float valve into Remove the float valve from the lid the float valve hole on the top of the lid. Place one finger on the flat top of float Place one finger on the flat top of the float valve, then turn the lid over.
-
Page 53: Troubleshooting
Troubleshooting Register your Instant Pot Pro Crisp today! If your issue persists or you have any additional questions, get in touch with a Customer Care Advisor through our chat widget at instantpot.com/#chat, by email at support@instantpot.com or by phone at 1-800-828-7280. - Page 54 Troubleshooting Problem Possible reason Try this The sound of power switching, or the pressure board may be This is normal; no action needed. expanding due to changing Occasional temperatures. clicking or light cracking sound. Wipe exterior surfaces of the inner pot. Make sure the Bottom of the inner pot heating element is dry before inserting the inner pot into is wet.
- Page 55 Troubleshooting Problem Possible reason Try this Remove the float valve from the lid and clean it thoroughly. Food debris on the float valve Perform the Initial test run to check for function and record or float valve silicone cap. your findings. Contact Customer Care. Check for scorching on the bottom of the inner pot.
- Page 56 Incorrect inner pot is Only use a stainless-steel Pro Series inner pot with easy- used. grip handles with the Pro Crisp. Sensor issue. Contact Customer Care. Lid is not in the correct Open and close the lid. position for the Do not use a lid when using Sauté.
-
Page 57: Warranty
Warranty Warranty Limited Warranty This Limited Warranty is effective for one year from the date of original consumer purchase. Proof of original purchase date and, if requested by an authorized representative of Instant Brands Inc. (“Instant Brands”), return of your appliance, is required to obtain service under this Limited Warranty. Provided that this appliance is operated and maintained in accordance with written instructions attached to or furnished with the appliance, Instant Brands will, in its sole and exclusive discretion, either: (i) repair defects in materials or workmanship;... - Page 58 Warranty Disclaimer of Implied Warranties EXCEPT AS EXPRESSLY PROVIDED HEREIN AND TO THE EXTENT PERMITTED BY LAW, INSTANT BRANDS MAKES NO WARRANTIES, CONDITIONS OR REPRESENTATIONS, EXPRESS OR IMPLIED, BY STATUTE, USAGE, CUSTOM OF TRADE OR OTHERWISE WITH RESPECT TO THE APPLIANCES OR PARTS COVERED BY THIS WARRANTY, INCLUDING BUT NOT LIMITED TO, WARRANTIES, CONDITIONS, OR REPRESENTATIONS OF WORKMANSHIP, MERCHANTABILITY, MERCHANTABLE QUALITY, FITNESS FOR A PARTICULAR PURPOSE OR DURABILITY.
-
Page 59: Contact
Instant Brands Inc. 11—300 Earl Grey Dr., Suite 383 Ottawa, Ontario K2T 1C1 Canada Register your product today instantpot.com/support/register Contact us 1-800-828-7280 support@instantpot.com instantpot.com/#chat instantpot.com store.instantpot.com Copyright 2020 Instant Brands © ™ 633-0101-41...
Need help?
Do you have a question about the PRO CRISP and is the answer not in the manual?
Questions and answers