Table of Contents
Advertisement
Advertisement
Table of Contents

Related Manuals for Brew Monk TITAN


Summary of Contents for Brew Monk TITAN
- Page 1 INSTRUCTION MANUAL BREW MONK TITAN Item N°.: 057.700.70 www.brewmonk.eu...
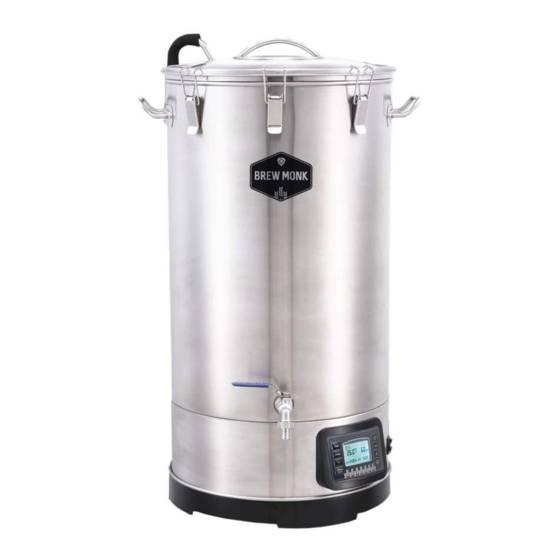
- Page 2 Adjustable SST malt screens Accessories Thank you for purchasing the Brew Monk Titan. Please verify using the picture and table above if your Brew Monk is complete. Contact your reseller should you be missing any components. Please read this manual carefully and take heed of the following information to avoid damages. Any failure caused by ignoring the items and cautions mentioned in the instruction manual are not covered by our warranty and we cannot assume any liability.
-
Page 3: Safety Instructions
• The device must be positioned on a stable, secure and horizontal support structure prior to use. • A full vessel contains boiling hot liquids and can weigh up to 70 kg (70 litres Brew Monk). A horizontal positioning is a prerequisite for transfer pumping during the brewing process. Avoid an unsteady surface. - Page 4 This can cause brew debris to enter the pump, potentially blocking and damaging the system. 2.2 Bazooka Filter Assembly Attach the bazooka filter (12) on the male thread inside the Brew Monk and screw the bazooka filter on (see picture below). 2.3 Overflow Pipe Assembly...
- Page 5 Instruction Manual Brew Monk Titan - EN Step 2 You can adapt the overflow pipe according to the amount of malt recommended for your recipe. For that adjust the telescopic pipe (D) to the desired height.
- Page 6 Insert the assembled overflow pipe with malt screen into the malt pipe. Step 2 Extend the telescopic overflow pipe (D) to its maximum height. Step 3 Place malt pipe (8) in the Brew Monk (1). Fill with water according to recipe. Step 4 Fill the malt pipe (8) with malt.
- Page 7 Instruction Manual Brew Monk Titan - EN 2.5 Programme Setting BLANK PAGE...
- Page 8 EN - Instruction Manual Brew Monk Titan 2.5.1 Manual Mode Setting 1. Switch on the power switch, then press the MANUAL button. 2. TEMP is for Temperature setting, POWER is for Wattage setting, TIMER is for step timing. These 3 must be set before machine will start; they can be set in any order. Use “-“ and “+”...
- Page 9 Instruction Manual Brew Monk Titan - EN 2.5.2 Auto Mode Setting 1. Switch on the device, then press AUTO button. 2. S1 will be shown on the top left corner, input the 3 settings - TEMP, TIMER and POWER (as in manual mode using “+” and “-“).
- Page 10 AUTO button for confirmation. It is the sparging reminder. 3. PAUSE button will stop the Brew Monk and timer working temporarily, and you can modify the data, afterwards press AUTO to continue.
- Page 11 Instruction Manual Brew Monk Titan - EN Press AUTO/PAUSE to enter recipe edit page. You can edit TEMP/POWER/TIMER. Press AUTO again to Press START not in boiling edit/check next step. step, machine starts to heat. RXSX at the top left corner...
-
Page 12: Maintenance
EN - Instruction Manual Brew Monk Titan 3. Maintenance • It is very important to clean the machine after every use. The dry ingredients may stick to the metal and inside the pump. • Rinse the machine with 5-10 litres of water of 60°C for 15 minutes or more, until it is clean. -
Page 13: Technical Data
Instruction Manual Brew Monk Titan - EN 5. Technical Data Model No.: 057.700.70 Volume: 70 litre to top, 65 litre to MAX line Voltage: 220 V-240 V Power: 3000 W Frequency: 50 Hz/60 Hz 6. Electric Circuit... - Page 14 www.brewmonk.eu Distributed by Brouwland Korspelsesteenweg 86 3581 Beverlo, Belgium www.brouwland.com...
Need help?
Do you have a question about the TITAN and is the answer not in the manual?
Questions and answers