Table of Contents
Advertisement
Advertisement
Table of Contents

Subscribe to Our Youtube Channel
Related Manuals for PLANET ECLIPSE LV1.6


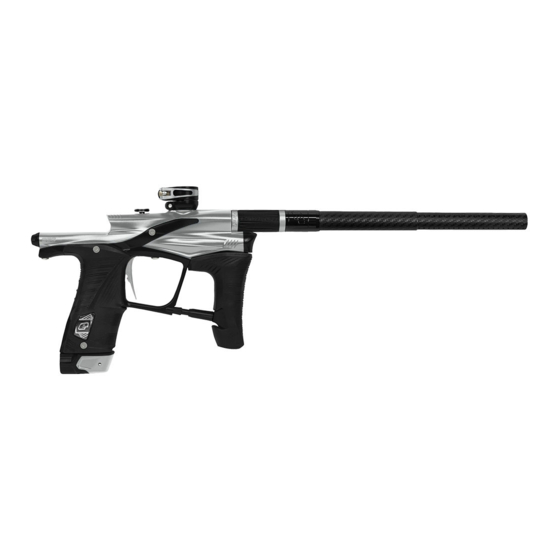
Summary of Contents for PLANET ECLIPSE LV1.6
- Page 1 PLANET ECLIPSE: LV1.6 USER MANUAL / ENGLISH...
- Page 2 WARNINGS READ CAREFULLY BEFORE USE THE PLANET ECLIPSE LV1.6 IS NOT A TOY. PAINTBALL Always fit a barrel-blocking device to the marker when not in use. SAFETY RULES MUST BE FOLLOWED AT ALL TIMES. Always remove paintballs from the marker when not in use.
- Page 3 WARNINGS READ CAREFULLY BEFORE USE Persons under 18 years of age must have adult supervision when This User Manual is in English. using or handling the marker. It contains important safety guidelines and instructions. Should you be unsure at any Only use professional paintball fields where codes of safety are stage, or unable to understand the contents of strictly enforced.
-
Page 4: Table Of Contents
04 CONTENTS LV1.6 USER MANUAL INTRODUCTION (06-21) RESET (42-43) Setting up Factory reset Switching On/Off Installing the battery User interface run-screen Breech sensor (BS) indicator FAULT FINDING (44-47) Trigger detection indicator Sound indicator Fault finding tables Tournament lock / Battery indicator... - Page 5 FOLLOW OUR OFFICIAL PLANET ECLIPSE SOCIAL MEDIA CHANNELS TO KEEP UP TO DATE WITH OUR TECH SUPPORT EVENTS CALENDAR.
-
Page 6: Introduction
06 INTRODUCTION SETTING UP FIG-1 A / K... - Page 7 Push the POPS bonnet into the POPS body until it engages. Do not install a compressed air system or load paintballs into the marker until you feel confident with your ability to handle the marker safely and responsibly. Switch ON the LV1.6.
-
Page 8: Switching On/Off
The navigation console houses the LCD screen and the navigation buttons: Up Down and Select Use the navigation console to switch the LV1.6 On or Off and change the marker settings. Switching ON Press and hold the Select button – or double-click it –... -
Page 9: User Interface Run-Screen
09 INTRODUCTION FIG-1 USER INTERFACE RUN-SCREEN FIG-1 Once powered-up a run screen will be displayed. There are a number of run screens and, with the exception of the splash screen, all have the same layout. Run screen specific information. Tap the Up button to cycle through the run screens. The breech sensor (BS) indicator (see page 10 for BS indicators and their meanings). -
Page 10: Breech Sensor (Bs) Indicator
10 INTRODUCTION FIG-1 BREECH SENSOR (BS) INDICATOR FIG-1 The BS indicator displays the various states of the breech sensor. BS enabled and a ball is detected The marker can be fired up to the selected rate of fire. BS enabled and NO ball is detected The marker cannot be fired. -
Page 11: Trigger Detection Indicator
11 INTRODUCTION FIG-1 TRIGGER DETECTION INDICATOR FIG-1 The trigger detection Indicator (TDI) relays the state of the trigger, ranging from fully released to fully depressed: OPTO sensor selected, reading 0% OPTO reads 0% meaning the trigger is fully released. OPTO sensor selected, reading below RELEASE point OPTO senses that the trigger is in a released state. -
Page 12: Sound Indicator
12 INTRODUCTION FIG-1 SOUND INDICATOR FIG-1 The Sound Indicator The sound indicator shows the status of the sound system. See page 33 for more details. Sound enabled Sound will be used to indicate certain events. Sound disabled Sound will not be used. -
Page 13: Tournament Lock / Battery Indicator
INTRODUCTION FIG-1 TOURNAMENT LOCK / BATTERY INDICATOR FIG-1 The Lock Indicator shows the status of the Tournament Lock (see page 17). Locked Firing mode parameters cannot be changed. Tournament legal state. Unlocked Firing mode parameters can be changed. The Battery Indicator The Battery Indicator shows the level of charge the battery has. - Page 14 Push and hold the Select button to switch the marker ON. When the LV1.6 logo appears let go of the Select button then push and hold immediately to freeze the version screen. The version screen (Fig-2) will now be displayed. Release the Select button to continue the start-up process.
-
Page 15: Velocity Adjustment
15 INTRODUCTION VELOCITY ADJUSTMENT FIG-1 FIG-1 The LV1.6 velocity adjustment screw is accessed from the bottom of the foregrip. Insert a 1/8 hex key into the velocity adjuster screw to adjust the velocity. Turn the hex key clockwise to reduce velocity. -
Page 16: Trigger Adjustment
16 INTRODUCTION TRIGGER ADJUSTMENT FIG-1 FIG-1 1/16 The spring return screw controls the spring strength of the trigger return. Clockwise increases the strength, counter-clockwise decreases it. The microswitch screw adjusts the distance between the trigger and microswitch. Clockwise increases the distance, counter-clockwise reduces it. -
Page 17: The Tournament Lock Button
17 INTRODUCTION FIG-1 THE TOURNAMENT 5/64 LOCK BUTTON FIG-1 To access the tournament lock button use a hex key to remove the grip screws (both sides of the grip frame) then pull and remove the grips. You can access the tournament lock button by just releasing the right side of the rubber grips. -
Page 18: Unloading The Lv1.6
18 INTRODUCTION UNLOADING THE LV1.6 FIG-1 5/32... - Page 19 INTRODUCTION UNLOADING THE LV1.6 FIG-1 IMPORTANT! Extra precaution to avoid injury. IMPORTANT! To switch OFF/ON, see page 08. Ensure that a barrel blocking device is still fitted for safety. IMPORTANT! Always de-gas before unloading. Switch the marker OFF. De-gas the marker.
-
Page 20: Air Transfer Pipe
20 INTRODUCTION FIG-1 AIR TRANSFER PIPE The Air Transfer Pipe (AT Pipe) enables air to move through the marker and allow it to fire. To do this consistently, without leaks, you need to ensure that it is seated correctly. FIG-1 The AT Pipe is in two parts and both parts screw into eachother with ease. -
Page 21: Storage And Transportaion
21 INTRODUCTION STORAGE AND TRANSPORTATION Your marker must be clear of all paint and propellant during Protect your marker from excessive heat during transportation. transportation or storage. When transporting a paintball marker by air, check with the airline Make sure the marker marker is switched off. regarding their policies on transporting paintball equipment as hold luggage before arriving at the airport. -
Page 22: Maintenance
MAINTENANCE ONLINE MAINTENANCE VIDEOS For step-by-step maintenance videos to help you service and maintain your marker check out our YouTube channels below. From simple, to more advanced maintenance videos, we got your back! YOUTUBE.COM/PLANETECLIPSETV For new products, documentaries and other cool video features visit: YOUTUBE.COM/PLANETECLIPSE... -
Page 23: Electronics
23 ELECTRONICS USER INTERFACE FIG-1 FIG-1 The marker can be configured through editable parameters that are arranged in a menu system. To access the menu when the marker is on, push and hold the Select button until the TURN OFF menu item is displayed. -
Page 24: Navigating The User Interface
24 ELECTRONICS FIG-1 NAVIGATING THE USER INTERFACE FIG-1 Once in a menu use the Up and Down buttons to navigate through the menu items. Use the Select button to select the item. If the item is an editable parameter then it can be adjusted with the Up and Down buttons and accepted with another push of the Select button. -
Page 25: User Interface Parameters
ELECTRONICS FIG-1 USER INTERFACE PARAMETERS WHAT IS A PRESET? A preset is comprised of all of the parameters that together control the way that the marker fires. These parameters are - > FIRE MODE > ROF CAP > BS ON ROF >... - Page 26 , push SAVE then select USER 1 or USER 2 to save your 1, 2 current user defined marker settings. Some presets may only be available in certain countries and on some models of the LV1.6. All presets are correct at the time of printing.
- Page 27 27 ELECTRONICS USER INTERFACE PARAMETERS FIG-1 FIG-1 - FIRE MODE PARAMETER > SEMI: 1 shot per trigger pull. Sets the firing mode of the marker. > RAMP: Ramping, multiple shots per trigger pull under certain conditions. See page 28. FIG-2 >...
- Page 28 28 ELECTRONICS USER INTERFACE PARAMETERS FIG-1 FIG-1 - RAMP SET-UP MENU This menu is only available when RAMP has been selected as the FIRE MODE parameter. FIG-2 - TYPE PARAMETER Select the type of ramping required: > STEP: The marker will fire in semi-automatic until a number of trigger pulls (set by SEMI SHOTS) have been made at a minimum pull rate (set by KICK IN).
- Page 29 29 ELECTRONICS USER INTERFACE PARAMETERS FIG-1 This parameter can be set between 3 and 9 pulls FIG-1 - SEMI SHOTS PARAMETER This sets the number of shots in semi-automatic in 1 pull increments. required at the KICK IN rate before ramping starts. FIG-2 FIG-2 - KICK IN PARAMETER This parameter can be set between 3.3 and 10.0...
- Page 30 30 ELECTRONICS USER INTERFACE PARAMETERS FIG-1 FIG-1 - TIMING MENU The TIMING menu parameters control the energise time of the solenoid valve. FIG-2 If set too high the marker will waste gas. FIG-2 - DWELL PARAMETER Sets the amount of time that the solenoid valve This parameter can be set between 5 and 20.0 is energised during each firing cycle.
- Page 31 31 ELECTRONICS USER INTERFACE PARAMETERS FIG-1 met. Factory default settings are suitable for most FIG-1 - FILTER MENU The FILTER menu parameters are used to tune the set-ups however, certain loader and trigger marker software filters to prevent the marker from set-ups may require filter adjustments.
- Page 32 32 ELECTRONICS USER INTERFACE PARAMETERS FIG-1 This parameter can be set between 3.0 and 20.0 FIG-1 - PULL TM PARAMETER Sets the minimum amount of time that the trigger milliseconds in 0.1 increments. must be pulled for in order to be recognised as a valid trigger pull.
- Page 33 33 ELECTRONICS USER INTERFACE PARAMETERS FIG-1 FIG-1 - HARDWARE MENU The HARDWARE menu contains items that are used to control the marker's electronic hardware. FIG-2 FIG-2 - TRIGGER PARAMETER > OPTO: OPTO-Electronic trigger pull sensor. This allows the user to select their trigger detection >...
- Page 34 ELECTRONICS USER INTERFACE PARAMETERS FIG-1 This parameter can be set between 00:00 and FIG-1 - BACKLIGHT PARAMETER Sets the time that the LCD backlight is illuminated 00:20 seconds. Setting this parameter to 00:00 for after a push-button is pressed. will prevent the backlight from coming on. FIG-2 FIG-2 - RED LEVEL PARAMETER This parameter can be set between 0% and...
- Page 35 35 ELECTRONICS USER INTERFACE PARAMETERS FIG-1 This parameter can be set between 1 and 31 in FIG-1 - CONTRAST PARAMETER This sets the contrast level of the LCD screen. increments of 1. FIG-2 FIG-2 - DBL CLICK PARAMETER > NONE: Double-click disabled. Sets where the Select button double-click can >...
- Page 36 36 ELECTRONICS USER INTERFACE PARAMETERS FIG-1 > ON: Training mode enabled. FIG-1 - TRAINING PARAMETER This simulates the firing cycle (in unloaded state) > OFF: Training mode disabled. using a BEEP to simulate a shot fired, allowing the user to practice their trigger technique off the field without firing the marker.
- Page 37 37 ELECTRONICS USER INTERFACE PARAMETERS FIG-1 FIG-1 - GAME TIMER MENU The game timer menu contains items associated with the game timer. FIG-2 FIG-2 - GAME PARAMETER GAME OVER is displayed on the LCD. This sets the game timer start point, from which This parameter can be set between 00:00 and the timer counts down to zero.
-
Page 38: The Menu Tree
38 ELECTRONICS THE MENU TREE Turn off the marker TURN OFF PRESET FACTORY Load preset - reverts to factory marker settings SEMI NC Load preset - semi auto with no rof cap SEMI 10 Load preset - semi auto with 10bps rof cap NXL 2016 Load preset - NXL 2016 rulebook compliant PSP 2015... - Page 39 39 ELECTRONICS THE MENU TREE Fire mode dependant RAMP SET-UP * STEP (Default) STEP ramping TYPE LINEAR LINEAR ramping CANCEL CANCEL Selection 0 - 100% Percentage LINEAR RAMP rate (RAMP TYPE dependant). Default 50% RATE * 3 - 9 Number of shots before ramping can start. Default 3 SEMI SHOTS 3.3 - 10.0 pps Rate which the trigger has to be pulled in pulls per second (pps) before ramping starts.
- Page 40 40 ELECTRONICS THE MENU TREE HARDWARE OPTO (Default) Use OPTO to detect trigger operation TRIGGER SWITCH Use micro-switch to detect trigger operation ON (Default) Turn on audible indicators SOUND Turn off audible indicators ON (Default) Turn on audible tone when any button is pressed (SOUND dependant) CLICK TONE Turn off audible tone when any button is pressed (SOUND dependant) 00:00 - 00:20 s...
- Page 41 41 ELECTRONICS THE MENU TREE SHOT COUNT ON (Default) Shot gauge on GAUGE Shot gauge off GAUGE MAX 100 - 2000 Shot gauge maximum (reset value - GAUGE dependant). Default 140 shots GAME TIMER MAIN MENU GAME TIME 00:00 - 60:00 Countdown game timer start time in minutes.
-
Page 42: Reset
42 RESET FIG-1 FIG-2 FACTORY RESET Follow these steps in order to reset the LV1.6 to the way that it left the factory. FIG-1 Navigate to the PRESET menu and load the FACTORY settings. See page 26. FIG-3 FIG-2 Using the 1/8 hex key... -
Page 43: Installing The Battery
43 RESET FIG-1 INSTALLING THE BATTERY 5/64 The LV1.6 uses 1 x 9V alkaline battery (IEC 6LR61 / ANSI 1604A) situated in the frame. Switch the marker off before you begin. FIG-1 Using a hex key remove the grip screws (both sides of the grip frame) then pull and remove the grips. -
Page 44: Fault Finding
Either of the two gaskets are damaged and/or not seated correctly in the manifold body pocket. Replace the gasket if damaged using the LV1.6 parts kit. Check the LPR output pressure. Adjust accordingly. Clean and inspect the LPR assembly paying particular attention Solenoid valve and/or manifold is over-pressurising. - Page 45 45 FAULT FINDING FAULT FINDING TABLES SYMPTOM POSSIBLE CAUSE SOLUTION Rear solenoid flow restrictor is set too low. Set the rear SFR to its factory level. Low rate of fire/rate of fire not reaching the ROF cap. The force setting of the loader is too low. Adjust the loader force feed settings.
- Page 46 46 FAULT FINDING FAULT FINDING TABLES SYMPTOM POSSIBLE CAUSE SOLUTION The POPS is not fully engaged. Push the POPS bonnet back until it engages. The solenoid flow restrictors (SFRs) are set too low. Set the SFRs to their factory settings. The battery quality or charge level is very low.
- Page 47 47 FAULT FINDING FAULT FINDING TABLES SYMPTOM POSSIBLE CAUSE SOLUTION The Breech Sensors are the wrong way around. Check that the red receiver is on the right-hand side of the breech. Check the plug and cables. There is a broken wire or contact, or a short circuit on The BS is not reading at all.
-
Page 48: Technical Information
48 TECHNICAL INFORMATION PARTS LIST FIG-1... - Page 49 49 TECHNICAL INFORMATION PARTS LIST Low rise clamping feed tube assembly Valve plug Marker body SL4 inline regulator assembly Rammer cap Foregrip sleeve Rammer assembly Air Transfer Pipe assembly (ATP) Bolt assembly Frame assembly Rubber detent Trigger assembly Breech sensor (BS) unit Rubber grips Rear frame screw 9V battery...
-
Page 50: Sl4 Inline Regulator
Reset the regulator to factory after re-assembly. AT pipe Only use the SL4 regulator with the LV1.6. #007 NBR70 Only use the LV1.6 SL4 spring with the SL4 inline regulator. Failure to re-install the Purge Poppet assembly correctly could seriously damage the LV1.6. -
Page 51: Lv1.6 Bolt Assembly
51 TECHNICAL INFORMATION LV1.6 BOLT ASSEMBLY FIG-1 Bolt pin o-ring #014 NBR70 Bolt pin Insert o-ring #012 NBR70 Plunger spring Bolt o-rings Bolt body 14x2 NBR70 Plunger Bolt insert Middle o-ring #011NBR70 Front o-ring #010 NBR70 Rammer cap o-ring Rammer shaft... -
Page 52: Solenoid Assembly
52 TECHNICAL INFORMATION SOLENOID ASSEMBLY FIG-1 FIG-1 Solenoid pilot Solenoid plug M1.7x16 (cross pan-head screws) Solenoid manifold gasket M2.5 x 5 (cap-head socket) Solenoid plate Manifold body gasket Inlet filter Manifold barb and 1/8" low pressure hose... -
Page 53: Push On Purge System (Pops) Assembly
53 TECHNICAL INFORMATION PUSH ON PURGE SYSTEM (POPS) ASSEMBLY FIG-1 FIG-1 POPS body POPS bonnet #004 NBR70 POPS gasket Inlet filter Latch button Latch spring POPS screws 10-32 UNF X1" Cap head socket Push rod #004 NBR70 POPS insert #007 NBR70 #005 NBR90 POPS pin... -
Page 54: Trigger Assembly
Post-travel adjuster screw (6-32 UNC x 3/16” socket set) Trigger pin Trigger pin locking screw (6-32 UNC x 1/8” socket set) Spring adjuster screw (6-32 UNC x 3/16” socket set) Micro-switch screw (6-32 UNC x 1/2” socket set) LV1.6 frame... -
Page 55: Low Rise Clamping Feed Tube Assembly
55 TECHNICAL INFORMATION LOW RISE CLAMPING FEED TUBE ASSEMBLY FIG-1 FIG-1 Clamping feed nut o-ring #004 NBR70 Clamping feed nut Short clamping feed screw 10-32 UNF x 1/2” Feed tube Feed insert Machined clamping feed screw Feed swivel o-ring #006 NBR70 Feed swivel Feed lever... -
Page 56: Solenoid Flow Restrictor (Sfr)
56 TECHNICAL INFORMATION SOLENOID FLOW RESTRICTOR (SFR) FIG-1 FIG-1 Using a flat-head screw driver you can adjust the front and rear SFRs. For factory settings adjust both the front and rear SFRs to the 12 o'clock position. Rear SFR Front SFR NOTE: The SFR's control the speed of the bolt and rammer. -
Page 57: Lpr Assembly
57 TECHNICAL INFORMATION LPR ASSEMBLY FIG-1 Valve guide Valve plug O-ring #013 NBR70 Exhaust valve O-ring #017 NBR70 Valve spring Valve stem Valve plug LPR spring Internal o-ring #008 NBR70 Tuning fork seal External o-ring LPR piston #013 NBR70 O-ring #013 NBR70 LPR cap O-ring #007 NBR70 O-ring #013 NBR70... -
Page 58: Breech Sensor (Bs) Assembly
58 TECHNICAL INFORMATION BREECH SENSOR (BS) ASSEMBLY FIG-1 FIG-1 Breech sensor and wires Breech sensor screw Breech sensor cover Breech sensor screw thread Rubber detent... -
Page 59: Frame Assembly
59 TECHNICAL INFORMATION LV1.6 FRAME ASSEMBLY LV1.6 frame FIG-1 AT Pipe POPS assembly Rear grip section LV1.6 Circuit board Push button console LCD screen LV1.6 Circuit board screws (x3) M2.5 x 5 socket cap-head... -
Page 60: Support
60 SUPPORT E-PORTAL FIG-1 E-portal 2 is a PC application that lets you connect to your LV1.6 via a USB cable. Amongst other things you can use E-portal 2 to: Upgrade the LV1.6 firmware. Change the start-up splash screen. Modify control parameters. -
Page 61: Our Promise
Eclipse products and be repaired or replaced in a snap! accessories that can enhance your playing style. For more information about our Planet Eclipse Approved Tech Centres, visit our servicing page online: PLANETECLIPSE.COM/TECH/SERVICING * Conditions apply, see online policies for full details at planeteclipse.com... -
Page 62: Index
62 SUPPORT INDEX Air system: 07,19,46,47,60 Dbl click: 35 Game timer: 09,37,41 Magnet: 54,62 Air transfer pipe: 04,20,49 Debounce: 31,39,45 Gauge: 36,41 Magnet adjuster screw: 16 Alarm: 37,41 Detent: 49,58 Grip: 17,43,59 Maintenance: 02,04,22 AT pipe: 20,59 Double-click: 08,35 GRN level: 34,40 Marker settings: 08,26,38 Auto off: 35 Dwell: 30,39... - Page 63 63 SUPPORT INDEX Parameters: 04,13,23,25,26,27,28,29,30, Select button: 08,14,23,24,35,37 Timing: 30,39 31,32,33,34,35,36,37,38,60 Semi: 25,26,27,28,38 Tournament lock button: 04,17 Pops: 04,07,19,46,49,53,59 Semi shots: 29,39 Training: 10,24,36,40 Post-travel screw: 16 SFR: 04,42,45,46,47,56 Trigger: 08,09,11,16,27,28,29,31,32,33,36, Preset regulator: 07 39,40,41,45,46,54 Shot count: 36,41 Presets: 26 Trigger detection indicator: 09 Software: 14,31 Pre-travel screw: 16...
-
Page 64: Notes
64 NOTES... - Page 65 12 months from the time of original purchase**. I verify that I am least 18 years of age and I have read Warranty cover is dependent on successful completion, and receipt by Planet Eclipse Limited, of warranty registration and proof the manual supplied with my Eclipse paintball marker ®...
- Page 66 LICK. GET MORE - PLANETECLIPSE.COM STICK. SEND. PLANET ECLIPSE 130 FRANKLIN STREET BUILDING L4 & L5 WARREN RHODE ISLAND 02885 U.S.A. TO BENEFIT FROM OUR INDUSTRY-LEADING GLOBAL TECH SUPPORT PLEASE REGISTER YOUR MARKER ONLINE TODAY WARRANTY.PLANETECLIPSE.COM...
- Page 67 67 NOTES...
- Page 68 12/256,832; 12/613,958; 12/493,777; 11/654,721; 11/747,107; 12/503,504; 11/781,821; 60/832,548; 11/965,886; 10/280,115 Additional U.S. and International Patents may be pending. EUROPE © Planet Eclipse Ltd. Pe-Paintball.De Gmbh 130 Franklin Street Unit 14 Premier Park, Acheson Way Langenberger Str. 9 Tor 5 & 6 Building L4 &...
Need help?
Do you have a question about the LV1.6 and is the answer not in the manual?
Questions and answers