Table of Contents
Advertisement
Quick Links
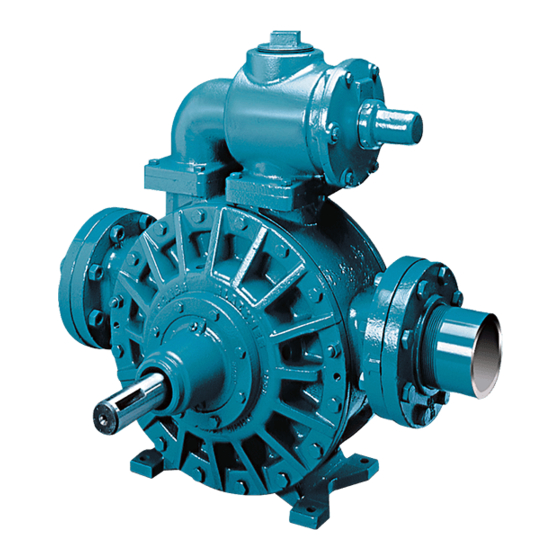
BLACKMER POWER PUMPS
INSTALLATION OPERATION AND MAINTENANCE INSTRUCTIONS
MODELS: MLX4B, MLXW4B, MRLX4B, MRLXW4B
TABLE OF CONTENTS
Technical Data ........................................................ 2
Initial Pump Start Up Information ............................. 2
Pre-Installation Cleaning ......................................... 3
Location and Piping ................................................. 3
Pump Mounting ....................................................... 3
Coupling Alignment ................................................. 4
Pump Rotation......................................................... 4
To Reverse Pump Rotation ..................................... 4
Check Valves .......................................................... 4
Optional Jacketed Heads ........................................ 4
Manual Bypass Valve .............................................. 4
Pre-Start Up Check List ........................................... 5
Start Up Procedures ................................................ 5
Running the Pump in Reverse Rotation .................. 5
Flushing the Pump .................................................. 6
Pump Relief Valve ................................................... 6
Relief Valve Setting and Adjustment ....................... 6
.................... 7
TROUBLE SHOOTING ................................................... 16
NOTE: Numbers in parentheses following individual parts
indicate reference numbers on Blackmer Parts List No.
106-A01 for MLX4B, MLXW4B, MRLX4B, MRLXW4B and
106-A02 for MLN4B, MRLN4B.
Blackmer pump manuals and parts lists may be obtained
from Blackmer's website (www.blackmer.com) or by
contacting Blackmer Customer Service.
MLN4B, MRLN4B
......................... 12
....... 8
......................... 12
....... 8
......................... 13
............ 9
......................... 14
This is a SAFETY ALERT SYMBOL.
When you see this symbol on the product, or in the manual,
look for one of the following signal words and be alert to the
potential for personal injury, death or major property
Warns of hazards that WILL cause serious personal injury,
Page
Warns of hazards that CAN cause serious personal injury,
Warns of hazards that CAN cause personal injury
Indicates special instructions which are very
Blackmer Pumps MUST only be installed in systems, which
have been designed by qualified engineering personnel.
The system MUST conform to all applicable local and
national regulations and safety standards.
This manual is intended to assist in the installation and
operation of the Blackmer ML4B Series pumps, and MUST
be kept with the pump.
Pump service shall be performed by qualified technicians
ONLY. Service shall conform to all applicable local and
national regulations and safety standards.
Thoroughly review this manual, all instructions and hazard
warnings, BEFORE performing any work on the pump.
Maintain ALL system and pump operation and hazard
warning decals.
966909
INSTRUCTIONS NO. 106-A00
Section
Effective
Replaces
SAFETY DATA
damage
death or major property damage.
death or major property damage.
or property damage.
NOTICE:
important and must be followed.
NOTICE:
106
Jan 2014
Aug 2010
Advertisement
Table of Contents

Related Manuals for Dover PSG BLACKMERMLX4B


Summary of Contents for Dover PSG BLACKMERMLX4B
-
Page 1: Table Of Contents
966909 BLACKMER POWER PUMPS INSTRUCTIONS NO. 106-A00 INSTALLATION OPERATION AND MAINTENANCE INSTRUCTIONS Section MODELS: MLX4B, MLXW4B, MRLX4B, MRLXW4B Effective Jan 2014 Replaces Aug 2010 MLN4B, MRLN4B SAFETY DATA This is a SAFETY ALERT SYMBOL. When you see this symbol on the product, or in the manual, look for one of the following signal words and be alert to the potential for personal injury, death or major property damage... -
Page 2: Pump Data
SAFETY DATA Failure to disconnect and lockout Failure to disconnect and lockout electrical power before attempting electrical power before attempting maintenance can cause shock, burns or maintenance can cause shock, burns or death death Hazardous Hazardous voltage. machinery can Can shock, burn or cause serious cause death. -
Page 3: Installation
INSTALLATION NOTICE: Check alignment of pipes to pump to avoid strains which Blackmer pumps must only be installed in systems might later cause misalignment. See Figure 1. Unbolt designed by qualified engineering personnel. System flanges or break union joints. Pipes must not spring design must conform with all applicable regulations and away or drop down. -
Page 4: Coupling Alignment
INSTALLATION COUPLING ALIGNMENT CHECK VALVES The pump must be directly coupled to a gear and/or driver The use of check valves or foot valves in the supply tank is with a flexible coupling. Verify coupling alignment after not recommended with self-priming, positive displacement installation of new or rebuilt pumps. -
Page 5: Operation
OPERATION START UP PROCEDURES NOTICE: Consult the "General Pump Troubleshooting" section of Operation without guards in place can this manual if difficulties during start up are experienced. cause serious personal injury, major property damage, or death. Start the motor. Priming should occur within one minute. Do not operate Check the vacuum and pressure gauges to see if the without guard... -
Page 6: Flushing The Pump
OPERATION FLUSHING THE PUMP NOTICE: If flushing fluid is to be left in the pump for an extended time, it must be a lubricating, non-corrosive fluid. If a corrosive or non-lubricating fluid is used, it must be flushed from the pump immediately. To flush the pump, run the pump with the discharge valve open and the intake valve closed. -
Page 7: Maintenance
MAINTENANCE MLX4B, MLXW4B, MRLX4B, MRLXW4B SCHEDULED MAINTENANCE Failure to disconnect and lockout STRAINERS electrical power before attempting Strainers must be cleaned regularly to avoid pump starvation. maintenance can cause shock, burns or Schedule will depend upon the application and conditions. death Hazardous machinery can... -
Page 8: Vane Replacement
The disc (71) will come off with the head assembly and MAINTENANCE: M(R)LX(W)4B Series is attached with four countersunk, allen-head machine screws (71A) and lockwashers (71B). VANE REPLACEMENT 10. In order to remove the rotor and shaft assembly without NOTICE: damaging the mechanical seal, it is advisable to remove the second hub assembly and mechanical seal Maintenance shall be performed by qualified technicians... -
Page 9: Pump Assembly
Attach one hub (20C) and bearing (24) to the mounted MAINTENANCE: M(R)LX(W)4B Series head without O-rings or mechanical seal components. Install and snug up the hub capscrews (21D). PUMP ASSEMBLY NOTE: This step is intended as an assembly aid and is Before reassembling the pump, inspect all component essential to help guide the rotor and shaft into place parts for wear or damage, and replace as required. - Page 10 MAINTENANCE: M(R)LX(W)4B Series 12. LOCKNUT INSTALLATION The bearing locknuts (24A) and lockwashers (24B) MUST be installed and adjusted properly. Overtightening locknuts can MECHANICAL SEAL cause bearing failure or a broken lockwasher tang. Loose Rotating Assembly locknuts will allow (See Figure 8) the rotor to shift against the Make sure the shaft is free of burrs that might cut or heads, causing wear.
- Page 11 MAINTENANCE: M(R)LX(W)4B Series 13. GREASE SEAL If the grease seal (104) has been removed from the bearing cover (27), it must be replaced prior to attaching the cover to the pump. Apply a small amount of grease to the outside diameter of the grease seal, and push it into the cavity of the bearing cover so that the lip of the seal will face inward (towards the pump) when the cover is attached.
- Page 12 MAINTENANCE: PUMP MODEL: MLN4B, MRLN4B SCHEDULED MAINTENANCE STRAINERS Failure to disconnect and lockout electrical power before attempting Strainers must be cleaned regularly to avoid pump starvation. maintenance can cause shock, burns or Schedule will depend upon the application and conditions. death Hazardous machinery can...
- Page 13 MAINTENANCE: MLN4B, MRLN4B 10. Depending on the pump application, the liner (41) can be removed in two ways: If the pumpage is a clean, non-corrosive liquid, with PUMP DISASSEMBLY low viscosity, the liner can usually be withdrawn from the casing by prying with two bars. Insert the tips of NOTICE: the bars into the port openings on either side of the Follow all hazard warnings and instructions provided in...
- Page 14 Install and tighten the head capscrews (21) uniformly, MAINTENANCE: MLN4B, MRLN4B making sure the head O-ring (72) slides into place without damage. PUMP ASSEMBLY SLEEVE BEARINGS (Bushings) – If the sleeve bearing (24) has been removed from the hub (20C), a new bearing Before reassembling the pump, inspect all component must be installed prior to attaching the hub assembly to parts for wear or damage, and replace as required.
- Page 15 MAINTENANCE: MLN4B, MRLN4B 12. RELIEF VALVE ASSEMBLY (if equipped) a. Insert the valve (9) into the relief valve body (6) with the fluted end inward. Follow Steps 2 through 5 to install the remaining head b. Install the relief valve spring (8), spring guide (7) and and hub assemblies.
-
Page 16: Troubleshooting
TROUBLESHOOTING NOTICE: Maintenance shall be performed by qualified technicians only, following the appropriate procedures and warnings as presented in this manual. LEAKAGE Location Probable Cause/Corrective Action Between the head & casing Damaged head O-ring: Inspect and replace if necessary. Burrs/dirt in head O-ring groove or casing: File and clean when necessary. - Page 17 TROUBLESHOOTING ….continued EXCESSIVE NOISE AND VIBRATION Probable Cause Corrective Action Cavitation or vaporization of the liquid resulting from Check for: excessive vacuum on the pump due to starved suction. Inlet piping too long or too small in diameter. Strainer plugged or dirty.
- Page 18 TROUBLESHOOTING ….continued DAMAGED VANES Probable Cause Foreign objects entering the pump. Excessive heat. Running the pump dry for extended periods of time. Worn or bent push rods, or worn push rod holes. Cavitation. Settled or solidified material in the pump at start-up. ...
- Page 19 NOTES 106-A00 Page 19/20...
- Page 20 Stainless Steel Sliding Vane Pumps Sliding Vane Pumps: 5 to 2200 GPM 1 to 265 GPM: Acids, Brines, Sugars, Syrups, Refined Fuels, Liquefied Gases, Solvents,Process Beer, Beet Juice, Cider, Flavor Extracts, etc. ® System One Centrifugal Pumps Magnetic Drive Pumps 10 to 7500 GPM;...
Need help?
Do you have a question about the PSG BLACKMERMLX4B and is the answer not in the manual?
Questions and answers