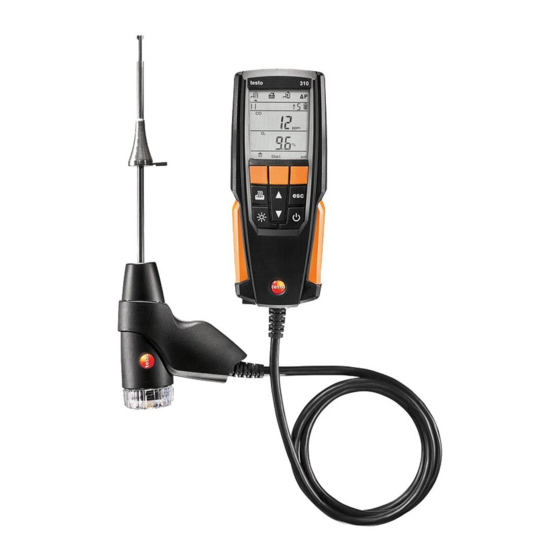
TESTO 310 Brief Instructions
Flue gas analyser
Hide thumbs
Also See for 310:
- User manual ,
- Instruction manual (36 pages) ,
- Instruction manual (28 pages)
Advertisement
testo 310 flue gas analyser
Brief instructions
These brief instructions provide an overview over the most important functions
of the product. Before using the product, you must read and follow the
instruction manual!
The instrument has two configuration menus. The menu that is
opened depends on the instrument status when called up.
Commissioning/instrument configuration menu
Area version, measurement units, time and date can be set.
When the instrument is switched on initially, the configuration menu is
opened automatically.
1. Switch the instrument on: hold down
the display.
2. Open instrument configuration menu: Press right function key
the initialisation phase.
3. Make settings:
[]
switches to the next parameter, while
previous parameter.
Parameter
Explanation
ArEA
(area
Selecting the area version activates different calculation
version)
formulas and associated measurement parameters.
> Select area version code:
> Confirm the entry: [OK].
Only when area version 5 is selected
UnI
> Measurement procedure according to UnI norm: activate
> Select the unit:
Pressure,
temperature
1: USA, HU, IN, KR / 2: GB, RU, DK, AU, JP, CN / 3: NL,
SE, TR, RO / 4: DE, AT, CH, CZ, FR, ES, BE, PL, PT, AR,
BR / 5: IT
[On]
/ deactivate [OFF].
[▲]
[
]
until all segments are shown on
[esc]
takes you to the
[▲]
and [▼].
and [▼], confirm the entry: [OK].
[set]
during
Advertisement
Table of Contents

Related Manuals for TESTO 310


Summary of Contents for TESTO 310
- Page 1 310 flue gas analyser Brief instructions These brief instructions provide an overview over the most important functions of the product. Before using the product, you must read and follow the instruction manual! The instrument has two configuration menus. The menu that is opened depends on the instrument status when called up.
- Page 2 Parameter Explanation > Select the parameter: [], set the values: [▲] and [▼], Time, date confirm the entry: [OK]. Measurements configuration menu Fuels and measurement units can be set. 1. Switch the instrument on: hold down until all segments are shown on the display.
- Page 3 Performing the measurement Measurement type Explanation > Edit reading display line 1/line 2: [▲] / [▼]. Flue gas Option for area version 5 > End measurement before the measurement period has lapsed: [Stop]. Once the measurement period has lapsed, the measurement stops automatically.
- Page 4 0971 3100 en 02 V01.00...
Need help?
Do you have a question about the 310 and is the answer not in the manual?
Questions and answers