Advertisement
Quick Links
Advertisement

Subscribe to Our Youtube Channel
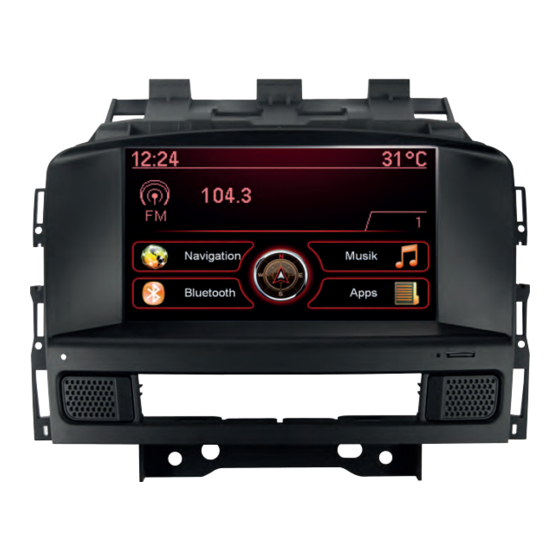
Summary of Contents for ESX Vision Naviceiver
- Page 1 VN709 OP-ASTRA...
- Page 2 SCOPE OF DELIVERY / Lieferumfang ITEM FIGURE QUANTITY Artikel Abbildung Anzahl MAIN DEVICE 17,8 CM (7“) Hauptgerät 17,8 cm (7“) CD/DVD-DRIVE CD/DVD Laufwerk FOAM PROTECTION BAG Schaumstoff-Schutzbeutel MICRO SD CARD 8GB INKL: NAVIGATION SOFTWARE MicroSD Speicherkarte 8GB Navigationssoftware SYSTEM CONNECTOR CD/DVD-DRIVE System-Anschluss CD/DVD-Laufwerk Y-CONNECTOR FOR ORIGINAL DISPLAY Y-Anschluss für Original-Display...
- Page 3 SCOPE OF DELIVERY / Lieferumfang ITEM FIGURE QUANTITY Artikel Abbildung Anzahl AUDIO / VIDEO IN- AND OUTPUTS Audio / Video Ein- und Ausgänge BT-MICROPHONE BT-Mikrofon GPS ANTENNA GPS Antenne USB TMC WIRE ANTENNA USB TMC Kabelantenne STYLUS Markierstift...
- Page 4 CONNECTION DIAGRAM / Anschlussdiagramm CONNECTOR FOR THE DVD-DRIVE Anschluss für das DVD-Laufwerk SYSTEM CONNECTOR OF CD/DVD-DRIVE GPS ANTENNA GPS Antenne System-Verbindung des CD/DVD-Laufwerks SYSTEM CONNECTOR FROM ORIGINAL RADIO System-Verbindung vom Original-Radio SYSTEM CONNECTOR FROM ORIGINAL RADIO System-Verbindung vom Original-Radio AUDIO JACK FOR THE MICROPHONE Audio Stecker für das Mikrofons...
-
Page 5: Device Connectors
CONNECTION DIAGRAM / Anschlussdiagramm DEVICE CONNECTORS Geräte-Anschlüsse BLUE / WHITE TV LEFT AUDIO INPUT GREY / WHITE LEFT AUDIO OUTPUT Blau / Weiß TV linker Audio-Eingang Grau / Weiß Linker Audio-Ausgang PINK / RED TV RIGHT AUDIO INPUT RED / RED RIGHT AUDIO OUTPUT Pink / Rot TV rechter Audio-Eingang... - Page 6 Recommended tools and accessories: Empfohlene Werkzeuge und Zubehör: Multi socket wrench set Plastic mounting wedges Mehrteiliger Steckschlüsselsatz Kunststoff-Montagekeile (AD Accessories Art.Nr.: 2426812) Cableties 6 x TMC Y-Splitter (Fakra connector) Kabelbinder 6 x TMC Y-Splitter (Fakra Anschluss) (ESX Accessories Art.Nr.: VNA-TMC-Y1)
-
Page 7: Installation Hints
In der Regel sollte das Kabel lang genug sein, um die A-Säule (Fahrerseite) über die Beifahrerseite zu erreichen. Ein evtl. werksseitig vorhandenes Mik- rofon ist nicht kompatibel mit dem ESX Gerät. Bitte verwenden Sie das mit- gelieferte Mikrofon. GPS antenna: The GPS (10) antenna must be mounted horizontally in front on the dashboard (ensure a clear view to the sky). - Page 8 INSTALLATION NOTES / Installationshinweise Handbrake connection: The green wire („Brake“) from the Audio/Video cable set (8) needs to be con- nected. The signal must be connected with ground while the handbrake is applied. Please contact for a proper and safe installation your car dealer! Ac- cording to legal regulations, the device must playback a DVD or video on the main screen only with the handbrake applied, Never connect the the cable permanently with the vehicle‘s ground.
- Page 9 INSTALLATION EXAMPLE / Einbaubeispiel Start to remove the original car audio system. Remove the insert in the storage compartment below the radio. Beginnen Sie mit dem Entfernen des originalen Radio Systems. Entnehmen Sie den Einsatz im Ablagefach unter dem Radio. Remove the storage compartment.
- Page 10 INSTALLATION EXAMPLE / Einbaubeispiel Carefully swing the plastic covers of the fan controllers to the side Remove the decoration panel carefully with a mounting wedge. (right and left side of the radio). The decoration panel is only clipped. Klappen Sie vorsichtig die Plastikabdeckungen an den Lüfterreg- Entfernen Sie die Zierblende vorsichtig mit einem Kunststoffhe- lern zur Seite (Rechts und links neben dem Radio).
- Page 11 INSTALLATION EXAMPLE / Einbaubeispiel IMPORTANT NOTE: If you want to install the enclosed ESX CD/DVD-Drive, continue with the next step 13. But you need to prepare and modify the original radio accordingly. This should be ideally carried out by a qualified technician with an appropriate experience in order to avoid damage to the device.
- Page 12 Put the original CD drive on the side. DVD drive (2 screws) Then put the losen front cover on the side. Mount the ESX CD/DVD drive onto the front cover with the original Dann entfernen Sie GANZ vorsichtig das Flachband an der Haupt- screws.
- Page 13 Armaturenbrett. (Oberes Display und Warnblinker/Airbag-Anzeige). Carefully remove the hazard light/airbag indicator from the origi- Insert the hazard light/airbag indicator on the ESX main device nal display. It‘s only clipped in. into the designated hole. Entfernen Sie vorsichtig die Warnblinker/Airbag-Anzeige am Setzen Sie die Warnblinker/Airbag-Anzeige am ESX Hauptgerät in...
- Page 14 INSTALLATION EXAMPLE / Einbaubeispiel Remove the connector on the original AUX port next to the ci- Then connect the gray ESX connector from the cable #7 with the garette lighter. After the installation the original AUX input is not connector of the original AUX input. Connect the original Opel po- available anymore.
- Page 15 INSTALLATION EXAMPLE / Einbaubeispiel Then connect the original connector of the hazard warning lights/ Now put the ESX main device into the bay, where previously was airbag indicator. the original display unit. Setzen Sie nun das ESX Hauptgerät in den Einbauplatz, wo sich Schließen Sie dann die Original-Stecker an die Warnblinker/...
- Page 16 ESX Car Media Systems · Audio Design GmbH Am Breilingsweg 3 · D-76709 Kronau/Germany Tel. +49 7253 - 9465-0 · Fax +49 7253 - 946510 www.esxaudio.de - www.audiodesign.de ©2015 All Rights Reserved...


Need help?
Do you have a question about the Vision Naviceiver and is the answer not in the manual?
Questions and answers