
Related Manuals for Whirlpool ACM230/IX


Summary of Contents for Whirlpool ACM230/IX
- Page 1 Health & Safety, Use & Care, Installation Guide and Online Warranty Registration Information Model: ACM230/IX...
-
Page 2: Table Of Contents
INDEX Safety precautions and warnings..............Installation......................Safety distances....................13 Power cord......................15 Wiring diagram ....................15 Description......................16 Cooking zone information................... 17 Control description................... 17 Sensor keys......................17 Cooking zone display....................17 Timer display....................... 17 Start and use..................... 18 Commissioning....................18 Booster Function.................... -
Page 3: Safety Precautions And Warnings
SAFETY PRECAUTIONS AND WARNINGS This hob is compliant with current safety regulations. Improper use can cause damage to property and/or to persons. Read the operating instructions carefully before operating the hob as they contain important indications for installation, safety, use and maintenance of the appliance. Observing them avoids dangers for persons and prevents damage to materials. - Page 4 SAFETY PRECAUTIONS AND WARNINGS Children - Keep children under the age of eight away from the appliance; alternatively, supervise them at all times. - Children over the age of eight may only use the hob on their own if it has been clearly explained to them how it works and if they are able to use it correctly.
- Page 5 SAFETY PRECAUTIONS AND WARNINGS These objects could cause them to climb onto the appliance. Danger of electric shock! Do not start or immediately turn off the hob if the glass ceramic plate is damaged or cracked. Disconnect the hob from the power supply Technical safety - Repairs or incorrectly performed installation and maintenance work can seriously endanger the user.
- Page 6 SAFETY PRECAUTIONS AND WARNINGS - For safety reasons, the hob must only be used after being installed. Consult this data before making the connection. In case of uncertainty, contact an electrician. - The connection data (voltage and frequency) indicated on the data plate of the hob must fully correspond with that of the electrical mains, otherwise the appliance could become damaged.
- Page 7 SAFETY PRECAUTIONS AND WARNINGS Normally measuring devices can discharge the contacts. The discharge time typically takes around 1 minute. Correct use - Spray cans, slightly flammable liquids or combustible materials are flammable. Therefore, do not store lightly flammable objects in the drawers directly under the hob. The cutlery tray, if present, must be made of heat-resistant material.
- Page 8 SAFETY PRECAUTIONS AND WARNINGS - If the hob has been fitted behind the door of a unit, only operate it with the unit door open. - Close the unit door only when the residual heat indicators have turned off. - The appliance in operation is very hot and remains hot for a certain time after it has been switched off.
- Page 9 SAFETY PRECAUTIONS AND WARNINGS - Clean the cooking zones with a glass ceramic cleaner as soon as they have cooled and resistand pot indicator is off. - Pans from which liquids evaporate directly can damage the glass ceramic surface. Always remain in the vicinity of the appliance when it is operating.
- Page 10 SAFETY PRECAUTIONS AND WARNINGS Warning for persons wearing pacemakers: - Bear in mind that in the immediate vicinity of the appliance, when it is operating, an electromagnetic field is generated. The possibility of a pacemaker's operation being affected is very remote. - If in doubt, contact the pacemaker manufacturer or your doctor.
-
Page 11: Installation
INSTALLATION General warnings - Installation and connection of the appliance can only be carried out by a qualified technician. The manufacturer is not responsible for damage caused by incorrect installation or connection of the appliance. To prevent damage to the appliance, only recess it after installing the wall units and the extractor hood. - Page 12 INSTALLATION BUILT-IN DIMENSIONS (mm) - Make the notch in the worktop according to the dimensions relative to the model (see figure above). Respect the minimum distance of 50 mm towards the rear wall as well as to the right or left towards any side wall. Turn the hob upside down and apply the seal supplied with the accessories kit to the outside...
-
Page 13: Safety Distances
INSTALLATION 50 mm 650 mm DISTANCE BETWEEN APPLIANCE AND EXTRACTOR HOOD f the hob is installed below an extractor hood, the safety distance indicated by the manufacturer of the hood must be respected. In the absence of precise indications or if the appliance is fitted with highly flammable materials (e.g. - Page 14 INSTALLATION Downward safety distance To guarantee correct ventilation, it is necessary to maintain a minimum distance between the appliance and an oven, an intermediate shelf or a drawer. The minimum distance between the lower edge of the hob and - the upper edge of an oven must be 15mm - the upper edge of an intermediate shelf must be 15mm - the bottom of a drawer must be 75mm Safety distance from the niche covering...
-
Page 15: Power Cord
INSTALLATION Differential circuit breaker (circuit breaker): turn the main switch from 1 (on) to 0 (off) or press the control key. After separation, make sure that there cannot be a connection to the power supply. Power cord The appliance must be connected by means of a H 05 VV-F type cable (PVC insulated) of suitable diameter, observing the connection diagram. -
Page 16: Description
DESCRIPTION COOKING ZONE INFORMATION OPERATION TIME LIMITATION ZONE A ZONE B Level Without 3 kW 1.4 kW Booster Booster 12.0 10.5 18.0 14.0 15.5 28.0 21.5 24.0 42.0 32.0 36.0 64.0 49.0 55.0 100.0 77.0 86.0 100.0 The cooking zone can also be switched off manually by bringing the power level to "0". -
Page 17: Cooking Zone Information
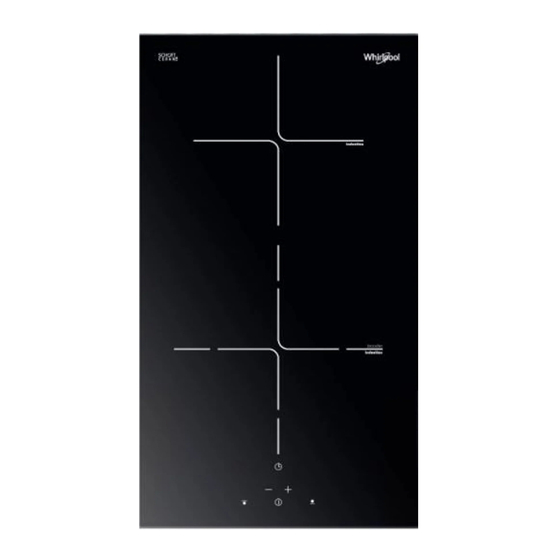
CONTROL DESCRIPTION Sensors key On/Off Timer Set the duration Set the power level Cooking zone display = Cooking zone ready for operation = Power level = Booster = Cookware not placed on the hob or not suitable = Residual heat Timer display = Time in minutes = Timer indicator light... -
Page 18: Start And Use
START AND USE Practical tips for use of the appliances. - U s e c o o k i n g c o n t a i n e r s w h o s e manufacturing material is compatible with the principle of induction (ferromagnetic material). -
Page 19: Booster Function
FIRST TIME USE The hob is switched on by selecting the sensor of the control zone. When this sensor is selected, a sound is emitted. Press the sensor key to turn it on. See photo below The heating zones turn on and all remain at "0" until a power level is selected. If this does not happen within 10 seconds, the hob switches off automatically. -
Page 20: Switching Off
FIRST TIME USE Timer function The timer can be activated by pressing the corresponding sensors (+) and (-). Values between 1 and 59 minutes are selectable but they can be modified at any time. The seconds and minutes remaining until expiry are always displayed. To cancel the timer operation, press the (+) and (-) keys at the same time. -
Page 21: Operation
FIRST TIME USE Changing the timer setting When the timer is running, the previously programmed time can be changed at any time by pressing the (+) and (-) keys at the same time and then + or - to change the time. -
Page 22: Troubleshooting
PROBLEMS AND SOLUTIONS ERROR MESSAGE DESCRIPTION POSSIBLE ERROR TROUBLESHOOTING The cooking zone can No error, the user is in the A pot must be on the be configured if a "C" is service menu. relevant cooking zone. displayed The cooking zone is The user is in the service Wait for the "-"... - Page 23 PROBLEMS AND SOLUTIONS ERROR MESSAGE DESCRIPTION POSSIBLE ERROR TROUBLESHOOTING E / 4 Induction module not Induction module not Remove the hob configured (all the configured configuration and activate induction modules the manual configuration. respond to the user Start the user interface interface but any service menu to configure element is related to the...
- Page 24 PROBLEMS AND SOLUTIONS ERROR DESCRIPTION POSSIBLE ERROR TROUBLESHOOTING MESSAGE E / A Hardware defect of the Defect of the hardware Replace the module induction module device detected by the auto control of the module. E / C Configuration error Two cooking zones are Delete the current dedicated to the same configuration.
-
Page 25: Cleaning And Maintenance
CLEANING AND MAINTENANCE Danger of injury! Steam from a steam cleaning appliance can reach voltage conductive parts and cause a short circuit. NEVER use a steam appliance to clean a hob. - always clean the hob after each use. Before doing so, allow it to cool completely. -
Page 26: Protecting The Environment
CLEANING AND MAINTENANCE For cleaning do not use detergent for dishes.With washing-up liquid not all residues and deposits can be removed. It creates an invisible film that discolours the glass-ceramic. These discolourations will then be impossible to remove. Clean the hob regularly with a specific glass ceramic detergent. Remove the largest pieces of dirt with a damp cloth;... -
Page 27: Safety Devices
SAFETY DEVICES ANTI-OVERHEATING DEVICES All the induction coils and the electronic heat dissipater are respectively equipped with an overheating protection device. Before the induction coils or heat dissipater can overheat, the overheating protection device ensures one of the following protection measures: - if the Booster is on, it is deactivated. - Page 28 Register your product online Save the planet and register your product warranty online! Enjoy extra 1-month free warranty upon online registration. https://rebrand.ly/WPwarranty COD. 211036 08-06-2020...
Need help?
Do you have a question about the ACM230/IX and is the answer not in the manual?
Questions and answers