Table of Contents
Advertisement
Advertisement
Table of Contents

Related Manuals for Whirlpool ACM 712 IX


Summary of Contents for Whirlpool ACM 712 IX
- Page 3 210 mm 280 mm 210 mm 145 mm 180 mm 145 mm 180 mm Domino 300 Domino 380 77x35 DEUTSCH Installation Seite 2 Bedienungsanleitung Seite 4 ENGLISH Installation Page 2 Instructions for use Page 10 FRANÇAIS Installation Page 2 Mode d’emploi Page 16 NEDERLANDS Installatie...
- Page 4 Domino 77x35 R min 6,5 min 50 min 50 max 8 R min 6,5 max 8 Domino min 50 R min 6,5 max 8 Misure in mm...
- Page 5 Min. 10 cm Min. 5 mm Min. 5 mm Min. 3 cm Max. 6 cm...
-
Page 6: Important Safety Instructions
ENGLISH Installation Page 2 Instructions for use Page IMPORTANT SAFETY INSTRUCTIONS YOUR SAFETY AND THAT OF OTHERS IS VERY IMPORTANT This manual and the appliance itself provide important safety messages, to be read and always observed. This is the danger symbol, regarding safety, warning of potential risks to users and others. All safety messages will be preceded by the danger symbol and the following words: Indicates a hazardous situation which, if not avoided, will result in serious injury. -
Page 7: Safeguarding The Environment
SAFEGUARDING THE ENVIRONMENT Disposal of packing The packing material is 100% recyclable and marked with the recycling symbol ( ). The various parts of the packing must not be dispersed in the environment, but disposed of in compliance with local regulations. Disposal This appliance is marked in conformity with European Directive 2002/96/EC on Waste Electrical and Electronic Equipment (WEEE). -
Page 8: Installation
INSTALLATION After unpacking the product, check for any damage during transport. In case of problems, contact the dealer or the After-Sales Service. PREPARING THE CABINET FOR FITTING Install a separator panel under WARNING the hob. The lower part of the product must not be accessible after installation. -
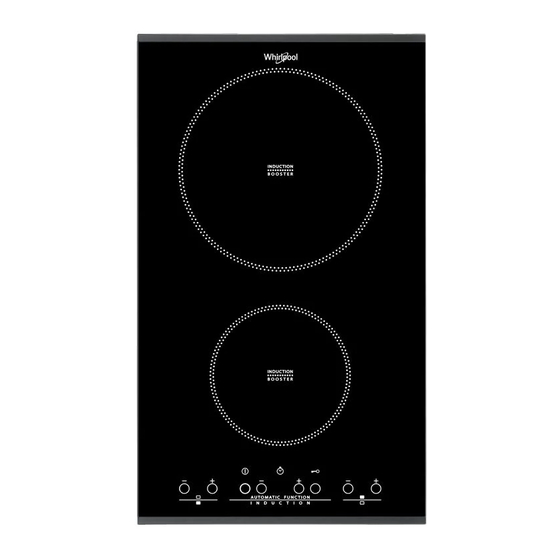
Page 9: Control Panel
Connect the yellow/green earth wire to the terminal with the symbol This wire must be longer than the other wires. 1. Remove the terminal block cover (A), undoing the screw and inserting the cover in the terminal block hinge (B). 2. -
Page 10: Control Panel Warnings
Timer The timer can be used to set cooking time for a maximum of 99 minutes (1 hour and 39 minutes) for one cooking zone only. Select the cooking zone to be used with the timer (an illuminated dot appears to the bottom right hand side of the heat setting indicator on the display), then set the desired cooking time using the buttons “+”... -
Page 11: Before Contacting The After-Sales Service
AFTER-SALES SERVICE Before contacting the After-sales Service: 1. See if you can solve the problem yourself with the help of the “Troubleshooting guide”. 2. Switch the appliance off and then on again it to see if the problem has been eliminated. If the problem persists after the above checks, contact the nearest After-Sales Service. - Page 12 DE GB FR 5019 300 00335 05/12...
Need help?
Do you have a question about the ACM 712 IX and is the answer not in the manual?
Questions and answers