
Subscribe to Our Youtube Channel
Related Manuals for Meyer Sound Ashby-5C


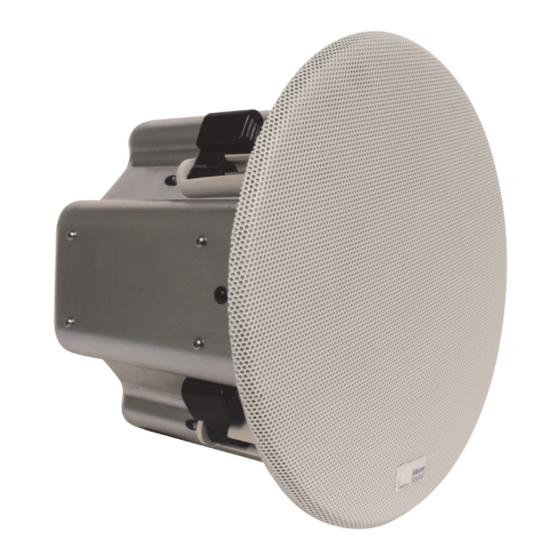
Summary of Contents for Meyer Sound Ashby-5C
- Page 1 OPERATING INSTRUCTIONS Ashby-5C and Ashby-8C Ceiling Loudspeakers with IntelligentDC Keep these important operating instructions. Check www.meyersound.com for updates.
- Page 2 The contents of this manual are furnished for informational purposes only, are subject to change without notice, and should not be con- strued as a commitment by Meyer Sound Laboratories Inc. Meyer Sound assumes no responsibility or liability for any errors or inaccura- cies that may appear in this manual.
-
Page 3: Symbols Used
7. Do not block any ventilation openings. Install in accor- fuse is the only user-serviceable item. When replacing the dance with Meyer Sound's installation instructions. fuse, only use the same type and the same value. 8. Do not install near any heat sources such as radiators, 15. - Page 4 Wassereinwirkung oder übermäßig hoher Luft- feuchtigkeit ausgesetzt werden könnte, solange es sich nicht um ein Produkt handelt, dass mit der Meyer Sound English Weather Protection Option ausgestattet ist. To reduce the risk of electric shock, disconnect the appa- •...
- Page 5 ASHBY OPERATING INSTRUCTIONS Pour réduire les risques de surchauffe, évitez d’exposer • directement l’enceinte aux rayons du soleil. Ne l’installez pas à proximité de sources de chaleur, radiateur ou four par exemple. S'il est équipé d'un porte-fusible externe, le fusible rem- •...
- Page 6 SYMBOLS USED...
-
Page 7: Table Of Contents
Connecting and Powering Ashby loudspeakers ........14 RMS Example: Configuring the MPS-488HP In the Control software ..15 Chapter 3: Installing Ashby Loudspeakers ........17 Meyer Sound Accessories ................17 Wiring the Loudspeaker ................18 Installing Into a Standard Ceiling ..............19 Installing into a Suspended Ceiling ............20 Installing into a High Ceiling with the Pendant..........21... - Page 8 viii...
-
Page 9: Chapter 1: Introduction To The Ashby Loudspeaker
The Ashby-5C and Ashby-8C include 5 in and 8 in cone cause delays or other problems. drivers, respectively. The Ashby-8C is ideally suited for applications that require a deeper low-end and higher SPL. - Page 10 CHAPTER 1: INTRODUCTION TO THE ASHBY LOUDSPEAKER...
-
Page 11: Chapter 2: Connecting Ashby Loudspeakers
The MPS-488HP, for example, can power up to 24 same audio signal. To set loudspeakers to different levels, Ashby-5C (3 per channel) or 16 Ashby-8C (2 per channel). use the Loudspeaker Attenuation knob (on Ashby loudspeak- ers equipped with this feature). - Page 12 Ashby-5C equations compensate for round trip length. Ω For 18 AWG, WRPF = 0.006385 Ashby-5C: Maximum length (ft) = 3 / (WRPF x # of Ashby-5C) 1200 Ashby-8C Ashby-8C: Maximum length (ft) = 2 / (WRPF x # of Ashby-8C)
-
Page 13: On/Status Led
ASHBY OPERATING INSTRUCTIONS Belden 1502 Cable ON/STATUS LED The Belden 1502 multiconductor cable is an effective, con- The LED on the Ashby connector panel is primarily intended venient way to connect an Ashby loudspeaker system. DC for use at the factory and before installation since it cannot be power and balanced audio use dedicated conductors in a seen when a loudspeaker is installed. -
Page 14: Operating Temperature And Amplifier Cooling
Do not connect more than three The drivers are subjected to excessive heat and excur- • Ashby-5C or two Ashby-8C on one channel of sion, which compromises their life span and may eventu- an MPS Power Supply. ally damage them over time. -
Page 15: Rms Example: Configuring The Mps-488Hp In The Control Software
ASHBY OPERATING INSTRUCTIONS RMS EXAMPLE: CONFIGURING THE MPS-488HP IN THE CONTROL SOFTWARE To configure the MPS-488HP in the Control Software: 1. Power on the MPS-488HP and RMServer(s). 2. Connect Compass and RMServer to the same local area network (LAN). 3. In Compass, click the RMServer > Inventory tab. 4. - Page 16 CHAPTER 2: CONNECTING ASHBY LOUDSPEAKERS...
-
Page 17: Chapter 3: Installing Ashby Loudspeakers
Figure 8: The C-Ring with Bridge Kit You can order the C-Ring with Bridge Kit using the part num- bers below: Figure 10: Ashby Pendant Ashby-8C Tile C-Ring with Bridge Kit: PN 40.260.131.01 Ashby-5C Tile C-Ring with Bridge Kit: PN 40.261.131.01... -
Page 18: Wiring The Loudspeaker
Three tabs for steel wires (not included) for a single hang • point. The tabs must be bent up before use. The Ashby-5C and Ashby-8C have separate pendant models. See “Ashby Pendant Dimensions” on page 31. You can order Ashby pendants using the following part... -
Page 19: Installing Into A Standard Ceiling
(see below). Figure 16: Ashby-5C (top) and Ashby-8C (bottom) loudspeaker mounting clamp screws and Attenuation Selector 7. Before placing the grille frame on the loudspeaker, choose an attenuation setting (if the loudspeaker has this feature). -
Page 20: Installing Into A Suspended Ceiling
CHAPTER 3: INSTALLING ASHBY LOUDSPEAKERS 8. Place the loudspeaker grille on the installed loudspeaker. Make sure to line up the grille with the magnets on the loudspeaker. Figure 20: Installing the loudspeaker into a bridge in the ceiling Safety Lanyard Some construction codes require a secondary support system. -
Page 21: Installing Into A High Ceiling With The Pendant
Figure 24: Fitting the grille frame onto an Ashby loudspeaker in a 5. Insert the Ashby loudspeaker inside the pendant and pendant rotate the four Phillips head screws clockwise to engage the loudspeaker clamps to the pendant. Figure 23: Installing an Ashby loudspeaker into a Meyer Sound pendant... - Page 22 GALAXY processors.The filter is a low fre- quency shelf with a 580 Hz breakpoint and 6 dB/octave slope. The gain is +6 dB for the Ashby-8C and +8 dB for the Ashby-5C. Figure 25: Filter settings Ashby-8C (top) and Ashby-5C (bottom)
-
Page 23: Appendix A: Ashby Accessories
ASHBY OPERATING INSTRUCTIONS APPENDIX A: ASHBY ACCESSORIES The following Ashby accessories are available from Meyer Sound. Ashby Accessories Part Number Accessory Notes 40.260.030.01 Ashby-8C Pendant 40.260.061.01 Ashby-8C Grille Frame Replacement (White) 40.260.061.02 Ashby-8C Grille Frame Replacement (Black) 40.260.130.01 Ashby-8C Tile C-Ring 40.260.131.01... - Page 24 APPENDIX A: ASHBY ACCESSORIES...
-
Page 25: Appendix B: Assembling Phoenix-To-Phoenix Loudspeaker Cables
ASHBY OPERATING INSTRUCTIONS APPENDIX B: ASSEMBLING PHOENIX-TO-PHOENIX LOUDSPEAKER CABLES When connecting Phoenix-equipped Ashby loudspeakers to the MPS-488HP Power Supply (also with Phoenix connectors), you need a Phoenix 5-pin female to Phoenix 5-pin female cable. The following procedure documents how to assemble this cable. - Page 26 APPENDIX B: ASSEMBLING PHOENIX-TO-PHOENIX LOUDSPEAKER CABLES...
-
Page 27: Appendix C: Ashby Loudspeakers Specifications
440 W peak Cooling Natural convection through the metal enclosure 48 V DC DC Power Supplied from a Meyer Sound MPS Power Supply Approved for Class 2 wiring used in conjunction with an MPS Power Supply Safety Agency Rated 48 V DC... - Page 28 Peak to RMS ratio of 18 dB. Pink noise is a full bandwidth test signal with Peak to RMS ratio of 12.5 dB. B-noise is a Meyer Sound test signal used to ensure measurements reflect system behavior when reproducing the most common input spectrum, and to verify there is still headroom over pink noise.
- Page 29 ASHBY OPERATING INSTRUCTIONS...
- Page 30 APPENDIX C: ASHBY LOUDSPEAKERS SPECIFICATIONS...
-
Page 31: Appendix D: Ashby Pendant Dimensions
ASHBY OPERATING INSTRUCTIONS APPENDIX D: ASHBY PENDANT DIMENSIONS ASHBY-5C holes to insert wires tabs in Weight = 4.5 lb (2.04 kg) ASHBY-8C holes to insert wires tabs in Weight = 8.0 lb (3.63 kg) - Page 32 APPENDIX D: ASHBY PENDANT DIMENSIONS...
-
Page 33: Appendix E: Ashby Loudspeaker Dimensions
ASHBY OPERATING INSTRUCTIONS APPENDIX E: ASHBY LOUDSPEAKER DIMENSIONS ASHBY-5C Weight = 7.80 lb (3.54 kg) ASHBY-8C Weight = 13.80 lb (6.26 kg) - Page 34 APPENDIX E: ASHBY LOUDSPEAKER DIMENSIONS...
- Page 36 Meyer Sound Laboratories Inc. © 2017, 2019 2832 San Pablo Avenue Meyer Sound. All rights reserved. Berkeley, CA 94702 Ashby Loudspeaker Operating Instructions +1 510 486.1166 PN 05.260.005.01 B www.meyersound.com...
Need help?
Do you have a question about the Ashby-5C and is the answer not in the manual?
Questions and answers