
Related Manuals for Graco Dream Suite Bassinet


Summary of Contents for Graco Dream Suite Bassinet
- Page 1 Read all instructions BEFORE assembly and USE of product. KEEP INSTRUCTIONS FOR FUTURE USE. Lea todas las instrucciones ANTES de armar y USAR este producto. GUARDE LAS INSTRUCCIONES PARA USO FUTURO. Dream Suite ™ ©2018 Graco PD319052F 1/18...
-
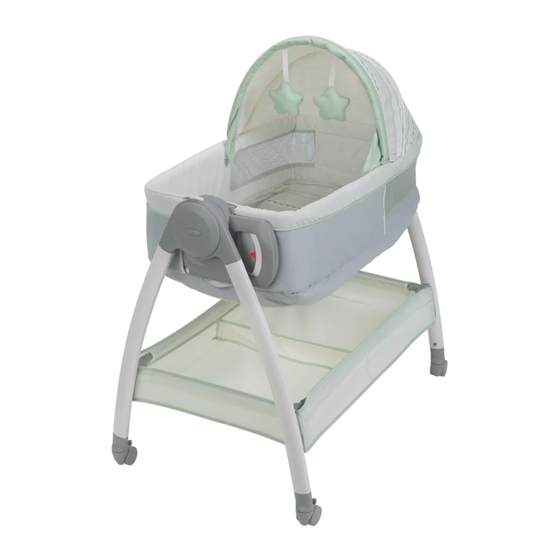
Page 2: Features • Características
1 WARNING • ADVERTENCIA 3-10 Pages • Páginas 2 Features • Características Pages • Páginas Parts List • Lista de piezas 3 Assembly • Assemblage 12-26 Pages • Páginas • Ensamblaje Position Handle • Manija de posición Bassinet/Changer Assembly • Ensamblaje moisés/cambiador Canopy •Capota 4 Use •... - Page 3 • In gaps between extra padding and side of the product, and • On soft bedding. Use ONLY mattress/pad provided by Graco. NEVER add a pillow, comforter or another mattress for padding. • Product can roll over on soft surfaces and suffocate child.
- Page 4 • If a sheet is used with the pad use the changing table as extra use only the one provided by storage. Graco or one specifically designed to fit the dimensions of • Never place baby face down on the product.
- Page 5 FOR SAFE BATTERY USE: Keep the batteries out of children’s reach. Any battery may leak battery acid if mixed with a different battery type, if inserted incorrectly (put in backwards) or if all batteries are not replaced or recharged at the same time. Do not mix old and new batteries.
- Page 6 Changes or modifications not expressly approved by the party responsible for compliance could void the user’s authority to operate the equipment. This device complies with part 15 of the FCC Rules. Operation is subject to the following two conditions: (1) This device may not cause harmful interference, and (2) this device must accept any interference received, including interference that may cause undesired operation.
- Page 7 • En ropa de cama blanda. Use SOLAMENTE el colchón proporcionado por Graco. NUNCA agregue una almohada, edredón u otro colchón como acolchado. • El producto puede darse vuelva sobre superficies suaves y el niño puede asfixiarse.
- Page 8 • Si se usa una sábana con la al bebé. almohadilla, use solamente la • El peso máximo para el que entregó Graco o una mudador es de 30 lb específicamente diseñada para (13.6 kg). No use el mudador caber en las dimensiones del como un espacio más para...
- Page 9 ADVERTENCIA PARA UN USO SEGURO DE LAS PILAS: Mantenga las pilas lejos del alcance de los niños. Cualquier pila puede perder ácido si se mezcla con un tipo de pila diferente, si se la coloca de manera incorrecta (puesta al revés) o si todas las pilas no se cambian o recargan al mismo tiempo.
- Page 10 ADVERTENCIA Los cambios o modificaciones no expresamente aprobados por la parte responsable del cumplimiento podrían anular la autoridad del usuario para usar el equipo. Este dispositivo cumple con la parte 15 de las Normas de la Comisión Federal de Comunicaciones (FCC por sus siglas en inglés). El funcionamiento está...
- Page 11 2-A Parts list • Lista de piezas This model may not include some Este modelo podría no incluir algunas de features shown below. Check las características que se that you have all the parts for this indican a continuación. Verifique que model BEFORE assembling your tenga todas las piezas de este modelo product.
- Page 12 Position Handle • Manija de posición Position Handle is assembled to foot end of bassinet/changer. La manija de posición está armada en el extremo del pie del moisés/cambiador. NOTE: Start assembly with the Button handle in this orientation. If it is not Botón in this orientation, follow steps 1-2.
- Page 13 2. Rotate handle until it clicks into place. 2. Gire la manija hasta que se trabe en su lugar. SNAP! ¡CRAC!
- Page 14 Bassinet/changer Assembly • Ensamblaje moisés/cambiador Head End Extremo de la cabeza 1. Lay bassinet/changer on floor Head End with canopy facing down. Extremo de la CHECK tube is inserted in cabeza channel above mesh exactly as shown. 1. Ponga el moisés/cambiador en el piso con la capota mirando hacia abajo.
- Page 15 3. CHECK tube is inserted in channel Head End above mesh exactly as shown. Extremo de la cabeza 3. VERIFIQUE que el tubo esté insertado en el canal arriba de la malla exactamente como se indica. 4. Insert tube into the top channel of leg hub in head end of bassinet/changer as shown.
- Page 16 5. Flip bassinet/changer over so side Head End with the canopy is facing up. Extremo de la CHECK tube with grooves is cabeza inserted exactly as shown. 5. De vuelta el moisés/cambiador para que la capota mire hacia arriba. VERIFIQUE que el tubo con las ranuras esté...
- Page 17 7. CHECK tube with grooves is Head End inserted exactly as shown. Extremo de la 7. VERIFIQUE que el tubo con las cabeza ranuras esté insertado exactamente como se indica. Groove Ranura 8. Insert tube with grooves into the top channel of leg hub in head end of bassinet/changer as shown.
- Page 18 9. CHECK that leg tube with handle is rotated as shown, if not see 3-A. 9. VERIFIQUE que el tubo de la pata con la manija esté girado como se indica, caso contrario consulte 3-A. 10. Attach end of tube with groove on the foot end of bassinet/ changer into top channel of leg hub with handle.
- Page 19 11. Attach other tube with groove on the foot end of bassinet/changer into top channel of leg hub with handle. The metal button should be facing out when snapped in place as shown. 11. Sujete el otro tubo con ranuras en el extremo del pie del moisés/ cambiador en el canal superior del eje de la pata con la manija.
- Page 20 11. Insert covered mattress into bassinet. 11. Ponga el colchón enfundado en el moisés. 12. Press down on mattress pad to be sure hook and loop tape is attached. 12. Oprima hacia abajo la almohadilla del colchón para estar seguro que la cinta de nudo y gancho esté...
- Page 21 13. Attach legs to bassinet/changer as shown. SNAP! ¡CRAC! 13. Sujete las patas al moisés/cambiador como se indica. SNAP! ¡CRAC!
- Page 22 14. Attach other two legs to bassinet/changer as shown. SNAP! ¡CRAC! 14. Sujete las otras dos patas al moisés/cambiador como se indica. SNAP! ¡CRAC!
- Page 23 15. Insert end tubes into channels in storage as shown. 15. Inserte los tubos del extremo en los canales en el almacenamien- to como se indica. 16. Insert ends of tubes into corners of long tubes as shown. SNAP! ¡CRAC! 16.
- Page 24 17. Insert other ends of tubes into corners of long tubes as shown. SNAP! ¡CRAC! 17. Inserte los otros extremos de los tubos en las esquinas de los tubos largos como se indica. SNAP! ¡CRAC! 18. Stand bassinet/changer up. NOTE: DO NOT use bassinet/changer without storage attached.
- Page 25 19. Place storage under bassinet/ changer. Insert tabs into larger end of channels in legs and press down firmly until they secure into place. Repeat on all four legs. 19. Ponga el almacenamiento debajo del moisés/cambiador. Inserte las lengüetas en el borde más grande de los canales en las patas y oprima hacia abajo firmemente hasta que aseguren...
- Page 26 Canopy •Capota 1. (A) Slide button inside of handle up and squeeze then (B) press button on top of handle. Rotate changer over to bassinet side. Press down on side of bassinet and handle to make sure bassinet/changer is locked into mode.
- Page 27 Switching Modes • Cómo cambiar de modo Bassinet Mode • Modo Moisés 1. (A) Slide button inside of handle up and squeeze then (B) press button on top of handle. 1. (A) Deslice el botón en el interior de la manija hacia arriba y oprímalo luego (B) oprima el botón de arriba de la manija.
- Page 28 3. To open canopy, attach hook and loop tape on both sides as shown. 3. Para abrir la capota, sujete la cinta de gancho y nudo en ambos costados como se indica. Changer Mode • Modo cambiador 1. Slide button inside of handle up and squeeze.
- Page 29 2. Rotate over to changer side. Press down on center of changer side to make sure bassinet/changer is locked into mode. 2. Gire el moisés al lado del cambiador. Oprima hacia abajo el centro del cambiador para tener la seguridad que el moisés/ cambiador esté...
- Page 30 Canopy •Capota 1. Disconnect hook and loop tape on canopy flaps from sides of the bassinet. 1. Desconecte la cinta de nudo y gancho en las aletas de la capota de los costados del moisés. 2. Connect strap on head end of bassinet to tab in center of canopy.
- Page 31 Brakes • Frenos 1. Push tab up on all four wheels to unlock. 1. Mueva la lengüeta hacia arriba en las cuatro ruedas para destrabarlos. 2. Push tab down on all four wheels to lock. 2. Mueva la lengüeta hacia abajo en las cuatro ruedas para trabarlos.
- Page 32 To Use Vibration • Usar la vibración 1. Remove battery lid on the foot end of product, with a philips screwdriver and insert 1-D (LR20-1.5V) battery in module. Replace lid. 1. Saque la tapa de las pilas en el pie del producto con un destornillador Phillips e inserte una pila D (LR20-1.5V) en el módulo.Vuelva a poner la tapa.
-
Page 33: Care And Maintenance
• FROM TIME TO TIME CHECK YOUR PRODUCT for loose screws, worn parts, torn material or stitching. Replace or repair the parts as needed. Use only Graco replacement parts. • TO CLEAN PRODUCT, wipe clean with damp cloth. • TO CLEAN FRAME, use only household soap and warm water. - Page 34 To Clean Mattress cover • Cómo limpiar la funda del colchón 1. Remove mattress from bassinet. 1. Saque el colchón del moisés. 2. Separate hook and loop tabs and remove mattress pad from mattress cover. See label on mattress cover for proper cleaning.
- Page 35 Notes • Notas...
- Page 36 We currently do not accept product registrations from those living outside the United States of America. Para registrar su producto Graco desde dentro de los EE.UU., visítenos en línea en www.gracobaby.com/productregistration o envíe la tarjeta de registro provista con su producto.
Need help?
Do you have a question about the Dream Suite Bassinet and is the answer not in the manual?
Questions and answers