
Related Manuals for Bose AM259777


Summary of Contents for Bose AM259777
- Page 1 LIFESTYLE ® DVD Home Entertainment Systems Installation Guide April 23, 2002 AM259777_02_V.pdf Bose Corporation...
-
Page 2: Safety Information
©2002 Bose Corporation. No part of this work may be reproduced, modified, distributed or otherwise used without prior written permission. Manufactured under license from Dolby Laboratories. “Dolby” and the double-D symbol are trademarks of Dolby Laboratories. Confidential Unpublished Works. -
Page 3: Table Of Contents
Where to find … Introduction ............... Welcome . -
Page 4: Introduction
For example, a region 1 DVD player should be marked like this: Your system can play only DVD discs marked with the same region number. Types of discs you can play The DVD player in your system can play the following types of discs: • Video DVDs • Audio CDs •... -
Page 5: System Installation
If any part of your system is missing or appears damaged, contact your authorized Bose Bose directly. Refer to the Bose address list included with your system. The instructions in this section tell you how to connect your system as shown in Figure 1. For alternate system connections, see “Using alternate system connections”... -
Page 6: System Installation Instructions
System Installation Instructions Cables and accessories The following items are included with your system. Figure 2 Cables and accessories included with your system Surround speaker cables Front speaker cables Audio input cable Stereo audio cable Component video adapter S-Video cable Video cable (6 ft) Batteries Mounting strip... -
Page 7: Placing Your Speakers
TV screen. Bose recommends a maximum distance of 3 feet (1 m) from the edge of the TV screen so that the sound does not become too separated from the picture. You may wish to vary this distance based on room conditions and personal preference. -
Page 8: Center Speaker Placement
System Installation Instructions Figure 4 Speaker placement and reflection rays Left surround Center speaker placement The sound from the center speaker should appear to come directly from the center of the pic- ture. The center speaker cable allows up to 20 feet (6.1 m) distance from the Acoustimass module. -
Page 9: Acoustimass Module Placement
Note: To avoid interference with the TV picture, place the Acoustimass module at least 18 inches (45 cm) from the TV. • Place the Acoustimass module so that the grille with the Bose or along the wall to avoid blocking the sound output or creating too much bass. -
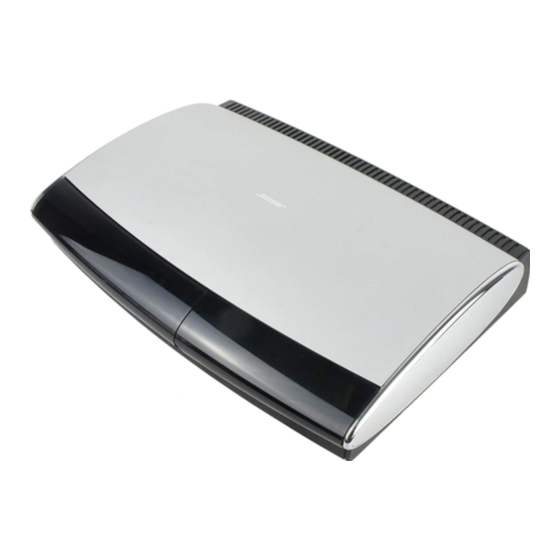
Page 10: Placing Your Media Center
• Do not block the front of the media center. Make sure you allow enough room to lift up the front cover and open the CD tray of the CD/DVD player. Also, position the media center so that you can clearly view the display window to the right of the CD tray cover. See Figure 6 for a description of the front of the media center. -
Page 11: Connecting The Speakers To The Acoustimass Module
12). Plug the blue connectors into the matching left front, center, and right front jacks. Plug the orange connectors into the matching left surround and right surround jacks. System Installation Instructions ® module ® customer service. Refer to the Bose address list Terminal tab Red (+) wire AM259777_02_V.pdf • April 23, 2002... -
Page 12: Making A Plug-In Cable Speaker Connection
System Installation Instructions Making a plug-in cable speaker connection In a plug-in cable connection (Figure 8), the positive and negative wires are oriented to ensure proper polarity. Figure 8 A plug-in cable type speaker 1. Match the correct cable to the corresponding speaker location. Front speaker cables have blue RCA connectors at one end, with L (left), R (right), or C (center) molded into both the RCA connectors and the speaker connectors at the other end. -
Page 13: Connecting The Acoustimass Module To The Media Center
Connecting the Acoustimass Connect the Acoustimass module to the media center with the audio input cable (Figure 10). Note: Be sure that each connector is fully inserted into each jack. 1. Plug the small black multi-pin connector (flat side facing up) into the SPEAKER ZONES jack labeled “1”... -
Page 14: Connecting The Antennas
System Installation Instructions Connecting the antennas The rear panel of the media center provides connections for AM and FM antennas (Figure 11). Be sure to unwrap the bundled antenna wires and straighten them as much as possible to ensure the best reception. Note: Outdoor antennas may be used. -
Page 15: Connecting Your Tv To The System
Connecting your TV to the system The media center provides audio and video connections for your TV. See Figure 12. Making audio connections Using the supplied stereo audio cable, connect the left (L) and right (R) audio outputs on the rear panel of your TV to the L and R TV audio inputs on the rear panel of the media center (Figure 12). -
Page 16: Connecting Your Vcr To The System (Optional)
Media center-to-VCR video and audio connections ® component video adapter (Figure 13). This adapter plugs into the Component video adapter S-VIDEO OUTPUT ® system, contact your local electronics store or authorized Bose dealer. RECORD TAPE DC POWER 1.1A SENSOR ANTENNA... -
Page 17: Connecting Your Cable/Satellite Box To The System (Optional)
Note: If your cable/satellite box did not come with the stereo audio and video cables required to connect it to your LIFESTYLE Bose dealer. The rear panel of the media center provides audio and video connections for your cable/sat- ellite box. -
Page 18: Installing The Tv On/Off Detector (Optional)
System Installation Instructions Installing the TV on/off detector (optional) The TV on/off detector senses whether your TV is on or off. This enables the media center to automatically switch the TV on, as needed, when another video source (DVD, cable/satellite box, etc.) is selected. -
Page 19: Making The Temporary Headset Connection Before Connecting To Power
Making the temporary headset connection before connecting to power Plug the special headset connector into the AUX jacks on the rear of the media center (Figure 17). This is for temporary use during steps for “Finishing the installation” on page 21. Figure 17 Headset connection for use in the final setup steps... -
Page 20: Installing The Remote Control Batteries
System Installation Instructions Figure 19 Power connection of the media center Plug the small round connector of the media center power supply cable into the DC POWER jack on the back of the media center (Figure 19). Insert the power supply line cord connector into the power supply and plug the cord into an AC (mains) outlet. -
Page 21: Finishing The Installation
Finishing the installation Included with your system is a small carton containing two setup discs and a special headset. Figure 21 Contents of the small car- • Setup Disc 1 verifies that your system’s speakers are connected correctly and ensures complete performance from your new system. -
Page 22: Save The Headset For Possible Future Use
System Installation Instructions Save the headset for possible future use When you have played both discs and followed their instructions, the installation of your LIFESTYLE ® DVD system is completed and its performance is tailored to your particular lis- tening area. Moving the system to another room or significantly changing the arrangement of the room ®... -
Page 23: Reference
Using alternate system connections The following describes alternate ways to connect your VCR and TV to your LIFESTYLE home entertainment system. To play VCR audio (not TV audio) through your system Connect the VCR audio outputs to the TV or VCR inputs of the media center as in Figure 1 on page 5, but do not connect the TV audio outputs. -
Page 24: To Play Tv Audio Through Your System With Vcr Audio Fed To The Tv
Reference To play TV audio through your system with VCR audio fed to the TV Connect the VCR audio outputs to the audio inputs of the TV. Connect the TV audio outputs to the TV inputs on the media center. In this configuration, the LIFESTYLE Figure 23 Diagram of a typical system... -
Page 25: Setting Up A Second Listening Zone
SPEAKER ZONES 2 connector on the rear panel of the media center. • A second LIFESTYLE See your dealer or contact Bose for information on obtaining additional powered speakers, remote controls, cables, and adapters for connecting additional equipment. How do I set up a speaker system in a second zone? 1. -
Page 26: Connecting External Equipment
Reference Connecting external equipment Other equipment can be connected to your system using standard RCA audio cables. Be sure to match the red connector to the R (right) channel and the white (or black) connector to the L (left) channel. A Y adapter can be used to connect mono sources. The appropriate cables are available at most electronic stores. -
Page 27: Connecting Other Playback Equipment
Connecting other playback equipment Other playback components such as an audio CD changer can be connected to the AUX inputs on the rear panel of the media center. Figure 26 AUX input connections Using digital audio connections If your TV, VCR, tape deck, or AUX component has electrical digital audio connections, you may connect them to the media center using the corresponding DIGITAL connector. -
Page 28: Connecting The Optional Ir Emitter Cable
4. Use the double-sided tape enclosed with the emitter to affix it in the proper position. Note: If you have questions, or need to obtain a replacement emitter, contact Bose tomer service. Refer to the Bose address list included with your system. -
Page 29: Technical Information
Technical information Media Center power pack power rating USA/Canada: 120V Speaker system power rating USA/Canada: 100-120V Media center inputs TAPE: 2Vrms, maximum AUX: 2Vrms, maximum VCR: 2Vrms, maximum TV: 2Vrms, maximum DIGITAL: SPDIF (1 each for TV, VCR, TAPE, and AUX) COMPOSITE VIDEO: NTSC or PAL format 1V S-VIDEO: Luminance 1V OPTICAL INPUT: SPDIF digital, mapped to input... - Page 30 AM259777_02_V.pdf • April 23, 2002...
- Page 31 AM259777_02_V.pdf • April 23, 2002...
- Page 32 ©2002 Bose Corporation, The Mountain, Framingham, MA 01701-9168 USA 259777 AM Rev.02 JN21093 AM259777_02_V.pdf • April 23, 2002...
Need help?
Do you have a question about the AM259777 and is the answer not in the manual?
Questions and answers