Bose Lifestyle 18 Series II Operating Manual
Dvd home entertainment systems
Hide thumbs
Also See for Lifestyle 18 Series II:
- Quick setup manual (98 pages) ,
- Operating manual (44 pages) ,
- Installation manual (42 pages)

Subscribe to Our Youtube Channel
Related Manuals for Bose Lifestyle 18 Series II


Summary of Contents for Bose Lifestyle 18 Series II
- Page 1 LIFESTYLE 18 Series II LIFESTYLE 28 Series II DVD Home Entertainment Systems ® ® Operating Guide...
-
Page 2: Safety Information
See the additional instructions on the Important Safety Instructions sheet enclosed in the shipping carton. ©2004 Bose Corporation. No part of this work may be reproduced, modified, distributed or otherwise used without prior written permission. Manufactured under license from Dolby Laboratories. “Dolby” and the double-D symbol are trademarks of Dolby Laboratories. Confidential Unpub- lished Works. -
Page 3: Table Of Contents
In case of 525 progressive scan picture problems, it is recommended that the user switch the connection to the “standard definition” output. If there are questions regarding our TV set compatibility with this model 525p DVD player, please contact our customer service center. - Page 4 Setting up a second room with sound ......... . . Bose ®...
-
Page 5: Introduction
“.mp3” extension and no other periods. The file tag is no higher than ID3 (ID3v2). Check for region number compatibility For any DVD player and DVD disc to be compatible, their region numbers must match. These numbers are assigned according to where the player and disc are sold. - Page 6 RDS – A system that displays radio broadcast station and programming information. This feature is available on European systems only. SACD – An abbreviation for Super Audio Compact Disc and a music format for CD audio and high-resolution digital audio stored on a CD-sized disc. The new Bose ® LIFESTYLE ®...
-
Page 7: Capabilities And Controls
The remote control The advanced radio-frequency remote control provided with the LIFESTYLE from almost anywhere inside your home. Simply press any button. There is no need to aim the remote at the media center. Power and mute Source and input selection *You can choose to set the LIFESTYLE VCR so it will turn those devices on or off. -
Page 8: Menu And Program Selection
Capabilities and Controls Menu and program selection Enters or exits the Settings menu for the current source. Enters or exits the System menu. Enters or exits the menu of the DVD disc that is currently loaded. Enters the main menu of a cable or satellite box. Displays an electronic TV listings guide (if the TV, cable, or satellite pro- vides that option). -
Page 9: Play Options
If the batteries are fine and the suggestions concerning “dead spots” above do not work, you may need an antenna extender. To contact Bose the address list included with the system. -
Page 10: The Media Center
Capabilities and Controls The media center The CD/DVD tray and system controls are located under the front panel door of the media center. To the right of that is the display window (Figure 1). An IR signal emitter, located under the CD/DVD tray, enables you to control other compo- nents using the LIFESTYLE path to other components or reflective surfaces in the room. -
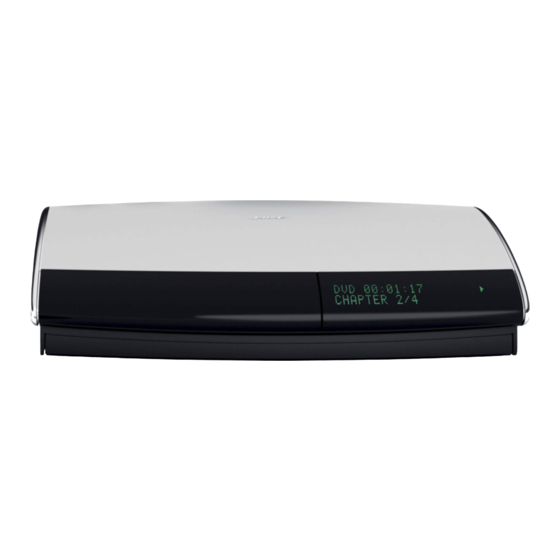
Page 11: Display Window
Display window The media center display window indicates the state of the system, including what source is playing, details of that program, and what option, if any, is selected (Figure 2). When Settings menu items or messages appear in the display, they may scroll to reveal information that does not fit in the two lines available. -
Page 12: System Operation
System Operation Making it all work together smoothly By pressing any source button on the LIFESTYLE tem and select that source at the same time. Or, press the On/Off button on the remote control or on the media center control panel. This turns the system on to the source that was last used. -
Page 13: General System Operation
Note: Not all DVDs offer the same features. For example, you can choose to display subtitles while watching a movie only if that disc provides subtitle information. to select the DVD player. If the system is off, this will also turn it on. Open/Close again to close the disc tray. -
Page 14: Control Options
General System Operation Control options If you want to: Pause a DVD movie … Resume play … Stop a DVD movie … Skip to the next chapter … Skip to the previous chapter … Repeat a chapter … Search backward or forward … Press and hold Note: For information on the quick adjustments you can make to DVD settings refer to “DVD setting options”... -
Page 15: Control Options
Control options If you want to: Pause a CD … Resume play of paused CD … Stop a CD … Clear continuously scrolling track information (for an MP3-CD) from the media center display... Go to next track… Go to beginning of current track… Go to a previous track…... -
Page 16: Using The Radio
General System Operation Using the radio The symbols below represent buttons on the LIFESTYLE Press FM or AM station that was last selected. Changing stations If you want to: Switch between FM and AM … Seek the next strong station … Manually tune to a station …... -
Page 17: Using The Headphone Jack
To remove a station preset Tune to the preset number you want to remove. Then follow the step below: • On the remote control, press and hold the 0 number button until the message PRESET: XX ERASED appears briefly on the media center display. The removal is then completed. To reassign a preset to a different station 1. -
Page 18: Controlling External Sources
Controlling External Sources ® Using your LIFESTYLE You can control most brands of external components, such as TVs, VCRs, and cable/satellite boxes, using your LIFESTYLE nents as the video tuner (channel selector) for all, to further simplify operation. Your LIFESTYLE of the music center to any component that your LIFESTYLE allows you to turn on other sources in the room and make basic selections from them, whether they are connected to the media center or to the TV. - Page 19 5. Identify the TV brand: • From the Remote Control options in the System menu, select • Move right into the list of brands and up or down to locate the brand for your TV. • Press Enter to select that brand. Figure 5 TV brand selection IR Control:...
- Page 20 Controlling External Sources 7. Set the TV to turn on automatically*, as needed: • Move up to the System menu categories and over to Video (Figure 6). • From the Video options, select • Move right into the list of choices and up or down to select one of the two below: Automatic Euro Connector •...
-
Page 21: For Cable/Satellite Control
For cable/satellite control While you can set the LIFESTYLE ® remote to control both cable and satellite boxes, you must designate one or the other, not both, in the steps below. The one connected to the CBL-SAT input on your media center is the one you should desig- nate. -
Page 22: For Vcr (Or Dvr) Control
Controlling External Sources For VCR (or DVR) control The list of VCR brands and VCR codes include selections for DVRs as well. By following the instructions below, you can set the remote to control one or the other, but not both. If you have both a VCR and a DVR, setting your remote to control the DVR will provide more control options. -
Page 23: Designating One Video Tuner
Follow the process below: Turn on your component. Turn on the TV and be sure to select the Video input on the TV for the media center. Then using the LIFESTYLE continue: 1. Identify the device: • From the Remote Control options in the System menu, select •... -
Page 24: Changing Source Settings
Changing Source Settings Making adjustments to a particular source While watching a video or listening to music on your system, you can make quick adjust- ments that will increase your enjoyment of the program. For example, you may want to hear more or fewer of the system speakers playing, or boost the center channel volume slightly. -
Page 25: How To Change The Settings
How to change the settings In the Settings menu on the media center display or on the TV screen, move around and make changes by using the selection buttons shown. On the display or the screen, the same actions apply: •... -
Page 26: Tuner Setting Options (Fm Or Am Radio)
Changing Source Settings Tuner setting options (FM or AM radio) There are different settings menus for AM and FM. You can adjust the settings differently for each. Two of the attributes below are available only when the tuner is set to FM. (or AM) CD setting options To see the CD Settings menu, you must insert a CD into the disc tray before you select the... -
Page 27: Dvd Setting Options
DVD setting options To see the DVD Settings menu, you must insert a DVD into the disc tray before you select the source. Three attributes (shown in italic type below) appear in the DVD menu only if you have set Audio Processing in the Audio options of the System menu. -
Page 28: Tv Setting Options (For Vcr, Cbl-Sat, And Aux)
Changing Source Settings TV setting options (for VCR, CBL-SAT, and AUX) The settings below affect programs on the TV, even when the source of the program is VCR, CBL/SAT or AUX. There are no separate settings menus for these sources. Four attributes (shown in italic type below) appear in the TV menu only if you have set Processing in the Video options of the System menu. -
Page 29: Using System Menus
Making system adjustments Adjustments to system properties are typically made only once. If your system operates as you want it to, there may be no need for any changes. In some cases, however, changes are required to make the system fully compatible with the installation options you have chosen. Using a component video connection is one example. -
Page 30: Audio Options
-14 to +14 Decreased (-) or increased (+) high-frequency reproduction. (-9 to +6) Range available following ADAPTiQ system calibration. ® Automatic Standard Bose User Adjustable Processing options available in Source Settings menus. Normal Standard signal level (loudness). -6, -3, +3, +6 Decreases or increases signal level (adjustable to match the levels of other components). - Page 31 5 seconds, by a press of the Erase button on the media center controls. Bose ® link Communicates only with Bose Legacy Communicates only with older Bose products. ® Installation Guide. ® system makes adjustments to the audio Using System Menus ®...
-
Page 32: Video Options
Using System Menus Video options Press the System button on the LIFESTYLE video features. Press the Enter button to move into an active display of submenus. Figure 13 Video preview Select Video to adjust these system options TV Power TV Power Status TV Aspect Ratio Widescreen DVDs Default Settings;... -
Page 33: Media Center Options
Media center options Press the System button on the LIFESTYLE media center features. Press the Enter button to move into an active display of submenus. Figure 14 Media Center preview Select Media Center to adjust these system options Display Brightness Display Language Optical Source Digital Audio Format... -
Page 34: Remote Control Options
Using System Menus Remote control options Press the System button on the LIFESTYLE remote control features. Press the Enter button to move into an active display of submenus. Figure 15 Remote Control preview Select Remote Control to adjust these system options IR Control IR Control TV Tuner... -
Page 35: Dvd Lock Options
DVD Lock options Press the System button on the LIFESTYLE Lock choices. Press the Enter button to move into an active display of submenus. Figure 16 DVD Lock Menu Select Remote Control to adjust these system options Create/Change Password Confirm Password Lock Unrated Discs Lock Discs Rated Above Default Setting;... - Page 36 Using System Menus Parental Control Setting For example, by choosing a Parental Control Setting of 4, you restrict access to videos rated above PG-13. Videos with ratings above that may be viewed only after entering the password. Your password also prevents others from changing the parental control setting without permission.
-
Page 37: Reference
Changing the batteries as needed is the only regular maintenance required. However, the switches inside the remote battery case may be changed, as needed. Additional remotes for use in other rooms may need their switches changed, too. For that, refer to “Bose remote switch settings” on page 39. -
Page 38: Setting Up A Second Room With Sound
Capable of supplying up to 14 addiitonal rooms with Bose sound, one LIFESTYLE can fill your entire living space with music. -
Page 39: Bose Link: The Key To Assured Compatibility
® One option is using a Bose product you already own, if you want the sound in just one addi- tional room. As a second option that can provide sound throughout your home (or even outside!), the ®... -
Page 40: Taking Care Of Your Lifestyle
Limited warranty Your LIFESTYLE See your product registration card for details. Please be sure to fill out the information section on the card and mail it to Bose. ® system ® home theater system is covered by a transferable limited warranty. -
Page 41: Troubleshooting
Troubleshooting Problem What to do System doesn’t • Make sure the power connector is inserted securely into the media center, the power cord do anything is inserted securely into the Acoustimass are fully plugged into operating AC wall outlets. • Be sure to press a source button (CD/DVD, AM/FM, etc.) on the LIFESTYLE remote control. -
Page 42: Contacting Customer Service
Enter the numbers 2673 as temporary password to access the parental controls. Then your password create a new password. Contacting customer service For additional help in solving problems, contact Bose and phone number list included with your system. ® system Installation Guide . -
Page 43: Specifications
Media center weight 8.2 lb (3.7 kg) Media center finish Aluminum Remote control range 65 ft (20 m) ® powered loudspeakers, contact your Bose dealer or call Bose 0.55A 50/60Hz 33VDC 1.1A 0.30A 50/60Hz 33VDC 1.1A 0.55A 50/60Hz 33VDC 1.1A... - Page 44 ©2004 Bose Corporation, The Mountain, Framingham, MA 01701-9168 USA 274397 AM Rev.00 CCM-000393...
Need help?
Do you have a question about the Lifestyle 18 Series II and is the answer not in the manual?
Questions and answers