Advertisement
Quick Links
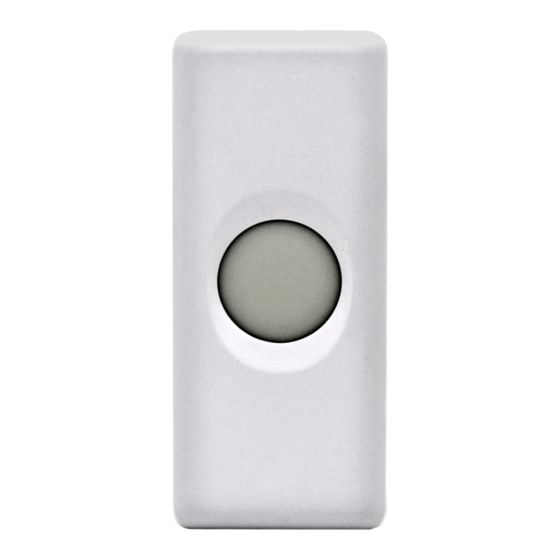
2GIG-DBELL1-345
DOORBELL
INSTALLATION INSTRUCTIONS
The Doorbell (2GIG‐DBELL1‐345) is a dual‐purpose doorbell that can
be installed with the dwelling's existing 24 V wiring or using the 345
MHz radio frequency:
• Wired Installation. When installed as a wired doorbell with the
home's existing 24 AC wiring, the bell is fully water‐resistant and
the push button remains illuminated.
• Wireless Installation. When installed as a wireless doorbell, it
features a fully water‐resistant button. It communicates with the
control panel using the 345 MHz frequency. The push button does
not remain illuminated.
Figure 1 Doorbell
Contents
Verify that the package includes the following:
• 1—Doorbell
• 2—Wood Screws
• 2—Machine Screws
• 1—O‐Ring
• 1—Lithium Coin Battery (installed)
Installing and Mounting the Doorbell
If possible, locate sensors within 100 ft (30 m) of the 2GIG Control
Panel. While a transmitter may have a range of 350 ft (106 m) or more
out in the open, the environment at the installation site can have a
significant effect on the transmitter range.
Although the doorbell has been designed to
IMPORTANT:
withstand weather and features a weep hole for draining, it is
recommended that you avoid mounting the sensor in areas
that may be subject to extreme moisture.
—
Figure 2 Doorbell Drain
(Weep Hole)
To install and mount the doorbell:
1
Remove the sensor cover by pressing the tab. This disengages the
clip that holds the cover to the base.
2
(Optional) If connecting the Doorbell to the existing 24V wiring,
pull the existing 24 AC wiring through the hole.
Ensure that the orientation arrows on the base are pointed in a
3
upwards direction as shown in Figure 3 below.
—
Figure 3 Doorbell Base
Orientation Arrows
Attach the base to the desired mounting location using the Phillips
4
wood screws (supplied).
Place the O‐ring (supplied) around the perimeter of the base.
5
6
If available, attach the existing 24V AC household doorbell wiring
to the board using the machine screws provided.
The Doorbell only illuminates when used in a wired
IMPORTANT:
installation.
Pull the battery tab out as shown in Figure 4 below. Then discard
7
tab properly.
Figure 4 Doorbell—Battery Pull Tab
Replace the sensor cover.
8
Ensure that the drain (weep hole) is facing downward.
9
NOTE:
If the cover does not snap in place, the Doorbell may have
been installed upside down.
Inserting and Replacing the Battery
To insert or replace the battery:
Unwrap the doorbell.
1
2
Insert a small flat head screwdriver at the top the backplate to
remove it.
3
Use the battery pull tab to remove the old battery.
Always dispose and/or recycle used batteries in
IMPORTANT:
accordance with the hazardous waste recovery and recycling
regulations for your location. Your city, state, or country may
also require you to comply with additional handling, recycling,
and disposal requirements.
4
Reinsert the pull tab and new battery. The plus (+) side of the
battery should be facing up.
5
Replace the doorbell backplate.
Copyright © 2015 Nortek Security & Control LLC
1
Advertisement

Related Manuals for Nortek 2GIG-DBELL1-345


Summary of Contents for Nortek 2GIG-DBELL1-345
- Page 1 Inserting and Replacing the Battery that may be subject to extreme moisture. To insert or replace the battery: — Figure 2 Doorbell Drain (Weep Hole) Unwrap the doorbell. Insert a small flat head screwdriver at the top the backplate to remove it. Use the battery pull tab to remove the old battery. Always dispose and/or recycle used batteries in IMPORTANT: accordance with the hazardous waste recovery and recycling regulations for your location. Your city, state, or country may also require you to comply with additional handling, recycling, and disposal requirements. To install and mount the doorbell: Reinsert the pull tab and new battery. The plus (+) side of the Remove the sensor cover by pressing the tab. This disengages the battery should be facing up. clip that holds the cover to the base. Replace the doorbell backplate. (Optional) If connecting the Doorbell to the existing 24V wiring, pull the existing 24 AC wiring through the hole. Copyright © 2015 Nortek Security & Control LLC...
- Page 2 This device must accept any interference received, including interference that may cause undesired operation. This equipment has been tested and found to comply with the limits 2GIG Nortek Security & Control LLC for a Class B digital device, pursuant to Part 15 of the FCC Rules. These 1950 Camino Vida Roble, Suite 150 limits are designed to provide reasonable protection against harmful Carlsbad, CA 92008‐6517 USA interference in a residential installation. This equipment generates, uses and can radiate radio frequency For technical support in the USA and Canada: energy and, if not installed and used in accordance with the Dial: 855‐2GIG‐TECH (855‐244‐4832) instructions, may cause harmful interference to radio Email: 2gigtechsupport@nortek.com Visit www.2GIG.com or dealer.2gig.com technical support hours of operation communications. However, there is no guarantee that interference will not occur in a particular installation. If this equipment does cause For technical support outside of the USA and Canada: harmful interference to radio or television reception, which can be Contact your regional distributor determined by turning the equipment off and on, the user is Visit www.nortekcontrol.com for a list of distributors in your region encouraged to try to correct the interference by one or more of the following measures: 77‐000004‐001 Rev. J • Reorient or relocate the receiving antenna. A Nortek Company • Increase the separation between the equipment and receiver. Copyright © 2015 Nortek Security & Control LLC...
Need help?
Do you have a question about the 2GIG-DBELL1-345 and is the answer not in the manual?
Questions and answers