Table of Contents
Advertisement
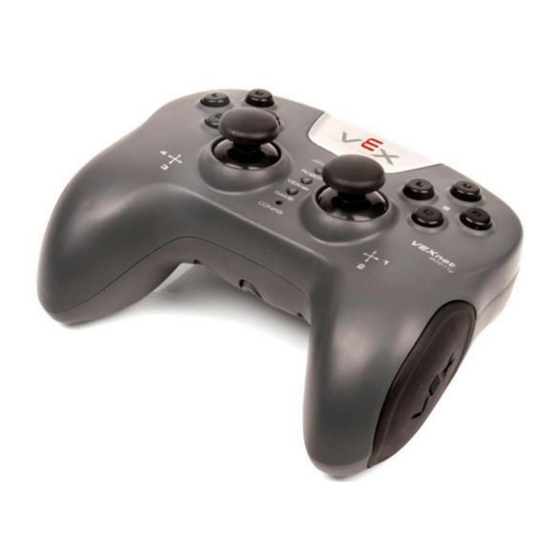
VEX Robot Remote Control Set-Up
Note: Before proceeding with the VEXnet
joystick setup on the following pages,
complete these steps:
1) Open the RobotC program
2) Select "File > Open Sample Program"
3) Select the "Remote Control" folder
4) Select and open the program entitled "Clawbot Single Joystick Control" –
it should be the 2
5) Select "File > Save As" rename the file and save it where you keep your
other programs ("Q" or "H" network drive).
6) Select "Robot > VEX Cortex Communication Mode" - set to "VEXnet or
USB".
7) Make sure your robot is connected to your computer with the USB cable,
a battery is installed and the Cortex is turned on.
8) Download the program "Clawbot Single Joystick Control" to your robot.
9) Turn the Cortex off. Unplug the USB cable.
Now follow the steps on the next pages to set-up your VEXnet joystick
Once you get the single joystick program working, try reprogramming the
remote for dual joystick, tank control style. There are sample programs in
the "remote control" folder that will help to guide you. You may need to
change motor port names and numbers to match your robot's
configuration!
nd
one listed.
Advertisement
Table of Contents

Summary of Contents for Vex Robotics VEXnet Joystick
- Page 1 8) Download the program “Clawbot Single Joystick Control” to your robot. 9) Turn the Cortex off. Unplug the USB cable. Now follow the steps on the next pages to set-up your VEXnet joystick Once you get the single joystick program working, try reprogramming the remote for dual joystick, tank control style.
-
Page 2: Section 1: Downloading Firmware To The Vexnet Joystick
• 1 USB-to-Serial Programming Cable Section 1: Downloading Firmware to the VEXnet Joystick 1. Begin by installing 6 AAA batteries in the VEXnet Joystick. You will need a small Phillips screwdriver to remove the battery cover. 1a. Install 6 AAA Batteries... - Page 3 VEXnet Joystick Configuration in ROBOTC (cont.) 2. Connect the VEXnet Joystick to your computer using the USB A-to-A cable and turn it ON. 2a. Connect the VEXnet Joystick Use the USB A-to-A cable to connect your VEXnet Joystick to your computer.
- Page 4 End of Section: Downloading Firmware to the VEXnet Joystick Once the Download Progress window closes, the VEXnet Joystick Firmware download is complete. Move on to the next section to learn how to create a wireless link between the VEXnet Joystick and VEX Cortex.
-
Page 5: Section 2: Creating A Wireless Link Betwen The Vexnet Joystick And Vex Cortex
Section 2: Creating a wireless link betwen the VEXnet Joystick and VEX Cortex In this section, you will learn how to pair a VEX Cortex Microcontroller to a VEXnet Joystick, allowing them to communicate over VEXnet. This section assumes that you have already updated the master firmware on the VEX Cortex and VEXnet Remote Control. - Page 6 VEXnet Joystick Configuration in ROBOTC (cont.) 2. Tether the USB port on the VEXnet Joystick to the USB port on the Cortex using a USB A-to-A cable. 2a. VEXnet Joystick USB Port Plug one end of the USB A-to-A cable into the USB port on the VEXnet Joystick.
- Page 7 ROBOTC (cont.) 4. Turn the Cortex OFF. 5. Remove the USB A-to-A cable from the VEXnet Joystick and Cortex. 6. Insert VEXnet USB Keys into both the VEXnet Joystick and Cortex. 6. VEXnet USB Keys Insert VEXnet USB Keys into the VEXnet Joystick and Cortex.
- Page 8 End of Section: Creating a Wireless Link between the VEXnet Joystick and VEX Cortex Your VEXnet Joystick and VEX Cortex can now communicate over the VEXnet USB Keys. Move on to the next section to calibrate the values your VEXnet Joystick sends out.
-
Page 9: Section 3: Calibrating The Vexnet Joystick Values
VEXnet to the robot, enabling a user to control the robot in real-time. To ensure that the VEXnet Joystick sends out accurate joystick values, the joysticks must be calibrated before their first use, and after any firmware updates are applied. - Page 10 CONFIG button. 3b. JOYSTICK LED Once the JOYSTICK LED begins to blink red and green, release both the 6U and CONFIG buttons. © 2011 Carnegie Mellon Robotics Academy / For use with VEX Robotics Systems VEX Cortex Configuration over USB •...
- Page 11 Once the remote control detects that the joysticks have been fully rotated, the JOYSTICK LED switches to solid green, indicating that you can stop moving the joysticks. © 2011 Carnegie Mellon Robotics Academy / For use with VEX Robotics Systems VEX Cortex Configuration over USB •...
-
Page 12: Additional Information
End of Section: Calibrating the VEXnet Joystick Values The joysticks on your VEXnet Joystick are now properly calibrated and ready to be used to remote control your robot. If you had any issues during the process, troubleshooting tips can be found on the following page. -
Page 13: Troubleshooting
Solution: LEDs starts blinking green. Release it, wait for another 5 seconds, and then turn the VEXnet Joystick OFF and then back ON. If that fails, download the VEXnet Joystick Firmware using ROBOTC. Yellow or red ROBOT light on the Cortex...
Need help?
Do you have a question about the VEXnet Joystick and is the answer not in the manual?
Questions and answers