Table of Contents
Advertisement
Advertisement
Table of Contents

Subscribe to Our Youtube Channel
Related Manuals for Exerpeutic Traction Table


Summary of Contents for Exerpeutic Traction Table
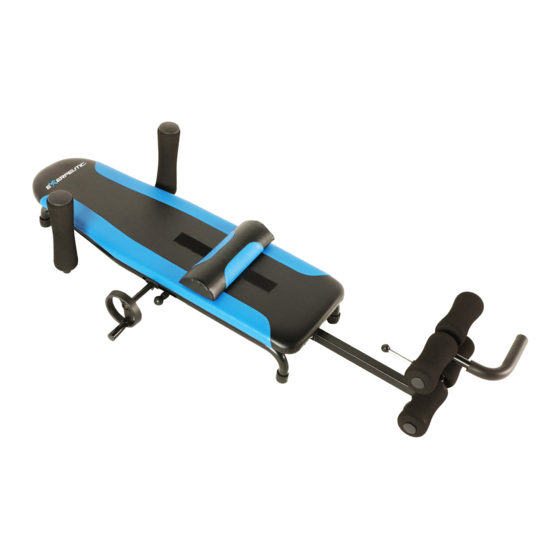
- Page 1 Traction Table 4510.3-110719 OWNER’S MANUAL...
- Page 2 PLEASE DO NOT RETURN THIS PRODUCT TO THE STORE. STOP and contact customer service if you have any questions regarding assembly or proper operation of the machine. Email us at: Service@paradigmhw.com Or call us at: 1-844-641-7921 Hours: 8:00 am to 5:00 pm (PST) Monday thru Friday...
-
Page 3: Table Of Contents
TABLE OF CONTENTS SERVICE------------------------------------------------------------------- 2 IMPORTANT SAFETY GUIDELINES-------------------------------- 3 LABEL PLACEMENT---------------------------------------------------- 5 OVERVIEW DRAWING------------------------------------------------- 6 PARTS LIST--------------------------------------------------------------- 7 ASSEMBLY---------------------------------------------------------------- 8 HOW TO USE------------------------------------------------------------- 12 STORAGE----------------------------------------------------------------- 15 TRANSPORTING-------------------------------------------------------- LUBRICATION----------------------------------------------------------- WARRANTY--------------------------------------------------------------- 18 PARTS REQUEST FORM--------------------------------------------- 19... -
Page 4: Service
SERVICE IMPORTANT: FOR NORTH AMERICA ONLY For damaged or defective product, questions, replacement parts or any other service support, please contact our customer service department by the below methods: For The Best Service, please Email: service@paradigmhw.com Response Time: 1-2 Business Days Emailing us with the information above will be the best method to receive a response during peak business hours Website:... -
Page 5: Important Safety Guidelines
For Household Use Only. Do not use outdoors or near water. Use the traction table only for its intended use as described in this manual. Do not use attachments not recommended by the manufacturer. Do not wear loose clothing when using the equipment. - Page 6 Discontinue use and contact customer service. WARNING: - To Reduce The Risk Of Personal Injury - Read And Understand All The Instructions Before Using The Traction Table. Do not use this equipment if you have any of the following conditions or ailments: ...
-
Page 7: Label Placement
LABEL PLACEMENTS... -
Page 8: Overview Drawing
OVERVIEW DRAWING... -
Page 9: Parts List
PARTS LIST Description Description Main Frame 26 End Cap Adjustable Boom 27 End Cap Heel Holder Boom 28 Foot Foam Rollers Adjustable Heel Holder 29 End Cap Swing Arm 30 Square End Cap Adjustable Arm 31 Bushing Transport Handle 32 Swing Arm Bushing Fixed Bracket 33 Arm Pit Foam Rollers Drive Screw... -
Page 10: Assembly
ASSEMBLY Tool: 3mm Allen Wrench 1PC Step 1 Hardware Removal 1A. Remove one Round Head Hex Bolt (37) from the Axle (18) by using 3mm Allen Wrench provided. . Installing the Crank Wheel 1B. Insert Crank Wheel (17) onto the Drive Screw (9) on the Main Frame (1) and tighten with one Round Head Hex Bolt (37) by using 3mm Allen Wrench provided. - Page 11 ASSEMBLY Tool: 3mm Allen Wrench 1PC 6mm Allen Wrench 1PC Step 2 Hardware Removal 2A. Remove four Hex Bolts (42) and four Flat Washers (39) from the Adjustable Boom (2) by using 6mm Allen Wrench provided. 2B. Remove two Hex Bolts (37) from the Heel Holder Tube (12) by using 3mm Allen Wrench provided.
- Page 12 ASSEMBLY Tool: 6mm Allen Wrench 1PC Step 3 Hardware Removal 3A. Remove one Hex Bolts (48) and one Flat Washer (39) from the Transportation Handle (7). Installing the Adjustable Heel Holder 3B. Depress the Snap Button (36), pull up the Pop Pin (19) and insert the Adjustable Heel Holder (4) onto Heel Holder Boom (3).
- Page 13 ASSEMBLY Step 4 Installing the Adjustable Arm 4A. Install the Adjustable Arm (6) on to the Main Frame (1). Depress Snap Button (36) and insert the Adjustable Arm (6) into the Swing Arm (5) Adjust the Adjustable Arm (6) to the suitable position.
-
Page 14: How To Use
HOW TO USE Step 1 Adjusting table to load in 1A. Pull out the Height Adjustment Pin (13) and simultaneously push the Heel Holder Boom (3) into the Main Frame (1) all the way in. Step 2 Locking feet in Heel Holders 2A. - Page 15 HOW TO USE Step 3 Checking Arm Pit Foam Roller Adjustment 3A. With your feet locked in to place, lay on the Backrest (10). Lift your arms and wrap them around the Arm Pit Foam Rollers (33). If they are to high or low get off the table and adjust them at this time.
- Page 16 HOW TO USE Step 4 Stretching your Back 4A. Keep your right arm wrapped around the Arm Pit Foam Roller (33), reach for the Crank Wheel (17) and pull the handle out ward. Rotate the Crank Wheel (17) CLOCK-WISE or towards your feet to extend the Heel Holder Boom (3) and stretching your back.
-
Page 17: Storage
STORAGE To put Traction Table into storage mode: 1. Pull Pop Pin (13) out and hold while simultaneously pushing the Heel Holder Boom (3) into the Main Frame (1). 2. Depress Snap Button (36) on the Adjustable Heel Holder (4) and pull it out of the Heel Holder Boom (3). -
Page 18: Transporting
TRANSPORTING Lift up the Main Frame (1) until the Wheels (25) on the Heel Holder Boom (3) make contact with the ground, then move the bench to your desired location. -
Page 19: Lubrication
LUBRICATION Grease Applying grease to the Drive Screw 1. Begin by turning the Crank Wheel (17) Counter Clock-wise until it stops. Take grease from container with finger, work the grease into the threads of the Drive Screw (9). 2. Repeat this process for both left and right sides of the Threaded Pin Joints (15). -
Page 20: Warranty
WARRANTY MANUFACTURER’S LIMITED WARRANTY Paradigm Health & Wellness warrants to the original purchaser that this product is free from defects in material and workmanship when used for the purpose intended, under the conditions that it has been installed and operated in accordance with Paradigm’s Owner’s Manual. -
Page 21: Parts Request Form
PARTS REQUEST FORM Paradigm Health & Wellness, Inc. EMAIL THIS FORM WITH YOUR RECEIPT OF PURCHASE TO Service@paradigmhw.com NAME:_____________________________________________________________________________________ ADDRESS:__________________________________________________________________________________ CITY:________________________ STATE:_____________ ZIP:_______________________________________ TELEPHONE: (Day)________________________________________________________________________ (Night)_______________________________________________________________________ SERIAL#:___________________________________________________________________________________ MODEL#:___________________________________________________________________________________ PURCHASE DATE:___________________________________________________________________________ PLACE OF PURCHASE:_______________________________________________________________________ PART # DESCRIPTION “YOUR ORDER WILL BE PROCESSED WITHIN 3 BUSINESS DAYS” This form can also be faxed to #: 626-810-2166...
Need help?
Do you have a question about the Traction Table and is the answer not in the manual?
Questions and answers