Table of Contents
Advertisement
Quick Links
Advertisement
Table of Contents

Related Manuals for Corghi Artiglio Master 28


Summary of Contents for Corghi Artiglio Master 28
- Page 1 Artiglio Master 28 Cod. 4-137578 - 09/2019 Italiano Manuale d’uso English Operator’s manual Français Manuel d’utilisation Deutsch Betriebsanleitung Español Manual de uso Tel. ++39 0522 639.111 - Fax ++39 0522 639.150 www.corghi.com - info@corghi.com...
- Page 3 CORGHI Dear Customer, Thank you for purchasing a Corghi tyre changer. Your Tyre Changer has been designed to provide years of safe and reliable service, as long as it is used and maintained in accordance with the instructions provided in this manual.
- Page 4 Wheels with reverse rim Bead lubrication for proper mounting WDK procedure Accessories Instructions for correct use of the accessories Inflatron user instructions (optional) Inflating procedure Safety measures Lubrication and removal of the valve insert Tubeless tyre inflation Artiglio Master 28 Operator’s manual...
- Page 5 Personnel and training dates _____________________________________________________________________ _____________________________________________________________________ _____________________________________________________________________ _____________________________________________________________________ _____________________________________________________________________ _____________________________________________________________________ _____________________________________________________________________ _____________________________________________________________________ _____________________________________________________________________ _____________________________________________________________________ Artiglio Master 28 Operator’s manual...
-
Page 6: Table Of Contents
3. ASSEMBLY/HANDLING ................ 104 3.1. LIFTING/HANDLING .................105 3.2. INSTALLATION ..................105 4. INSTALLATION AREA ................108 5. ARTIGLIO MASTER 28 DESCRIPTION ..........109 5.1. OPERATOR POSITION................109 5.2. OVERALL DIMENSIONS ................110 5.3. EQUIPMENT COMPONENTS (MAIN WORKING OPERATING ELEMENTS OF THE MACHINE) ..............110 5.4. - Page 7 12. INFORMATION AND WARNINGS ABOUT TYRE LUBRICATING FLUID ..143 13. FIREFIGHTING EQUIPMENT TO BE USED ........143 14. GLOSSARY ................... 144 TABLE FOR USING CENTRING AND CLAMPING ACCESSORIES ACCORDING TO RIM TYPE ..............148 WIRING DIAGRAM ..................156 PNEUMATIC DIAGRAM ................163 Artiglio Master 28 Operator’s manual...
-
Page 8: Commissioning
Furthermore, ask the new owner to fill out the ownership transfer module attached to the previous page in the manual and send it to Corghi, so that Corghi will be able to provide the customer with all necessary safety information. Alternately, the new owner can send an email to service@corghi.com. -
Page 9: General Warnings And Instructions
This manual makes continuous reference to the possibility that accidents can occur. Any accident could lead to serious or fatal injuries to the operator or people nearby, or cause material damage. Artiglio Master 28 Operator’s manual... - Page 10 • Do not use tools other than those supplied with tyre changer. • Use lubricant that is specific for tyres in order to prevent tyre seizure. • Pay attention while handling the rim or the tyre and while using the lever Artiglio Master 28 Operator’s manual...
- Page 11 19. Wear protective, non-slip footwear while using the tyre changer. 20. While positioning, lifting or removing wheels from the tyre changer, wear an appropriate back support and use a correct lifting technique. Artiglio Master 28 Operator’s manual...
-
Page 12: Labels Placement
21. Only appropriately trained personnel can use, service and repair the machine. Repairs must only be performed by qualified personnel. Corghi technicians are the most qualified individuals. The employer must determine if an employee is qualified to carry out any machine repair safely if the operator has attempted to make the repair. - Page 13 446436 GAUGE PROHIBITION OF TWO 461936 OPERATORS WORKING SIMULTANEOUSLY ADHESIVE SAFETY STRIP Y/B 346855 50X130 462081 RISK OF CRUSHING 461930 RISK OF CRUSHING HEARING PROTECTION 462080 PLATE 461931 INFLATION WARNING PLATE 462778 USA HAZARD PLATE Artiglio Master 28 Operator’s manual...
- Page 14 Part n. 461936. Never stand behind the machine. Only one operator may operate and use the machine part n. 446442. Danger - pressurised container part n. 425211A. Risk of electrocution. part n. 425083. Earth ground terminal. Artiglio Master 28 Operator’s manual...
- Page 15 Artiglio Master 28 Operator’s manual...
- Page 16 Artiglio Master 28 Operator’s manual...
-
Page 17: Electrical And Pneumatic Connections
140 Nl/min (see technical data). CAUTION For correct equipment operation, the air produced must be suitably treated (not above 5/4/4 according to standard ISO 8573-1). Artiglio Master 28 Operator’s manual... - Page 18 The permitted exposure levels may also vary according to the country. In all cases, this information will enable machine users to better assess the danger and risks involved. Artiglio Master 28 Operator’s manual...
-
Page 19: Air Pressure
This machine must only be used to demount and mount vehicle tyres from/on the rims, using the provided tools. Any other use is improper and may result in injury. The machine is not designed for working with motorcycle wheels. Artiglio Master 28 Operator’s manual... -
Page 20: Personnel Training
Make sure that all other people are standing at least 6 metres (20 feet) from the machine. To switch off the machine in case of emergency: • disconnect the power supply plug; • interrupt the compressed air supply by disconnecting the supply pipe. Artiglio Master 28 Operator’s manual... -
Page 21: Transport, Storage And Handling
HANDLING section. CAUTION Keep the packing material intact for possible future transport of the machine. 2.1. UNPACKING Remove the upper part of the packaging and make sure the machine has not been damaged during transport. Artiglio Master 28 Operator’s manual... -
Page 22: Assembly/Handling
(Fig.4 - “F”) on the pallet - The machine packaging includes the following units (fig. 5): A) Outfit B) Roll-Bar C) Bead pressing tool D) Pressure gauge unit Artiglio Master 28 Operator’s manual... -
Page 23: Lifting/Handling
- Remove the bead pressing unit from the packing. - Place the spacer of the bead pressing tool support correctly on the tyre changer (see Fig. 10) - Place the bead pressing tool support on the Artiglio Master 28 Operator’s manual... - Page 24 (L, Fig. 15) by means of the 2 M6 screws (M, Fig. 15) supplied. - Connect the bead pressing tool pipe (N, Fig. 16) to the T-shaped fitting of the filter/regulator unit (O, Fig. 16). Artiglio Master 28 Operator’s manual...
- Page 25 FOR T.I. VERSIONS ONLY: - Fix the inflation handle support to the tyre changer (P, Fig. 19) using the screw (Q, Fig. 19) supplied. - Place the inflation handle on the support (see Fig. 19a). Artiglio Master 28 Operator’s manual...
-
Page 26: Installation Area
Fig.16 The support surface must have a load- bearing capacity of at least 1000 kg/m 1000 Ambient working conditions - Relative humidity 30% ÷ 95% without condensation. - Temperature 0°C ÷ 50°C. Artiglio Master 28 Operator’s manual... -
Page 27: Artiglio Master 28 Description
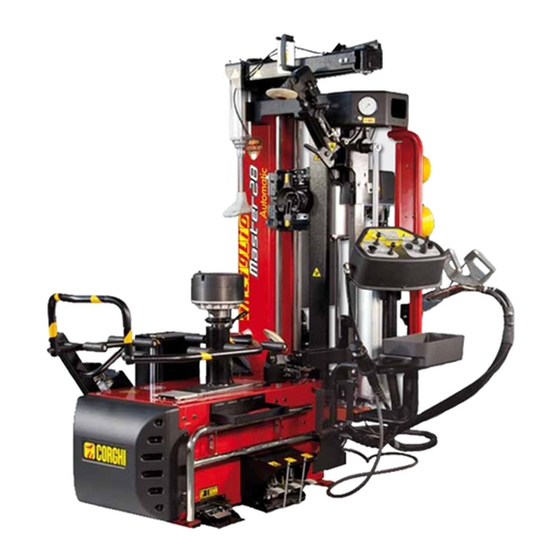
Artiglio Master 28 is an electropneumatically operated universal tyre changer to change car, off-road and light commercial vehicle tyres. Artiglio Master 28 makes it easy to easily break, demount and mount any type of tyres with a rim diameter between 13” and 28”. -
Page 28: Overall Dimensions
Pressure gauge with deflation push-button Frame Upper bead breaker disc Upper bead breaker disc release lever Upper bead breaker disc positioning lever Lower bead breaker disc Movable tool Tool head Fixed tool Bead pressing tool Artiglio Master 28 Operator’s manual... - Page 29 Artiglio Master 28 Operator’s manual...
-
Page 30: Controls
With regard to the technical characteristics, warnings, maintenance and any other information about the air tank (optional), consult the relevant operator's and maintenance manual provided with the documentation of the accessory. 5.4. CONTROLS 5.4.a. ON/OFF SWITCH Artiglio Master 28 Operator’s manual... -
Page 31: Control Console
Area B – Tool head functional controls 4 - Push-button for 180° head rotation. 5 - Button to operate the movable tool to select the upper bead. 6 - Selector to operate the movable tool for upper bead demounting. Artiglio Master 28 Operator’s manual... -
Page 32: Pedal Unit
In its rest position, the system which clamps the turntable centring handle is normally active. The pedal is used during positioning and clamping of the wheel on the turntable, and to release the wheel when the job is done. Artiglio Master 28 Operator’s manual... -
Page 33: Wheel Lifter Pedal Unit (Fig. 23) (Optional)
2 - Pedal pressed (unstable position): hands-on wheel lowering 5.4.e. PRESSURE GAUGE WITH DEFLATION PUSH-BUTTON (Fig. 24) 1- Pressure gauge displaying air pressure, with pedal regulation 2- Deflation button 6. BASIC PROCEDURES - USE CAUTION Artiglio Master 28 Operator’s manual... -
Page 34: Preliminary Checks
CAUTION In order to prevent damage or involuntary movement of the machine, it is recommended to only use original Corghi spare parts and accessories. 6.1. PRELIMINARY CHECKS Check that there is a pressure of at least 8 bar on the filter regulator pressure gauge. -
Page 35: Deciding From Which Side Of The Wheel The Tyre Must
C, except in the area of the valve hole A where the curvature is less pronounced B. On these wheels the bead must first be broken in correspondence of the valve hole, on both the top and bottom sides. Artiglio Master 28 Operator’s manual... -
Page 36: Wheel Loading
- Load the wheel onto the lifter (Fig. 30) then press the UP pedal. The wheel will be lifted and positioned horizontally on the turntable (Fig. 31). - Press the UP pedal again. The lifter will lower and place the wheel on the turntable. Artiglio Master 28 Operator’s manual... -
Page 37: Clamping The Wheel On The Turntable
- Insert the clamping handle in the central hole of the wheel - Turn the handle for correct engagement with the turntable - Manually move the centring cone into position on the rim by moving the retainers “1” Artiglio Master 28 Operator’s manual... -
Page 38: Clamping The Wheel On
TABLE FOR USING CENTRING AND CLAMPING ACCESSORIES ACCORDING TO RIM TYPE Standard rim Rim with embedded hole Artiglio Master 28 Operator’s manual... - Page 39 6.6. CONFIGURATION OF WHEEL DATA Set the rim diameter value using the keyboard “9”. The rim diameter in inches will appear on display “8”. The displayed value consists of two digits with a decimal separator. Artiglio Master 28 Operator’s manual...
- Page 40 1 - Place the upper bead breaking unit in the working position (horizontal arm axis), lowering it manually using the fixed gripping lever (Fig. 36). 2 - Operate the lever and move the disc, taking it to about 5 mm under the rim edge (Fig. 36a). Artiglio Master 28 Operator’s manual...
- Page 41 Artiglio Master 28 Operator’s manual...
- Page 42 14- Make at least one rotation to finish bead breaking. THESE LAST OPERATIONS will completely detach the bottom bead from the rim. 15- Move the lever downwards to automatically stop penetration and to withdraw the disc from the work area Artiglio Master 28 Operator’s manual...
- Page 43 4 - After hooking the bead, release the button to return the tool to the rest position (Fig. 37c). raise the movable tool until the horizontal line of the tool is completely visible (Fig. 37d) - (A Fig. 37e). Artiglio Master 28 Operator’s manual...
- Page 44 12- Operate the lever to move the head to the lower part of the wheel (Fig. 37hH). 13 - Manually position the tyre so that the tool hook is between the lower bead and the rim (Fig. 37i). Artiglio Master 28 Operator’s manual...
- Page 45 Also check that rims are not deformed, that their fixing holes have not become oval, that they are not scaled or rusty and that they do not have sharp burrs on the valve holes. Check that the tyre is in good condition with no signs of damage. Artiglio Master 28 Operator’s manual...
- Page 46 6 - During movement, press the button to configure the fixed tool or the mounting phase of the upper bead (Fig. 38c). 7 - Operate the handle P (Fig. 38d) to manually lower the upper bead breaking disc. Artiglio Master 28 Operator’s manual...
- Page 47 Proceed with caution to prevent any injuries. Make sure the top bead is correctly inserted in the rim channel, throughout the entire mounting stage. 12- Remove the bead pressing clamps or the bead pressing tool. 13- Return the bead breakers to the top and bottom ends (Fig. 38h). Artiglio Master 28 Operator’s manual...
- Page 48 6.11. APPROVED UHP AND RUN FLAT TYRE DEMOUNTING AND MOUNTING PROCEDURE For this type of tyre please refer to the instructions in the manual prepared by WDK (German Tyre Industry Association). Artiglio Master 28 Operator’s manual...
- Page 49 Carefully check that the air hose is well inserted in the valve. 4. Never bring your head or other body parts close to a tyre during inflation or bead insertion operations. Artiglio Master 28 Operator’s manual...
- Page 50 (see Fig. 40a). 3. Remove the valve core if it has not already been removed (Fig. 40b). Artiglio Master 28 Operator’s manual...
- Page 51 8. Reinsert the internal valve mechanism. 9. Bring the pressure to the operating value by pressing the inflation button (2, Fig. 40d). 10. Place the cap back on the valve. “HUMP” (H) “double HUMP” (H2) Artiglio Master 28 Operator’s manual...
- Page 52 2 buttons on the accessory to emit a jet of high pressure air from the four jets, which make it easier to position the tyre beads (Fig. 41d). Artiglio Master 28 Operator’s manual...
- Page 53 (e.g., 16 and 1/2 inch tyre and a 16 inch rim). If the tyre is excessively inflated, the air can be released by pressing the brass manual deflation button located below the air pressure gauge (“2” - Fig.41e) Artiglio Master 28 Operator’s manual...
- Page 54 - Turn the locking system anticlockwise to release it from the turntable (Fig. 42b). - Remove the device from the rim (Fig. 42c). WHEEL UNCLAMPING (“AUTOMATIC” VERSION) - Press pedal (3, Fig. 43) to unlock the wheel from the turntable. Artiglio Master 28 Operator’s manual...
- Page 55 The signal disappears when the control is inverted “E3“: GENERAL LOWER POWER SIGNAL FOR THE MACHINE. THIS APPEARS WHEN THE MAINS VOLTAGE IS INSUFFICIENT FOR CORRECT MACHINE OPERATION. Turn off the machine and check the mains voltage Artiglio Master 28 Operator’s manual...
- Page 56 The “Spare parts” handbook does not authorise the user to carry out work on the machine with the exception of those operations explicitly described in the User Manual. It only enables the user to provide the technical assistance service with precise information, to minimise delays. Artiglio Master 28 Operator’s manual...
- Page 57 While cleaning, try as far as possible to prevent dust from forming or rising. CAUTION CORGHI declines all liability for claims derived from the use of non-original spare parts or accessories. Scheduled maintenance: CAUTION The machine will periodically prompt maintenance reminders.
- Page 58 (7, Fig. 49) and connection pin (8, Fig. 49): Clean with environmentally- friendly solvents and lubricate with ordinary grease. To be carried out every month. - Contact the service network to check the belts and rubber pads: Artiglio Master 28 Operator’s manual...
- Page 59 Anyone disposing of the product otherwise than as described above will be liable to prosecution under the laws of the country where the product is disposed of. Artiglio Master 28 Operator’s manual...
- Page 60 - Inhalation: for exposure to high concentrations of fumes or oil mist, move the affected person to the open air and seek medical attention immediately. - Eyes: bathe with plenty of running water and seek medical attention immediately. - Skin: wash with soap and water. Artiglio Master 28 Operator’s manual...
- Page 61 Use only if more appropriate extinguishers are not at hand or when the fire is small. WARNING This table contains general instructions to be used as guidelines for users. Contact the manufacturer for details of the applications of each type of extinguisher. Artiglio Master 28 Operator’s manual...
- Page 62 A radial casing in itself is quite unstable. To make it stable and prevent incorrect tread movement in the area of contact with the ground, the casing and the shim under the tread are reinforced with an annular Artiglio Master 28 Operator’s manual...
- Page 63 12 - Foot. This is the innermost layer of the tread in contact with the belt, or if the latter is not present (conventional tyres) with the last casing ply. Artiglio Master 28 Operator’s manual...
- Page 64 – j) rim channel. III - Air chamber (tube type tyres). The air chamber is a closed ring-like rubber structure with a valve, which contains pressurised air. Artiglio Master 28 Operator’s manual...
- Page 65 It is generally used for mounting low profile tyres. Discharge regulator. Union allowing regulation of the air flow. Bead breaking. Operation used to detach the bead from the rim edge. Artiglio Master 28 Operator’s manual...
- Page 66 TABLE FOR USING CENTRING AND CLAMPING ACCESSORIES ACCORDING TO RIM TYPE Standard rim Rim with embedded hole Reverse rims Rim for vans Rim without central hole Rim with central hole Artiglio Master 28 Operator’s manual...
- Page 67 FIXING ACCESSORIES I - Accessori a richiesta GB - Accessories on request F - Accessoires sur demande D - Zubehör auf Anfrage E - Accessorios opcionales Artiglio Master 28 Operator’s manual...
- Page 68 STANDARD RIM Artiglio Master 28 Operator’s manual...
- Page 69 RIM WITH EMBEDDED HOLE Artiglio Master 28 Operator’s manual...
- Page 70 REVERSE RIM Artiglio Master 28 Operator’s manual...
- Page 71 RIM FOR VANS Artiglio Master 28 Operator’s manual...
- Page 72 RIM WITHOUT CENTRAL HOLE Artiglio Master 28 Operator’s manual...
- Page 73 RIM WITH CENTRAL HOLE Artiglio Master 28 Operator’s manual...
- Page 74 SQ11 Vertical movement upper limit microswitch SQ12 Vertical movement lower limit microswitch SQ18 Lifter microswitches SQ19 Tool head joystick Power supply transformer Diode jumper Power supply plug Terminal board Vertical movement DC motor brake Vertical movement motor noise disturbance filter Artiglio Master 28 Operator’s manual...
- Page 75 UP limit switch Pressure gauge Control Y-axis motors console Turntable motor X-axis motor Down limit switch of Y-axis Pedal unit brake X limit switch Solenoid valve Artiglio Master 28 Operator’s manual...
- Page 76 Artiglio Master 28 Operator’s manual...
- Page 77 Artiglio Master 28 Operator’s manual...
- Page 78 Artiglio Master 28 Operator’s manual...
- Page 79 Artiglio Master 28 Operator’s manual...
- Page 80 Artiglio Master 28 Operator’s manual...
- Page 81 Quick discharge valve (“AUTOMATIC” version only) Turntable cylinder (“AUTOMATIC” version only) I - INFLATION L - MANUAL DEFLATION Pressure gauge 2/2 NC manual deflation valve M - BEAD PRESSING TOOL Silencer filter 5/3 NC Valve Bead pressing tool cylinder Artiglio Master 28 Operator’s manual...
- Page 82 Artiglio Master 28 Operator’s manual...
- Page 83 Artiglio Master 28 Operator’s manual...
- Page 84 DE - EG – Konformitätserklärung - EU – Konformitätserklärung * ES - Declaración EC de conformidad - Declaración UE de conformidad * Quale fabbricante dichiara che il prodotto: ARTIGLIO MASTER 28 al quale questa dichiarazione si riferisce e di cui abbiamo costituito e deteniamo il relativo fascicolo tecnico è...
Need help?
Do you have a question about the Artiglio Master 28 and is the answer not in the manual?
Questions and answers