Subscribe to Our Youtube Channel
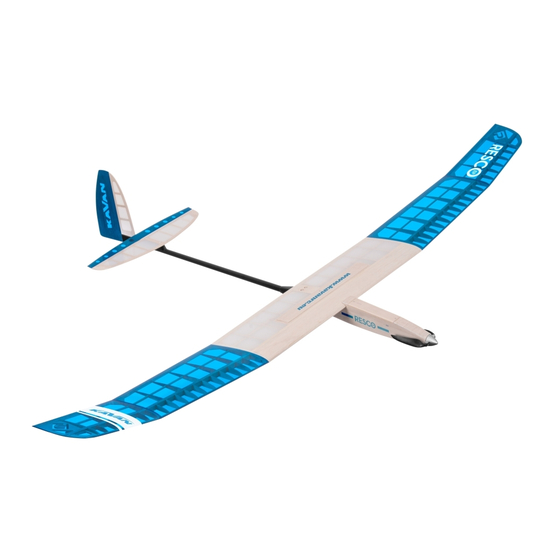
Summary of Contents for Kavan RESCO Kit
- Page 1 RESCO Kit Instruction Manual/Návod ke stavbě/Bauanleitung High Performance Thermal Glider / Electric Glider Vysokovýkonný termický větroň/motorový větroň Der leistungsstarke Thermik-Segler / Motorsegler www.kavanrc.eu...
- Page 2 3S LiPo RAY G4 450mAh/11.1V FOXY G3 C2208-1200 9x5“ 2S LiPo RAY G4 450mAh/7.4V Ask for KAVAN combo power sets for the RESCO kit. K dispozici jsou rovněž pohonné sady KAVAN pro RESCO. Fragen Sie nach KAVAN Combo Power Sets für das RESCO Kit.
-
Page 3: Specification
RESCO Kit High Performance Thermal Glider / Electric Glider Designed and manufactured in the Czech Republic Specification Wingspan: 1990 mm Wing Section: modified AG Length: 1125 mm CG Position: 80 mm All-up Weight: 440g plus Controls: Rudder, elevator, spoiler Recommended RC Equipment •... - Page 4 phatic resin (Fig. 3+4) edge) plate. Prevent the epoxy hardening inside the bays – put the parts together with the carbon joiner Fuselage (Glider Version) inserted, then immediately remove the joiner (do not • Trial fit the parts of the fuselage– no glue yet! Sand as forget cleaning the joiner using a paper tissue and necessary to obtain perfect fit (Fig.
- Page 5 • Bevel the root ribs of the wing outer panels using pushrod tube holder. the supplied 7° dihedral jig. Trial fit the carbon wing • Tack thick cyano to the balsa and insert the pushrod joiner into the respective bays; there should be a ti- tubes into the carbon fuselage tube (with a little help ght fit, no play.
- Page 6 rewall; secure the ESC and power pack using Vel- close to the spoiler as possible. cro tape into the cockpit. With your RC set on test • Install the servo using double sided foam tape. whether the motor rotates in the correct direction Recommended Control Surface Throw, CG Po- (counter clockwise when looking from the front) If it sition (Fig.
- Page 7 RESCO Kit Vysokovýkonný termický větroň/motorový větroň Zkonstruováno a vyrobeno v České republice Technické údaje Rozpětí: 1990 mm Profil: modifikovaný AG Délka: 1125 mm Poloha těžiště: 80 mm Letová hmotnost od: 440g Ovládané funkce: Směrovka, výškovka, brzda Upozornění! RC model, který budete stavět a létat, není hračka! létáte a dále budete létat v souladu s běžnými zvyk-...
- Page 8 STAVBA MODELU Ocasní plochy • Mezi připravená středová žebra epoxidem vlepte desku pro upevňovací šrouby křídla. (Obr. 18) • Připravte si a na sucho bez lepení slícujte díly ocas- • Epoxidem slepte díly stojiny hlavního nosníku; krát- ních ploch; dle potřeby zabruste. (Obr. 1) kou 0,8 mm překližkovou spojku s otvorem ve středu •...
- Page 17 tenkou polyetylénovou fólií slepte obě uši (pamatuj- le a vodorovnou ocasní plochu k ocasnímu nosníku. te – stavíte zrcadlově shodné levé a pravé ucho!). Na přední konec ocasního nosníku nasuňte uhlíkový • Nalepte koncové oblouky; konce pásnic hlavního přechod s překližkovou přepážkou a na sucho, bez nosníku seřízněte do úkosu a přilepte ke koncovému lepení...
- Page 18 ce, regulátor otáček a pohonný akumulátor upevněte • Na podložku je přilepte oboustrannou lepící páskou. v prostoru kabiny pomocí suchého zipu. Se zapnu- Doporučené velikosti výchylek ovládacích tou RC soupravou vyzkoušejte, zda se motor otáčí ve ploch, těžiště (Obr. 58) správném smyslu (proti směru hodinových ručiček při •...
- Page 19 RESCO Kit Der leistungsstarke Thermik-Segler / Motorsegler Entworfen und hergestellt in der Tschechischen Republik Technische Daten Spannweite: 1990 mm Profil: modifizierte AG Länge: 1125 mm Schwerpunktlage: 80 mm Fluggewicht ab: 440g Steuerbare Funktionen: Seitenleitwerk, Höhenleitwerk, Spoiler Empfohlene Ausstattung • Servo VOP a SOP: Hitec HS-53 2x •...
- Page 20 BAU DES MODELLS Leitwerke Ihrem Bedarf zu, oder als letzte Möglichkeit, machen Sie neue, die genau zu Ihrem Motor passen. (Abb. 13) • Bereiten Sie die Leitwerksteile vor und richten Sie sie aus, ohne sie zu verkleben; schleifen Sie nach Be- Flügel darf (Abb.
- Page 21 plankung aus 1,5 mm Balsa zwischen die Mittelrip- telrippe ist (achten Sie auf die Stärke des Klebebands, pen mit ausgeschnittenen Löchern für die Befestigu- mit dem Sie das Servo befestigen!). Damit das Klebe- ngsschrauben des Flügels. (Abb. 31) band gut hält, tragen Sie Epoxid auf die Servoplatte •...
- Page 22 Servo-Installation • Das Außenrohr des Seitenleitwerk-Bowdenzugs wird am Rande an das Rumpfrohr aufgeklebt. Platzierung der Seiten- und Höhenleitwerks-Ser- • Das Rohr des Höhenleitwerk-Bowdenzugs klebt man vos (Abb. 48): nicht. • Biegen Sie den Draht im Bowdenzug in „Z“-Form und stecken Sie den Servo-Hebel ein. Detail des Schlepphakens (Abb.
- Page 23 Bewegungen der Ruder und trimmen Sie, bis der Flug während eines Gleitflugs. Steuern Sie RESCO gegen makellos ist. Nun kontrollieren Sie die Lage der Steu- den Wind und verfolgen Sie seinen Flug. Falls er nach erflächen; wenn es nötig ist, stellen Sie die Länge aller rechts (ohne Motor) abbiegt, ist es notwendig, Achsen Gestänge so ein, dass die Trimms aller Kanäle mög- des Motors rechts größer einzustellen und umgekehrt.
- Page 24 Bag No. 2 Sáček č. 2 Beutel Nr. 2 Fuselage Nose (Balsa 8 mm) 1pc Trup předek balsa 8 mm 1ks Vorderrumpf Balsa 8 mm 1 Stück Fuselage Nose (Balsa 10 mm) 2pc Trup předek balsa 10 mm 2ks Vorderrumpf Balsa 10 mm 2 Stück Triangle Balsa Stock 4pc Trup balsa trojúhelníková...


Need help?
Do you have a question about the RESCO Kit and is the answer not in the manual?
Questions and answers