Table of Contents
Advertisement
Quick Links
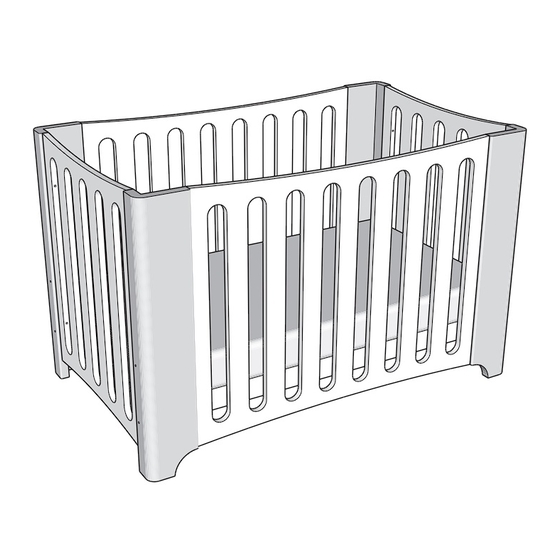
Vogue Cot
Assembly and care instructions
Cot
Bassinet
Chaise lounge
Junior Bed
RECYCLED
Packaging and instructions
printed on recycled materials
Single Bed - Optional Kit
Optional single bed rails, end
panel extensions and base kit
purchased separately
Save these instructions for future reference. Due to the heavy nature
of the cot, it is recommended assembly is undertaken by two people.
TM
Mattress and accessories not included
SJC Brands Pty Ltd
abn.
58 106 988 578
4 Merryvale Road, MINTO, NSW 2566
p.o. box
customer.service@sjcbrands.com.au
t.
02 9603 5000 f. 02 9603 7000
e.
5878 MINTO DC, NSW 2566
w.
www.tasmaneco.com.au
Advertisement
Table of Contents

Related Manuals for TasmanEco Vogue Cot


Summary of Contents for TasmanEco Vogue Cot
- Page 1 Vogue Cot Assembly and care instructions Bassinet Mattress and accessories not included Chaise lounge Single Bed - Optional Kit Optional single bed rails, end panel extensions and base kit purchased separately Junior Bed Save these instructions for future reference. Due to the heavy nature RECYCLED of the cot, it is recommended assembly is undertaken by two people.
- Page 2 • Regularly check cot for weakness in timber joints and timber panels. If any weaknesses are found, report immediately to Tasman Eco via: www.tasmaneco.com.au • Do not use cot if it has been damaged in any way and always use genuine Tasman Eco parts. Contact your nearest Tasman Eco stockist or original place of purchase for spare parts •...
- Page 3 Assembly tips - hardware Wooden dowel pins Gently push or tap dowel pins into place using your thumb or a small hammer. Note, excessive force may result in damage to the pin or furniture. Connector screws and lunar washers Insert the lunar washer into the locating hole, with the curved face against the wall of the locating hole.
- Page 4 What you will need Side panels x 2 End panels x 2 Base x 1 Allen key x 1 Phillips style key may also be needed for the metal cross dowel Double ended cap screws x 8 70mm connector screws x12 Metal cross dowels x 4 Warning Small parts can present a choking hazard.
- Page 5 Single bed kit (optional) Lattice bed bases x 2 Bed rails x 2 Extension panels x 4 Cap screws x 8 50mm connector screws x 12 Lunar washers x 4 15mm screws x 4 60mm connector screws plus end caps x 8...
- Page 6 Step 1 - Attach the base to one of the side panels Hardware needed 2 x 70mm connector screws 2 x metal cross dowels I N E T B A S S Attach the base to one of the side panels. C O T Note the base position needed for either ‘cot’...
- Page 7 Step 2 - Attach the other side panel Hardware needed 2 x 70mm connector screws 2 x metal cross dowels Attach the remaining side panel to the base. Again, note the base position needed for either ‘cot’ or ‘bassinet’. Choose the same set of locating holes as the other side panel.
- Page 8 Step 4 - Attach the end panels Hardware needed 8 x 70mm connector screws Lightly loosen the connector screws on the base and sides to allow the sides to be gently spread apart. Position the end panels between the corner posts at each end of the cot.
- Page 9 Single Bed - Assembly Step 1 - Attach the extension panels to the end panels x4 each end x4 each end Hardware needed 8 x 60mm connector screws 8 x end cap screws Attach the extension panels to the end panels.
- Page 10 Step 3 - Attach the bed rails to the bed heads Hardware needed 4 x 50mm connector screws 4 x lunar washers Temporarily attach the bed rails to the bed heads. To do this, align the three wooden dowels at the end of the bed rails with the holes on each corner post.
- Page 11 Step 5 - Plug the unused holes Hardware needed 8 x double ended cap screws 4 x 15mm cap screws IMPORTANT SAFETY STEP Fit the small cap screws and double ended cap screws to the remaining unused holes as shown. Repeat for each corner of the bed.
- Page 12 Converting the cot into a junior bed these steps are best undertaken by two people. 1. To convert your Tasman Eco cot into a 2. Remove the connector screws from the front junior bed, begin by loosening the connector and rear panels. (8 in total, store these parts in a screws that hold the base in place.
- Page 13 Converting the cot into a chaise lounge these steps are best undertaken by two people. 1. To convert your Tasman Eco cot into 2. Remove the 4 connector screws from the inner a chaise lounge, begin by loosening the front panel. (Store these parts in a safe place). connector screws around the cot (8 in total).
- Page 14 For claims under either the 100% Satisfaction Guarantee or the 5 year Materials and Workmanship Warrranty, please email us via our claims section on our website at www .tasmaneco.com.au or visit the store where the product was purchased. The product must be returned to SJC Brands Pty Ltd or to the place of purchase with proof of purchase, including date and purchase price.
Need help?
Do you have a question about the Vogue Cot and is the answer not in the manual?
Questions and answers