Advertisement
Care & Cleaning Tips:
For general dusting / cleaning - periodically wipe the cot with a dry soft cloth. To remove day to
day spills or dirt, wipe down with a soft cloth and mild solution of warm soapy water. Avoid
scourers and steel wool as these will damadge the finish. Always dry the cot after cleaning.
RECYCLED
Packaging and instructions
printed on recycled materials
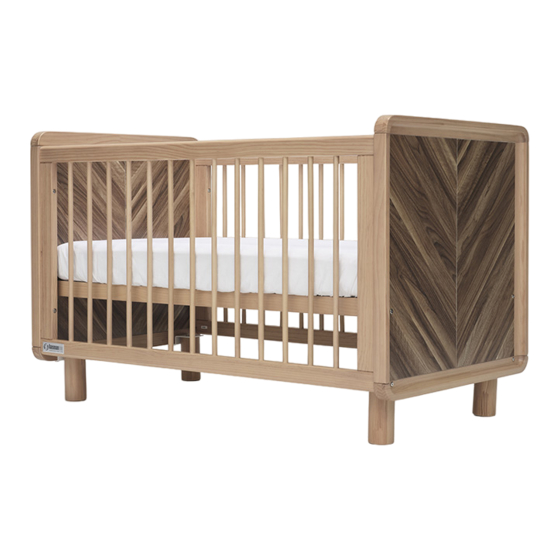
Bookleaf cot
Assembly Instruction
Save the instructions for future reference.
Assembly of this furniture is best undertaken by two people.
Tasman Eco Pty Ltd
abn.
58 106 988 578
4-6 Merr yvale Rd, Minto, NSW 2566
t.
02 9603 5000
f. 02 9603 7000
e.
ser vices@tasmaneco.com.au
p.o.
box
5878 M into, DC, NSW 2566
w.w w w.tasmaneco.com.au
Advertisement
Table of Contents

Related Manuals for TasmanEco Bookleaf cot


Summary of Contents for TasmanEco Bookleaf cot
- Page 1 Bookleaf cot Assembly Instruction Care & Cleaning Tips: For general dusting / cleaning - periodically wipe the cot with a dry soft cloth. To remove day to day spills or dirt, wipe down with a soft cloth and mild solution of warm soapy water. Avoid scourers and steel wool as these will damadge the finish.
- Page 2 Parts List Headboard x 2 Base x 1 Side panel x 2 Leg x 4 H!"#$!"% &'%&()*+, M6 x 60mm Bolt x 4 M6 x 22mm Metal cross dowel x 4 M6 x 15mm Bolt x 24 M6 x 70mm Bolt x 8 Bracket x 4 M6 x 15mm Cap screw x 4 !""#$ %#&...
- Page 3 Attach the brackets on the headboard secure with M6 x15mm bolts. M6 x 15mm Bolt x12 Bracket x 4 Connect the legs on the brackets secure with M6 x 15mm bolts. M6 x 15mm Bolt x8...
- Page 4 Connect the base to headboard secure with M6 x 60mm bolts and metal cross dowels. M6 x 60mm Bolt x 4 Metal cross dowel x 4 Fix M6 x15mm bolts and cap screws to unused holes. M6 x 15mm Cap screw x 4 M6 x 15mm Bolt x 4...
- Page 5 Connect side panels to headboards secure with M6 x 70mm bolts M6 x 70mm Bolt x 8 Check all the bolts and screws are tighten but do not over tighten. Insert the recommanded mattress and cot is completed.
- Page 6 4.The item is transferred, gifted or disposed of by the original owner to another. WARRANTY CLAIM PROCEDURE: For warranty claims, please email us via our claims section on our website www.tasmaneco.com.au or visit the store where the product was purchased.
Need help?
Do you have a question about the Bookleaf cot and is the answer not in the manual?
Questions and answers