
Related Manuals for Unitech PA400


Summary of Contents for Unitech PA400
- Page 1 Data Collection Terminal - PA400 - Quick Reference Guide Version 1.0 © 2014 Unitech Electronics Co., Ltd. All rights reserved. Unitech is a registered trademark of Unitech Electronics Co., Ltd.
- Page 2 PA400 Package Contents PA400 Terminal USB Cable Wrist Strap Power Adapter / Plugs QRG/UM CD-ROM - 2 -...
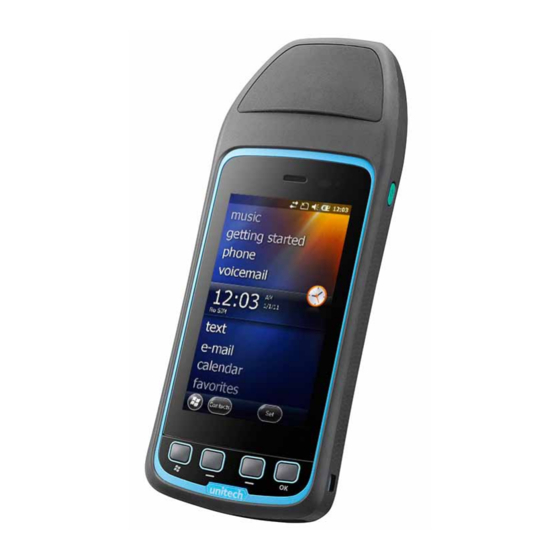
- Page 3 8 UP key 3 VOLUME control and 9 DOWN key ACTION buttons 10 OK key 4 Memory card and 11 Microphone SIMcard slots 12 Camera and Flash 5 Touch screen 13 Speaker 6 Notification LED 14 PA400 IO Port - 3 -...
- Page 4 Charging the battery IMPORTANT: Fully charge the battery at least 4 hours. The battery LED will turn green when fully charged. CAUTION: Extreme Heat • Extreme heat: The battery is designed to stop operating at or above the extreme heat of +149°F (+65°C). • If the battery temperature exceeds 158°F (70°C) it will be disabled and will need to be replaced. Insert the SIM card and memory card 2. Insert the SIM card 3. Replace the cover 1. Remove the cover. and memory card. - 4 -...
- Page 5 Install Wrist Strap Switch on and enter your PIN Once you have started to charge your device, you can switch it on. Select Language Once the language is selected, it cannot be changed. - 5 -...
- Page 6 Turning your unit on and choosing your language WARNING! BEFORE TURNING THE DEVICE ON, THE DEVICE MUST BE PLUGGED IN TO AN EXTERNAL POWER SOURCE. Once you have started to charge your device, you can turn it on. 1. Press the POWER button on the right panel of the device for about 5 seconds. The device is turned on. 2. The Welcome Wizard will lead you through the setup process.
Need help?
Do you have a question about the PA400 and is the answer not in the manual?
Questions and answers