Dell EqualLogic PS Series Hardware Owner's Manual
Storage arrays
Hide thumbs
Also See for EqualLogic PS Series:
- Installation and setup manual (62 pages) ,
- Installation and setup (60 pages) ,
- Setting up (2 pages)

Related Manuals for Dell EqualLogic PS Series


Summary of Contents for Dell EqualLogic PS Series
- Page 1 Dell EqualLogic PS6610 Storage Arrays Hardware Owner's Manual Version 1.0 Regulatory Model Series E11J...
- Page 2 © Copyright 2016 Dell Inc. rights reserved. Dell™ and EqualLogic® are trademarks of Dell Inc. trademarks registered trademarks mentioned herein the property their respective owners. Information in this document is subject to change without notice. Reproduction this material in manner...
-
Page 3: Table Of Contents
Table of Contents Preface 1 Basic Storage Array Information About the PS6610 Array PS6610 Features Recommended Tools Hardware Protection Shutting Down and Restarting an Array 2 Drive Maintenance Supported Drives and Drive Types Drive Installation Guidelines and Restrictions Drive Handling Requirements Drive Maintenance Requirements Array Behavior When a Drive Fails Identifying Failed Drives... - Page 4 PS6610 Hardware Owner's Manual Contents...
-
Page 6: Preface
Dell support service from the Contact Us list of services provided. 3. Choose your preferred method of contacting Dell support, such as email or telephone. Online Services You can learn about Dell products and services by visiting dell.com... -
Page 7: Basic Storage Array Information
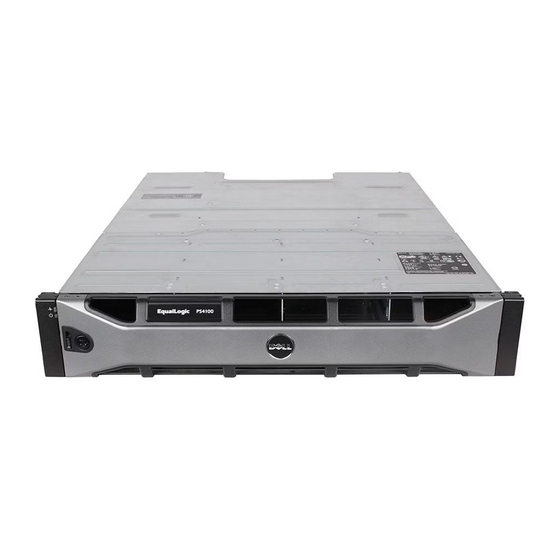
About the PS6610 Array The PS6610 array is a PS6x10 10GbE class EqualLogic PS Series array that continues the focus by Dell on industry-standard features and capabilities for the midrange iSCSI SAN market. PS Series Storage Arrays version 8.0 introduces the PS6610. - Page 8 PS6610 Hardware Owner's Manual 1 Basic Storage Array Information Figure 1: Front Panel Features Table 1: Front Panel Feature Identification Item Description Recessed Handle Anti-Tamper Lock Sideplane Status Indicator Enclosure Status Indicator Figure 2: Anti-Tamper Locks The anti-tamper locks require a T20 Torx key (included). To lock drawers, turn the key until Note: the red arrows point away from the center of the enclosure.
- Page 9 PS6610 Hardware Owner's Manual 1 Basic Storage Array Information Figure 3: Sideplane Status Indicator Table 2: Sideplane Status Indicator Description Item Indicator Description Sideplane OK/ Off — Sideplane card or cable fault Power Good Green — Sideplane card and cable are functional (though a fault might be indicated by the following LEDs) Drawer Fault Amber —...
- Page 10 PS6610 Hardware Owner's Manual 1 Basic Storage Array Information Figure 4: Enclosure Status Indicator Table 3: Enclosure Status Indicator Description Item Indicator Description Enclosure Unit ID Display — A numerical display whose primary function Status is to display the enclosure unit identification number. This display Indicator can be helpful when setting up and maintaining a multiple- enclosure storage center.
- Page 11 PS6610 Hardware Owner's Manual 1 Basic Storage Array Information Item Indicator Description Fault drawer 1 Drawer 2 Amber when a drive, cable, or sideplane fault has occurred in Fault drawer 2 Note: The LEDs are part of a built-in chassis control panel that is not hot-swappable and can be replaced only by support personnel.
-
Page 12: Recommended Tools
The PS6610 array includes redundant, hot-swappable drives, power supplies, and control modules. You can remove a redundant component without affecting operation as long as a functioning component is available. Otherwise, Dell recommends that you cleanly shut down the array and turn off power before removing a component. - Page 13 3. Enter the command: shutdown login: grpadmin Password: Welcome to Group Manager Copyright 2001-2014 Dell Inc. group1> shutdown After entering the command, the system displays information similar to the following output: shutdown Do you really want to shutdown the system? (yes/no) Halt at Fri Dec 12 09:43:44 EST 2014 -- please wait...
- Page 14 PS6610 Hardware Owner's Manual 1 Basic Storage Array Information 5. After performing array maintenance, you can turn on power to the array. When the array restart completes, the member and volumes will be set online.
-
Page 15: Drive Maintenance
Dell uses specially qualified and tested hard drives for its EqualLogic storage systems, and Note: manages hard drive quality and firmware only for those drives. As a result, only Dell-provided hard drives are supported by PS Series arrays. Attempts to use unapproved hard drives in the PS6610 array will not be successful. -
Page 16: Drive Maintenance Requirements
PS6610 Hardware Owner's Manual 2 Drive Maintenance • Protect drives from electrostatic discharge. Wear an electrostatic wrist strap when handling a drive. See Hardware Protection on page • Store drives properly. Store replacement drives in the packaging in which they were shipped. Do not stack drives or place anything on top of a drive. -
Page 17: Array Behavior When A Drive Fails
PS6610 Hardware Owner's Manual 2 Drive Maintenance Array Behavior When a Drive Fails The PS6610 firmware uses a copy-to-spare operation to replace failing drives. This operation can, in many cases, improve the performance of the drive replacement process by avoiding a full RAID rebuild, which provides better reliability. - Page 18 PS6610 Hardware Owner's Manual 2 Drive Maintenance Table 7: Drive LED States Item Description Indicator States • Off — Drive OK • Amber — Drive failed Drive status indicator (LED) • Blinking — Drive identification Installing and Removing Disk Drives The proper insertion and seating of hard drives in the chassis drawers is critical to the operation of the array.
- Page 19 PS6610 Hardware Owner's Manual 2 Drive Maintenance Figure 8: Inserting a Drive in the Drive Bay Figure 9: Securing a Drive in the Drive Bay 4. Verify that the new drive is operational by examining the LED on top of the DDIC. (An amber LED indicates that the drive is working properly.) In addition, you can examine the GUI group member Disks tab and the CLI command output to check the status of...
- Page 20 PS6610 Hardware Owner's Manual 2 Drive Maintenance Remove Disk Drives Removing a drive is easier if you work from the side of the open drawer. Note: 1. Using two hands, apply firm downward pressure to the top surface of the drive carrier. 2. While maintaining downward pressure, use one finger to press the release button on the center of the carrier and push it in the direction of the arrow (callout 1 in Figure...
-
Page 21: Control Module Maintenance
3 Control Module Maintenance The control modules in a PS Series array contain the PS Series firmware, which provides the Group Manager GUI, the command-line interface (CLI), and all the array and storage management functions and features. Ideally, an array has two control modules (which must be of the same type) to avoid a single point of failure for the array. - Page 22 PS6610 Hardware Owner's Manual 3 Control Module Maintenance Dual Controller Configuration A dual control module configuration eliminates a single point of failure in the array. If the active control module fails, the secondary control module takes over automatically with no interruption of service.
- Page 23 PS6610 Hardware Owner's Manual 3 Control Module Maintenance • Above the release latch is a column of three LEDs that indicate the status of the entire control module. See Table Figure 12: Control Module LEDs Table 8: Ethernet and Management Port LED Descriptions Management State Description...
- Page 24 PS6610 Hardware Owner's Manual 3 Control Module Maintenance LED Name State Description Normal operation or no power Array is starting up, in error condition, in Standby mode, or returning from Steady red Standby mode. Array is entering power standby mode because the Standby On/Off button Blinking red was pressed.
- Page 25 If you are adding a second control module, upgrading a control module, or replacing a failed microSD card, contact your PS Series support provider, which is in most cases Dell EqualLogic Technical Support. Inform your provider of the current PS Series firmware version on your system. If you are replacing a failed control module, remove the microSD card from the failed control module and install it in the replacement control module.
- Page 26 PS6610 Hardware Owner's Manual 3 Control Module Maintenance Figure 13: Standby Button Location Enable the Standby Feature To use the standby button, a group administrator must enable the feature in the Group Manager GUI or CLI. Enabling the use of the button applies groupwide; that is, it allows you to press the button to shut down any member (array) that has the standby button (PS4100, PS4110, PS6100, PS6110, PS6210, and PS6610 array models).
-
Page 27: Replace A Control Module
PS6610 Hardware Owner's Manual 3 Control Module Maintenance Using the Standby On/Off button on one member does not affect any other group members, with the exception of the group lead member. When the group lead member is in standby mode, it takes a few minutes for the group lead to fail over to another member. - Page 28 PS6610 Hardware Owner's Manual 3 Control Module Maintenance 1. Shut down the system with a full shutdown, as described in Shutting Down and Restarting an Array on page 2. Replace the control module, as described in Replacing the Secondary Control Module on page 3. Remove and swap the battery from the existing control module to the replacement control module, Battery Replacement on page as described in...
- Page 29 PS6610 Hardware Owner's Manual 3 Control Module Maintenance Figure 14: Removing a Control Module 3. Place the control module on a flat surface where it will be protected from electrostatic discharge. To avoid damage, do not place anything on top of the control module. 4. If you are replacing a failed control module, remove the microSD card from the failed control module and install it in the replacement control module.
- Page 30 PS6610 Hardware Owner's Manual 3 Control Module Maintenance Figure 15: Correct Control Module Orientation 1. Attach an electrostatic wrist strap or similar protective device. See Hardware Protection on page 2. Pull up on the orange release tab (callout 2 in Figure 16) and swing the lever out.
-
Page 31: Replace The Microsd Card
PS6610 Hardware Owner's Manual 3 Control Module Maintenance If two control modules are installed in the array, but only one is shown in the GUI (or CLI), make sure that you have allowed enough time (minimum of 5 minutes) for the two control modules to boot and synchronize. - Page 32 PS6610 Hardware Owner's Manual 3 Control Module Maintenance To reduce the risk of losing or damaging the microSD card, do not remove it until you are Caution: ready to install it in the replacement control module. 1. Firmly push the card into its housing to release the spring mechanism (see Figure 17).
-
Page 33: Battery Replacement
Damage due to servicing that is not authorized by Dell is not covered by your warranty. Read and follow the safety instructions that came with your system. - Page 35 PS6610 Hardware Owner's Manual 3 Control Module Maintenance If the screw falls inside the control module, you might have to return the control module to Dell Note: for servicing. 4. Using the screw tab as a handle, swing the battery cover up and to the left and lay it upside down...
-
Page 36: Shipping Requirements
The manner in which to dispose of rechargeable batteries varies by country. Make sure that you dispose of your old battery in a way that conforms to your country's regulations. Alternatively, you can return the old battery back to Dell for proper disposal. See Shipping Requirements on page... -
Page 37: Maintain Power Supply Units
4 Maintain Power Supply Units The array supports two hot-swappable power supply units. The array is capable of operating with one power supply temporarily, but both power supplies are required to maintain long-term reliability of the array. About Power Supplies The PS Series array receives power from two power supply units (PSUs). - Page 38 PS6610 Hardware Owner's Manual 4 Maintain Power Supply Units Table 10: Power Supply Features Color Item LED/Control Description (State) Release latch none Used to remove PSU from array Amber PSU fault. PSU not supplying power. (steady) PSU fault Amber PSU firmware is downloading (flashing) Amber AC power is not detected.
- Page 39 PS6610 Hardware Owner's Manual 4 Maintain Power Supply Units Figure 23: Removing a Power Supply Unit Install a Power Supply Unit To install a power supply unit: 1. Hold the power supply unit so that the orange release latch is on the upper left (callout 1 in Figure 2. Slide the power supply unit into the chassis until it is fully seated and the release latch clicks into place, as illustrated in...
- Page 40 PS6610 Hardware Owner's Manual 4 Maintain Power Supply Units Figure 24: Inserting a Power Supply 3. Ensure the power switch is in the OFF position. 4. Connect the power cable to the power supply and cooling module and plug the cable into a power outlet.
-
Page 41: Maintain Fan Modules
5 Maintain Fan Modules The PS6610 array contains five cooling fan modules. The array is capable of operating with one failed fan module; however all five cooling modules are required to maintain long-term cooling and reliability of the array. Remove a Cooling Fan Module Although an array can operate with only four working fan modules, you should replace the failed fan unit as soon as possible. - Page 42 PS6610 Hardware Owner's Manual 5 Maintain Fan Modules Install a Cooling Fan Module Do not allow the array to operate for more than 2 minutes without a fan module in place to Caution: maintain proper cooling of the array. How to Install a Cooling Fan Module Wear electrostatic protection when handling a cooling module.
-
Page 43: Advanced Networking Options
2. On both control modules, connect the port labeled MANAGEMENT to the management network. The location of the management port is shown in Figure Figure 28: Management Port Location Software Steps See the Dell EqualLogic Group Manager Administrator's Guide for the procedure to configure the management network in the Group Manager GUI. - Page 44 PS6610 Hardware Owner's Manual 6 Advanced Networking Options...
-
Page 45: Troubleshooting Your Array
Damage due to servicing that is not authorized by Dell is not covered by your warranty. Read and follow the safety instructions that came with the product. -
Page 46: Loss Of Array Connections
If the problem is not resolved, or if the power supply’s fault indicator is lit, contact your PS Series support provider. Power supply and cooling modules are hot-swappable. Dell does not recommend hot-swapping a DC power supply module. Note: The array can operate on a single power supply; however, both modules must be installed to ensure proper cooling. -
Page 47: Control Module Failures
PS6610 Hardware Owner's Manual 7 Troubleshooting Your Array • Ambient temperature is too high. See the technical specifications for the array in the Dell EqualLogic PS6610 Series Array Installation and Setup Guide. • External airflow is obstructed by cables or other items in the rack. - Page 48 PS6610 Hardware Owner's Manual 7 Troubleshooting Your Array...
-
Page 49: Index
Index protecting verifying operational status array electrostatic discharge control modules electrostatic wrist strap cooling 31, fans 31, firmware LEDs 11, failover power supplies 31, control module shutdown procedure failure indications control modules disks fans battery removing PSU 32, 35-36 firmware identifying version requirements control modules... - Page 50 PS6610 Hardware Owner's Manual Index network vertical failover failure protection network interfaces LEDs power supplies removing 32, 35-36 PS Series array protecting from discharge QR code recommended tools removing 3.5-inch drive requirements control modules cooling 32, 35-36 disks firmware power 32, 35-36 safety SD card...
Need help?
Do you have a question about the EqualLogic PS Series and is the answer not in the manual?
Questions and answers