Table of Contents
Advertisement
Available languages
Available languages
Quick Links
IB515008EN
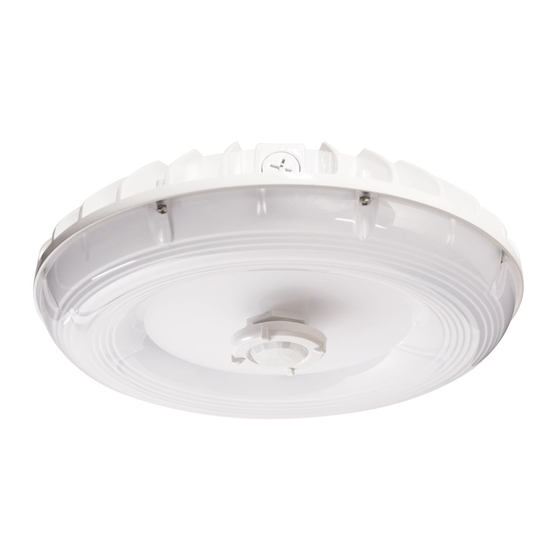
Installation Instructions – RPGC Round Parking Garage and Canopy
Instructions d'installation – RPGC Round Parking Garage and
Canopy
Instrucciones de instalación – RPGC Round Parking Garage and
Canopy
Risk of Fire, Electrical Shock, Cuts or other Casualty Hazards- Installation and maintenance of this
product must be performed by a qualified electrician. This product must be installed in accordance
with the applicable installation code by a person familiar with the construction and operation of the
product and hazards involved.
Risk of Fire and Electric Shock- Make certain power is OFF before starting installation or attempting
any maintenance. Disconnect power at fuse or circuit breaker.
Risk of Fire- Refer to product label for specific minimum supply conductor requirements.
Risk of Burn- Disconnect power and allow fixture to cool before handling or servicing.
Risk of Personal Injury- Fixture may become damaged and/or unstable if not installed properly.
Failure to comply with these instructions may result in death, serious bodily injury and property damage.
N
otee:
These instructions do not claim to cover all details or variations in the equipment, procedure, or process
described, nor to provide directions for meeting every possible contingency during installation, operation
or maintenance. When additional information is desired to satisfy a problem not covered sufficiently for
user's purpose, please contact your nearest representative.
N
otee:
Care must be taken not to set lighting fixture down on optical lenses or lift the fixture in the lens area.
N
otee:
Specifications and dimensions subject to change without notice.
DISCLAIMER OF LIABILITYe: Eaton assumes no liability for damages or losses of any kind that may arise from the
improper, careless, or negligent installation, handling or use of this product.
NOTICEe: Green ground wire provided in proper location. Do not relocate.
ATTENTION Receiving Departmente: Note actual fixture description of any shortage or noticeable damage on
delivery receipt. File claim for common carrier (LTL) directly with carrier. Claims for concealed damage must be
filed within 15 days of delivery. All damaged material, complete with original packing must be retained.
Safety: This fixture must be wired in accordance with the National Electrical Code and applicable local codes and
ordinances. Proper grounding is required to insure personal safety. Carefully observe grounding procedure under
installation section.
APPLICATIONS: This lighting fixture is designed for outdoor lighting services, and should not be used in area
of limited ventilation or inside high ambient temperature enclosures. It must be stored in a dry location prior to
installation. Do not expose lighting fixture to rain, dust or other environmental conditions prior to installation
and insertion of photo control or shorting cap (if so equipped). Best results will be obtained if installed and
maintained according to the following recommendations.
WARNING
Brand Logo
reversed out of
black
Lumark
INS #
INS #
Advertisement
Table of Contents

Related Manuals for Eaton Lumark RPGC Series


Summary of Contents for Eaton Lumark RPGC Series
- Page 1 Specifications and dimensions subject to change without notice. DISCLAIMER OF LIABILITYe: Eaton assumes no liability for damages or losses of any kind that may arise from the improper, careless, or negligent installation, handling or use of this product. NOTICEe: Green ground wire provided in proper location. Do not relocate.
-
Page 2: Installation
Connect supply side line voltage wire to black lead. b. Connect supply side neutral wire to white lead. c. Connect supply side ground wire to green lead. Figure 3. EATON IB515008EN Installation instructions... -
Page 3: Surface Mounting
If there is a motion sensor, be sure to reconnect the motion sensor quick connects while performing (2) White Cover this step. Make sure the two quick connects are Screws reconnected appropriately. Cautione: DO NOT over tighten lens screws. Figure 6. EATON IB515008EN Installation instructions... -
Page 4: Pendant Mounting
(IF APPLICABLE) Remove the clear plastic cap that covers the motion sensor installed on the fixture. Twist to install the provided motion sensor lens onto the fixture until secure. 3/4” NPS Plug (Provided in Packaging) Figure 7. EATON IB515008EN Installation instructions... - Page 5 Les caractéristiques techniques et les dimensions sont sujettes à modifications sans préavis. otee: EXONÉRATION DE RESPONSABILITÉ e: Eaton n’assume aucune responsabilité pour les dommages ou pertes de quelque nature que ce soit pouvant découler d’une installation, d’une manipulation ou d’une utilisation inappropriée, imprudente ou négligente de ce produit.
- Page 6 Pendant que le luminaire est suspendu par l’anneau de la plaque de montage rapide, effectuez les raccords électriques. Assurez-vous d’éviter tout excès de fil pouvant nuire au câblage intérieur de la boite de jonction. Figure 3. EATON IB515008EN Instructions d’installation...
-
Page 7: Montage En Surface
13 mm (1/2 po) de diamètre sont directement opposés l’un à l’autre sur le luminaire. N’utilisez pas l’entrée défonçable de l’interrupteur de sélection de lumens pour raccorder le conduit. (2) cache-vis blancs Insérez tous les raccords électriques à l’intérieur du luminaire. Figure 6. EATON IB515008EN Instructions d’installation... - Page 8 AFIN DE RETIRER LA SALETÉ ET LES AUTRES DÉBRIS. à la boite de jonction et effectuez les raccords comme UN NETTOYAGE ADDITIONNEL PEUT ÊTRE FAIT AVEC UN à l’étape 5 du chapitre de montage de la boite de NETTOYANT NON ABRASIF . jonction. EATON IB515008EN Instructions d’installation...
- Page 9 Las especificaciones y las dimensiones están sujetas a cambios sin previo aviso. RENUNCIA DE RESPONSABILIDADe: Eaton no asume ninguna responsabilidad por daños o pérdidas de ningún tipo que puedan derivarse de la instalación, manipulación o uso incorrecto, descuidado o negligente de este producto.
-
Page 10: Instalación
Asegúrese de que no haya cable sobrante que impida la contención de todo el cableado en el interior de la caja de derivación. a. Conecte el cable de voltaje de línea del lado de la alimentación con el conector negro. EATON IB515008EN Instrucciones de instalación... -
Page 11: Montaje En Superficie
Figura 6. b. Conecte el cable neutro del lado de la alimentación con el conector blanco. c. Conecte el cable de conexión a tierra del lado de la alimentación con el conector verde. 11 11 EATON IB515008EN Instrucciones de instalación... - Page 12 SU RENDIMIENTO TÉRMICO. SE DEBE LIMPIAR LA LENTE ÓPTICA CON UN TRAPO LIMPIO Y SECO PARA EXTRAER TODO TIPO DE POLVO U OTROS CONTAMINANTES. SE PUEDE REALIZAR UNA LIMPIEZA ADICIONAL CON UNA SOLUCIÓN DE LIMPIEZA ACRÍLICA NO ABRASIVA. EATON IB515008EN Instrucciones de instalación...
- Page 13 Warranties and Limitation of Liability Please refer to www.eaton.com/LightingWarrantyTerms for our terms and conditions. Garanties et limitation de responsabilité Veuillez consulter le site www.eaton.com/LightingWarrantyTerms pour obtenir les conditions générales. Garantías y Limitación de Responsabilidad Visite www.eaton.com/LightingWarrantyTerms para conocer nuestros términos y condiciones.
Need help?
Do you have a question about the Lumark RPGC Series and is the answer not in the manual?
Questions and answers