
Related Manuals for SBC PCD2.M5 Series


Summary of Contents for SBC PCD2.M5 Series
- Page 1 Handbuch Hardware of the PCD2.M5_ series Manual of the PCD2.M5_ series Document 26/856; Version EN 12 | 2014-07-24...
-
Page 2: Table Of Contents
Internal power supply ..................3-25 3.7.3 Earthing concept ..................... 3-25 3.7.4 Cable layout ....................3-26 Operating states ....................3-27 Connections to PCD2.M5_ ................3-28 3.10 Partitioning options for user memory .............. 3-30 Hardware Manual for the PCD2.M5 Series│Document 26/856; Version EN 1 2│2014-07-24... - Page 3 3.19.4 Structure of the setup menu ................3-59 3.19.5 PG5 Device configuration for eDisplay ............3-62 3.19.6 USER project ....................3-63 3.19.7 Web-Editor ...................... 3-66 3.19.8 Browse the eDisplay pages on the PC ............3-69 RIO (remote input/output) head stations Hardware Manual for the PCD2.M5 Series│Document 26/856; Version EN 1 2│2014-07-24...
- Page 4 PCD2.A220, 6 relays with make contacts, without contact protection .... 6-34 6.5.4 PCD2.A250, 8 relays with make contacts, without contact protection .... 6-36 6.5.5 PCD2.A410, 8 digital outputs for 0.5 A each, electrically isolated ....6-38 Hardware Manual for the PCD2.M5 Series│Document 26/856; Version EN 1 2│2014-07-24...
- Page 5 System cables with I/O module connections to the PCD ........ 7-1 Configuration and programming CPUs ....................... 8-1 8.1.1 Configuring the PCD with PG5 ............... 8-1 8.1.2 "Hardware settings" option ................8-5 Maintenance Changing the battery on the PCD2.M5xx0 ............. 9-1 Hardware Manual for the PCD2.M5 Series│Document 26/856; Version EN 1 2│2014-07-24...
- Page 6 Installation instructions for carrying low voltage ..........A-5 A.3.3 Carrying inductive loads .................. A-7 A.3.4 Details of relay manufacturers for sizing of RC elements ....... A-7 Order details ....................A-9 Hardware Manual for the PCD2.M5 Series│Document 26/856; Version EN 1 2│2014-07-24...
-
Page 7: Document-History
STEP ® are registered trademarks of Siemens AG. Technical changes are subject to the state of technology Saia-Burgess Controls AG, 2013. © All rights reserved. Published in Switzerland Hardware Manual for the PCD2.M5 Series│Document 26/856; Version EN 1 2│2014-07-24... -
Page 8: Graphical Index
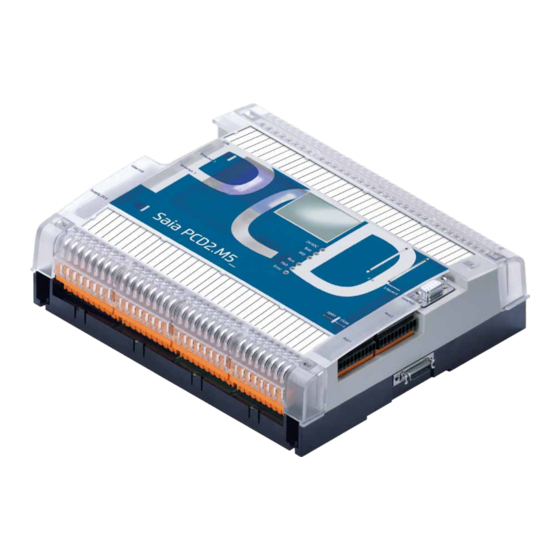
#3 cards Port #0 ETH1 ETH2 Port #2 User inputs Port #0 Port #1 Supply Lithium- battery LEDs Run/Halt- Switch I/O Slots X3 Port #2 X4 Port #1 Hardware Manual for the PCD2.M5 Series│Document 26/856; Version EN 1 2│2014-07-24... -
Page 9: Overview Introduction
When Saia PCD controllers are connected directly to the internet, they are also a potential target of cyber attacks. For secure operation, appropriate protective measures must always be taken. PCD controllers include simple, built-in protection features. However, secure op- eration on the internet is only ensured if external routers are used with a firewall and encrypted VPN connections. For more information, please refer to our support site: www.sbc-support.com/security Hardware Manual for the PCD2.M5 Series│Document 26/856; Version EN 1 2│2014-07-24... -
Page 10: Planning An Application With Pcd2.M5_ Components
Current consumption of the PCD2 input/output modules. Note that in most applications the outputs place the heaviest load on the 24 V supply. For 16 outputs with a load current of 0.5 A each, the loading will be 8 A with all outputs connected. Hardware Manual for the PCD2.M5 Series│Document 26/856; Version EN 1 2│2014-07-24... -
Page 11: Cabling
Surge protection for long distances or external lines ● Where lines are laid outside the building, or over longer distances, suitable surge protection measures should be applied. For bus lines in particular, these measures are essential. ● With lines laid outside, the shield must have adequate current-carrying capacity and be earthed at both ends. ● The surge conductors should be installed at the input to the switching cabinet. Hardware Manual for the PCD2.M5 Series│Document 26/856; Version EN 1 2│2014-07-24... -
Page 12: Addressing
I/O modules. The connection to the next row is made via the 26-core extenstion cable or the connector (see section 3.4.3). Forces arising with too small cable radii (smaller than the natural radius) may damage the plug connection. The extension cables must not be plugged in or removed with the controller connected to the power supply. Hardware Manual for the PCD2.M5 Series│Document 26/856; Version EN 1 2│2014-07-24... -
Page 13: Hw Overview
I/O 2 I/O 3 I/O 0 I/O 1 Ground connection for I/O modules I/O bus Power supply I/O 7 I/O 6 I/O 5 I/O 4 I/O 3 I/O 2 Hardware Manual for the PCD2.M5 Series│Document 26/856; Version EN 1 2│2014-07-24... -
Page 14: Pcd2.M5Xx0 Cpus And Module Holders
"low-cost solution" for machinery and systems. SBC S-Net networking concept SBC S-Net is the name of the new, flexible networking concept for innovative and economical automation systems with Saia PCD ® ● B ased on the Ethernet-TCP/IP (Ether-S-Net) and Profibus (Profi S-Net) open standards: use of existing network infrastructure → no duplicate cabling required Hardware Manual for the PCD2.M5 Series│Document 26/856; Version EN 1 2│2014-07-24... - Page 15 All PCD controllers and PCD3 RIOs come with an integrated web server as standard: ● W eb browser as a tool for commissioning, support and visualization: Access to the SBC web server is via standard web browsers such as Internet Explorer or Netscape Navigator. This makes the web browser, which can be operated intuitively by anyone, the standard tool for commissioning, service, support and visualization of machines, units and installations.
-
Page 16: General Technical Details
EN61000-4-4: 4 kV on DC supply lines, 4 kV on I/O signal lines, 1 kV on interface lines Noise emission according to EN 61,000-4-6: Class A (for industrial areas). Guidance on the correct use of these controls in residential areas can be found at www.saia-support.com (additional measures). Hardware Manual for the PCD2.M5 Series│Document 26/856; Version EN 1 2│2014-07-24... - Page 17 Please verify if your chosen product is listed in the corresponding Certificate under www.saia-support.com. The condition for cULus Compliance are mentioned on the sheet annexed to the product or can be required under www.saia-support.com. Hardware Manual for the PCD2.M5 Series│Document 26/856; Version EN 1 2│2014-07-24...
-
Page 18: System Resources
Values - 2,147,483,648 to +2,147,483,647. Can only be loaded media code into a register with an LD command, and cannot be used in instructions instead of registers. 1) The number of timers configured should be only as many as required, to prevent unnecessary CPU loading ** Since firmware 1.14.23 14’336 flags are supported, before it was 8192. In order to use flags > 8191 PG5 2.6.150 is Hardware Manual for the PCD2.M5 Series│Document 26/856; Version EN 1 2│2014-07-24... -
Page 19: Pcd2.M5_ Cpus
Max. input frequency 1 kHz User outputs Interfaces Programming interface Optional serial data interface Port 1, 2 RS-232, RS-422/485 or TTY current loop 20 mA Port 0 (PGU) also as RS-232 interface (D-Sub) or RS-485 (X5 terminal block), up to 115 kbit/s Hardware Manual for the PCD2.M5 Series│Document 26/856; Version EN 1 2│2014-07-24... - Page 20 H modules can be used on the sockets with base address 240 3) Typical values; the processing time is dependent on the load on the communication ports 4) The period given is a buffer time; it is dependent on the ambient temperature (a higher temperature means a shorter buffer time) 5) The 1 kHz applies with a pulse/pause ratio of 1:1 and refers to the total frequencies of the inputs 6) The USB port is type "USB 1.1 Slave Device 12 Mbps" and can only be used for programming and as an S-Bus Slave, together with certain software products (Webconnect, ViSi-PLUS with S-Driver). With a USB 2.0 hub, the download runs twice as fast Can also be used as a serial data port, e.g. to connect a terminal; but this hampers commissioning and trouble- shooting with the debugger Hardware Manual for the PCD2.M5 Series│Document 26/856; Version EN 1 2│2014-07-24...
-
Page 21: Block Diagram For Pcd2.M5
COM/PGU o. RS485 S-Net/ Ethernet- Modem RS 232 TCP/IP “Full Handshaking” 1) Connection for the programming unit 2) With PCD2.M5540 No changes (e.g. plugging/unplugging I/O modules) should be made with the power switched on. To prevent loss of data, batteries should be changed with the power switched on. Hardware Manual for the PCD2.M5 Series│Document 26/856; Version EN 1 2│2014-07-24... -
Page 22: Hardware And Firmware Versions For The Pcd2.M5
The download operation is terminated by rebooting the PCD. 1) A modem connection is not always reliable. A modem may become blocked in such a way that remote access is no longer possible. In such cases, an on-site visit will be necessary. Other connection options are preferable. Hardware Manual for the PCD2.M5 Series│Document 26/856; Version EN 1 2│2014-07-24... -
Page 23: Extensions With Various Module Holders
Max. plug-in I/O modules Max. additional digital I/Os Connecting cable or PCD2.K1x0 PCD2.K106 PCD2.K106 PCD3.K1x6 PCD3.K1x6 Connector PCD3.K010 PCD2.K010* Restrictions Max. 6 PCD3.C200 *In preparation 3-10 Hardware Manual for the PCD2.M5 Series│Document 26/856; Version EN 1 2│2014-07-24... -
Page 24: Expansion Housings
This check is especially important when using analogue, counter and positioning modules, as these may have a very large power consumption. It is advisable to use the calculation table at www.saia-support.com. 3-11 Hardware Manual for the PCD2.M5 Series│Document 26/856; Version EN 1 2│2014-07-24... - Page 25 PCD2.C2000 and PCD2.C1000 serve as a bus repeater and provide +5V and V+ internally for a segment of I/O modules. ● The order of the expansion housings is freely selectable. ● Expansion housings of the PCD3 serie (PCD3.C100, PCD3.C110 and PCD3.C200) can also be used. 3-12 Hardware Manual for the PCD2.M5 Series│Document 26/856; Version EN 1 2│2014-07-24...
- Page 26 Meaning Power fail +5 V or V+ not present Power good Power supply present Shared connection n.c. not connected n.c. not connected +24 V +24 V +24 V 3-13 Hardware Manual for the PCD2.M5 Series│Document 26/856; Version EN 1 2│2014-07-24...
- Page 27 I/O expan- sion cable PCD2.K110 PCD2.K100 Up to 255 central data points in PCD2.C100 / .C150 Minimum distance between PCD2.M5xxx and PCD2.C2000/C1000 I/O expansion cable PCD2.M5x40 PCD2.C2000 PCD2.K106 ≥10cm 3-14 Hardware Manual for the PCD2.M5 Series│Document 26/856; Version EN 1 2│2014-07-24...
-
Page 28: Addressing Of Module Holders And Modules
2xPCD2.C1000 4th ext. 512...639 (Modul 32...39) 5th ext. 640...767 (Modul 40...47) 6th ext. 768...895 (Modul 48...55) 960...975 976...991 896...911 912...927 7th extension 944...959 928...943 1008... 992... 1023 1007 3-15 Hardware Manual for the PCD2.M5 Series│Document 26/856; Version EN 1 2│2014-07-24... -
Page 29: Decentralised Expansion Of Rio With Pcd3 Components
1.5 MBit/s 4 plug-in I/O modules Integrated web server for diagnostics, support and commissioning (Connection to PC via optional PCD3.K225 connector cable) PCD Type Max. number of PCD3 I/Os PCD3.RIO nodes 256 per node 3-16 Hardware Manual for the PCD2.M5 Series│Document 26/856; Version EN 1 2│2014-07-24... -
Page 30: Dimensions
Saia-Burgess Controls AG PCD2.M5_ Classic CPUs and expansion housings PCD2 CPUs 3.4.7 Dimensions PCD2.M5-,PCD2.C2000 PCD2.C1000 3-17 Hardware Manual for the PCD2.M5 Series│Document 26/856; Version EN 1 2│2014-07-24... -
Page 31: Mounting
0 °C to 55°C. In all other positions, air convection works less well, and an ambient temperature von 40 °C should not be exceeded. 3-18 Hardware Manual for the PCD2.M5 Series│Document 26/856; Version EN 1 2│2014-07-24... -
Page 32: Remove Cover From Housing
NB: Do not use earlier methods. They may cause damage. Grip both sides of the housing with the fingers and push to the left. After removing the cover, the plug boards for flash cards, the lithium battery, the run/ halt switch etc. are freely accessible. Flash- Aperture for cars LCD-display and keys Lithium- Run/Halt- battery switch 3-19 Hardware Manual for the PCD2.M5 Series│Document 26/856; Version EN 1 2│2014-07-24... -
Page 33: Replace Housing Cover
Saia-Burgess Controls AG PCD2.M5_ Classic CPUs and expansion housings Mounting 3.5.3 Replace housing cover In the reverse order; position the 4 clips of the housing cover in the 4 grooves on the housing (see below), press down with the fingers (see below) and push the housing cover to the right. 3-20 Hardware Manual for the PCD2.M5 Series│Document 26/856; Version EN 1 2│2014-07-24... -
Page 34: Remove Upper Part Of Housing
To simplify customer installation, optional communication interfaces should be ordered together with the PCD2.M5_. Up to two PCD7.F1xx units can be plugged into Slots A#1 and A#2. The following PCD7.F1xx communication modules can be plugged into Slots A#1 and A#2: ● PCD7.F110 ● PCD7.F121 (PCD7.F120 must not be used) X3-Port 2 ● PCD7.F130 2. PCD7.F1xx ● PCD7.F150 ● PCD7.F180 X4-Port 1 1. PCD7.F1xx 3-21 Hardware Manual for the PCD2.M5 Series│Document 26/856; Version EN 1 2│2014-07-24... -
Page 35: Replace Housing Cover
To remove the I/O cover, place the thumbs on the I/O housing cover and push the I/O cover away with the fingers. I/O covers (Slot#0 to #3 and Slot#4 to #7) 3-22 Hardware Manual for the PCD2.M5 Series│Document 26/856; Version EN 1 2│2014-07-24... -
Page 36: Installation And Addressing Of Pcd2 I/O Modules
All PCD2 systems are provided with a set of matching A4 templates Removing the cover gives access to terminals, but also exposes components that are sensitive to electrostatic discharges. 3-23 Hardware Manual for the PCD2.M5 Series│Document 26/856; Version EN 1 2│2014-07-24... -
Page 37: Power Supply, Earthing Scheme, Cable Layout
Suitable for PCD2.Mxxxx Modules PCD2. E1xx, E5xx, E6xx, A2xx, A4xx, B1xx, G4xx PCD2.W1xx, W2xx, W3xx, W4xx, W5xx, W6xx PCD2. H1xx , H2xx , H3xx PCD7.D2xx *) These modules must be connected to a smoothed 24 VDC supply 3-24 Hardware Manual for the PCD2.M5 Series│Document 26/856; Version EN 1 2│2014-07-24... -
Page 38: Internal Power Supply
When a module is plugged into the module holder, a metal tab on the module housing creates a reliable multi-point contact to the module carrier concerned. The zero-potential (Minus pole) of the 24 V supply is connected to the Minus terminal of the supply. This should be connected to the earthing bar with the shortest possible wire (< 25 cm) of 1.5 mm 3-25 Hardware Manual for the PCD2.M5 Series│Document 26/856; Version EN 1 2│2014-07-24... -
Page 39: Cable Layout
The cables to the terminals on the motherboard are run through the two side channels from the bottom or from the top. The terminals are accessible on the motherboard without removing the cover. Following these rules will ensure that the LEDs are visible and the bus connections remain ac- cessible. 3-26 Hardware Manual for the PCD2.M5 Series│Document 26/856; Version EN 1 2│2014-07-24... -
Page 40: Operating States
• no communication module on an S-Bus PGU or Gateway Master port System diagnostics Reset The RESET state has the following causes: • Supply voltage too low • Firmware not starting up 3-27 Hardware Manual for the PCD2.M5 Series│Document 26/856; Version EN 1 2│2014-07-24... -
Page 41: Connections To Pcd2.M5
Port#10: Pins 3, 4, 5, 6 and 8 are insulated from the system. Pin 2 serves as a backlink for Pin 7. Port#0: This can be used as an alternative only, either the 10-pole terminal block or the 9-pole D-Sub socket. 3-28 Hardware Manual for the PCD2.M5 Series│Document 26/856; Version EN 1 2│2014-07-24... - Page 42 Both sockets can be used independently of each other. The RJ-45 shield is AC-coupled and so fully insulated. ETH1 ETH2 are independently AC-coupled. Sockets: 2 x RJ-45 positioned vertically, metal housing, 2 LEDs orange: Link and activity green: Speed 10 or 100 Mbits USB programming port USB 1.1 slave device 3-29 Hardware Manual for the PCD2.M5 Series│Document 26/856; Version EN 1 2│2014-07-24...
-
Page 43: Partitioning Options For User Memory
Each 32-bit element of a DB occupies eight bytes in the address range 0..3999, and the header of the DB takes up a further three bytes We recommend always using DBs with addresses ≥ 4000. These can hold more elements (16384 instead of 384), take up less space (only 4 bytes instead of 8 bytes per element, but NB, 8 bytes instead of 3 for the header) and the access time is substantially shorter. Example of manual partitioning: 3-30 Hardware Manual for the PCD2.M5 Series│Document 26/856; Version EN 1 2│2014-07-24... -
Page 44: Data Storage In Case Of Power Failure
2.4 V the battery is flat or shows an interrupt the battery is missing We recommend changing the batteries with the PCD attached to the power supply, to avoid any loss of data. 3-31 Hardware Manual for the PCD2.M5 Series│Document 26/856; Version EN 1 2│2014-07-24... -
Page 45: Memory Space On The Pcd
PCD as machine code. If it transpires when the PCD is started up that the RAM memory has been corrupted (e.g. after a power failure with a flat or missing battery), the application is automatically reloaded from the flash backup memory. The LIST command "Test" and operand "400" can be used to test this. All hardware settings are also saved to the flash backup memory (onboard or on an equivalent flash card). Partition of user backup memory The user backup memory is split into two parts. The first is available for the user program backup and is always present. In the PG5 hardware configurator, this memory is referred to accordingly as "user program backup". 3-32 Hardware Manual for the PCD2.M5 Series│Document 26/856; Version EN 1 2│2014-07-24... - Page 46 Flash memory modules (optional) For the PCD, there are various flash memory modules for different applications. Some of these modules are explicitly designed for a particular use (e.g. the PCD7. R500 for user program backup). However, there are other modules available for various types of storage (e.g. the PCD7.R551M04, which contains 1 MB of memory space for the user program backup and 3 MB the file system). Most flash memory modules are simple cards (PCD7.Rxxx), which can be plugged into a PCD2.M5xxx0 in Slot M1 or M2. Flash memory modules for the file system Apart from the flash memories mentioned above for backing up the user program memory and DBs, there is another type of flash memory available for files. These memory modules can be used to save "PC-readable" files such as web pages, images or log files. The content of these flash memory modules can be accessed via the web server, the FTP server (for PCD2 with Ethernet interface only) and the user program. 3-33 Hardware Manual for the PCD2.M5 Series│Document 26/856; Version EN 1 2│2014-07-24...
- Page 47 This card can be read with a card reader and the appropriate software (SBC File System Explorer) installed R - S D .7 S CON on a PC. A BUR Sockets for memory modules The slots shown below are intended to take memory cards. 3-34 Hardware Manual for the PCD2.M5 Series│Document 26/856; Version EN 1 2│2014-07-24...
-
Page 48: Program Backup And Restore On Backup Flash
If no valid user program is loaded when the CPU is switched on, the CPU operating system checks whether there is a valid program in the onboard flash; if so, it is automatically loaded and executed. An automatic restore is also executed if a flat battery, or none at all, is detected on a PCD2.M5xx0. 3-35 Hardware Manual for the PCD2.M5 Series│Document 26/856; Version EN 1 2│2014-07-24... -
Page 49: Transferring An Application With Flash Card
● Remove the supply to the source controller, and unplug the flash card ● Send off the flash card where applicable ● Insert the flash card into the target controller (which should be switched off) ● Switch on controller. ● Press "Run/Halt" switch for more than 3 seconds; the LEDs will flash while the program is being copied from the flash card (control switches to "Halt" state) ● Restart the control with the "Run/Halt" switch If the configuration does not match the options available on the controller (e.g. IP configuration on a controller without IP), the controller will switch to "Halt" state and an entry will be written to history. Loading the user program from the flash card will overwrite the user program backup on the onboard flash, provided there is sufficient space for the program on the backup flash. 3-36 Hardware Manual for the PCD2.M5 Series│Document 26/856; Version EN 1 2│2014-07-24... -
Page 50: Backup Program After Download Option
PCD2.M5_ Classic CPUs and expansion housings Memory space on the PCD 3.12.4 Backup program after download option In PG5, there is an option which copies the whole user program (HW configuration, code, Text/DB and extension memory) to flash after the program download. This can be found on the “Download Program...” screen: It is also possible to activate this option by default. To do this, the corresponding option should be enabled in the PG5 project manager in the "Tools" menu → "Op- tions…": 3-37 Hardware Manual for the PCD2.M5 Series│Document 26/856; Version EN 1 2│2014-07-24... -
Page 51: Backup/Restore Of Ram Texts/Dbs At Run-Time
If the "extension memory backup size" is increased, the "user program backup size" will be automatically reduced (by twice the configured "extension memory backup size") For storing texts/DBs on the flash card, restoring, deleting and running diagnostics, there are four SYSRD/SYSWR instructions provided, as described in detail below; these can be invoked at a suitable place in the user program. These instructions must be used with great care, to prevent any damage to the unit or the flash card. 3-38 Hardware Manual for the PCD2.M5 Series│Document 26/856; Version EN 1 2│2014-07-24... - Page 52 SYSWR K 3x00 instruction has been used to store newer versions. ● Within the maximum number of write cycles, a text/DB can be stored any number of times, without the flash card becoming over-full. 3-39 Hardware Manual for the PCD2.M5 Series│Document 26/856; Version EN 1 2│2014-07-24...
- Page 53 ● It is strongly recommended to execute a SYSRD K 3x00 before this instruction, to test whether the flash card is available and ready. ● If errors occur during processing, e.g. because no flash card is plugged in, XOB 13 will be called where it is present, or the error LED will be set 3-40 Hardware Manual for the PCD2.M5 Series│Document 26/856; Version EN 1 2│2014-07-24...
- Page 54 ● It is strongly recommended to execute a SYSRD K 3x00 before this instruction, to test whether the flash card is available and ready. ● The processing time for the instruction may be several 100 ms. For this reason, it must not be invoked in XOB 0 (XOB for a power failure) or during time-critical processes. ● If errors occur during processing, e.g. because no flash card is plugged in, XOB 13 will be called where it is present, or the error LED will be set 3-41 Hardware Manual for the PCD2.M5 Series│Document 26/856; Version EN 1 2│2014-07-24...
- Page 55 Too many texts/DBs, no more free memory space available Already in progress The last SYSWR 3x0x instruction was not yet completed when the next was started 8...31 Spare 3-42 Hardware Manual for the PCD2.M5 Series│Document 26/856; Version EN 1 2│2014-07-24...
-
Page 56: Memory Module Pcd2.R6000 For Flash Cards (Fcs)
128, 256, 512 MB, 1 GB Technology Single-level cell Service life 600,000 or more programming/deletion cycles Data retention 5 years or more Operating temperature -25°C...+85°C or better MTBF 1,000,000 hours or better 3-43 Hardware Manual for the PCD2.M5 Series│Document 26/856; Version EN 1 2│2014-07-24... -
Page 57: Operation
(4 Mbyte - 1 GByte max.) (512 kByte max.) FTP server and file system access can only be achieved with the plug-in flash memory module. Access via FTP server is only possible via the Ethernet TCP/IP interface. Based on the predefined requirements, SBC uses its own file system. The SBC file system is embedded in a FAT (PC compatible file system) framework, to make the restricted processes when used in a commercial SD card reader/writer visible with 3-44 Hardware Manual for the PCD2.M5 Series│Document 26/856; Version EN 1 2│2014-07-24... - Page 58 SBC. As 10% of the SD card capacity is reserved for the FAT, this extraction PC tool can be copied there. This allows data stored in the SBC file system to be accessed quickly on any PC with a standard SD card reader. The SBC PC tool can also make copies of SAIANTFS.FFS on any drive. Any remaining FAT storage space can be used to save documentation or for other purposes. The PCD2.R6000 can be used for PCD2 program backup in the same way as the PCD7.R500. The PCD2 program backup is written to the file backup.sei in a specified...
-
Page 59: Displays And Switches
On the module is a 10-position BCD switch which can be set with a #0 screwdriver. BCD position Meaning normal read/write** Spare Spare Spare Spare format*/** Spare Spare Spare normal read only * Starts after insertion; remove, then plug in again ** If the card itself is not write-protected (switch or software) 3-46 Hardware Manual for the PCD2.M5 Series│Document 26/856; Version EN 1 2│2014-07-24... -
Page 60: Flash Card
To increase service life, the flash cards should not be more than 80% filled for pure read applications. For read/write applications, no more than 50% of the memory space should be used. On the PCD2, a non-standard file system (SBC FS) is used. This means that the flash cards have to be formatted before being used for the first time. This happens automatically when a new FAT 16 flash card is inserted into the PCD2.R6000. Flash card handling The card is inserted into a so-called push-push socket (push to insert and remove). It can be removed without switching off the PCD2. 3-47 Hardware Manual for the PCD2.M5 Series│Document 26/856; Version EN 1 2│2014-07-24... -
Page 61: User Program Backup To The Flash Card
Remove and re-insert SD card NB: This procedure deletes all stored data. 3.13.6 User program backup to the flash card It is possible to back up the user program (see section 3.12.1) to the flash card in the PCD2.R6000. The memory locations for the user program (to back up and restore) are queried in the following order: 1. M1 Slot 2. M2 Slot 3. I/O Slot 0...3 4. Onboard flash memory (where present) 3-48 Hardware Manual for the PCD2.M5 Series│Document 26/856; Version EN 1 2│2014-07-24... -
Page 62: Order Details
1 = SD blocked/removed 0 = MMC or SD released 3.13.7 Order details Order code Description Weight PCD2.R6000 Base module for SD flash memory cards, for I/O 60 g slot 0…3 (flash card not included) PCD7.R-SD256 SD flash memory card 256 MB PCD7.R-SD512 SD flash memory card 512 MB PCD7.R-SD1024 SD flash memory card 1,024 MB 3-49 Hardware Manual for the PCD2.M5 Series│Document 26/856; Version EN 1 2│2014-07-24... -
Page 63: Hardware Clock (Real Time Clock)
With cycle times over 200 ms, the code sequence must be repeated several times in the user program, to prevent the watchdog dropping out in normal operation. 3-50 Hardware Manual for the PCD2.M5 Series│Document 26/856; Version EN 1 2│2014-07-24... - Page 64 Start Process Bridging switch CPU-Start Switching capacity of the watchdog contact: 1 A, 48 V The status of the watchdog relay can be read via I 8107 “1” = Watchdog relay on. 3-51 Hardware Manual for the PCD2.M5 Series│Document 26/856; Version EN 1 2│2014-07-24...
-
Page 65: Software Watchdog
200 ms, there will be a cold start x = 2 The software watchdog is activated; if the instruction is not repeated within 200 ms, XOB 0 will be called and then there will be a cold start XOB 0 calls are entered in the PCD history as follows: "XOB 0 WDOG START" where XOB 0 has been invoked by the software watchdog "XOB 0 START EXEC" where XOB 0 has been invoked because of a supply fault 3-52 Hardware Manual for the PCD2.M5 Series│Document 26/856; Version EN 1 2│2014-07-24... -
Page 66: User Inputs And Outputs
Outputs Direct output a positive edge query query XOB 20 I 8100 XOB 21 I 8101 XOB 22 I 8102 XOB 23 I 8103 IX4* IX5* out0 O 8104 out1 O 8105 3-53 Hardware Manual for the PCD2.M5 Series│Document 26/856; Version EN 1 2│2014-07-24... -
Page 67: Pcd2.M5_ User Outputs
H = +15...+30 V * Other funktions with later FW-versions L = -30...+ 5 V or disconnected 3.17.3 PCD2.M5_ user outputs Sorry, this sub-chapter is in preparation. Please see german manual 3-54 Hardware Manual for the PCD2.M5 Series│Document 26/856; Version EN 1 2│2014-07-24... -
Page 68: Operating Mode Switch (Run/Halt)
If the controller is switched to halt mode, this will cause a change from run to halt; when it is switched to run, a cold start will be executed. To release the switch, check the options in the PG5 hardware settings (see section 8.1.2). 3-55 Hardware Manual for the PCD2.M5 Series│Document 26/856; Version EN 1 2│2014-07-24... -
Page 69: E-Display With Pcd7.D3100E Nano-Browser
3.19.2 Installing the display The eDisplay is an electronic device, and must be handled according to ESD (electrostatic discharge) guidelines. Remove cover of PCD2.M5_ housing (see section 3.5.2) Remove the transparent protective film from the back of the cover Insert the display into the aperture and push up to the stop. Fix with the screw provided (3 x 6 Torx plus). 3-56 Hardware Manual for the PCD2.M5 Series│Document 26/856; Version EN 1 2│2014-07-24... -
Page 70: Function And Use Of Joystick
Pressing the up, down, left and right keys allows: ● movement and selection of different menu options ● modification of numeric values Pressing on the centre generates an ENTER command Moving between different menu options Example: Pressing twice to the left moves from "PCD sys" to "Config". 3-57 Hardware Manual for the PCD2.M5 Series│Document 26/856; Version EN 1 2│2014-07-24... - Page 71 - Add one character at first position Select the user start html field then pressing enter, the first character is selected. Move the cursor with navigation switch left and select the character that you want to add then press enter. →‘start.html’ becomes ‘astart.html’ - In order to delete a character at „end“ position he can just make a space sign “out” of the character you want to delete. -> ‘start.html’ becomes ‘start.htm ‘ -> ‘start.htm’) 3-58 Hardware Manual for the PCD2.M5 Series│Document 26/856; Version EN 1 2│2014-07-24...
-
Page 72: Structure Of The Setup Menu
The root page is the first page which is displayed after “switch on” the PCD Menu point Description see topic Config go to the configuration pages 4.2 & 4.3 PCD Syst go to the PCD system pages 4.4 .. 4.6 User go to the user program 3-59 Hardware Manual for the PCD2.M5 Series│Document 26/856; Version EN 1 2│2014-07-24... - Page 73 75 and 100) * Setup timeout: This timeout can be increased up to 60 sec (value is 60) and up to “∞ “ ( value is -1 ). Using the intermediate values 0 to 2 is injudicious because we have not enough reaction time to stay in the setup menu. Configuration page 2 3-60 Hardware Manual for the PCD2.M5 Series│Document 26/856; Version EN 1 2│2014-07-24...
- Page 74 Program name: Name of the PG5 Program ( can be cut at end) Read only S-bus Address S-bus address of the PCD2 Read/ write Back Back the PCD system page 1 Next Go the PCD system page 3 3-61 Hardware Manual for the PCD2.M5 Series│Document 26/856; Version EN 1 2│2014-07-24...
-
Page 75: Device Configuration For Edisplay
Read only Back Back the PCD system page 2 To root page Go the root page 3.19.5 PG5 Device configuration for eDisplay With the PG5 SP 2.0.150 you can configure the setup menu of the “eDisplay”. This is available in combination with PCD2.M5xxx firmware version ≥ 1.14.11 In the Device configurator: Select the display module PCD7.D3100E 3-62 Hardware Manual for the PCD2.M5 Series│Document 26/856; Version EN 1 2│2014-07-24... -
Page 76: User Project
Max Container per project Max HTML Tag per project 1000 Max PPO per view Max Container per view Max HTML Tag per view 1000 Max Painter per view See also /Web Editor/ SaiaDefaultSpiderHWProfile.shp 3-63 Hardware Manual for the PCD2.M5 Series│Document 26/856; Version EN 1 2│2014-07-24... - Page 77 PCD2.M5_ Classic CPUs and expansion housings E-display with PCD7.D3100E nano-browser Fonts Don’t use any fonts. Please refer to the topic 5.3. In the project configuration, select Tahoma regular 8,10 or 12 as default font. Set focus macro Cause of the system of navigation (no touch screen) , one but only one “EventP_Set- Focus_onGainFocus” macro is necessary in each teq view. You advice to put this macro under a Jump action to another page. Macro: EventP_SetFocus_onGainFocu 3-64 Hardware Manual for the PCD2.M5 Series│Document 26/856; Version EN 1 2│2014-07-24...
- Page 78 Always, have a look to the Web-editor Build advanced before compiling !! Jump to the setup menu → Access to the setup menu without switch off the PCD. Recommendation: Add a button with an “URL jump” to the “saiaedsetup.html” Known restriction - Edit boxes do not support grey interior color but only black or white 3-65 Hardware Manual for the PCD2.M5 Series│Document 26/856; Version EN 1 2│2014-07-24...
-
Page 79: Web-Editor
These fonts can be used in all cases, for PPOs, Containers, Strings or html tags. Font generator The use of other character sets and font sizes is possible with the font generator, which has been incorporated in this version. The relevant .fnt files are created auto- matically during the Web-Editor’s «build». Project configuration: 3-66 Hardware Manual for the PCD2.M5 Series│Document 26/856; Version EN 1 2│2014-07-24... - Page 80 Project configuration: The Web-Editor project will have to be compiled, remembering to select the options: « Generate Spider Font files » and/or « Convert project’s Gif to Bmp » Creation of .fnt and .bmp files then takes place automatically. 3-67 Hardware Manual for the PCD2.M5 Series│Document 26/856; Version EN 1 2│2014-07-24...
- Page 81 Don’t use it eD_Blinker_5_14_03.esm Ok !! @BLINKO contain- er variable does not blink with 1 sec/1 sec. for the period of 1 sec but with faster frequency. - All this macros are part of the Web Editor package under: HWSpecific/Saia/eDis- play/128_88/MacroLib 3-68 Hardware Manual for the PCD2.M5 Series│Document 26/856; Version EN 1 2│2014-07-24...
-
Page 82: Browse The Edisplay Pages On The Pc
IMasterSaia5_nn_nn.jar to browse the project on the PC. What’s the drill? Copy the IMasterSaia_5_14_27.jar or other into the flash module PCD7.R550xxx. (The IMasterSaia5_x,xx.jar version must always be corresponding to the web-editor version) Use the scalable function of the Web Editor to create scalable html files. We suggest to use the scale x3 or x5 in order to increase the teq pages with the same ration as the the setup menu pages (see chapter 7.1) 3-69 Hardware Manual for the PCD2.M5 Series│Document 26/856; Version EN 1 2│2014-07-24... - Page 83 The editor does not make a byte calculation but there is a limit given in the SpiderH- WProfile.shp Hardware profile. There is no number of macro limitations. Look the SpiderHWProfile.txt under the directory “web editor”.This is automatically generated by the web editor during compiling !!!! 3-70 Hardware Manual for the PCD2.M5 Series│Document 26/856; Version EN 1 2│2014-07-24...
-
Page 84: Rio (Remote Input/Output) Head Stations
RIO (remote input/output) head stations Saia-Burgess Controls AG PCD3.T76x head stations RIO (remote input/output) head stations PCD3.RIOs (remote I/Os) are used to capture decentralized I/O signals. PCD3.RIOs can communicate via Profibus-DP with any master PCD; this may be via the integrated Profi-S I/O on the PCD2.M5xx0. A detailed description can be found in section 4 of the PCD3 Manual 26/789. Hardware Manual for the PCD2.M5 Series│Document 26/856; Version EN 1 2│2014-07-24... -
Page 85: Pcd2.M5Xx0 Communication Interfaces
An open, vendor-neutral fieldbus will be more effective in achieving this end. SBC S-Net, the networking concept from Saia-Burgess Controls AG, is based on the RS-485, Profibus and Ethernet open standards. Ethernet covers layers 1 and 2 of the ISO / O SI layer model. Based on layer 2, a variety of different protocols and applications can be run in parallel on the same network. -
Page 86: Onboard Interfaces
RS 485 5.2 Plug-in communication interfaces Base unit with sockets for Summary of plug-in plug-in communication communication modules modules Serial PCD2.M5_ Port 1 E/A-Slot Port 8 Port 2 PCD2.M5540 Port 8 1) Suitable for modem connection, as 6 control lines provided Hardware Manual for the PCD2.M5 Series│Document 26/856; Version EN 1 2│2014-07-24... -
Page 87: Pgu Connector (Port # 0) (Rs-232) For Connecting Programming Devices
+5 V The PGU protocol is provided for operation with a programming device. The use of the PCD8.P800 service unit is supported from firmware version $301 for all PCD2 controllers. PCD8.K111 connecting cable (P8 and S-Bus protocol, suitable for all PCD2 units) D-SUB 9 pol. D-SUB 9 pol. (female) (male) Hardware Manual for the PCD2.M5 Series│Document 26/856; Version EN 1 2│2014-07-24... -
Page 88: Pgu Connection (Port # 0) (Rs-232) As Communication Interface
When communicating with terminals, check whether some connections are equipped with bridges or need to be set with the "SOCL" command to "1" or "0". It is generally recommended to use a handshake (RTS / C TS). Hardware Manual for the PCD2.M5 Series│Document 26/856; Version EN 1 2│2014-07-24... -
Page 89: Pgu Connection (Port # 0) (Rs-485) As Communication Interface
330 Ohm /RX - /TX Termination Bus RS 485 Resistor 150 Ohm RX - TX Pull down 330 Ohm Segment length max. 1200 m max. 32 stations At the first and last stations, switch S1 must be set to "C" (closed). At all other stations, switch S1 must be left in position set to "O" (factory setting). Hardware Manual for the PCD2.M5 Series│Document 26/856; Version EN 1 2│2014-07-24... -
Page 90: Usb Port As Pgu Interface
To establish a connection with a PCD via USB, the following settings must be entered in the online settings for the PG5 project: Activating the PGU option ensures that the PCD connected directly to the PC can be reached, regardless of the S-Bus address that has been configured. Hardware Manual for the PCD2.M5 Series│Document 26/856; Version EN 1 2│2014-07-24... -
Page 91: D-Sub X1 S-Net/Mpi
Port 10: Pins 3, 4, 5, 6 and 8 are insulated from the system. Pin 2 serves as a backlink for Pin 7. For details of the configuration and programming of Profi S-Net functions, please consult the specialised manuals. Hardware Manual for the PCD2.M5 Series│Document 26/856; Version EN 1 2│2014-07-24... -
Page 92: Plug-In Interface Modules - Slots A1 And A2
/RX - /TX Termination Bus RS 485 Resistor 150 Ohm RX - TX Pull down 330 Ohm Segment length max. 1200 m max. 32 stations Not all manufacturers use the same connection configuration, so the data lines may need to be crossed Hardware Manual for the PCD2.M5 Series│Document 26/856; Version EN 1 2│2014-07-24... - Page 93 14 (4) PGND 15 (5) SGND 16 (6) /RTS 17 (7) /RTS 18 (8) OPEN CLOSED /CTS 19 (9) /CTS For RS-422, each pair of receive lines is terminated with a 150 Ω line termination resistor. Jumper J1 must be left in the “OPEN” position (factory setting). The jumper is on the connection side of the module. Hardware Manual for the PCD2.M5 Series│Document 26/856; Version EN 1 2│2014-07-24...
-
Page 94: With Pcd7.F121, Port #1 & Port#2
(e.g. PC) (e.g. PC) PGND PGND 10 (0) PCD7.F121 11 (1) 12 (2) 13 (3) 14 (4) PGND 15 (5) SGND 16 (6) 17 (7) Reserve18 (8) 19 (9) 5-10 Hardware Manual for the PCD2.M5 Series│Document 26/856; Version EN 1 2│2014-07-24... -
Page 95: Current Loop With Pcd7.F130, Port#1 & Port#2
TA 13 (3) RA 14 (4) TC 16 (6) RC 17 (7) TG 18 (8) RG 19 (9) PCD active PCD7.F130 Peripherie Cable (active) (passive) Pin-Nr. Receiver Transmitter Receiver Transmitter 5-11 Hardware Manual for the PCD2.M5 Series│Document 26/856; Version EN 1 2│2014-07-24... - Page 96 Serial interfaces - Slots A1 and A2 PCD passive PCD7.F130 Peripherie Cable (passive) (active) Pin-Nr. Receiver Transmitter Receiver Transmitter PCD and peripheral transmitters active PCD7.F130 Peripherie Cable (active) (active) Pin-Nr. Receiver Transmitter Receiver Transmitter 5-12 Hardware Manual for the PCD2.M5 Series│Document 26/856; Version EN 1 2│2014-07-24...
-
Page 97: With Pcd7.F150, Port #1 & Port#2
50 VDC Block diagram: OPTO-0601 +5VE Transmit 75176 330 Ohm RS 485 Receive Driver 150 Ohm 330 Ohm SGND +5VE SGND PGND SGND 5-13 Hardware Manual for the PCD2.M5 Series│Document 26/856; Version EN 1 2│2014-07-24... - Page 98 Saia-Burgess Controls AG Communication interfaces Serial interfaces - Slots A1 and A2 Not all manufacturers use the same connection configuration, so the data lines may need to be crossed The potential difference between PGND and the data lines Rx-Tx, /Rx-/Tx (and SGND) is limited to 50 V by a suppressor capacitor. For installation details, see manual 26/740 “Installation components for RS-485 networks” 5-14 Hardware Manual for the PCD2.M5 Series│Document 26/856; Version EN 1 2│2014-07-24...
-
Page 99: Mp-Bus With Pcd7.F180, Port#1 & Port#2
There are the following parameterization devices of BELIMO ® Manual Control Unit MFT-H With its own power supply/batteries PC-Tool MFT-P With the adapter ZIP-RS-232 Supply option Common supply for control and drive PCD2 24 VDC Controller ±20% – 5-15 Hardware Manual for the PCD2.M5 Series│Document 26/856; Version EN 1 2│2014-07-24... -
Page 100: Serial Interfaces On I/O Module Slots 0 - 3
The crucial factor is that the peripheral devices connected can be run with the selected configuration and communication capacity. 5.5.2 Communication ports on the PCD2.M5_ The PCD2.F2xxx modules are designed for insertion into slots 0...3 on a PCD2.M5_. As shown in the figure below, the slots are designated as follows: Slot 0: Port 100 for the x.0 port on the PCD2.F2xxx module Port 101 for the x.1 port on the PCD2.F2xxx module Slot 1: Port 110 for the x.0 port on the PCD2.F2xxx module Port 111 for the x.1 port on the PCD2.F2xxx module Slot 2: Port 120 for the x.0 port on the PCD2.F2xxx module Port 121 for the x.1 port on the PCD2.F2xxx module Slot 3: Port 130 for the x.0 port on the PCD2.F2xxx module Port 131 for the x.1 port on the PCD2.F2xxx module 5-16 Hardware Manual for the PCD2.M5 Series│Document 26/856; Version EN 1 2│2014-07-24... -
Page 101: Module Overview
Port x.1: Slot for PCD7.F1xx module Usable PCD7.F1xx modules (for connection to port x.1 on the PCD2.Fxxxx) PCD7.F110 Serial interface module RS-422 / RS-485 PCD7.F121 Serial interface module RS-232, for modem connection PCD7.F130 Serial interface module, current loop 20 mA PCD7.F150 Serial interface module, RS-485, electrically isolated PCD7.F180 Serial interface module for Belimo MP bus, for max. 8 actuators and sensors 5-17 Hardware Manual for the PCD2.M5 Series│Document 26/856; Version EN 1 2│2014-07-24... - Page 102 ‘green’ means that the port is working properly ● Both LEDs permanently red: F2xxx not running ● Both LEDs green 25% / red 75%: F2xxx start-up procedure ● Both LEDs green 50% / red 50%: F2xxx running, but no communication with PCD2.M5_ ● Status LED green 75% / red 25%: F2xxx running, Interface still not assigned by the program ● Status LED green 100%: F2xxx running, Interface assigned 5-18 Hardware Manual for the PCD2.M5 Series│Document 26/856; Version EN 1 2│2014-07-24...
- Page 103 Other key factors are: ● Communication on the PCD2.M5_, such as Profi-S-Net, Ether-S-Net, USB ● Use of the web server ● Data transfer from CPU to memory ● User program in the PCD2.M5_ The exact system limits have still to be confirmed. 5-19 Hardware Manual for the PCD2.M5 Series│Document 26/856; Version EN 1 2│2014-07-24...
- Page 104 RS232 or I/O Port RS422/485 equipped Microcontroller ARM7 UART 1 SPI (Slave) Port x.1 serial line Interface interface Interrupt Interrupt Slot for one module Input Output UART 2 PCD7.F1xx 5-20 Hardware Manual for the PCD2.M5 Series│Document 26/856; Version EN 1 2│2014-07-24...
-
Page 105: Port X.0: Rs-422 / Rs-485 On The Modul Pcd2.F2100
10-pole spring terminal block Connection: +5 V +5 V Pull up 330 Ohm /RX-/TX Termination Resistor RX-TX 150 Ohm Pull down 330 Ohm Segment lenght max. 1200 m max. 32 stations 5-21 Hardware Manual for the PCD2.M5 Series│Document 26/856; Version EN 1 2│2014-07-24... -
Page 106: Port X.0: Rs-232 On The Modul Pcd2.F2210 (For Modem)
RS-232 connection to DCE: Modem cable (ETCD) DCE 0 PGND PGND 1 TXD 2 RXD 3 RTS 4 CTS 5 PGND SGND 6 DTR 7 DSR 8 Reserve 9 DCD 5-22 Hardware Manual for the PCD2.M5 Series│Document 26/856; Version EN 1 2│2014-07-24... -
Page 107: Port X.0: Belimo Mp-Bus On Module Pcd2.F2810
MP-Bus with up to 8 drives and sensors can then be connected to Port x.0. Belimo connection Belimo MP bus PGND ‚MFT‛ ‚IN‛ PGND 10-pole spring terminal block 5-23 Hardware Manual for the PCD2.M5 Series│Document 26/856; Version EN 1 2│2014-07-24... -
Page 108: Modem Module For I/O Module Socket
If a different socket is chosen for the internal modem, it can no longer be connected via the ribbon cable. The modem is then connected to the PCD7.F121 interface module by spring terminals. anual 26/771 “PCD2.T8xx modem modules“ An external modem can also be connected to the PCD7.F121 module. For physical reasons, PCD2.T8xx modems cannot be connected to the slots highlighted in colour: PCD2.Mxxxx Not allowed Slot Two modem modules cannot be mounted side-by-side. For installtion details, see manual 26/771 “PCD2.T8xx modem modules“ Do not use the modem modules on PCD2.C2000/C1000. 5-24 Hardware Manual for the PCD2.M5 Series│Document 26/856; Version EN 1 2│2014-07-24... -
Page 109: Communication On Slot C
The rounded ends of the spacers must be inserted into the round holes in the PCD board ● Turn the circuit board and insert into the holes provided in the CPU board Ensure that the plug is correctly positioned in Slot C (Fig. 3) Fig. 1 Fig. 2 Fig. 3 5-25 Hardware Manual for the PCD2.M5 Series│Document 26/856; Version EN 1 2│2014-07-24... -
Page 110: Can Bus, Module Pcd7.F7400
5.7.1 CAN bus, module PCD7.F7400 The CAN bus should be connected directly to the PCD7.F7400 module. PCD7.F7400 PCD7.F7400 to connect the CAN bus, 1 MBit/s Pin layout, D-Sub 9 pole, CAN Port 10 Socket Connection type D-Sub 9-pole (male) signal Pin no CAN_Low CAN_High 5-26 Hardware Manual for the PCD2.M5 Series│Document 26/856; Version EN 1 2│2014-07-24... -
Page 111: Profibus Dp Master, Module Pcd7.F7500
Threaded bolts RxD / T xD-N 8 A (green) RxD / T xD-P 3 B (red) DP GND DP +5 V Details can be found in manual 26 / 7 65 "Profibus DP". To avoid reflections, each segment must be terminated at the line ends. According to the Profibus standard, this cannot be done on the device. The PCD7.T160 termination boxes or standard 9-pole Profibus DP D-Sub connectors are suitable for this. 5-27 Hardware Manual for the PCD2.M5 Series│Document 26/856; Version EN 1 2│2014-07-24... -
Page 112: Input/Output (I/O) Modules
6-34 50 V PCD2.A250 8 make contacts 2 A 48 V 6-36 505-8 V PCD2.A410 8 outputs 0.5 A, electrically isolated 5 … 3 2 V 6-38 1) galvanic separation of outputs to PCD, channels themselves not separated Hardware Manual for the PCD2.M5 Series│Document 26/856; Version EN 1 2│2014-07-24... - Page 113 0 … 1 0 V 6-61 PCD2.W315 7 analogue inputs 12 bit 0 … 2 0 mA 6-61 PCD2.W325 7 analogue inputs 12 bit -10 … + 10 V 6-61 1) galvanic separation of outputs to PCD, channels themselves not separated Hardware Manual for the PCD2.M5 Series│Document 26/856; Version EN 1 2│2014-07-24...
- Page 114 0 … 1 0 V, 0(4) … 2 0 mA Weighing modules PCD2.W720 2-channel weighing module for 4/6-wire weighing cells 6-85 General-purpose temperature modules PCD2.W745 Thermocouple module for J, K … thermocouples 6-86 1) Galvanic separation of outputs to PCD, channels themselves not separated 2) Non-pluggable cage clamp terminals Hardware Manual for the PCD2.M5 Series│Document 26/856; Version EN 1 2│2014-07-24...
- Page 115 Motion control module for servo-motors 2-axis encoder 6-108 24 VDC PCD2.H322 Same as H320, but 1-axis (slave operation) 6-108 PCD2.H325 Motion control module for servo-drives, 2-axis with 5 V 6-108 encoder and SSI absolute value encoder PCD2.H327 Same as H325, but 1-axis (slave operation) 6-108 Hardware Manual for the PCD2.M5 Series│Document 26/856; Version EN 1 2│2014-07-24...
-
Page 116: Power Consumption Of Pcd2 Input/Output Modules
Load current H310/H311 max. 15 mA H320/H322 Load current H325/H327 Load current 1) Coil resistance of the relay 3 kOhm 2) Basic consumption 20 mA, plus 0...20 mA per output 6.1.2 Capacity of basic units Unit internal 5 V-Bus internal +V-Bus PCD2.M5xx0 1,400 mA 200 mA Hardware Manual for the PCD2.M5 Series│Document 26/856; Version EN 1 2│2014-07-24... -
Page 117: Digital Input Modules
-7 V I/O modules and I/O terminal blocks may only be plugged in and removed when the PCD and the external +24 V are disconnected from the power supply. Hardware Manual for the PCD2.M5 Series│Document 26/856; Version EN 1 2│2014-07-24... -
Page 118: Pcd2.E11X, 8 Digital Inputs
1.5 mm² LEDs and connection terminals Bus connector Bus interface and Threshold switches Input circuits LEDs Screw terminals Inputs E0 to E7 Input load resistors User ground - Hardware Manual for the PCD2.M5 Series│Document 26/856; Version EN 1 2│2014-07-24... - Page 119 Ue : 24 V Switch open : Input state "H" = LED on 12 V Watchdog: This module can be used on all base addresses; there is no interaction with the watchdog on the CPUs. For details, please refer to the "Watchdog" section, which describes the correct use of the watchdog in conjunction with PCD2 components. Hardware Manual for the PCD2.M5 Series│Document 26/856; Version EN 1 2│2014-07-24...
-
Page 120: Pcd2.E160/161, 16 Digital Inputs, Ribbon Cable Connector
External current consumption max. 64 mA (all inputs=1) at 24 V Terminals: 34-pole ribbon cable connector LEDs and connection terminals Bus connector Bus interface and Threshold switch Input circuits LEDs (3 colour) Ribbon cable connector E8 E7 Hardware Manual for the PCD2.M5 Series│Document 26/856; Version EN 1 2│2014-07-24... - Page 121 ● (Metal strain relief) *) Type 3448-2034 ● (Handle for socket connector 34-pole) *) Type 3490-3 Matching cables can be ordered in reels from '3M': ● Ribbon cable 34-pole, grey with pin 1 identification Type 3770/34 or 3801/34 ● Round cable 34-pole, grey with pin 1 identification Type 3759/34 *) optional 6-10 Hardware Manual for the PCD2.M5 Series│Document 26/856; Version EN 1 2│2014-07-24...
- Page 122 240. In this case, the last input with address 255 cannot be used. For details, please refer to the "Watchdog" section, which describes the correct use of the watchdog in conjunction with PCD2 components. 6-11 Hardware Manual for the PCD2.M5 Series│Document 26/856; Version EN 1 2│2014-07-24...
-
Page 123: Pcd3.E165/166, 16 Digital Inputs, Cage Clamp Terminal Connectors
Function E15 E14 E13 E12 E11 E10 E9 E8 E7 E6 E5 E4 E3 E2 E1 E0 Terminal 19 18 17 16 15 14 13 12 11 10 6-12 Hardware Manual for the PCD2.M5 Series│Document 26/856; Version EN 1 2│2014-07-24... - Page 124 240. In this case, the last input with address 255 cannot be used. For details, please refer to the "Watchdog" section, which describes the correct use of the watchdog in conjunction with PCD2 components. 6-13 Hardware Manual for the PCD2.M5 Series│Document 26/856; Version EN 1 2│2014-07-24...
-
Page 125: Digital Input Modules, Electrically Isolated
I/O modules and I/O terminal blocks may only be plugged in and removed when the PCD and the external +24 V are disconnected from the power supply. 6-14 Hardware Manual for the PCD2.M5 Series│Document 26/856; Version EN 1 2│2014-07-24... -
Page 126: Pcd2.E500, 6 Digital Inputs For 115 - 230 Vac
< 1 mA (from +5 V bus) Internal current consumption: 0 mA (from V+ bus) External current consumption: Terminals: Pluggable 10-pole screw terminal block (4 405 4847 0), for wires up to 1.5 mm² Switch on/off level: 250 V 80 V 40 V 6-15 Hardware Manual for the PCD2.M5 Series│Document 26/856; Version EN 1 2│2014-07-24... - Page 127 Phase 115 - 230V 50/60 Hz *) Zero conductor *) *) or interchangeable, if the rules permit this Watchdog: This module can be used on all base addresses; there is no interaction with the watchdog on the CPUs. For details, please refer to the "Watchdog" section, which describes the correct use of the watchdog in conjunction with PCD2 components. 6-16 Hardware Manual for the PCD2.M5 Series│Document 26/856; Version EN 1 2│2014-07-24...
-
Page 128: Pcd3.E61X, 8 Digital Inputs, Electrically Isolated
1 … 2 4 mA (from +5 V bus) typ. 12 mA Internal current consumption: 0 mA (from V+ bus) External current consumption: max. 40 mA (all inputs=1) at 24 V , (source operation), max. 18 mA (sink operation) Terminals: Pluggable 10-pole spring terminal block (4 405 4847 0), for wires up to 1.5 mm² 6-17 Hardware Manual for the PCD2.M5 Series│Document 26/856; Version EN 1 2│2014-07-24... - Page 129 Switch open : Input state "L" = LED on Ue : 48 V 24 V Watchdog: This module can be used on all base addresses; there is no interaction with the watchdog on the CPUs. For details, please refer to the "Watchdog" section, which describes the correct use of the watchdog in conjunction with PCD2 components. 6-18 Hardware Manual for the PCD2.M5 Series│Document 26/856; Version EN 1 2│2014-07-24...
-
Page 130: Digital Output Modules
16 outputs 0.5 A, 10…32 V I/O modules and I/O terminal blocks may only be plugged in and removed when the PCD and the external +24 V are disconnected from the power supply. 6-19 Hardware Manual for the PCD2.M5 Series│Document 26/856; Version EN 1 2│2014-07-24... -
Page 131: Pcd2.A300, 6 Digital Outputs For 2 A Each
External current consumption: Load current Terminals: Pluggable 10-pole screw terminal block (4 405 4847 0), for wires up to 1.5 mm² LEDs and connection terminals Bus connector Bus interface Output transistors (MOSFET) Protective diodes LEDs Screw terminals Outputs Load supply 6-20 Hardware Manual for the PCD2.M5 Series│Document 26/856; Version EN 1 2│2014-07-24... - Page 132 Fuse: It is recommended that each module should be separately protected with a fast-blow (S) fuse of max. 12.5 A. Watchdog: This module can be used on all base addresses; there is no interaction with the watchdog on the CPUs. For details, please refer to the "Watchdog" section, which describes the correct use of the watchdog in conjunction with PCD2 components. 6-21 Hardware Manual for the PCD2.M5 Series│Document 26/856; Version EN 1 2│2014-07-24...
-
Page 133: Pcd2.A400, 8 Digital Outputs For 0.5 A Each
External current consumption: Load current Terminals: Pluggable 10-pole screw terminal block (4 405 4847 0), for wires up to 1.5 mm² Version “B” since February 1995 (Version “A” was fitted with bipolar transistors. These had a shorter recovery time, but also a higher residual voltage, resulting in a restriction on 100% loading) 6-22 Hardware Manual for the PCD2.M5 Series│Document 26/856; Version EN 1 2│2014-07-24... - Page 134 Fuse: It is recommended that each module should be separately protected with a fast-blow (S) 4 A fuse Watchdog: This module can be used on all base addresses; there is no interaction with the watchdog on the CPUs. For details, please refer to the "Watchdog" section, which describes the correct use of the watchdog in conjunction with PCD2 components. 6-23 Hardware Manual for the PCD2.M5 Series│Document 26/856; Version EN 1 2│2014-07-24...
-
Page 135: Pcd2.A460, 16 Digital Outputs For 0.5 A Each, With Ribbon Connector
External current consumption: Load current Terminals: 34-pole ribbon cable connector LEDs and connection terminals Bus connector Bus interface Quad output driver Protective diodes LEDs (3-colour) Spring termianls A8 A7 6-24 Hardware Manual for the PCD2.M5 Series│Document 26/856; Version EN 1 2│2014-07-24... - Page 136 ● Socket connector 34-pole Type 3414-6600 ● (Metal strain relief) *) Type 3448-2034 ● (Handle for socket connector 34-pole) *) Type 3490-3 Matching cables can be ordered in reels from '3M': ● Ribbon cable 34-pole, grey with pin 1 identification Type 3770/34 or 3801/34 ● Round cable 34-pole, grey with pin 1 identification Type 3759/34 *) optional 6-25 Hardware Manual for the PCD2.M5 Series│Document 26/856; Version EN 1 2│2014-07-24...
- Page 137 Watchdog: This module can interact with the watchdog, if it is used on base address 240. In this case, the last input with address 255 cannot be used. For details, please refer to the "Watchdog" section, which describes the correct use of the watchdog in conjunction with PCD2 components. 6-26 Hardware Manual for the PCD2.M5 Series│Document 26/856; Version EN 1 2│2014-07-24...
-
Page 138: Pcd2.A465, 16 Digital Outputs For 0.5 A Each
Screwless terminals A15 A14 A13 A12 A11 A10 A9 A8 A7 A6 A5 A4 A3 A2 A1 A0 19 18 17 16 15 14 13 12 11 10 6-27 Hardware Manual for the PCD2.M5 Series│Document 26/856; Version EN 1 2│2014-07-24... - Page 139 Watchdog: This module can interact with the watchdog, if it is used on base address 240. In this case, the last input with address 255 cannot be used. For details, please refer to the "Watchdog" section, which describes the correct use of the watchdog in conjunction with PCD2 components. 6-28 Hardware Manual for the PCD2.M5 Series│Document 26/856; Version EN 1 2│2014-07-24...
-
Page 140: Digital Output Modules, Electrically Isolated
I/O modules and I/O terminal blocks may only be plugged in and removed when the PCD and the external +24 V are disconnected from the power supply. The Annex, Section A.4 "Relay contacts" contains measurement details and suggested wiring for the relay contacts. For safe switching and a long service life, these figures must be observed. 6-29 Hardware Manual for the PCD2.M5 Series│Document 26/856; Version EN 1 2│2014-07-24... -
Page 141: Pcd2.A200, 4 Relays With Make Contacts, With Contact Protection
1.5 mm² With external protective diode With reverse voltage protection These ratings are not UL-listed The Annex, Section A.4 "Relay contacts" contains measurement details and sug- gested wiring for the relay contacts. For safe switching and a long service life, these figures must be observed. 6-30 Hardware Manual for the PCD2.M5 Series│Document 26/856; Version EN 1 2│2014-07-24... - Page 142 With an open relay contact, the current leakage through the contact protection is 0.7 mA (at 230 V / 50 Hz). This should be taken into account for smaller AC loads. If this is too high, it is recommended to use a PCD2.A220 module (without contact protection). Watchdog: This module can be used on all base addresses; there is no interaction with the watchdog on the CPUs. For details, please refer to the "Watchdog" section, which describes the correct use of the watchdog in conjunction with PCD2 components. 6-31 Hardware Manual for the PCD2.M5 Series│Document 26/856; Version EN 1 2│2014-07-24...
-
Page 143: Pcd2.A210, 4 Relays With Break Contacts, With Contact Protection
1.5 mm² With external protective diode With reverse voltage protection These ratings are not UL-listed The Annex, Section A.4 "Relay contacts" contains measurement details and suggested wiring for the relay contacts. For safe switching and a long service life, these figures must be observed. 6-32 Hardware Manual for the PCD2.M5 Series│Document 26/856; Version EN 1 2│2014-07-24... - Page 144 LED on Relay reset (contact closed): LED off 24 V must be connected to the +/- terminals. Watchdog: This module can be used on all base addresses; there is no interaction with the watchdog on the CPUs. For details, please refer to the "Watchdog" section, which describes the correct use of the watchdog in conjunction with PCD2 components. 6-33 Hardware Manual for the PCD2.M5 Series│Document 26/856; Version EN 1 2│2014-07-24...
-
Page 145: Pcd2.A220, 6 Relays With Make Contacts, Without Contact Protection
1.5 mm² With external protective diode With reverse voltage protection These ratings are not UL-listed The Annex, Section A.4 "Relay contacts" contains measurement details and suggested wiring for the relay contacts. For safe switching and a long service life, these figures must be observed. 6-34 Hardware Manual for the PCD2.M5 Series│Document 26/856; Version EN 1 2│2014-07-24... - Page 146 Relay energized (contact closed): LED on Relay reset (contact open): LED off 24 V must be connected to the +/- terminals. Watchdog: This module can be used on all base addresses; there is no interaction with the watchdog on the CPUs. For details, please refer to the "Watchdog" section, which describes the correct use of the watchdog in conjunction with PCD2 components. 6-35 Hardware Manual for the PCD2.M5 Series│Document 26/856; Version EN 1 2│2014-07-24...
-
Page 147: Pcd2.A250, 8 Relays With Make Contacts, Without Contact Protection
*) Higher voltages are not allowed for this module because clearances between circuit paths too small. The Annex, Section A.4 "Relay contacts" contains measurement details and suggested wiring for the relay contacts. For safe switching and a long service life, these figures must be observed. 6-36 Hardware Manual for the PCD2.M5 Series│Document 26/856; Version EN 1 2│2014-07-24... - Page 148 LED on Relay reset (contact open): LED off 24 V must be connected to the +/- terminals. Watchdog: This module can be used on all base addresses; there is no interaction with the watchdog on the CPUs. For details, please refer to the "Watchdog" section, which describes the correct use of the watchdog in conjunction with PCD2 components. 6-37 Hardware Manual for the PCD2.M5 Series│Document 26/856; Version EN 1 2│2014-07-24...
-
Page 149: Pcd2.A410, 8 Digital Outputs For 0.5 A Each, Electrically Isolated
1 … 2 4 mA (from +5 V bus) typ. 15 mA Internal current consumption: 0 mA (from V+ bus) External current consumption: Load current Terminals: Pluggable 10-pole screw terminal block (4 405 4847 0), for wires up to 1.5 mm² 6-38 Hardware Manual for the PCD2.M5 Series│Document 26/856; Version EN 1 2│2014-07-24... - Page 150 Fuse: It is recommended that each module should be separately protected with a fast-blow (S) 4 A fuse Watchdog: This module can be used on all base addresses; there is no interaction with the watchdog on the CPUs. For details, please refer to the "Watchdog" section, which describes the correct use of the watchdog in conjunction with PCD2 components. 6-39 Hardware Manual for the PCD2.M5 Series│Document 26/856; Version EN 1 2│2014-07-24...
-
Page 151: Digital Combined Input/Output Modules
-30 V I/O modules and I/O terminal blocks may only be plugged in and removed when the PCD and the external +24 V are disconnected from the power supply. 6-40 Hardware Manual for the PCD2.M5 Series│Document 26/856; Version EN 1 2│2014-07-24... -
Page 152: Pcd2.B100, 2 Inputs + 2 Outputs + 4 Digital Inputs/Outputs (Selectable)
If the state of a combined output is to be read off, voltage U must be at least 17 V , as the state and the LED are displayed via the input. 6-41 Hardware Manual for the PCD2.M5 Series│Document 26/856; Version EN 1 2│2014-07-24... - Page 153 However, if the input is shifted to 0 V with a changeover contact and the corresponding output is set in error, the MOS-FET can be destroyed, as it is not short circuit protected. For this reason, only positive-switching contacts should be used. 6-42 Hardware Manual for the PCD2.M5 Series│Document 26/856; Version EN 1 2│2014-07-24...
- Page 154 Fuse: It is recommended that each module should be separately protected with a fast-blow 3.15 A fuse. Watchdog: This module can be used on all base addresses; there is no interaction with the watchdog on the CPUs. For details, please refer to the "Watchdog" section, which describes the correct use of the watchdog in conjunction with PCD2 components. 6-43 Hardware Manual for the PCD2.M5 Series│Document 26/856; Version EN 1 2│2014-07-24...
-
Page 155: Multi-Functional Input/Output Modules
I/O modules and I/O terminal blocks may only be plugged in and removed when the PCD and the external +24 V are disconnected from the power supply. 6-44 Hardware Manual for the PCD2.M5 Series│Document 26/856; Version EN 1 2│2014-07-24... -
Page 156: Pcd2.G400, Multi-Functional Input/Output Module
A17 A18 A19 A20 A21 ---- A32 A33 A34 A35 A36 A37 A38 ---- E48 E49 E50 E51 E52 E53 E54 E55 ---- ---- E110 A400 W200 / W220 W400 The module can be installed on sockets 1…4 (top) on the PCD2. 6-45 Hardware Manual for the PCD2.M5 Series│Document 26/856; Version EN 1 2│2014-07-24... -
Page 157: Pcd2.G410, Multi-Functional I/O Module With Elect. Isolated Digital I/O
The 24 V supply is common to the relay coils and the external supply to the analogue outputs. Current consumption: 9 mA per relay 20 mA per analogue output * (when the module is installed on sockets 1…4 on the PCD2). 6-46 Hardware Manual for the PCD2.M5 Series│Document 26/856; Version EN 1 2│2014-07-24... - Page 158 Jumper Config. Factory settings: I0 … I 15 Source operation: O32…O35 Voltage: 0 … 1 0 V “U” I48 … I 51 Voltage: 0 … 1 0 V “U” 6-47 Hardware Manual for the PCD2.M5 Series│Document 26/856; Version EN 1 2│2014-07-24...
-
Page 159: Analogue Input Modules
*) jumper selectable I/O modules and I/O terminal blocks may only be plugged in and removed when the PCD and the external +24 V are disconnected from the power supply. 6-48 Hardware Manual for the PCD2.M5 Series│Document 26/856; Version EN 1 2│2014-07-24... -
Page 160: Pcd2.W2X0, Analogue Inputs, 8 Channels, 10 Bit Resolution
W220 : typically 10 ms Internal current consumption: 8 mA (W200/210/220) (from +5 V bus) Internal current consumption: 5 mA (W200/210) (from V+ bus) 16 mA (W220) External current consumption: 0 mA Terminals: Pluggable 10-pole screw terminal block (4 405 4847 0), for wires up to 1.5 mm² 6-49 Hardware Manual for the PCD2.M5 Series│Document 26/856; Version EN 1 2│2014-07-24... - Page 161 0 mA the end of this section – 10.0 V – 20 mA Connection diagram for PCD2.W200 PCD2/3.W200 Power PCD PGND Earthing bar Shield Shield Shield Shield 6-50 Hardware Manual for the PCD2.M5 Series│Document 26/856; Version EN 1 2│2014-07-24...
- Page 162 Two-wire transducers (0..20 mA and 4...20 mA transmitters) need a 24 V supply in the measuring trunk. Connection concept PCD3.W220 Pt1000 / Ni1000 Connection concept PCD3.W220Z02 NTC10 PCD2/3.W220 Power PCD Pt/Ni 1000 PGND Earthing bar Shield Shield Shield Shield 6-51 Hardware Manual for the PCD2.M5 Series│Document 26/856; Version EN 1 2│2014-07-24...
- Page 163 Analogue input modules Connection concept PCD3.W220Z12 4 × 0…10 V and 4 × Pt1000 / Ni1000 PCD2/3.W220Z12 Power PCD PGND Earthing bar Shield Shield Shield Shield Shield Shield Shield Shield 6-52 Hardware Manual for the PCD2.M5 Series│Document 26/856; Version EN 1 2│2014-07-24...
- Page 164 Watchdog: This module can interact with the watchdog, if it is used on base address 240. In this case, the last input with address 255 cannot be used. For details, please refer to the "Watchdog" section, which describes the correct use of the watchdog in conjunction with PCD3 components. 6-53 Hardware Manual for the PCD2.M5 Series│Document 26/856; Version EN 1 2│2014-07-24...
- Page 165 1 + (0.509 • 10 - ³ • (261.8 - 10)) Resistance measurement up to 2.5 kΩ Special temperature sensors or any other resistances up to 2.5 kΩ can be connected to the PCD2.W220. The digital value can be calculated as follows: 4092 • R DV = (7500 + R) where 0 ≤ DV ≤ 1023 and R = the resistance to be measured in Ω. 6-54 Hardware Manual for the PCD2.M5 Series│Document 26/856; Version EN 1 2│2014-07-24...
-
Page 166: Pcd2.W3X0, Analogue Inputs, 8 Channels, 12 Bit Resolution
± 0.2 % Conversion time A/D: < 10 µs Overvoltage protection: W340: ± 50 V (permanent) W300 *): + 50 V (permanent) Overcurrent protection: W340: ± 40 mA (permanent) W310 *): + 40 mA (permanent) EMC protection: 6-55 Hardware Manual for the PCD2.M5 Series│Document 26/856; Version EN 1 2│2014-07-24... - Page 167 Screw terminals Jumper positions for selecting working mode PCD2.W340 only; on the other module types the working modes are fixed All inputs set to "temperature" (position T) must be connected. Unused inputs (on the W340) should be set to current ‘C’ or voltage ‘V’. Moving the jumpers On this circuit board there are components that are sensitive to electrostatic discharges. For further information, refer to Appendix B, "Icons" 6-56 Hardware Manual for the PCD2.M5 Series│Document 26/856; Version EN 1 2│2014-07-24...
- Page 168 ● The reference potentials of signal sources should be wired to a common GND connection (“–” and “COM” terminals). To obtain optimum measurement results, any connection to an earthing bar should be avoided. ● If shielded cables are used, the shield should be continued to an external earth- ing bar. 6-57 Hardware Manual for the PCD2.M5 Series│Document 26/856; Version EN 1 2│2014-07-24...
- Page 169 ● If screened cables are used, screening should be continued to an external earth- ing bar. ● Unused temperature inputs are to be connected to the logical ground. Mixed operation E3 E2 Distributor Distributor ‘V’ and ‘C’ Temp. 6-58 Hardware Manual for the PCD2.M5 Series│Document 26/856; Version EN 1 2│2014-07-24...
- Page 170 ● Watchdog: This module cannot be used on the base address 240, because it would interact with the watchdog, and would cause a malfunction. ● For details, please refer to the "Watchdog" section, which describes the correct use of the watchdog in conjunction with PCD2 components. 6-59 Hardware Manual for the PCD2.M5 Series│Document 26/856; Version EN 1 2│2014-07-24...
- Page 171 Temperature range - 50 … + 150 °C Computational error: ± 0.25 °C 200 • DV T= - 178.1 + + 3.873 • 10 • (DV -2786) 2509 = temperature DV = digital value 6-60 Hardware Manual for the PCD2.M5 Series│Document 26/856; Version EN 1 2│2014-07-24...
-
Page 172: Analogue Input Modules, Electrically Isolated
Galvanic separation of outputs to PCD, channels themselves are not separated I/O modules and I/O terminal blocks may only be plugged in and removed when the PCD and the external +24 V are disconnected from the power supply. 6-60 Hardware Manual for the PCD2.M5 Series│Document 26/856; Version EN 1 2│2014-07-24... -
Page 173: Pcd2.W3X5, Analogue Inputs, Electrically Isolated, 7 Channels
2.4 ms Internal current consumption: < 60 mA (from +5 V bus) Internal current consumption: 0 mA (from V+ bus) External current consumption: 0 mA Terminals: Pluggable 14-pole spring terminal block (4 405 5002 0), for Ø up to 1.5 mm², 6-61 Hardware Manual for the PCD2.M5 Series│Document 26/856; Version EN 1 2│2014-07-24... - Page 174 The voltage and current input signals are connected directly to the 14-pole terminal block (I0…I6 and COM). To minimize the amount of interference coupled into the module via the transmission lines, connection should be made according to the principle explained below. 6-62 Hardware Manual for the PCD2.M5 Series│Document 26/856; Version EN 1 2│2014-07-24...
- Page 175 ● If shielded cables are used, the shield should be continued to an external earthing bar. Earthing bar Block diagram Galvanically μController separate interface DC / DC Converter I/O Bus Reference +5 V GND Voltage 2.5V PCD Bus 6-63 Hardware Manual for the PCD2.M5 Series│Document 26/856; Version EN 1 2│2014-07-24...
- Page 176 Programming Classic: There is an FBox for programming the modules. xx7 and RIOs: The firmware reads in the values according to the configuration (I/O Builder or network configurator) Watchdog: This module can be used on all base addresses; there is no interaction with the watchdog on the CPUs. For details, please refer to the "Watchdog" section, which describes the correct use of the watchdog in conjunction with PCD2 components. 6-64 Hardware Manual for the PCD2.M5 Series│Document 26/856; Version EN 1 2│2014-07-24...
-
Page 177: Analogue Output Modules
4 … 2 0 mA: < 50 µApp Temperature error: typically 0.2 %, (over temperature range 0 … + 55 °C) Burst protection: ± 1 kV, with unshielded cables (IEC 801-4) ± 2 kV, with shielded cables 6-66 Hardware Manual for the PCD2.M5 Series│Document 26/856; Version EN 1 2│2014-07-24... - Page 178 138240 5.0 V*) 10 mA*) 12 mA*) 4 mA *) The exact values are 1/255 higher Changing the jumpers On this circuit board there are components that are sensitive to electrostatic discharges. For further information, refer to Appendix B, "Icons" 6-67 Hardware Manual for the PCD2.M5 Series│Document 26/856; Version EN 1 2│2014-07-24...
- Page 179 DATA WRITE JUMPER J2 ADDR VOLTAGE CONTROLLED CURRENT Reference SOURCE Voltage 24 V Programming Classic: Programming examples for the PCD2.W4x0 can be found on the TCS Support site (www.saia-support.com + getting started). xx7: The firmware writes the values according to the configuration (I/O Builder) 6-68 Hardware Manual for the PCD2.M5 Series│Document 26/856; Version EN 1 2│2014-07-24...
- Page 180 Watchdog: This module cannot be used on the base address 240, because it would interact with the watchdog, and would cause a malfunction. For details, please refer to the “Watchdog” section, which describes the correct use of the watchdog in conjunction with PCD2 components. 6-69 Hardware Manual for the PCD2.M5 Series│Document 26/856; Version EN 1 2│2014-07-24...
-
Page 181: Pcd2.W6X0, Analogue Outputs, 4 Channels, 12 Bit Resolution
During start-up, a voltage of 5 V is sent to all outputs of the W600 module. The start-up phase lasts 40 ms, then 0 V is sent to the outputs. 6-70 Hardware Manual for the PCD2.M5 Series│Document 26/856; Version EN 1 2│2014-07-24... - Page 182 Uext A3 Digital/analogue values Digital values Output signals Classic Simatic 4095 4095 27648 +20.1 mA 4075 4075 27513 +20 mA 2048 2048 13824 +10 mA 0 mA 0 mA 6-71 Hardware Manual for the PCD2.M5 Series│Document 26/856; Version EN 1 2│2014-07-24...
- Page 183 Connection for 0 … 2 0 mA: (PCD2.W610 only) + 24 VDC VOLTAGE CONTROLLED CURRENT SOURCE 4 (A2) R = 0.. 500 Ω An external 24 V supply is required for current outputs. 6-72 Hardware Manual for the PCD2.M5 Series│Document 26/856; Version EN 1 2│2014-07-24...
- Page 184 Watchdog: This module cannot be used on the base address 240, because it would interact with the watchdog, and would cause a malfunction. For details, please refer to the “Watchdog” section, which describes the correct use of the watchdog in conjunction with PCD2 components. 6-73 Hardware Manual for the PCD2.M5 Series│Document 26/856; Version EN 1 2│2014-07-24...
-
Page 185: Analogue Output Modules, Electrically Isolated
EN 61 000-4-2, EN 61 000-4-4, EN 61 000-4-5 Time constant of output filter: W605: typ. 1 ms W615: typ. 0.3 ms W615: typ. 1 ms Internal current consumption: W605: 110 mA (typ. 80 mA) (from +5 V bus) W615: 55 mA (typ. 45 mA) W625: 110 mA (typ. 80 mA) 6-74 Hardware Manual for the PCD2.M5 Series│Document 26/856; Version EN 1 2│2014-07-24... - Page 186 Notes on the output range Balancing the offset and the amplification is done for the PCD2.W6x5 digitally by the µC. As there is no potentiometer, the output range has been slightly enlarged to cover maximum values even in the worst case. 6-75 Hardware Manual for the PCD2.M5 Series│Document 26/856; Version EN 1 2│2014-07-24...
- Page 187 PCD2.W605 and .W625 modules or ● current outputs for the PCD2.W615 module Connection for 0..10 V (W605) or -10 V...+10 V (W625): (A2) R ≥ 3 kΩ No external supply is needed for voltage outputs. 6-76 Hardware Manual for the PCD2.M5 Series│Document 26/856; Version EN 1 2│2014-07-24...
- Page 188 PCD Bus Programming Classic: For programming the modules, an FBox is available. xx7 and RIOs: The firmware reads in the values according to the configuration (I/O Builder or network configurator) Watchdog: This module can be used on all base addresses; there is no interaction with the watchdog on the CPUs. For details, please refer to the "Watchdog" section, which describes the correct use of the watchdog in conjunction with PCD2 components. 6-77 Hardware Manual for the PCD2.M5 Series│Document 26/856; Version EN 1 2│2014-07-24...
-
Page 189: Analogue Combined Input/Output Modules
Pt500, -50 … 4 00 °C, resolution: 0.2 °C Ni1000, -60 … 2 00 °C, resolution 0.1 °C ○ Resistance 0 … 2 500 Ω, resolution 0.2 Ω ● Each channel can be configured to have a software-based filter with 50 Hz/ 60 Hz 6-79 Hardware Manual for the PCD2.M5 Series│Document 26/856; Version EN 1 2│2014-07-24... - Page 190 0 … 1 0 V, resolution: 2.44 mV per LSB (12 Bit) ○ Current 0 … 2 0 mA, resolution: 4.88 μA per LSB (12 Bit) 4 … 2 0 mA, resolution: 4.88 μA per LSB (11.7 Bit) ● High impedance: Miscellaneous ● All I/O channels are electrically isolated from the external power supply. (but all channels are electrically connected to each other). ● Each channel has two connections. 6-80 Hardware Manual for the PCD2.M5 Series│Document 26/856; Version EN 1 2│2014-07-24...
- Page 191 Current mode Temperature mode 0...10 V 0...20 mA Pt1000 (-50...400 ˚C) 4...20 mA Pt500 (-50...400 ˚C) Ni1000 (-60...200 ˚C) Resistor mode 0...2500 Ω Configuration of outputs As the outputs are configured using software (with the relevant FBox or FB), it is not necessary to configure the operating mode of the outputs using jumpers or DIP switches. 6-81 Hardware Manual for the PCD2.M5 Series│Document 26/856; Version EN 1 2│2014-07-24...
- Page 192 Internally, the W525 outputs the last output value received from the PCD with a maximum delay of 2 ms. ○ Depending on the speed of the PCD, the transmission time for each individual output value scaled to 16 bit is normally 100 μs. 6-82 Hardware Manual for the PCD2.M5 Series│Document 26/856; Version EN 1 2│2014-07-24...
- Page 193 0.2 °C Resolution for Ni1000; range -60 … 2 00 °C 0.1 °C Resolution for resistor; range 0 … 2 500 Ω 0,2 Ω Shunt capacity for temp sensor / resistor: 2.5 mW max. 6-83 Hardware Manual for the PCD2.M5 Series│Document 26/856; Version EN 1 2│2014-07-24...
- Page 194 Operating voltage: 24 V ±4 V smoothed Current consumption: max. 2.5 W (depending on output load) Terminals: Plug-in 14-pole screw clamps (PCD2.W525; item no: 4 405 5002 0, supplied with module), for cables up to 1.5 mm² 6-84 Hardware Manual for the PCD2.M5 Series│Document 26/856; Version EN 1 2│2014-07-24...
-
Page 195: Weighing Modules
I/O modules and I/O terminal blocks may only be plugged in and removed when the PCD and the external +24 V are disconnected from the power supply. 6.13.1 PCD2.W720 weighing modul The module PCD2.W720 is described in Manual 26/833. 6-85 Hardware Manual for the PCD2.M5 Series│Document 26/856; Version EN 1 2│2014-07-24... -
Page 196: General-Purpose Temperature Modules
I/O modules and I/O terminal blocks may only be plugged in and removed when the PCD and the external +24 V are disconnected from the power supply. 6.14.1 PCD2.W745 weighing modul The PCD2.W745 module is described in Manual 26/796. 6-86 Hardware Manual for the PCD2.M5 Series│Document 26/856; Version EN 1 2│2014-07-24... -
Page 197: Fast Counter Modules
2 channels I/O modules and I/O terminal blocks may only be plugged in and removed when the PCD and the external +24 V are disconnected from the power supply. 6-88 Hardware Manual for the PCD2.M5 Series│Document 26/856; Version EN 1 2│2014-07-24... -
Page 198: Pcd2.H100, Counting Module Up To 20 Khz, 1 Channel
0 … + 55 °C without forced ventila- tion, Storage: -25 … + 85 °C Noise immunity: CE mark acc. to EN 61 000-6-3 and EN 61 000-6-2 6-89 Hardware Manual for the PCD2.M5 Series│Document 26/856; Version EN 1 2│2014-07-24... - Page 199 “En” (Enable) Counter active 0 “CCO” Output “CCO” 3 Screw terminals (*) GAL = Generic Array Logic) Changing the jumpers On this circuit board there are components that are sensitive to electrostatic dis- charges. For further information, refer to Appendix B, "Icons" 6-90 Hardware Manual for the PCD2.M5 Series│Document 26/856; Version EN 1 2│2014-07-24...
- Page 200 Modes x1, x2: Up/down counting mode for 2-phase incremental shaft encoder at inputs A and B. Input A Input B Clock Counter Input A Input B Clock Counter 6-91 Hardware Manual for the PCD2.M5 Series│Document 26/856; Version EN 1 2│2014-07-24...
- Page 201 To reset a CCO hardware output which had previously been set high by the user pro- gram, it is necessary to differentiate between two cases: case a) count range between 0...65,535 (normal case) case b) count range exceeding 65,535 Case a): Resetting the counter flag results in a simultaneous reset of the CCO output. 50'000 Counter Flag Reset Enable The “Reset-Enable” should be activated before the counter reaches zero. 6-92 Hardware Manual for the PCD2.M5 Series│Document 26/856; Version EN 1 2│2014-07-24...
- Page 202 Watchdog: This module cannot be used on the base address 240, because it would interact with the watchdog, and would cause a malfunction. For details, please refer to the "Watchdog" section, which describes the correct use of the watchdog in conjunction with PCD2 components. 6-93 Hardware Manual for the PCD2.M5 Series│Document 26/856; Version EN 1 2│2014-07-24...
-
Page 203: Pcd2.H110, General Purpose Counting And Measuring Module Up To 100 Khz, 1 Channel
Power supply External supply 5 … 3 2 V , (for supply to CCO output only) Internal current consumption: max. 90 mA (from +5 V bus) Internal current consumption: 0 mA (from V+ bus) External current consumption: max. 2 A (all outputs) 6-94 Hardware Manual for the PCD2.M5 Series│Document 26/856; Version EN 1 2│2014-07-24... - Page 204 Input "A" Input "B" FPGA EnableC (Field Programmable EnableM Gate Array) Input filter and adapter 24V to 5V Output amplifier 5 .to. 32 V (Uext) For further details, please refer to manual 26/755 "PCD2.H110 - Universal counting and measuring module". 6-95 Hardware Manual for the PCD2.M5 Series│Document 26/856; Version EN 1 2│2014-07-24...
-
Page 205: Pcd2.H112, General Purpose Counting And Measuring Module Up To 100 Khz, 2 Channel
Watchdog: This module cannot be used on the base address 240, because it would interact with the watchdog, and would cause a malfunction. For details, please refer to the "Watchdog" section, which describes the correct use of the watchdog in con- junction with PCD2 components. 6-96 Hardware Manual for the PCD2.M5 Series│Document 26/856; Version EN 1 2│2014-07-24... -
Page 206: Ssi Encoder Module
Number of outputs: Terminal 4 = O12: Speed high Terminal 5 = O13: Speed low Terminal 6 = O14: Dir + positive direction Terminal 7 = O15: Dir - negative 6-97 Hardware Manual for the PCD2.M5 Series│Document 26/856; Version EN 1 2│2014-07-24... - Page 207 LED 4: State of output 12 LED 5: State of output 13 Screw terminals LED 6: State of output 14 LED 7: State of output 15 D /CLK CLK 6-98 Hardware Manual for the PCD2.M5 Series│Document 26/856; Version EN 1 2│2014-07-24...
- Page 208 Watchdog: This module cannot be used on the base address 240, because it would interact with the watchdog, and would cause a malfunction. For details, please refer to the "Watchdog" section, which describes the correct use of the watchdog in conjunction with PCD2 components. 6-99 Hardware Manual for the PCD2.M5 Series│Document 26/856; Version EN 1 2│2014-07-24...
-
Page 209: Motion Control Modules For Stepper Motors
Nominal voltage: 24 V “low" range: -30 … + 5 V “high" range: +15 … 3 0 V for source operation, for safety reasons, normally-closed contacts (negative logic) should be used Input current: typically 6.5 mA 6-99 Hardware Manual for the PCD2.M5 Series│Document 26/856; Version EN 1 2│2014-07-24... - Page 210 CE mark acc. to EN 61 000-6-3 and EN 61 000-6-2 Programming: Based on PCD user program and pre-programmed function blocks (FB). Terminals: Pluggable 10-pole screw terminal block (4 405 4847 0), for wires up to 1.5 mm² For further information, please refer to manual 26/760, "PCD2.H210 - motion control modules for stepper motors" 6-100 Hardware Manual for the PCD2.M5 Series│Document 26/856; Version EN 1 2│2014-07-24...
- Page 211 FPGA Input 2 Input 3 (Field Programmable Gate Array) Output 2 Output 3 Input filter and adaptation from 24V to 5V Output amplifier 5 .to. 32 V (Uext) 6-101 Hardware Manual for the PCD2.M5 Series│Document 26/856; Version EN 1 2│2014-07-24...
- Page 212 Watchdog: This module cannot be used on the base address 240, because it would interact with the watchdog, and would cause a malfunction. For details, please refer to the "Watchdog" section, which describes the correct use of the watchdog in conjunction with PCD2 components. 6-102 Hardware Manual for the PCD2.M5 Series│Document 26/856; Version EN 1 2│2014-07-24...
-
Page 213: Motion Control Modules For Servo Drives
Sample time for differential part can be programmed separately. Analogue controller output: Velocity set point ±10 V (resolution 12 bit) Counting frequency: max. 50 kHz Digital inputs to PCD2.H310 Number of inputs: 1 encoder A, B, IN, 1 reference input 6-103 Hardware Manual for the PCD2.M5 Series│Document 26/856; Version EN 1 2│2014-07-24... - Page 214 CE mark acc. to EN 61 000-6-3 and EN 61 000-6-2 Programming: Based on PCD user program and pre-programmed function blocks (FB). Terminals: Pluggable 10-pole screw terminal block (4 405 4847 0), for wires up to 1.5 mm² 6-104 Hardware Manual for the PCD2.M5 Series│Document 26/856; Version EN 1 2│2014-07-24...
- Page 215 − and + = external supply terminals 5 V = output for 5 V supply to encoder (300 mA max.) = analogue controller output A, B, IN = non-inverted encoder signals /A, /B, /IN = inverted encoder signals 6-105 Hardware Manual for the PCD2.M5 Series│Document 26/856; Version EN 1 2│2014-07-24...
- Page 216 Watchdog: This module cannot be used on the base address 240, because it would interact with the watchdog, and would cause a malfunction. For details, please refer to the "Watchdog" section, which describes the correct use of the watchdog in conjunction with PCD2 components. 6-106 Hardware Manual for the PCD2.M5 Series│Document 26/856; Version EN 1 2│2014-07-24...
-
Page 217: Pcd2.H32X, Motion Control Modules For Servo-Drives
Additional speed and acceleration feed- forward (all 16 bit values) Analogue controller Velocity set point ±10 V output (resolution 12 bit) Counting frequency max. 125 kHz for H320/5 max. 250 kHz for H322/7 6-107 Hardware Manual for the PCD2.M5 Series│Document 26/856; Version EN 1 2│2014-07-24... - Page 218 Minimum load impedance 3 kΩ Setting accuracy ± 5 mV. Balancing output voltage is carried out in the factory, and the value is stored in a digitally programmable potentiometer. 6-108 Hardware Manual for the PCD2.M5 Series│Document 26/856; Version EN 1 2│2014-07-24...
- Page 219 CE mark acc. to EN 61 000-6-3 and EN 61 000-6-2 Programming: Based on PCD user program and pre-programmed function blocks (FB). Terminals: Pluggable 10-pole screw terminal block (4 405 4847 0), for wires up to 1.5 mm² 6-109 Hardware Manual for the PCD2.M5 Series│Document 26/856; Version EN 1 2│2014-07-24...
- Page 220 State of limit switch 2 2x LED “Ref” State of reference switch 2x LED “LS1” State of limit switch 1 2x LED “SO” State of synchronization output 2x LED “SI” State of synchronization input 1x LED “PWR” State of internal voltage (+/- 15 V) 1x LED “OK” State of controller On this circuit board there are components that are sensitive to electrostatic dis- charges. For further information, refer to Appendix B, "Icons" 6-110 Hardware Manual for the PCD2.M5 Series│Document 26/856; Version EN 1 2│2014-07-24...
- Page 221 State of axis synchronization output AxisEvent_1_2 Axis event interrupt PowerError_1_2 Internal supply error PowerEncError_1_2 Encoder supply error CableBreak_1s2 Cable break SSI_timeout_1s2 SSI timeout OK_LED_1_2 State of controller (OK LED) HostIOError_1_2 Host I/O error ( _1s2 selection of axis via “Axis Select” output) ( _1_2 affects whole module) 6-111 Hardware Manual for the PCD2.M5 Series│Document 26/856; Version EN 1 2│2014-07-24...
- Page 222 Watchdog: This module cannot be used on the base address 240, because it would interact with the watchdog, and would cause a malfunction. For details, please refer to the "Watchdog" section, which describes the correct use of the watchdog in conjunction with PCD2 components. 6-112 Hardware Manual for the PCD2.M5 Series│Document 26/856; Version EN 1 2│2014-07-24...
- Page 223 Saia-Burgess Controls AG Input/output (I/O) modules Motion control modules for servo drives 6-113 Hardware Manual for the PCD2.M5 Series│Document 26/856; Version EN 1 2│2014-07-24...
-
Page 224: System Cables And Adapters
At the process end there are ribbon connectors to the terminal adapters or the relay interface, or 0.5 mm or 0.25 mm strands, numbered and colour-coded. All cables are described in Manual 26-792 'System cables and adapters'. Hardware Manual for the PCD2.M5 Series│Document 26/856; Version EN 1 2│2014-07-24... -
Page 225: Configuration And Programming
Create new project: ● Click on “New…” ● The “New Project” dialogue is displayed Creating and opening a new project. The dialogue box is brought up via “File/New Project”. The size of the dialogue box can be changed by dragging the bottom right corner or by dragging the frame. Hardware Manual for the PCD2.M5 Series│Document 26/856; Version EN 1 2│2014-07-24... - Page 226 Project Directory Directory containing the new project. The specified project directory is set up via “Options”, “Directories page”. The ‘>‘ button can be used to browse for a directory. Description May contain up to 2000 characters of free text. The first line of text is displayed in the "Description" window in the "Open Project" dialogue box. “Create CPU” box If this box is ticked, a CPU with the same name is created automatically (the name can be changed later in CPU properties). This is useful for single CPU projects. If it is not ticked, a project will be created without any CPU. The “New CPU” command can be used to add a CPU. ● Enter project name, e.g. “First Project” ● Check “Create CPU” option ● Click “OK” Hardware Manual for the PCD2.M5 Series│Document 26/856; Version EN 1 2│2014-07-24...
- Page 227 ● Tick PGU option ● Click “OK” Now connect the PCD to the PC via the USB cable. Ensure that the PCD is connected to the 24 VDC supply. Hardware Manual for the PCD2.M5 Series│Document 26/856; Version EN 1 2│2014-07-24...
- Page 228 Configuration Saia-Burgess Controls AG CPUs Go to “Hardware Settings”: ● Click on “Upload…”, to copy the settings from the CPU. ● Click on “Upload…” ● Click “OK” Hardware Manual for the PCD2.M5 Series│Document 26/856; Version EN 1 2│2014-07-24...
-
Page 229: Hardware Settings" Option
PCD2.M5_ when you click “Download...”. If "Upload..." is pressed, the current sttings for the CPU will be displayed. Example: PCD2.M5540 settings Hardware Manual for the PCD2.M5 Series│Document 26/856; Version EN 1 2│2014-07-24... - Page 230 If this option is enabled, it will no longer be possible to communicate with the CPU via the PGU port. This seting should only be used when the USB port or the Ether- net connection are being used for programming. All these options are written to the “flash card” when the settings are backed up. Hardware Manual for the PCD2.M5 Series│Document 26/856; Version EN 1 2│2014-07-24...
-
Page 231: Maintenance
2.4 V the battery is missing We recommend changing the batteries with the PCD attached to the power supply, to avoid any loss of data. Hardware Manual for the PCD2.M5 Series│Document 26/856; Version EN 1 2│2014-07-24... -
Page 232: Annex Icons
This sign accompanies instructions that must always be followed. Explanations beside this sign are valid only for the SBC PCD Classic series. ® Explanations beside this sign are valid only for the SBC PCD xx7 series. ® Hardware Manual for the PCD2.M5 Series│Document 26/856; Version EN 1 2│2014-07-24... -
Page 233: Definitions Of Serial Interfaces
-7 V Control/message 0 (off) -15 V to -3 V -7 V signal 1 (on) +3 V to +15 V +7 V The idle state of the data signals = "mark" of the control and message signals = “off” Hardware Manual for the PCD2.M5 Series│Document 26/856; Version EN 1 2│2014-07-24... - Page 234 To guarantee error-free operation of an RS-485 network, the network should be terminated at both ends. Cable and line termination resistors should be selected in accordance with manual 26/740 "Installation components for RS-485 networks". Hardware Manual for the PCD2.M5 Series│Document 26/856; Version EN 1 2│2014-07-24...
-
Page 235: Tty/Current Loop
By wiring to the cable connector, the user selects either an "active" or "passive" cir- cuit. The max. transmission rate for TTY/current loops at 20 mA is 9600 bps. Hardware Manual for the PCD2.M5 Series│Document 26/856; Version EN 1 2│2014-07-24... -
Page 236: Installation Instructions And Relay Contacts
AC phase by one common fuse. Each load circuit may however be fused individually. Examples: PCD2.A200 max. 10 A Last max. 2 A Hardware Manual for the PCD2.M5 Series│Document 26/856; Version EN 1 2│2014-07-24... - Page 237 Installation instructions and relay contacts PCD2.A210 max. 10 A Last max. 2 A PCD2.A220 Last max. 6 A max. 6 A Last PCD2.A250 Last max. 8 A max. 8 A Last Hardware Manual for the PCD2.M5 Series│Document 26/856; Version EN 1 2│2014-07-24...
-
Page 238: Carrying Inductive Loads
Direct operation at mains voltage is still possible. The resistors used must be able to withstand high voltages (impulse resistance). Particularly at low resistances, there may be flashovers in the coil caused by the production process. This is why fixed carbon resistors are most often used for suppression elements. However, vitreous enamelled wire-wound resistors and cement resistors with large pitch windings are also suitable. Hardware Manual for the PCD2.M5 Series│Document 26/856; Version EN 1 2│2014-07-24... - Page 239 R curve. Verbraucher Example: U = 100 V I = 1 A C is calculated directly as 0.1 μF R = 10 Ω (intersection with R scale) Hardware Manual for the PCD2.M5 Series│Document 26/856; Version EN 1 2│2014-07-24...
- Page 240 50 g PCD2.T851 ISDN-TA digital modem (RS-232 and TTL interface) 50 g Accessories 4 507 4817 0 Renata CR 2032 lithium battery (coin cell), PCD2.M5xx0 10 g Plug-in terminal blocks 4 405 4847 0 with 10 terminals (standard) 17 g 4 405 4869 0 with 14 terminals (for ...A250) Hardware Manual for the PCD2.M5 Series│Document 26/856; Version EN 1 2│2014-07-24...
-
Page 241: Order Details
6 analogue inputs 10 Bit Pt / N i 1000, 8 digital outputs, 6 analogue outputs 8 Bit PCD2.G410 16 digital inputs, 79 g 4 analogue inputs 10 Bit, 4 relay outputs, 4 analogue outputs 8 Bit A-10 Hardware Manual for the PCD2.M5 Series│Document 26/856; Version EN 1 2│2014-07-24... - Page 242 Resolution 18 Bit, 2 weighing systems for up to 6 weighing cells 45 g Temperature modules PCD2.W745 Resolution 16 Bit, temperature module for up to 4 measurement inputs 40 g 1) Special version, supplied on request. A-11 Hardware Manual for the PCD2.M5 Series│Document 26/856; Version EN 1 2│2014-07-24...
- Page 243 Motion control module up to 250 kHz for servo-drives, 1 axis for 24 VDC encoder 66 g PCD2.H327 Motion control module up to 250 kHz for servo-drives, 1 axis for 66 g 5 VDC / R S-422422 encoder or SSI absolute angle transmitter (Slave only) 2) Depending on the encoder, the 5 VDC supply may be loaded with up to 300 mA. A-12 Hardware Manual for the PCD2.M5 Series│Document 26/856; Version EN 1 2│2014-07-24...
- Page 244 International Represetatives & : ..... SBC Sales Companies www.saia-pcd.com/contact Postal address for returns from customers of the Swiss Sales office Saia-Burgess Controls AG Service Après-Vente Bahnhofstrasse 18 3280 Murten, Switzerland A-13 Hardware Manual for the PCD2.M5 Series│Document 26/856; Version EN 1 2│2014-07-24...
Need help?
Do you have a question about the PCD2.M5 Series and is the answer not in the manual?
Questions and answers