Advertisement
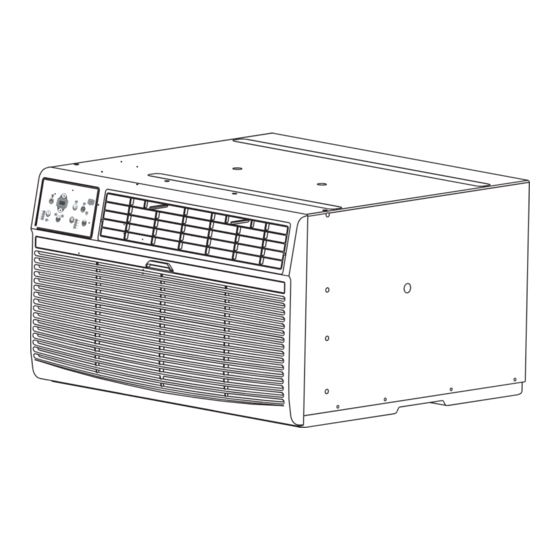
WALL-MOUNTED AIR CONDITIONER
Operator's manual
Customer Service / Service à la clientèle:
Our customer service staff is available to help you. For any problem with your purchase, or to receive further
information about this product, please call our toll-free number.
SAVE THIS MANUAL
Keep this manual and the original sales invoice in a safe, dry place for future reference.
Notre personnel du service à la clientèle est disponible pour vous aider. En cas de problème avec votre achat, ou pour
obtenir plus d'informations à propos de ce produit, veuillez composer notre numéro sans frais.
CONSERVEZ CE GUIDE
Conservez ce manuel avec la facture d'origine dans un endroit sûr et sec pour référence future.
Model/Modèle :
87795051
M
W
1-866-206-0888
E
U
W
2
1 -
0
C
R
N
1
B -
C
J
6
Advertisement
Table of Contents

Related Manuals for Arctic King 87795051


Summary of Contents for Arctic King 87795051
- Page 1 Model/Modèle : 87795051 WALL-MOUNTED AIR CONDITIONER Operator's manual Customer Service / Service à la clientèle: 1-866-206-0888 Our customer service staff is available to help you. For any problem with your purchase, or to receive further information about this product, please call our toll-free number.
- Page 3 2. OPERATING INSTRUCTIONS REMOTE CONTROL OPERATING INSTRUCTIONS...
- Page 4 Do not direct airflow directly on room occupants. grounding grounding A damaged appliance place It may cause explosion, fire, and burns.
- Page 5 any other purpose than air cooling. Failure to do so may cause electric shock and damage. Do not place heavy objects on the...
-
Page 6: Safety Precautions
Safety Precautions vapours Operation of Current Device air conditioner. Please contact Customer Service. with a new cord - please contact Customer Service. -
Page 7: Normal Sounds
Operating Instructions Normal Sounds Vibration High Pitched Chatter Unit may vibrate and make noise High efficiency compressors because of poor wall or window may have a high pitched chatter construction or incorrect installation. during the cooling cycle. Sound of Rushing Air At the front of the unit, you may Pinging or Switching hear the sound of rushing air... -
Page 8: Unit Control Panel
Operating Instructions Unit Control Panel 62ºF and 86ºF (17ºC - 30ºC). - Page 9 Operating Instructions The unit will initiate automatically the Energy Saver function under Cool, Dry, Auto(only Auto -Cooling and Auto-Fan) modes. cannot be 2ºF/1ºC 2ºF/1ºC LED indicator light illuminate...
-
Page 10: Additional Things You Should Know
Operating Instructions NOTE: In the event of an unexpected power outage, the unit will automatically restart with the previous settings when the power resumes. Additional Things You Should Know Air directional louvers control air flow direction. Your air Louvers center handles conditioner has the 4-way directional system described below. -
Page 11: Installation Instructions
Installation Instructions Installation with existing sleeve Note that the air conditioner dimensions are: 24 inches wide, 14 inches high, and 18 inches deep(without front). Install Air Conditioner according to these installation instructions to achieve he best performance. Save these installation instructions for future reference. Do not use any screws other than those specified here. - Page 12 Installation Instructions your existing Arctic King This ground wire will later be attached to frame of air conditioner once it is installed. /Arctic King Identify your wall sleeve type and follow the instructions for that type in the following pages.
- Page 13 Installation Instructions IMPORTANT This units increased performance characteristics result from having two rear air intakes. It is very important that these installation instructions are followed for your unit to operate at maximum efficiency. If you are using an existing sleeve, and there is an existing rear grille, it needs to be replaced by the one that has been shipped with the unit in the accessory kit.
- Page 14 Installation Instructions Installation in an existing wall sleeve - please use instructions relevant to your existing sleeve's brand #1 Emerson 15 Deep 1. Remove existing rear grille as shown on Page 11 of this manual and replace with provided louvered rear panel. Install as shown here. NOTE: You may need to drill holes in flange of existing sleeve to match new rear grille.
- Page 15 Installation Instructions Wall Sleeve Brands: #2 Fedders 3 4 / Deep Remove existing rear grille as shown on Page 11 of this manual and replace with provided louvered rear panel. Install as shown here. NOTE: You may need to drill holes in flange of existing sleeve to match new rear grille.
- Page 16 Installation Instructions Wall Sleeve Brands: 3 4 / #3 Fedders or Friedrich Deep Remove existing rear grille as shown on Page 11 of this manual and replace with provided louvered rear panel. Install as shown here. NOTE: You may need to drill holes in flange of existing sleeve to match new rear grille.
- Page 17 Installation Instructions Wall Sleeve Brands: #4 General Electra/Hotpoint 16 7 8 / Deep Remove existing rear grille as shown on Page 11 of this manual and replace with provided louvered rear panel. Install as shown here. NOTE: You may need to drill holes in flange of existing sleeve to match new rear grille.
- Page 18 Installation Instructions Wall Sleeve Brands: #5 Sears or Carrier 51S Series ( 18 5 8 / Deep) Remove existing rear grille as shown on Page 11 of this manual and replace with provided louvered rear panel. Install as shown here. NOTE: You may need to drill holes in flange of existing sleeve to match new rear grille.
- Page 19 Installation Instructions Wall Sleeve Brands: #6 Whirlpool Deep 1 8 / Remove existing rear grille as shown on Page 11 of this manual and replace with provided louvered rear panel. Install as shown here. NOTE: You may need to drill holes in flange of existing sleeve to match new rear grille.
- Page 20 Installation Instructions Wall Sleeve Brands: #7 Whirlpool ( 23 Deep) Remove existing rear grille as shown on Page 11 of this manual and replace with provided louvered rear panel. Install as shown here. NOTE: You may need to drill holes in flange of existing sleeve to match new rear grille.
- Page 21 Installation Instructions Wall Sleeve Brands: #8 White Westinghouse/Frigidaire/ Carrier 52F Series/Arctic King (16 +17 Deep) Remove existing rear grille as shown on Page 11 of this manual and replace with provided louvered rear panel. Install as shown here. NOTE: You may need to drill holes in flange of existing sleeve to match new rear grille.
- Page 22 Installation Instructions Wall Sleeve Brands: #9 White Westinghouse or Frigidaire ( 22 Deep) Remove existing rear grille as shown on Page 11 of this manual and replace with provided louvered rear panel. Install as shown here. NOTE: You may need to drill holes in flange of existing sleeve to match new rear grille.
- Page 23 Installation Instructions Direct Unit Mounting: The previous directions are the preferable way to mount the new rear grill. The units performance is slightly better and the possibility of draughts is reduced. As a last resort, direct mounting of the grille to the unit can be considered.
-
Page 24: Finishing Installation
Installation Instructions FINISHING INSTALLATION: 1. Install the 1 x1 x84 long stuffer-seal between the wall-sleeve and the unit. The use of a flat head screwdriver or putty knife is recommended. 2. Assemble the trim frame by inserting top and bottom pieces into side pieces and snapping into place. -
Page 25: Care And Cleaning
Care And Cleaning CAUTION Clean your air conditioner occasionally to keep it looking new. Be sure to unplug the unit before cleaning to prevent chock or fire hazards. Air Filter Cleaning The air filter should be checked at least once a month to see if cleaning is necessary. -
Page 26: Troubleshooting Tips
Troubleshooting Tips workmanship... -
Page 27: Remote Controller Instructions
Remote Controller Instructions Handling the remote controller Location of the remote controller. Use the remote controller within a distance of 16 feet (5 m) from the appliance, pointing it towards the receiver. Reception is confirmed by a beep. CAUTIONS The air conditioner will not operate if curtains, doors or other materials block the signals from the remote controller to the indoor unit. - Page 28 Remote Controller Instructions WARNING 1. Battery must be disposed of properly. Do not short circuit or dispose of in the fire. 2. Keep batteries out of the reach of children. 3. Batteries must not be ingested. 4. Non-rechargeable batteries are not to be recharged. 5.
- Page 29 Remote Controller Instructions NOTE: Function buttons MODE button Press this button to select the ON/OFF button desired operation mode from AUTO, COOL, DRY, HEAT Operation starts when this button (Cooling & heating models is pressed and stops when the button is pressed again. only) and FAN.
- Page 30 Remote Controller Instructions add space automatically between modes cannot...
- Page 31 Remote Controller Instructions add space cannot pressing...
- Page 32 Remote Controller Instructions increments...
- Page 33 Remote Controller Instructions...
- Page 34 Remote Controller Instructions starts.
- Page 35 Remote Controller Instructions All functions described in these instructions apply to the different models available; if your model doesn't have a specific function, pressing the corresponding button will have no effect. must must...
- Page 36 Air Conditioner Limited Warranty These products have been made to quality standards and are guaranteed for domestic use against manufacturing faults for a period of 5 years from the date of purchase. One (1) year full warranty from original purchase date and limited 2nd through 5th year sealed system warranty if used for normal trade purposes.
Need help?
Do you have a question about the 87795051 and is the answer not in the manual?
Questions and answers