Table of Contents
Advertisement
Advertisement
Table of Contents

Subscribe to Our Youtube Channel
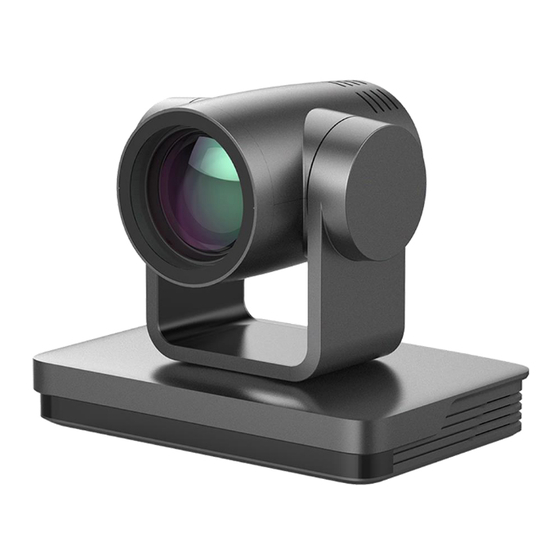
Related Manuals for minrray UV570


Summary of Contents for minrray UV570
- Page 1 FULL HD PTZ CAMERA User Manual (V1.0) - 0 -...
- Page 2 Attentions Improper operations may damage the product structure and result in mechanical failure. Please note the following tips: Do not move the camera by grabbing the head. Move the camera by holding the bottom with one or both hands. Please do not rotate the lens and holder manually no matter the camera is power on or off;...
- Page 3 This manual introduces functions, installations and operations for this PTZ camera in details. Please read this manual carefully before installation and use. 1. Cautions 1.1 Avoid damage to product caused by heavy pressure, strong vibration or immersion during transportation, storage and installation. 1.2 Housing of this product is made of organic materials.
-
Page 4: Table Of Contents
Content 1. Camera Installation ..............................2 1.1 Camera Introduction ............................2 1.2 Interfaces and Connection ..........................3 1.3 Mounting Brackets ............................3 2. Product Overview ..............................7 2.1 Model ................................7 2.2 Dimension ..............................8 2.3 Accessory ............................... 8 2.4 RS-232 Interface ............................9 2.5 Main Features .............................. -
Page 5: Camera Installation
1. Camera Installation 1.1 Camera Introduction Figure 1.1 Interface of ST (standard) Model 10. 3G-SDI Output Interface Camera Lens 11. USB2.0 Interface (U-disk memory) Camera Base 12. CVBS Output Interface Remote Control Receiving Indicator 13. Audio Input Interface (Line-in) Infrared Receiver 14. -
Page 6: Interfaces And Connection
1.2 Interfaces and Connection Figure 1.3 Wiring Diagram 1) After power on and self-check, the camera will automatically return to the preset 0 position if it’s pre-set. 2) The default address for the IR remote control is 1#. If the menu restored to factory defaults, the remote control default address will restore to 1#. 1.3 Mounting Brackets Notes: Ceiling or wall mounting brackets can only be mounted on template and concrete wall. - Page 7 1) Wall Mounting:...
- Page 9 2) Ceiling Mounting...
-
Page 10: Product Overview
2. Product Overview 2.1 Model Model No. —XXX—XXX—XX IR ---IR Remote Controller WR---Wireless Remote Controller ST---Standard Interface (SDI + HDMI ) U3---USB 3.0 Interface (USB3.0 + SDI + HDMI) 05---05X Optical Zoom Lens 10---10X Optical Zoom Lens 12---12X Optical Zoom Lens 20---20X Optical Zoom Lens 30---30X Optical Zoom Lens S---1080P60 Downward Compatible... -
Page 11: Dimension
2.2 Dimension Figure 2.2 Product Dimension 2.3 Accessory Please check below standard and optional accessories when unpacking the box. Standard Accessory Optional Accessory Power adapter Wireless Remote Control IR Remote Control Ceiling Mount RS232 Cable Wall Mount User Manual USB3.0 Cable (only for model with USB3.0 output) -
Page 12: Rs-232 Interface
2.4 RS-232 Interface 1). RS-232 Interface Definition Connection to PC or Camera Controller Camera WindowsDB-9 1.DTR 1.DCD 2.DSR 2.RXD 3.TXD 3.TXD 4.GND 4.DTR 5.RXD 5.GND 6.GND 6.DSR 7.IR OUT 7.RTS 8.NC 8.CTS 9.RI 2). RS232 Mini-DIN 8-pin: Port Definition Port Definition Data Terminal Ready Data Set Ready... -
Page 13: Main Features
4). VISCA networking as shown below: Camera cascade connection Camera 1 Camera 2 1.DTR 1.DTR 2.DSR 2.DSR 3.TXD 3.TXD 4.GND 4.GND 5.RXD 5.RXD 6.GND 6.GND 7.IR OUT 7.OPEN 8. NC 8.OPEN 2.5 Main Features This series camera has perfect functions, superior performance and rich video output interfaces; Featuring with advanced ISP processing algorithms, offering vivid and high resolution video with a strong sense of depth and fantastic color rendition. -
Page 14: Specifications
OFF/ Dynamic level adjustment Video Adjustment Brightness, Color, Saturation, Contrast, Sharpness, B/W mode, Gamma curve >55dB Input/output Interface UV570-05/10/12/20/30-ST Model: HDMI, SDI, LAN, CVBS, RS232-IN/OUT, RS485, A-IN, USB2.0(USB Disk Storage) Video Interfaces UV570-05/10/12/20/30-U3 Model: HDMI, SDI, LAN, CVBS, RS232-IN/OUT, RS485, A-IN, USB3.0 Video Output HDMI, SDI, LAN, USB3.0, CVBS... - Page 15 Video Encoding Format H.265、H.264 Code Stream Support dual streaming output, main code stream and sub-code stream Main stream:1920×1080、1280×720、640×480 Video Format Sub stream:1920×1080、1280×720、640×480 、640×360 320×240、320×180 Video Bitrates 64Kbps~40960Kbps Audio Compression AAC、MP3、G.711A Format Audio Bitrates 32Kbps、48Kbps、64Kbps、96Kbps、128Kbps TCP/IP、RTSP、RTMP、ONVIF、GB/T28181; Network Protocols Network VISCA control protocol; Support remote upgrade, reboot and reset PTZ Parameter Pan/Tilt Rotation...
-
Page 16: Remote Control
3. Remote Control 3.1 Match Code for Wireless Remote Control One to One Code Matching: Press the "set" and "*" keys combined for 3 seconds, LED indicator starts flashing. Camera receive the signal and power on, LED indicator will go off if code matching successfully. The camera can be controlled by this wireless remote control only after one to one code pairing. - Page 17 2. Camera Selection Select the camera address to control. 3. Focus Control Auto: auto focus mode Manual: manual focus mode Focus + (near):Press【FOCUS +】 key (Valid only in manual focus mode) Focus - (far): Press【FOCUS -】 key (Valid only in manual focus mode) Press and hold the keys, the action of focus will keep continue and stop as soon as the key is released.
- Page 18 6. Pan/Tilt Control Up: press Down: press Left: press Right: press Back to middle position: press“【HOME】” Press and hold the up/down/left/right key, the pan/tilt movements will keep running, from slow to fast, until it runs to the endpoint; stop as soon as the key is released. 7.
-
Page 19: Menu Introduction
9. Key Combination 1) 【#】+【#】+【#】: Clear all presets 2) 【*】+【#】+【6】: Restore factory defaults 3) 【*】+【#】+【3】: Menu set to Chinese 4) 【*】+【#】+【4】: Menu set to English 5) 【*】+【#】+【9】: Flip switch 6) 【*】+【#】+Auto: Enter aging mode 7) 【#】+【*】+Auto: Exit aging mode 8) 【*】+【#】+Manual: Restore the default user name, password, and IP address 9) 【#】... -
Page 20: Network Configuration
2). English Menu 4. Network Configuration 4.1 Network Connection Direct connection: Connect the camera and computer by network connecting cable. Internet connection mode: Connect the camera to Internet by Router or Switcher and user can login the device by browser web page. Note: Please do not put the power cable and network cable in places where can be easily touched, to prevent video unstable signal transmission due to poor contact of cables. -
Page 21: Ie Login
To verify whether the network segment has been successfully added, click the “Start” and select “Operation” to input cmd, then click CONFIRM and open DOS command window, ping 192.168.5.26 and press Enter key to display information as shown below: After camera power on and self-check, follow the steps above to verify network connection. Open DOS command window, ping 192.168.5.163 and press Enter key. -
Page 22: Streaming
Chrome login is available after firmware update, but only support basic configuration and preview video, no functions of record video, voice volume, video capture and playback. 2). Download and Install Plug in for IE login If it’s the first time to login via IE browser, the login page will prompt “Playback plug-in is not installed, please download and install!”... -
Page 23: Software Upgrading
2). Push Video Stream Configurations -> Video Configure-> Stream Publish Push RTMP stream to public network server, the stream camera must be on the public network, otherwise it will fail to connect to server. Host address: server address, which can be either a domain name or an IP address Host port: server default port number Stream name: live/test (live/ XXX) Username and password: the username and password set by the server, or leave it empty... -
Page 24: Maintenance And Troubleshooting
3). Click "browse" to select .mrg update file, then click upgrade button to finish software upgrading. 4). Camera reboot after completion of firmware update. It prompts with "successful upgrade". Log in to check the firmware version to make sure software upgrade successful. Then click "restore factory default", reboot and restore parameters to factory default (default IP 192.168.5.163, user name: admin;... -
Page 25: Copyright Statement
b. Whether there is shaking machine or objects around the camera 4) Remote control not works a. Remote control address is set to 1 (if the machine is set back to the factory defaults, remote control addresses need to be back to 1 too) b.
Need help?
Do you have a question about the UV570 and is the answer not in the manual?
Questions and answers